


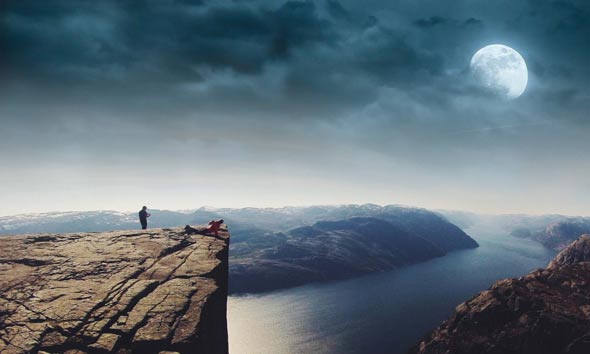
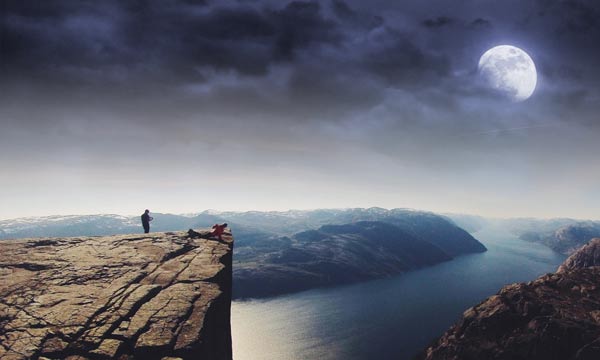
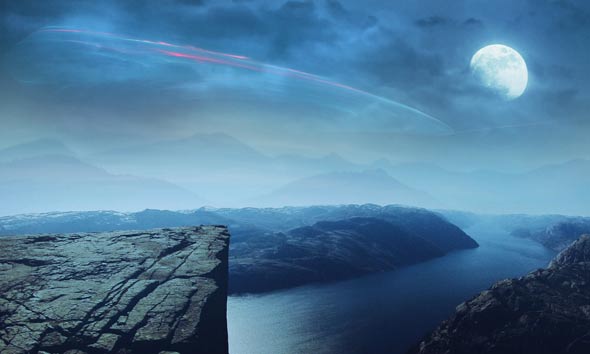
In this tutorial, you’ll learn how you can create a sci-fi meteor night in Photoshop. This tutorial will walk you through about the working process of turning an ordinary daylight photo into a sci-fi night. You’ll also learn how you can achieve very cold tones effects in your photo manipulation. Sound interesting? Have a try!!
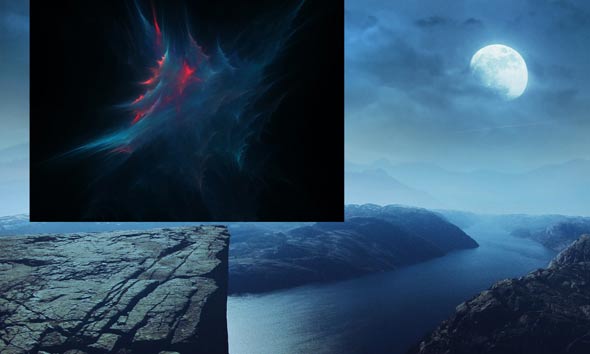
Tutorial Resources
Setting up the Background
Step 1
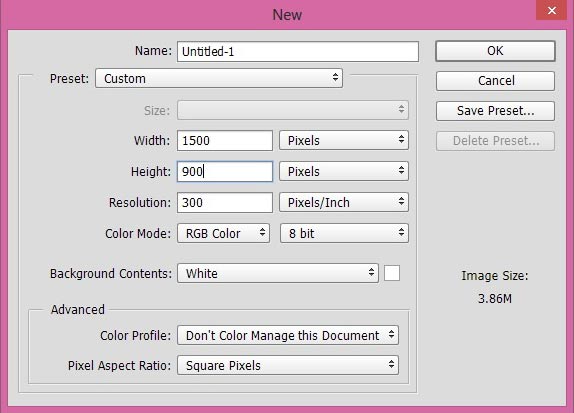
First of all download all the resources attached to this tutorial, this will make easier to follow the tutorial. Let’s start by creating a new document by selecting File > New and then set the setting as shown in the image below or you can go for a higher setting.
Step 2
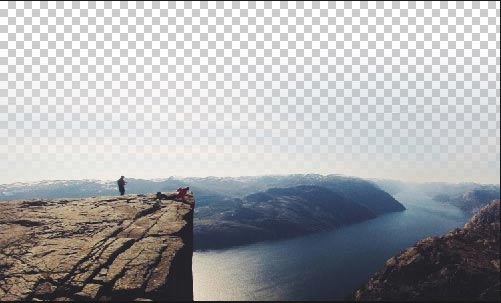
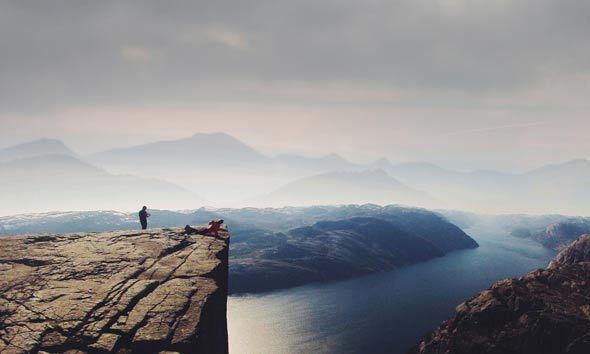
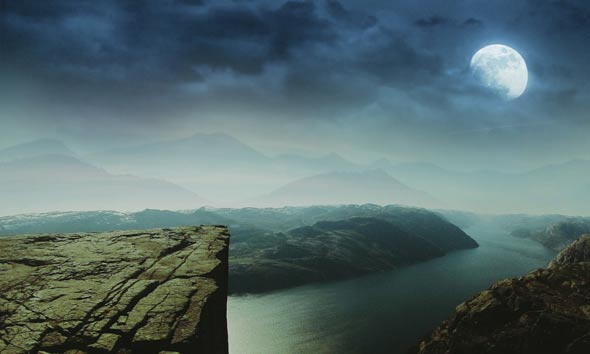
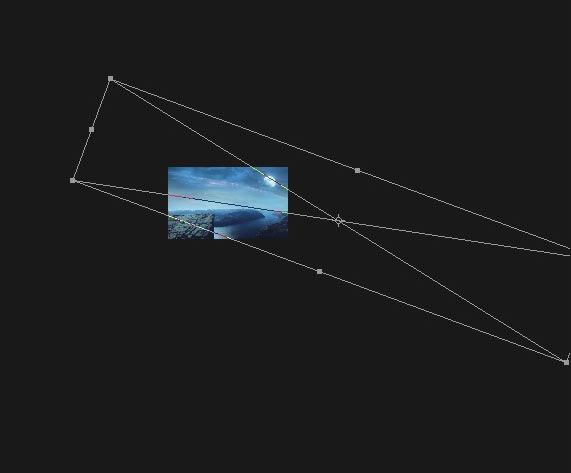
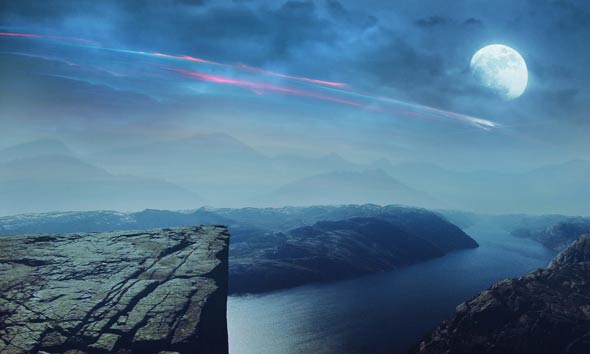
Now place the cliff image to the main document. Select File > Place Embedded (Photoshop CC 2014) or Place and then place it.
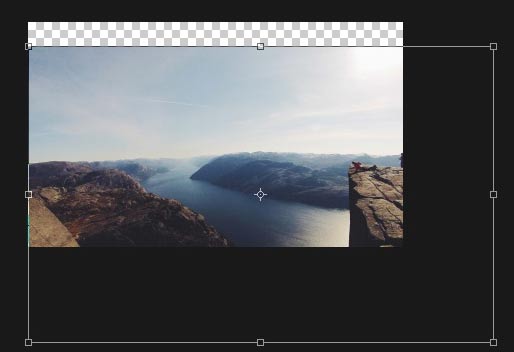
As you can see that I’ve re-sized it using transform tool. So I can only get the cliff parts and also leave some space on the top of the document.
Step 3
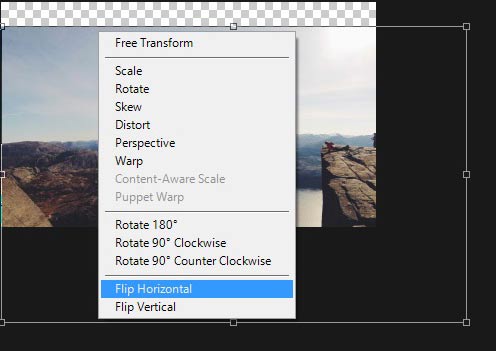
In the previous step you’ve seen that we are not getting the cliff as much we needed. To fix this, flip the cliff layer horizontally. To do this, activate the Transform tool by pressing (CTRL + T) and then right click on the cliff layer and choose flip horizontal.
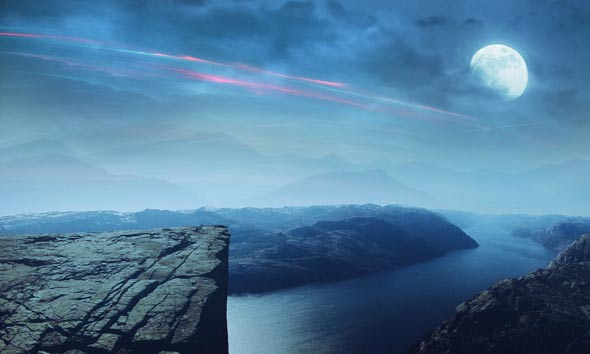
Here are the results after flipping it.
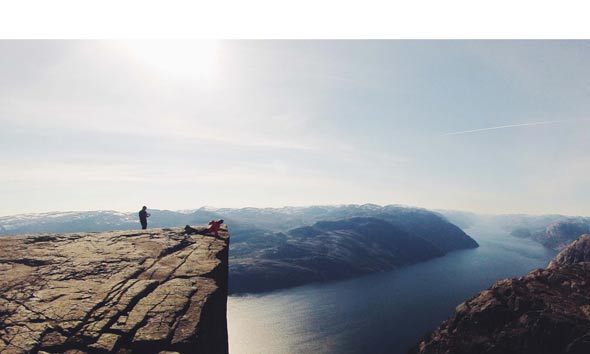
As you can see that we’ve enough parts of the cliff and also we’ve a far view for the scene.
Step 4
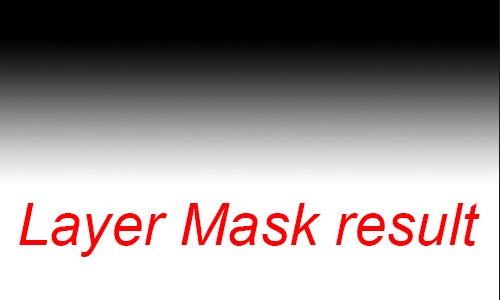
Add a layer mask to cliff layer (Layer > Layer Mask > Reveal All) and grab the Brush tool by pressing (B) on keyboard. Activate the Gradient tool by pressing (G) on the keyboard then choose a linear black/white gradient. Then apply it vertically (hold shift while applying) from top to bottom on the layer mask of cliff image.
Here you can see the layer mask results.
Adding Moon
Step 5
Place the moon under the cliff layer.
As you can see that by using Gradient Tool on the layer mask of cliff layer we’ve blended the moon to the cliff layer. I recommend this technique to everyone because it’s not only the faster way to hide any image parts but it’s also left soft edges while masking. That will allow us to blend two images without consuming time.
I also added a Gaussian Blur filter to moon layer. To apply it, select Filter > Blur > Gaussian Blur and set the radius value to 1.2. Here are the results on moon.

Step 6
Add a Hue/Saturation (Layer > New Adjustment Layer > Hue/Saturation) adjustment layer to the moon to colorize it. This will make make the moon more darker and shiny.
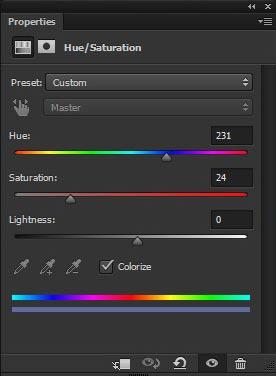
Here are the results.
Adding Mountains
Step 7
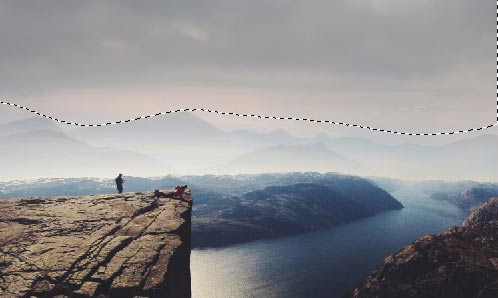
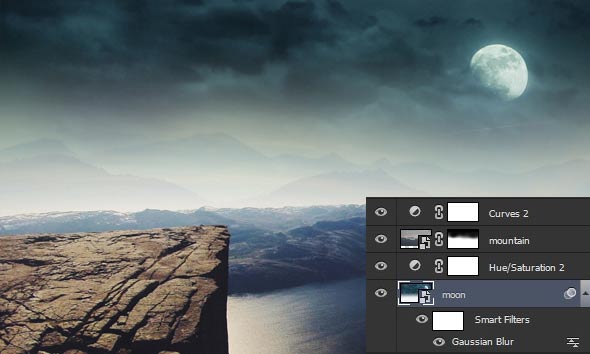
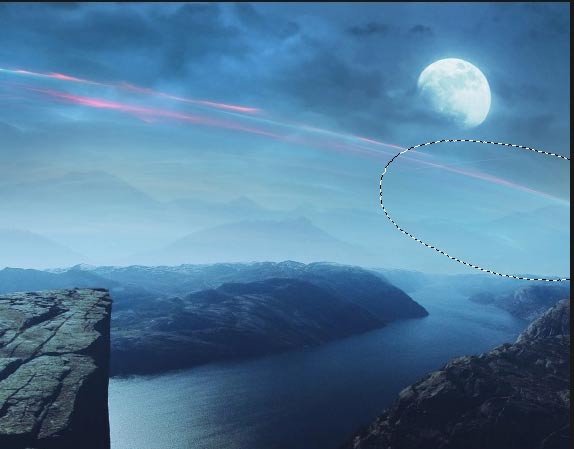
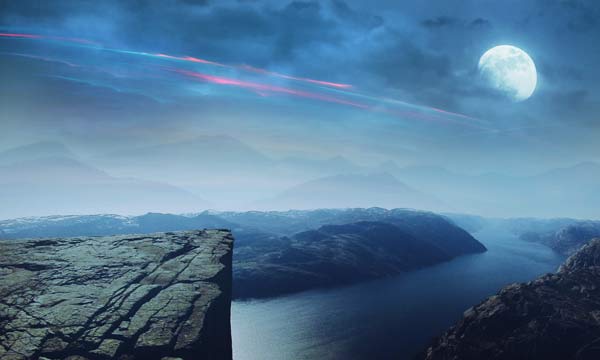
Place the mountain image below the cliff layer but above the moon layer. Here we’ve mountain image placed.
To reveal the moon parts we need to hide mountain top parts. Add a layer mask to mountain image and using a soft round black brush (B), hide the selected parts to reveal moon layer.
Here are results so far.

Step 8
Now we’ll add more colors to the moon and mountain layers using adjustments layers. So add a Curves adjustment layer above the mountain and here are the setting.
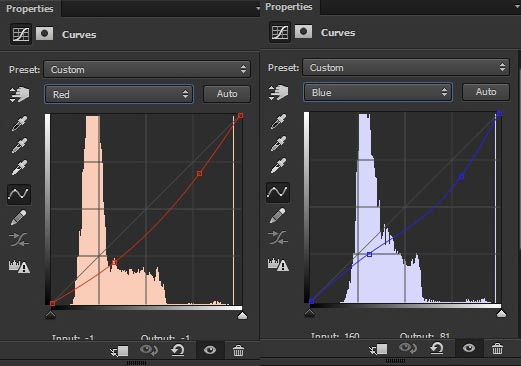
Here we got the results.
Step 9
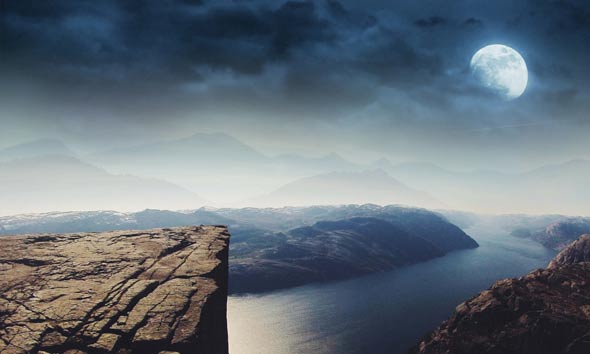
Add again a Curves adjustment layer to increase brightness and for adding blue tones on the top parts of the scene.
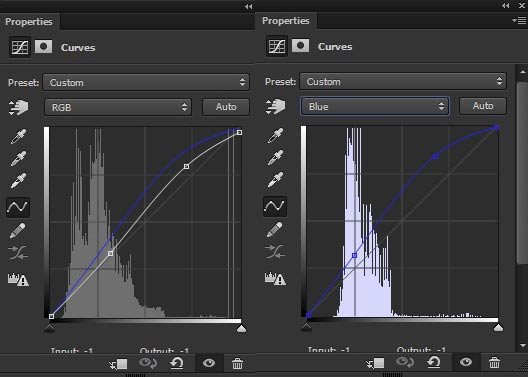
Here are the results.
Step 10
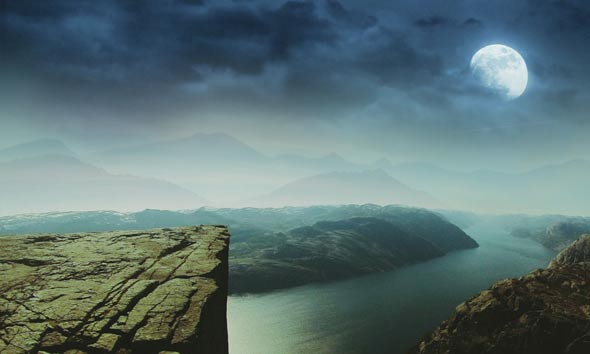
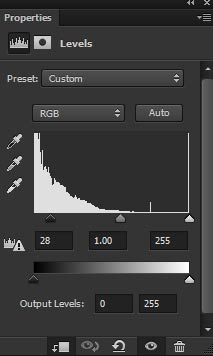
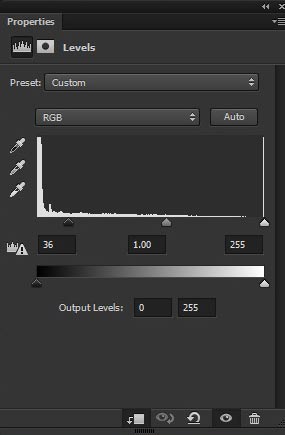
Make a Levels adjustment layer to increase the brightness on Midtones and set the setting as shown in the image below.
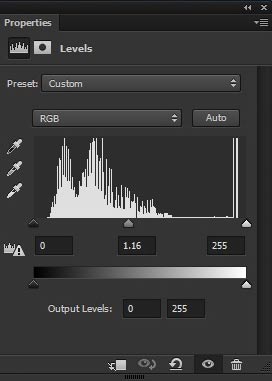
Results :

Step 11
Now get back to cliff layer and in the below image red circle indicating the unwanted parts. We should clean these parts using Clone Stamp (S) tool. Create a new layer ( CTRL + ALT + SHIFT + N ) and then clip it (hold the Alt key and then hover your mouse between the cliff and newly created layer to clip layer) to cliff layer. Then activate the Clone Stamp tool by pressing (S) on the keyboard and clone out these unwanted details from the cliff layer.
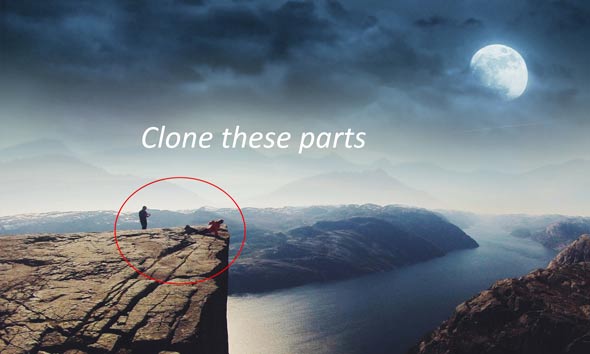
Here is the magic happen and now we don’t have any unwanted details.

Step 12
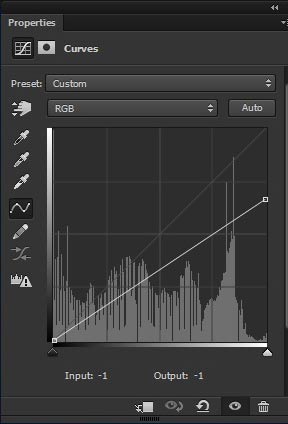
Time to color the cliff layer. Add Curves adjustment layer to cliff layer as clipping mask (press the red button for clipping mask) and here are the settings.
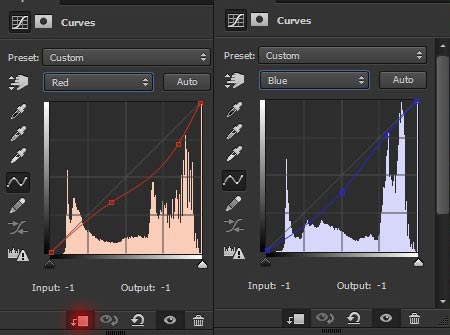
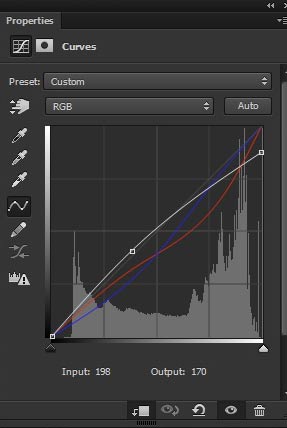
Here are the results.
Step 13
To darken the cliff layer, use Gradient Map adjustment layer and you can see that I’ve chosen a Black/White gradient for the cliff layer. It’s a default 3rd preset in gradient editor.
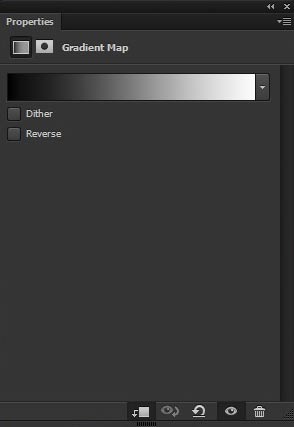
Change the blend mode of Gradient Map to Multiply and reduce the opacity to 29%. You can also play with opacity to darken or brighten the cliff layer but for me, 29% opacity works best.
Step 14
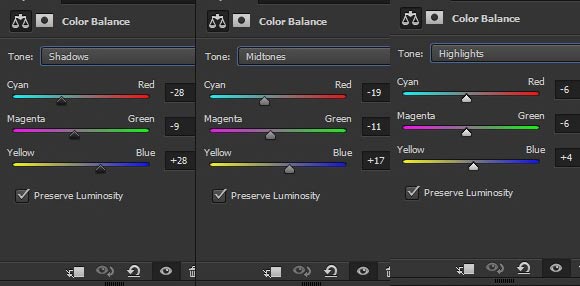
Continue coloring the cliff layer using Color Balance adjustment layer. Only change the values of Midtones and Highlights.
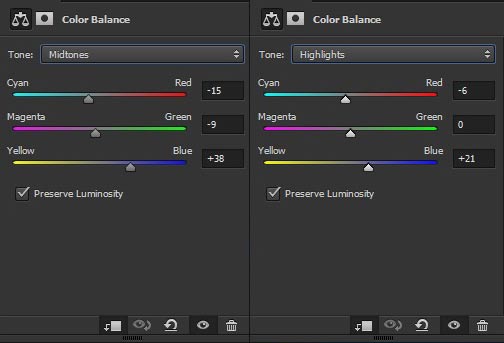
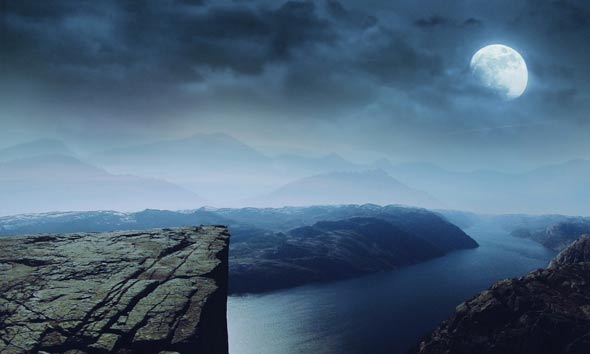
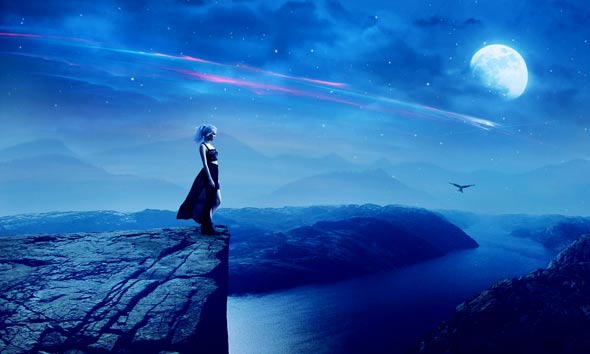
Results :
Creating Light Effects
Step 15
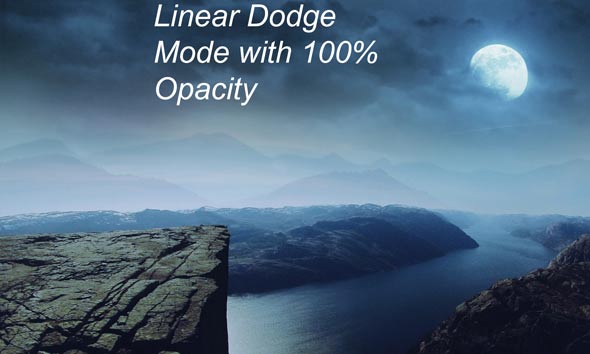
Light up the moon by painting some lights on it. To do this, create a new layer and name it ‘light 1’. Change your foreground color to #4b7aa4. Grab the Brush tool (B) and set it’s opacity and flow about 50%. Using a soft round brush paint a stroke on the moon as shown in the image below.

Change the blend mode of ‘light 1’ to Linear Dodge. Here are the results with brightening moon.
Step 16
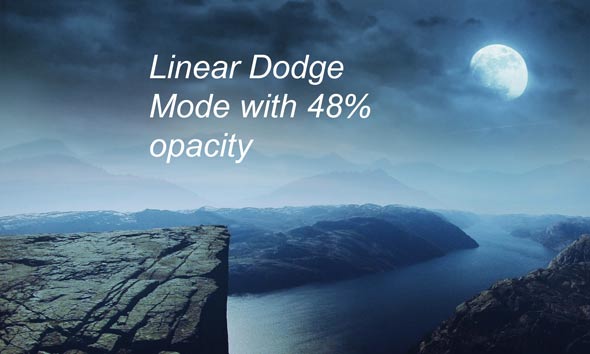
Create a new layer again and name it ‘light 2’. Using the same color in the previous step and paint some more lights on the brighter parts of the scene. But this time reduce the brush opacity and flow to 30%.
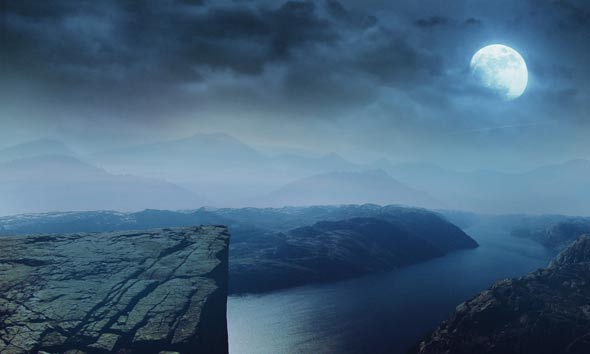
Change the blend mode of ‘Light 2’ layer to Linear Dodge and reduce the opacity to 48% (as always reducing the opacity depend on you as how much light you want to add).
Step 17
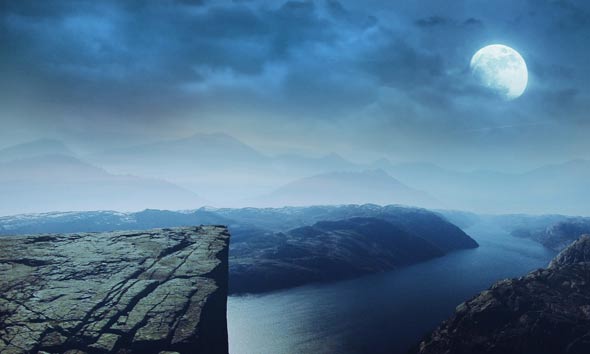
The left top part, besides the moon, looks darker compared to rest of the scene. To brighten it, make a new layer and name it ‘light 3’. Use the same setting and paint some more lights on darken top parts.

Change the blend mode to Linear Dodge and results should resemble below image.
Adding Nebula
Step 18
Place the nebula image to the main document.
Change the blend mode of nebula image to Screen.
Step 19
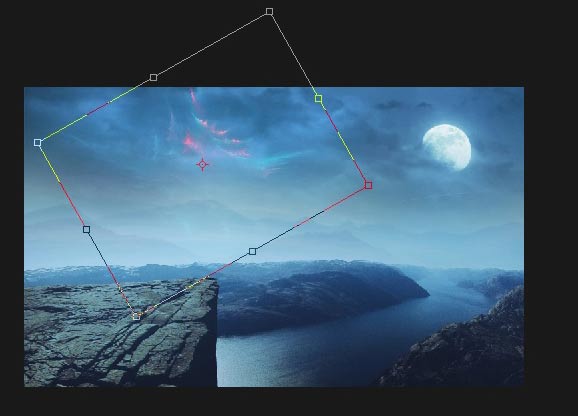
Now we’ll turn this nebula into shooting star or meteors. To do this, activate the transform tool (CTRL + T) and then rotate the nebula image.
Step 20
Once you’ve rotated it and now you’ve to alter its shape using Warp tool. To use the Warp tool I recommend you convert the nebula image to smart objects by doing this you’ll able make changes on nebula image at any time you want. You can convert the nebula image to smart objects by right clicking on Nebula image and then choose convert to smart object.
Once you converted it, go to Edit > Transform > Warp and then alter the shape of nebula image to below image.
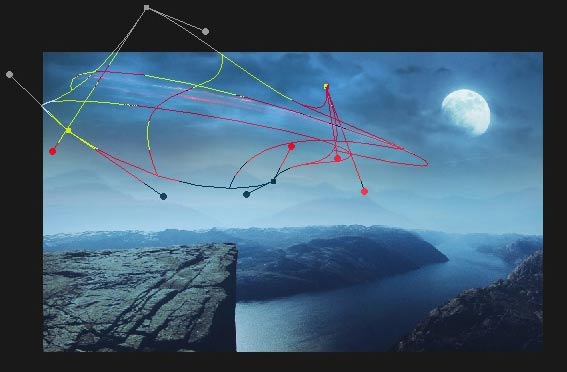
It is not necessary to exactly alter the shape as I did it. If you are not able to do so then try to alter it so it looks like it is falling from top to bottom as the meteor falls. However, if you don’t want to do that either then you can download the PSD file and after that, you can use the already altered nebula image.
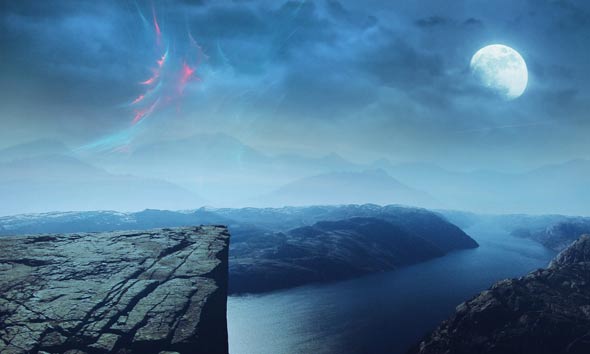
Here are the results.
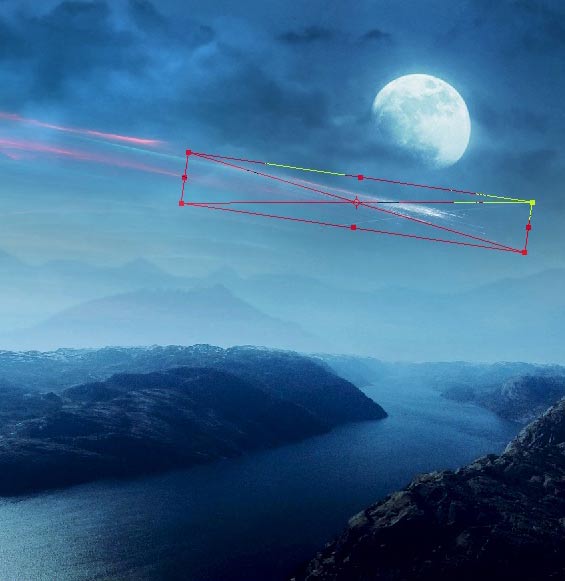
Step 21
Transform (CTRL + T) the nebula image again. Resize it and rotate it as well as shown in the image below.
Here are the results.

Step 22
Add a layer mask to nebula layer and hide the selected parts of it using soft round black brush. We’ll add more meteors at the end of it.
Here are the results.
Step 23
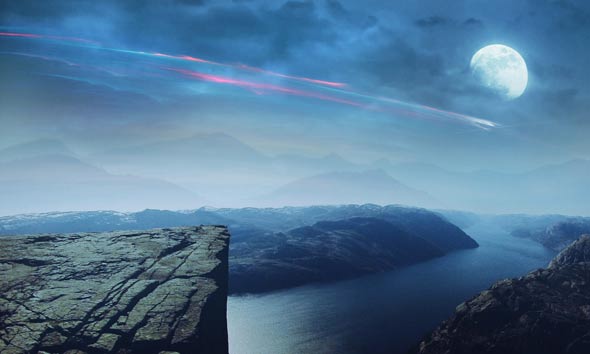
Add a Level adjustment layer to nebula to increase the contrast.
Results :
Step 24
Place the meteor 01 to the main document. Now using the transform tool (CTRL + T) stretch it as shown in the image below.
Here are the results with added meteors at the end of the nebula.
Step 25
The middle part of the scene looks too bright. To fix this,
create a new layer and use the color #65a5ad to paint light only on the mountains.

Change the blend mode to Multiply and reduce the opacity to 64%.
Step 26
I also painted some more light around moon because it looks a little bit darker and I don’t want that.

Change the blend mode to Linear Dodge and reduce the opacity to 36%.

Adding Model
Step 27
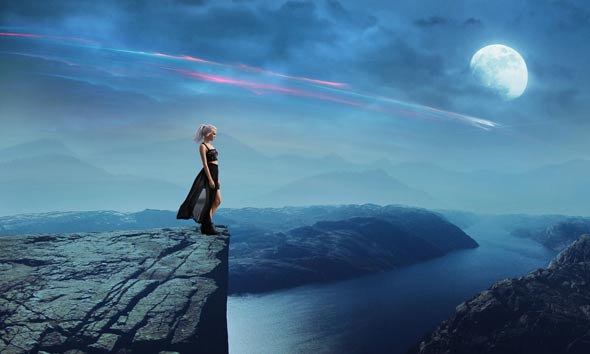
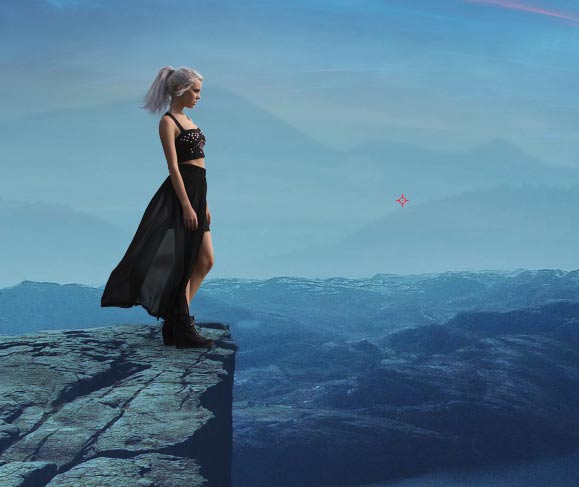
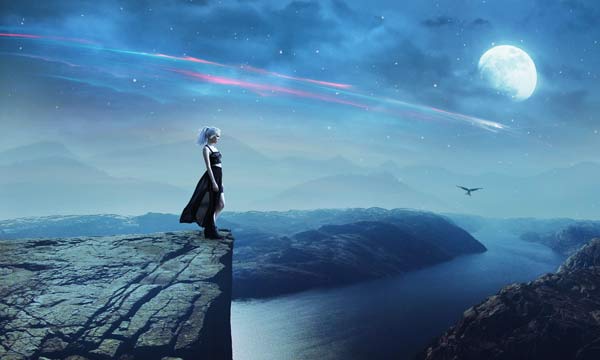
Extract the model from it’s background using selection tool and then place it to the main document as shown in the image below. Use the Refine Edge techniques explained in previous tutorial to deal with hair.
Step 28
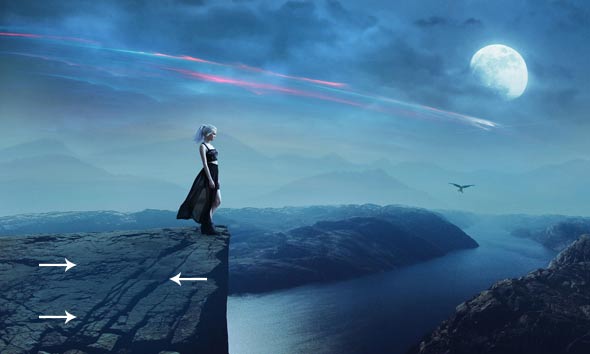
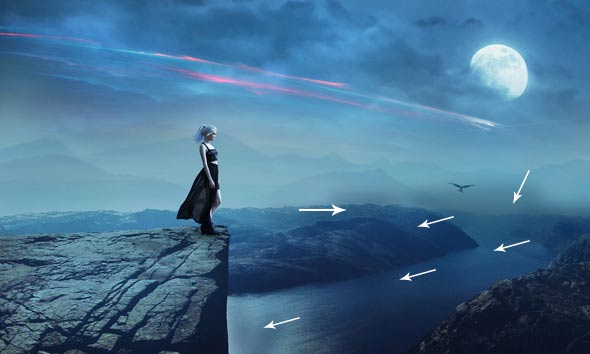
Create a new layer under the model layer and use a soft round black brush to paint a shadow for the model.
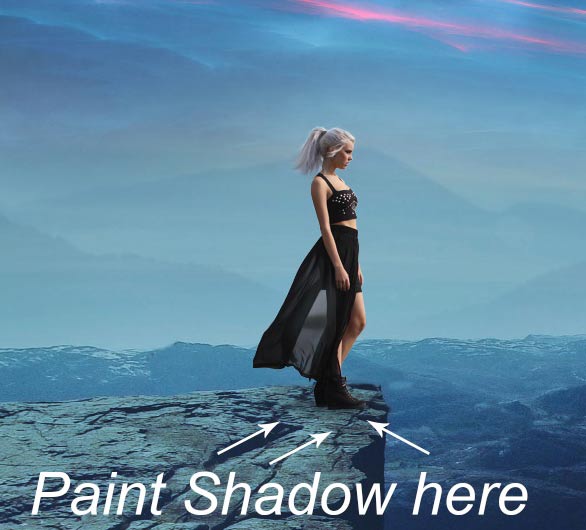
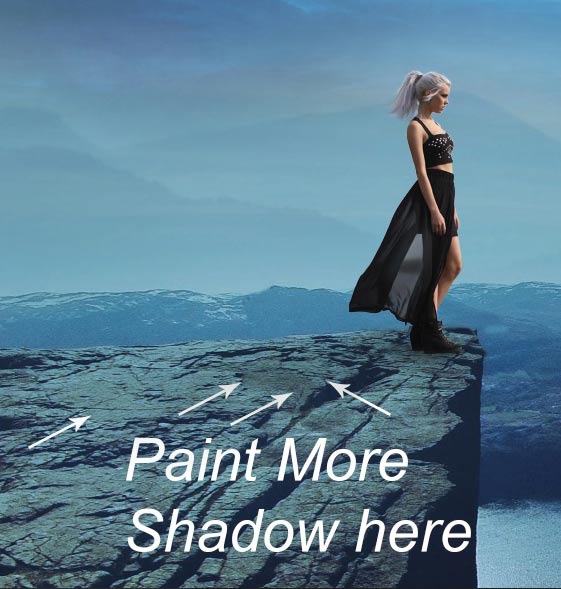
Create a new layer again and paint some cast shadow indicated by arrows.
Step 29
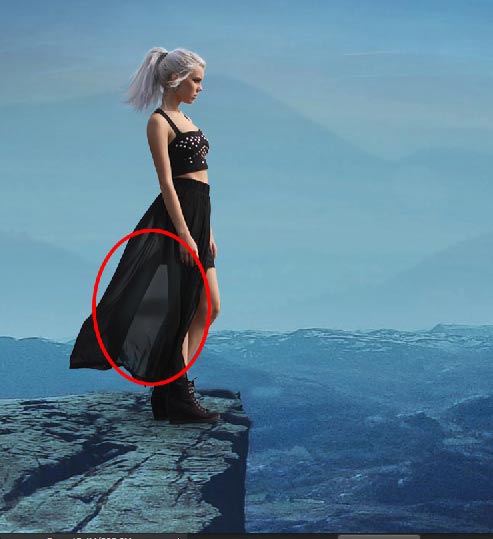
You may notice that there are transparent parts in model dress as indicated by red circle.
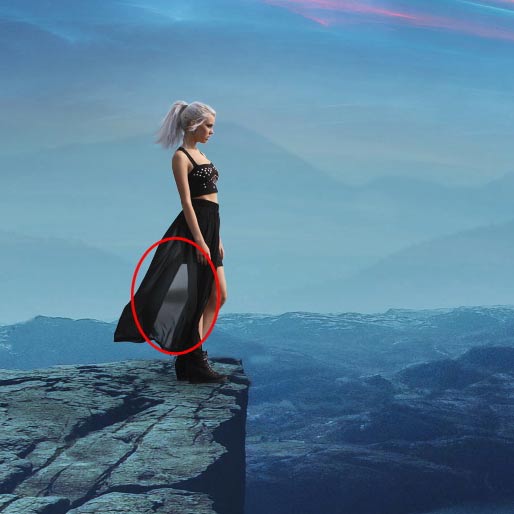
We need to fix it, there is two way to fix it. Either we clone it using Clone Stamp tool or darken it to match it with rest of the dress. Cloning can be time consuming so the better way is to darken it.
Create a new layer above the model and clip it to model.
Activate the Brush tool (B). Set its opacity and flow about 30%. Use a soft round black brush to paint on the transparent parts of the model dress. Here are the results.
Step 30
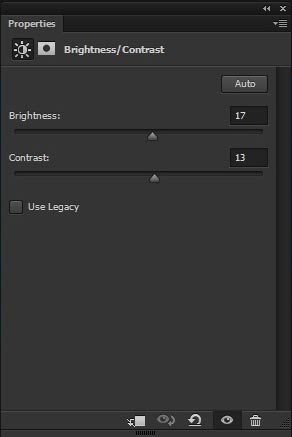
Make a Brightness/Contrast adjustment for model and reduce the brightness.
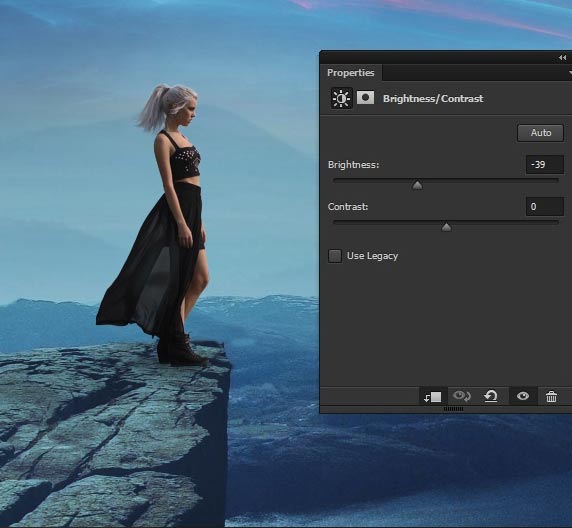
On the layer mask of Brightness/Contrast adjustment layer hide the effects (highlighted in red color) using soft round black brush. Because these parts are reflected by the light source (moon) so we should maintain light on those parts.
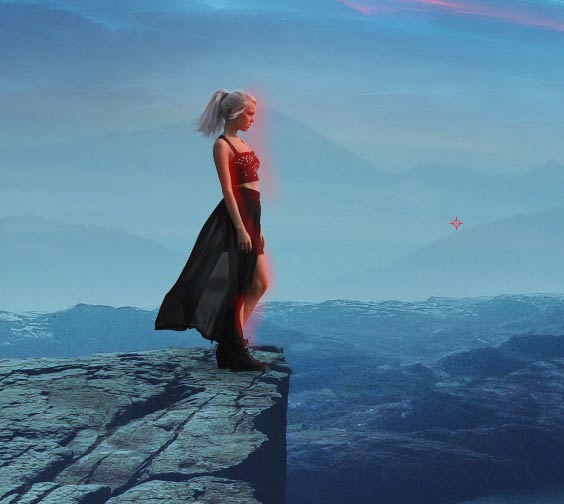
Here are the results.
Step 31
Continue coloring the model with Curves adjustment layer. Set the setting as shown in the image below.
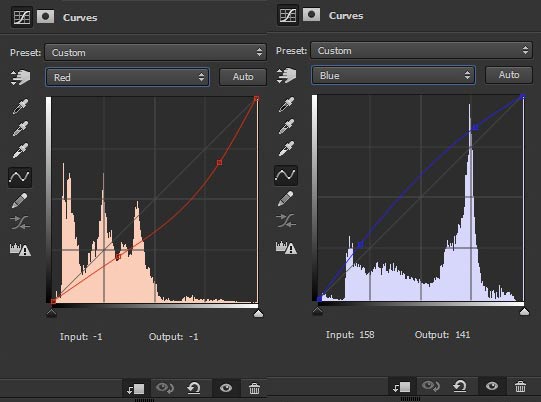
Also, increase the brightness on the model.
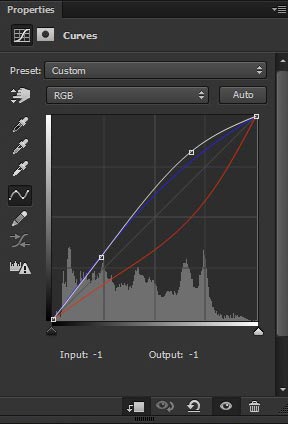
Here are the results with added cyan and blue tones.

Step 32
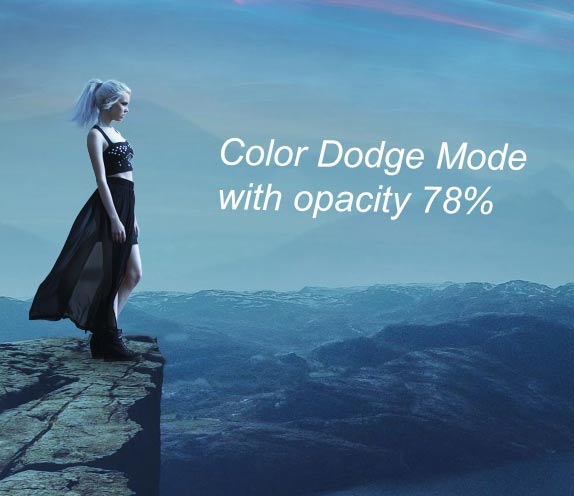
Create a new layer and name it ‘model lights’. Change your foreground color to #0f2846. Grab the Brush Tool (B). Set its opacity and flow about 30% and then paint some lights in where you think the model parts are illuminated by the light source.
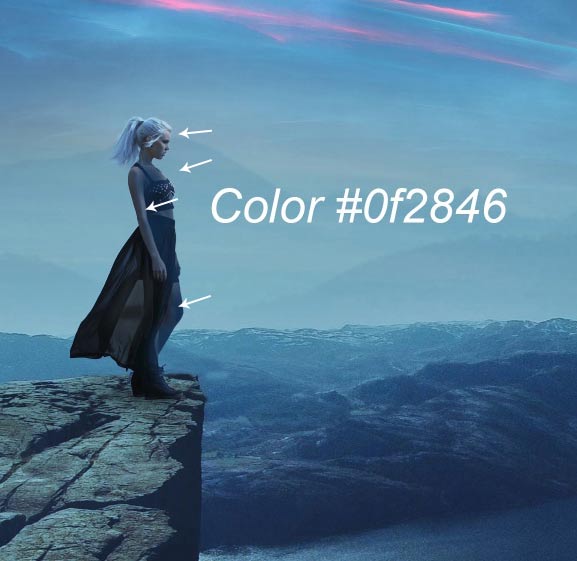
Set the blend mode of ‘model lights’ layer to Color Dodge and reduce the opacity to 78%. Here are the results.
Adding Eagle
Step 33
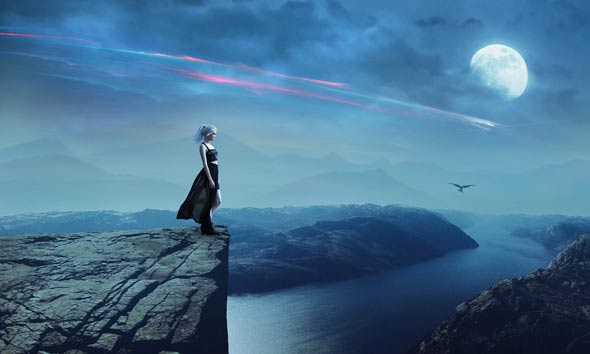
Cut out the eagle and place it to the main document. Then simply change it’s blend mode to overlay to blend it to the scene.
Step 34
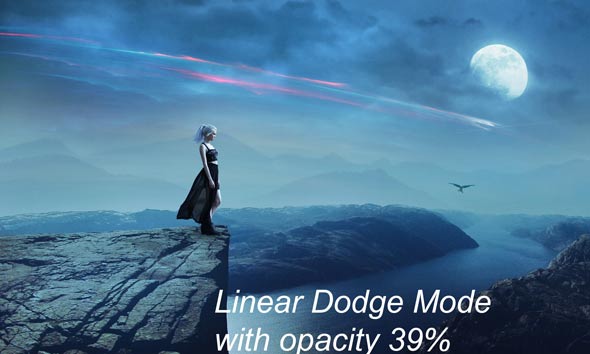
Create the final light effects. Create a new layer and paint some light on the cliff layer using soft round brush. Use the same color in step 32.
Here are the results with Linear Dodge blend mode and opacity 39%.
Step 35
Create a new layer one more time and use the same color in the previous step. Now paint some light on the cliff parts which are close to the moon.
Here are the result with Color Dodge mode and opacity 30%.

Adding Stars
Step 36
Place the starry 1 texture to the main document and then change the blend mode to screen. We’ve now stars added to scene.

Since stars appear in the sky so we should hide the bottom parts starry1. Add a layer mask to starry1 and hide the bottom parts of it.
Step 37
Control the visibility of stars using the Levels adjustment layer. Add a Level adjustment to starry1 and here the values.
The more you drag the black slider to right the less visible the stars.
Here are the results.

Final Adjustments
Everything is set now and it’s time the finalize the whole scene using final adjustment layers. Make a Brightness/Contrast adjustment layer (above all layers) to the scene.
Reduce the opacity of Brightness/Contrast to 71%.
Step 39
Add a Color Balance adjustment layer to the scene. Here are the values.
Here are the results.
Step 40
Decrease the brightness of overall scene using Curves adjustment layers.
Reduce the opacity of Curves to 50%. Here are the results.
Step 41
Finally make a Color Lookup adjustment layer.
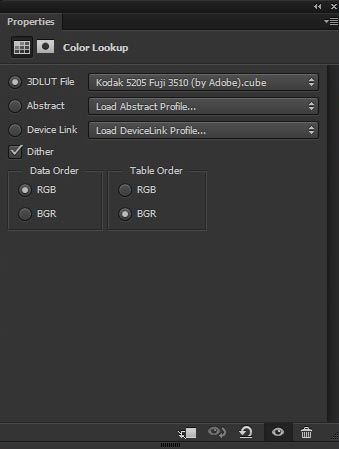
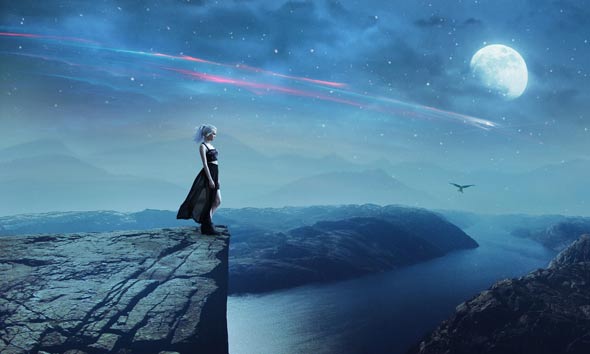
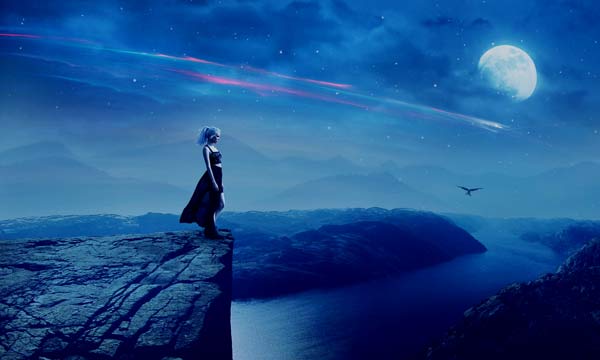
Reduce the opacity of Color Lookup to 59%. Here are the final results.

Conclusion
Thanks for following the tutorial and I hope that you’ve learned something new today. If you have any question regarding tutorial then do let me know through comments and I’ll happy to help you.
Need Help With Photoshop or Looking for Professional Support?
Whether you're just getting started with Photoshop or need expert-level assistance, we're here to help! Contact us for personalized Photoshop tutorials, project support, or creative services.
Get in touch today to take your skills or projects to the next level.
CONTACT US NOW📘 Want to Master Photoshop Faster?
🎁 Get Your FREE PDF E-Book "Top 10 Photoshop Tricks Every Designer Must Know" Now – Packed with expert tips, shortcuts, and techniques to boost your creativity & workflow.
👉 Download Your FREE PDF E-Book NOW!
