


Adobe Photoshop has been around for years and it’s an amazing tool to manipulate photos just in any way you can think of. Getting started with Photoshop can be cumbersome if you don’t know the basics of Photoshop. In today’s tutorial, we are getting started with Photoshop 10 most important tools used in every photo manipulation.
Note: I am using Photoshop CC 2014 for this tutorial, but you can use Photoshop CS3 or higher to follow this tutorial.
Tutorial Resources
Tool 1 – Move Tool
Let’s learn more about Photoshop Tools. Open up any image you want to get started in Photoshop. To open any image, select File > Open and open the image you want to open.

The first Photoshop tool is Move Tool and it is used to move images, selections, and layers. It’s a very simple tool and you can drag any image, layer wherever you want to. Just press (V) on the keyboard to activate it or you can also use the mouse to activate it, just click on the move tool icon shown below.

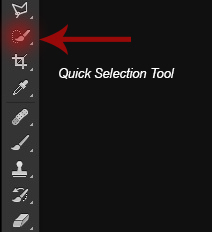
Tool 2 – Quick Selection Tool
Next we have the Quick Selection tool and it is used to make the selection of any portion of the image. It works like a brush tool and allows us to simply select the area of an image by painting over it. You can activate the Quick Selection tool by simply pressing the (W) button on the keyboard.
I have this image open in Photoshop and I want to make the selection of sky part.

First, activate the Quick Selection tool and simply click on the sky, then drag it over the sky. You can also hold (ALT) to minus the selection while making selections. Now we have the sky selected properly.

Now we have the sky part selected and add a layer mask to it by simply clicking on add layer mask icon at the right bottom corner to extract the sky (If you get the desert part extracted instead of the sky and to overcome this you can press CMD or CTRL + I to inverse the selection). The Layer mask concept is beyond the scope of this tutorial and we’ll learn more about it in next upcoming tutorials.

As you can see we have a pretty much decent selection of sky. One more thing about the Quick Selection tool is that it works best when we have solid backgrounds. But it can also ruin the result when we have the complex background and a better alternative to this tool is Pen Tool. We’ll learn more about the Pen tool in this tutorial.
Tool 3 – Crop Tool
Crop Tool as the name suggest used to crop images. With this tool, you can crop any image. You can activate the Crop tool by pressing (C) on the keyboard or see the image below for crop tool icon.

Open up any image you want to crop and let we have the city image again. After you activated the crop tool you’ll see the crop handles around the image. Resize the shape of the crop box according to your needs and simply double click on the image to crop the image.

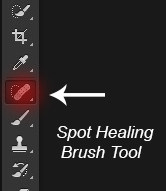
Tool 4 – Spot Healing Brush Tool
Spot Healing Brush Tool is a retouching tool and used to heal the spot. Next to Spot healing brush you’ll have the Healing brush tool. The only difference between Spot healing brush tool and healing brush tool is that spot healing brush tool allows you to sample the pixels automatically while the healing brush tool allows you to sample the pixels manually. You can sample the pixels with the Healing brush tool by pressing (ALT) on the keyboard. You can activate this tool by pressing (j) on the keyboard.
I have this image of girl open in Photoshop with a few skin flaws. The red circle indicates the spot for healing.
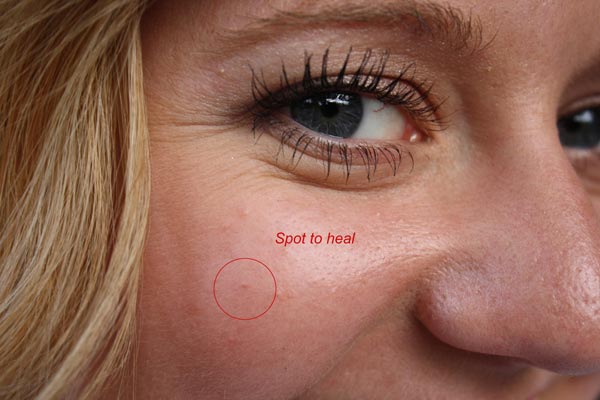
Simply activate the Spot Healing brush tool and start clicking on the spot to heal the spot.

As you can see the spot is healed now. With little more practices, you can reduce wrinkles, blemishes, skin flaws and unwanted spot from an image with these tools.
Tool 5 – Brush Tool
Brush Tool is a painting tool and used to paint colors over an image. You can paint lines, shapes, and colors with Brush Tool. You can press (B) on the keyboard to activate the Brush Tool.

Brush tool has many options but in this tutorial, we are describing
the basic one. There are many types of brushes such as soft round brush, hard round brush, chalk brushes and you can load many brushes as much you want.
At the property bar of brush tool, you’ll have two basics options Opacity and Flow. Opacity value determines the percentage of transparency. 100% means full-color stroke whereas a small percentage means more transparent painting. The Flow value determines the rate of color applied. You can reduce the opacity and flow percentage according to your needs.
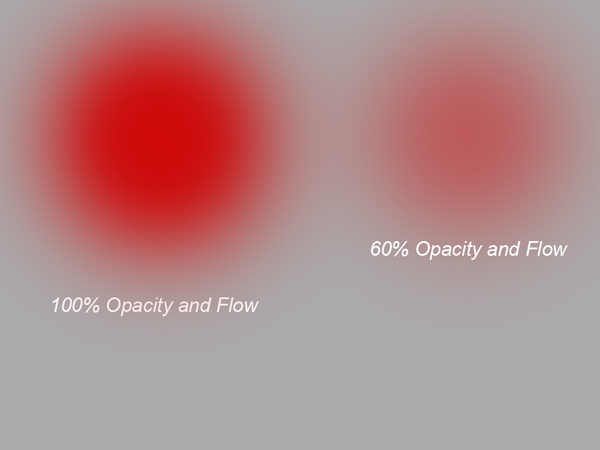
In the above image, you can see the result how the opacity and flow work.
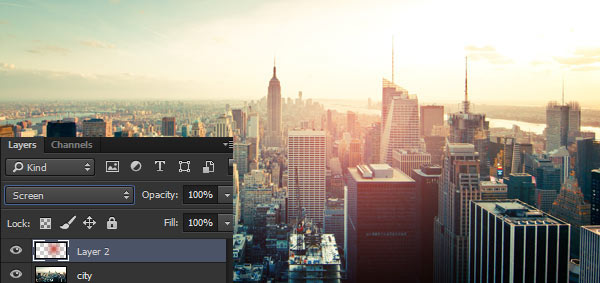
Let’s use the brush tool. Open up the city image and then use a soft round brush (it’s the first default brush) to paint on a new layer with bright orange color like I did it with 100% opacity and flow.

Change the blending mode to Screen and we have created a light effect using the brush tool.
I just shown you a basic use of brush tool. It’s a very important tool and in photo manipulation, you can paint shadows, hairs and even a painting with this tool.
You can also load different brushes in Photoshop, all you need to do is when the brush tool is active just right-click anywhere on the document, then click on the Gear Icon (top right side of the brush presets) and then choose load brushes option to load the brushes in Photoshop.
Tool 6 – Clone Stamp Tool
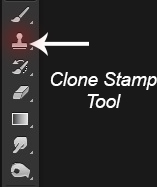
Clone Stamp tool is used to copy one area of an image and copy it onto another area. To activate the clone stamp tool simply press (S) on the keyboard or see the image below for clone stamp tool icon.
To practice Clone stamp tool you can open any image. Let’s open the gull’s image in Photoshop.
In the gulls’ image, I want to clone the red circle gull.
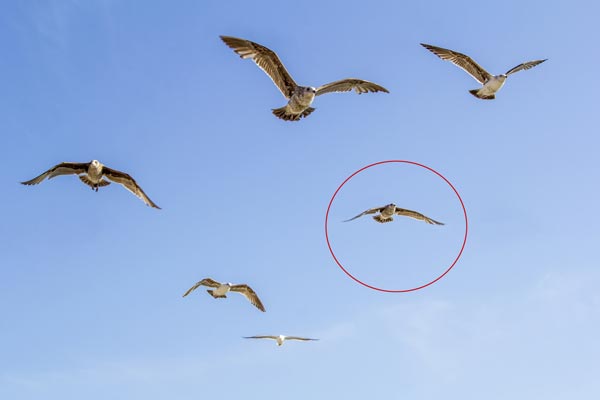
To clone the gull, I need to sample the source for cloning to do this simply press ALT (Windows) or Option (Mac) on your keyboard. When you press ALT key your cursor will change to a target. Take the source of cloning (Sample the sky part). Once you sample the source simply paint it over the gull.
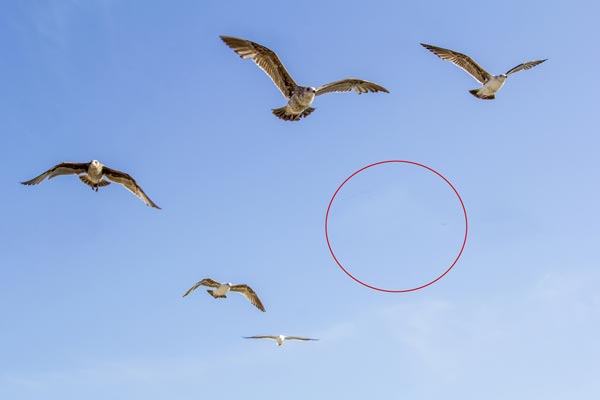
As you can clearly see that the gull has cloned perfectly. You can also use the clone stamp tool to reduce blemishes, skin flaws and wrinkles.
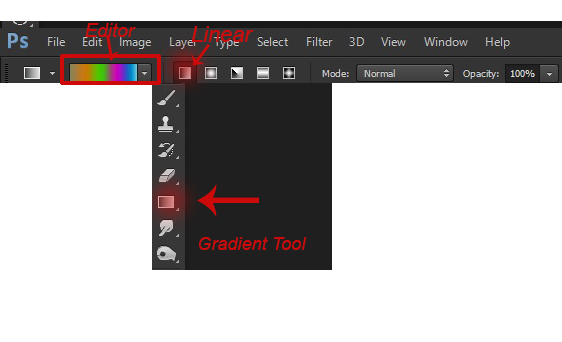
Tool 7 – Gradient Tool
Gradient tool used to create the gradient effect. It creates a gradual blend between multiple colors. You can activate the Gradient tool by pressing (G) on the keyboard. On the options bar, you can also choose the type of gradient such as Linear, Radial, Angle, Reflected or Diamond. You don’t need to use all types of gradient and most of the time Linear gradient works best. It is also the default gradient type you can see the image below.
In the above image, click on the Gradient Editor (colorful bars) and the gradient editor dialog box will appear.
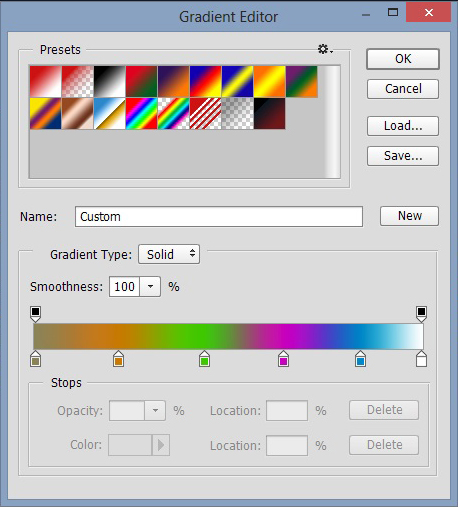
You can add many colors on the gradient and just move your cursor on the color picker. Simply click on it and choose any color you want to apply it.
You can apply the gradient by simply activating the Gradient Tool and dragging it over the image. You can also hold the Shift key to apply the gradient vertically. Try it with yourself!
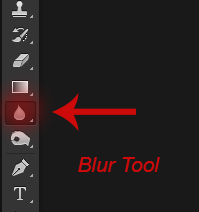
Tool 8 – Blur and Sharpen Tools
Blur tool is used to soften the area of an image and Sharpen tool is used to sharpen the area of an image.
There is no shortcut key for Blur tool and you have to click on the blur tool icon to activate it.
Open the gull image again and I want to blur the red circle gull. To do this simply activate the blur tool and paint over the bird to blur it.

Similarly, you can use the Sharpen tool to sharpen the gull. Try it by yourself and see the results.
Tool 9 – Dodge & Burn
Dodge and Burn tool are very important tool. They allow us to refine the shades of an image. Dodging the area simply means lighting the area of an image while burning means darkening the area of an image. In simple word Dodge = lightens and Burn = Darken. To activate the Dodge & Burn tools you can press (O) on the keyboard.

In the options bar, you can see that we have a range and exposure options. The range allows us to dodge and burn different tones in an image. When it’s set to shadow (darker parts), only the darker parts are affected. When it’s set to midtones (the area between darker and lighter parts), only the midtones are affected. When it’s set to Highlight, only the brighter area of the image is affected.
Exposure options control the intensity of effects. The setting you have seen in the above image these are my setting for dodging and burning. I always work with these settings whenever I want to dodge and burn the parts of an image in Photoshop.
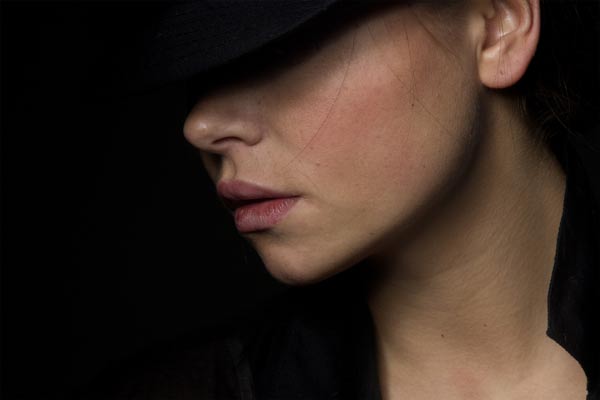
Let’s practice dodge and burning. Open up the girl portrait image.
Non-Destructive Dodge and Burn
Dodge and Burn tool suffer from one serious problem and the problem is that they can permanently damage your images. I recommend you to whenever you dodge and burn an image, always duplicate the image before doing.
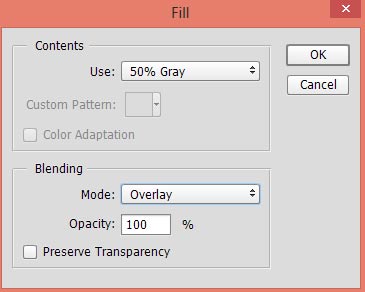
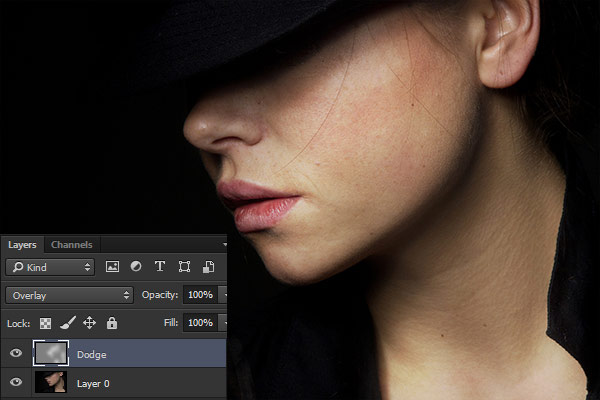
You can also create a new layer by pressing CTRL + SHIFT + N and then go to Edit > Fill fill this layer with 50% Gray and change the blending mode to Overlay. Name this layer ‘Dodge’. We’ll apply the dodge tool in this separate layer to make sure that it doesn’t harm our original image.
Activate the dodge tool and set the Range to Midtones and Exposure to 9-10%.
Start brightening the model skin using the Dodge Tool. Remember you can paint in certain areas to add more lightning there. You can also target the different range by the changing the range settings. You can also increase the exposure settings to add a more intense dodging effect or decrease it for subtle dodge effect. Also, check the Protect Tones option in the options bar to make sure that you are not losing details while dodge and burn tool.
Here how I did it:
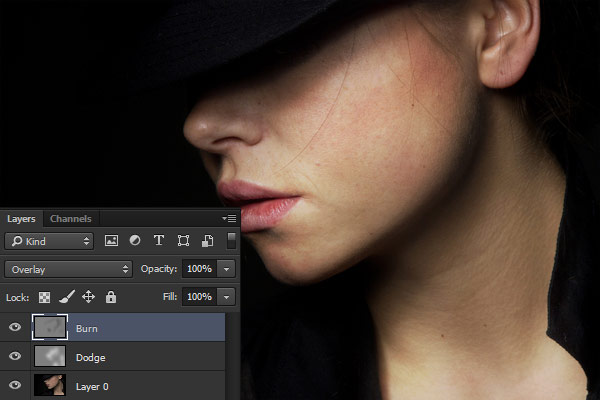
Similarly, I use the Burn Tool to darken the areas of the image. You can notice there is no much to darken anything so I did a little bit burning on the image. So this is how the dodge and burn tools work in Photoshop.
Final Tool – Pen Tool
Pen tool is a selection tool and used to make the selection of the area of the image. It is also used to create path and shapes. You can activate the pen tool by pressing (P) on the keyboard.
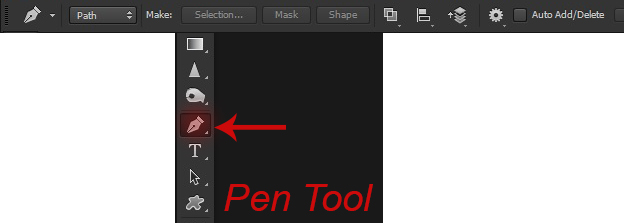
Initially, the pen tool is confusing and difficult to understand. But once you comfortable with this tool, then you’ll only use this tool to make the selection. On the options bar, you can see the pen tool mode is set to the path. Always set it to the path when you make the selection of an image.
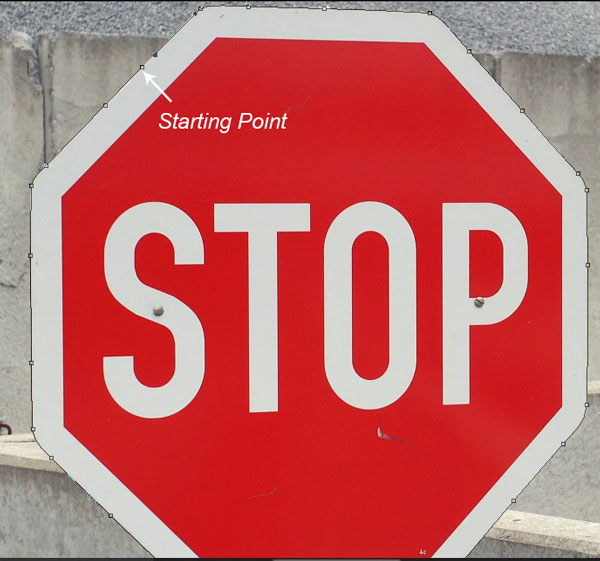
Let’s make the selection with the Pen tool. Open up the stop sign image in Photoshop.

Let’s say that I want to extract the stop sign from its background. Always Zoom (by pressing (Z) on the keyboard) in when you make the selection with Pen tool. By zooming, you’ll find it easier when making selections with the Pen tool. In that way, you can be sure you’re keeping your path just inside the area you want to select.

So zoom in and click on the line of the stop sign to add an anchor point to it. Now I just have a starting point for my path. To create a path around the stop sign I’ll have to go around the sign adding an anchor point in each corner where the path needs to change direction. As I add each anchor point, a new path segment will appear joining the previous anchor point with a new one, until I’ve gone all the way around the sign. You can also move your mouse to make the curve selection in the corner area of the stop sign.
Sometimes you can also make mistakes while making a selection with this tool to overcome this you can press (Ctrl or Cmd + Z) to undo it. That’s why it is the best selection tool in Photoshop.
To close the path simply click on the starting anchor point. To make the selection of stop sign now all you have to do is right click on it and choose make selection.
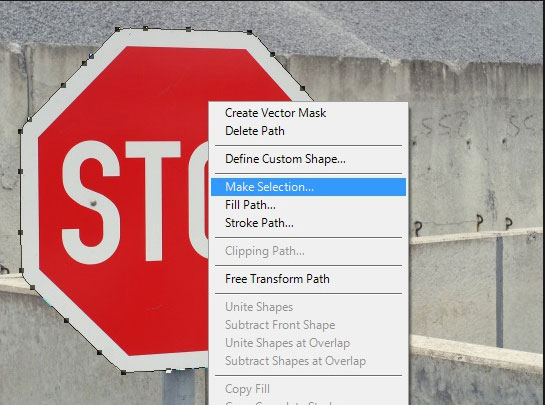
So click on make selection and just press ok (don’t enter any value in feather) to make the selection.
To extract it properly from the background you can add a layer mask to it by pressing the add layer mask button on layer panel.

As you can see we’ve very clean and decent results. Now I can move and copy it another document.
Conclusion
That’s it for now. So these are the top 10 most important in Photoshop used in every photo manipulation. Remember this tutorial all about basics and you’ll learn more about these tools in advanced upcoming tutorials.
Need Help With Photoshop or Looking for Professional Support?
Whether you're just getting started with Photoshop or need expert-level assistance, we're here to help! Contact us for personalized Photoshop tutorials, project support, or creative services.
Get in touch today to take your skills or projects to the next level.
CONTACT US NOW📘 Want to Master Photoshop Faster?
🎁 Get Your FREE PDF E-Book "Top 10 Photoshop Tricks Every Designer Must Know" Now – Packed with expert tips, shortcuts, and techniques to boost your creativity & workflow.
👉 Download Your FREE PDF E-Book NOW!
