


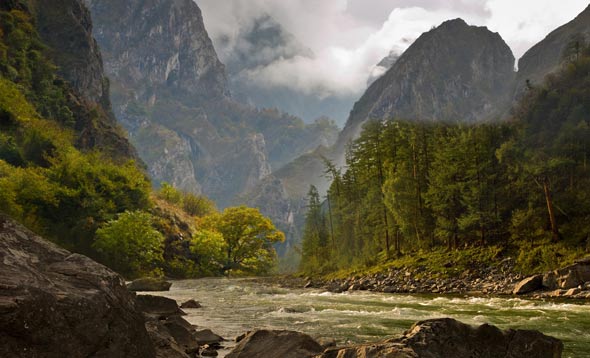
Learn how to create a beautiful landscape matte painting in Photoshop. In this tutorial, you’ll learn how you can merge mountains stock images and also how you can blend them to make a perfect composition. This tutorial will also guide you about complex masking, creating realistic effects and using the adjustment layer in an effective way.
Tutorial Resources
Setting up the Background
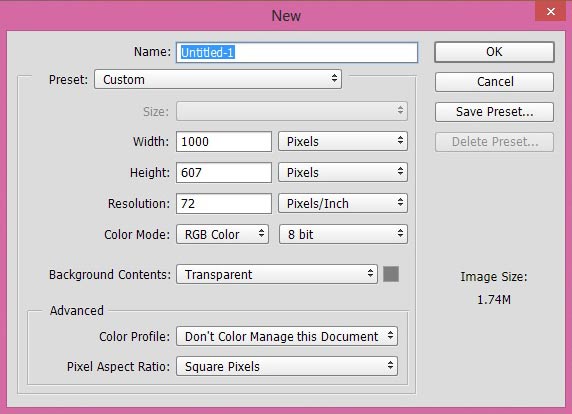
Step 1
Start by creating a new document by selecting File > New and set the setting as shown in the image below.
Step 2
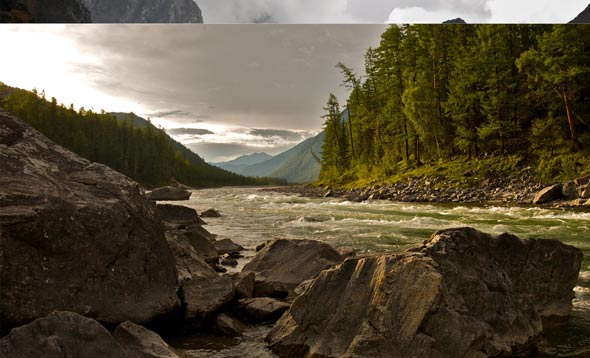
Now place the mountain 1 image to the main document by selecting File > Place or Place Embedded (Photoshop CC 2014).
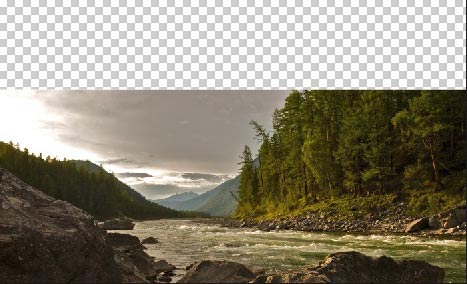
Step 3
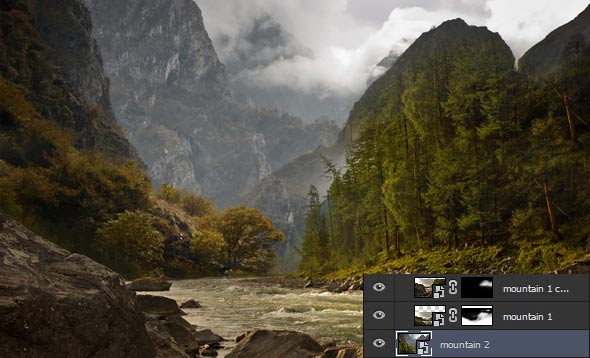
Place the mountain 2 image to the main document and then move it under the mountain 1 layer.
Step 4
Add a layer mask to the mountain 1 layer by clicking on the second button on layer panel or select Layer > Layer Mask > Reveal All. Use a soft round black brush with opacity and flow about 30% (recommended setting when masking an image) to mask the selected part of mountain 1 layer. Have some patience while masking.
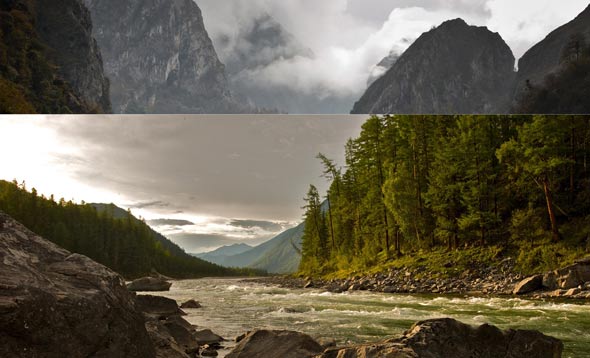
Here are the results.
Step 5
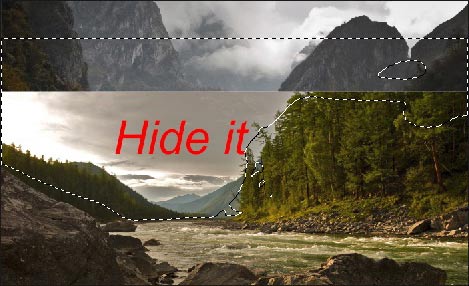
As you can see that hiding the mountains 1 layer, we’ve blended the mountain 2 layer to the scene. But if you notice that right side tree parts of mountain 1 layer are incomplete. We need to fix it, to do this duplicate the mountain 1 layer (delete the existing layer mask) then move it a little bit above as shown in the below image so the tree parts of duplicated mountain 1 go over the original mountain 1 layer.
The goal behind duplicating the mountain 1 layer is to keep the tree parts of it. To hide the unwanted parts, add a layer mask to it. Activate the brush tool by pressing (B) on the keyboard and set it’s opacity and flow to 30%.
Then using a soft round black brush, hide all the parts except the selected tree parts as shown in the image above.
As you can see the tree parts are fixed.
Adding the Sky
Step 6
Now add the sky to the scene. Place the sky image under the mountain 2 layer.
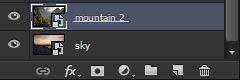
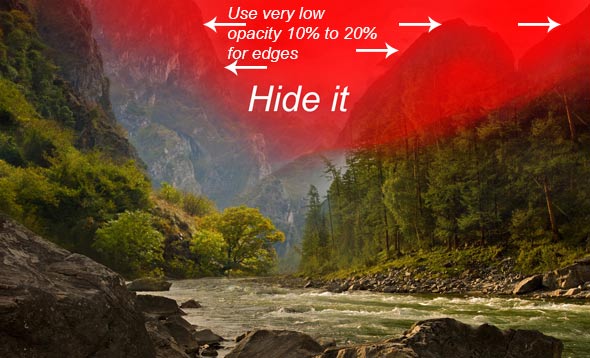
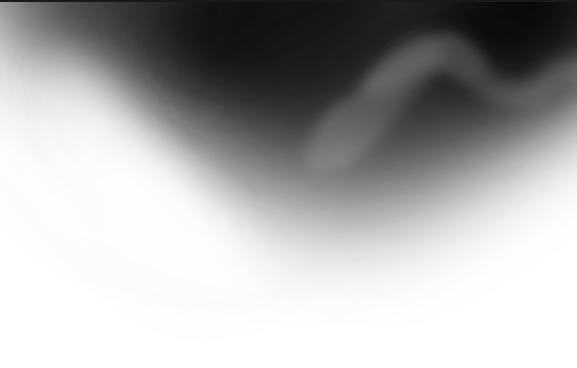
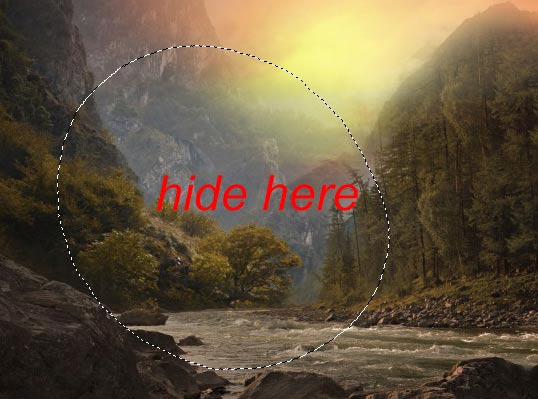
To reveal the sky layer, we need to hide the parts of mountain 2 layer. So add a layer mask to mountain 2 layer and start hiding red
area of mountain 2 layer using soft round black brush.
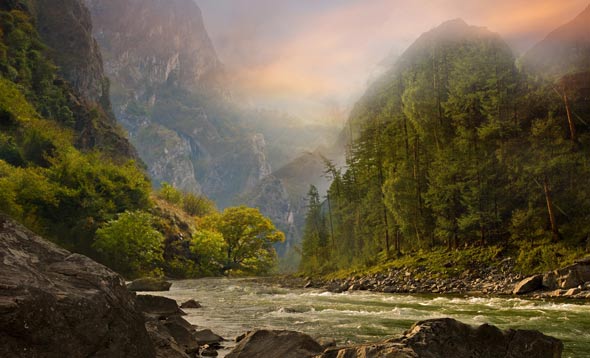
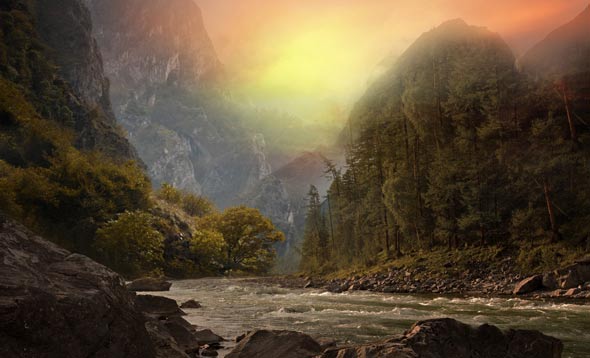
Here are the results on layer mask.
You may notice that I’ve also erased the hard edges and also other parts of mountain 2 using very low opacity about 10% to 20%. I’ve done this deliberately because that will help me to blend the mountain 2 image with sky without getting any hard or sharp edges.
Otherwise, you’ll get sharp edges for mountain and anybody don’t want that. So whenever got a situation like this try hiding the mountain parts using very low opacity to soften edges of any mountains images. For those who are not good in masking, they can use the Blur tool to soften the edges. Here are the results with proper blending.
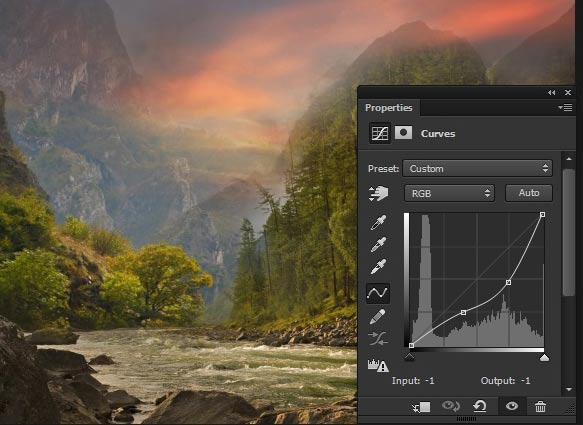
Step 7
Add a Curves adjustment layer ( go to Layer > New Adjustment Layer > Curves) to the sky to lower the brightness of the sky. Reduce the opacity of Curves to 50%.
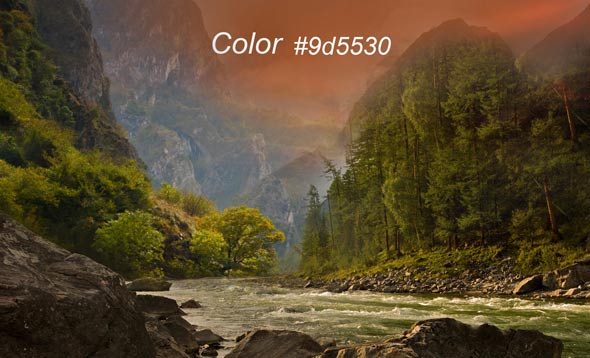
Step 8
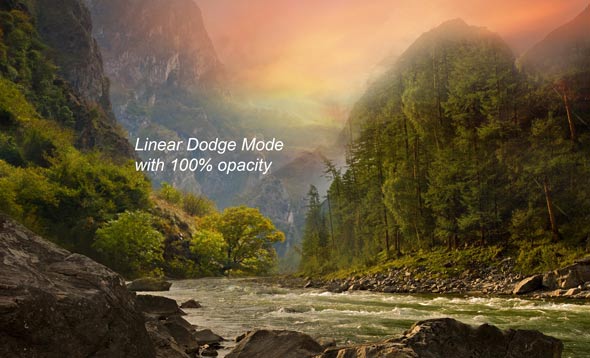
Create a new layer by pressing (CTRL + ALT + SHIFT + N) on keyboard and name it ‘Light 1’. Change your foreground color to #9d5530 and paint some lights on the sky parts using soft round brush tool.
Change the blend mode of light 1 layer to Linear Dodge and here are the results.
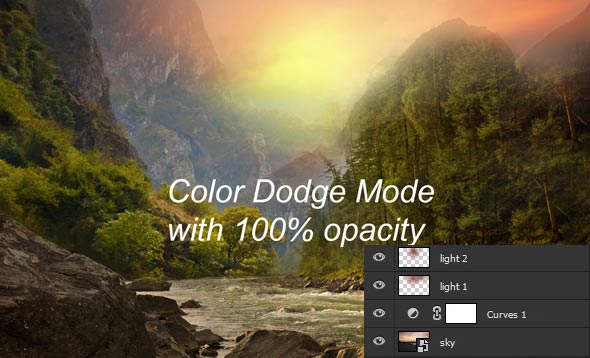
Step 9
Create a new layer again and name it ‘Light 2’. Using the same color in the previous step, make a stroke (use brush size around 1100 pixels) as shown in the image below.

Change the blend mode of ‘Light 2’ layer to Color Dodge. Here are the results.
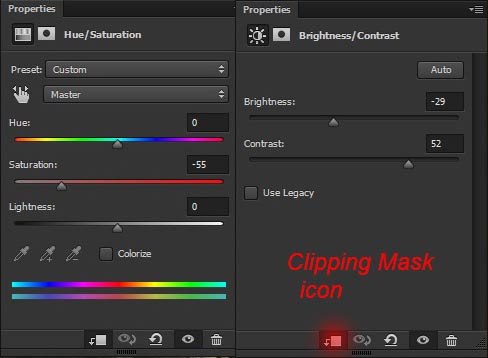
Step 10
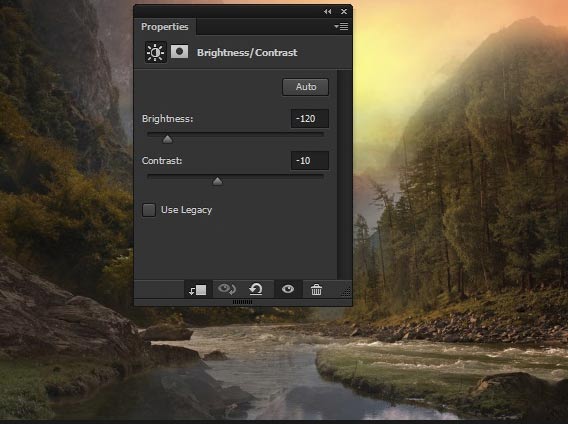
Head back to the mountain 2 layer and add Hue/Saturation adjustment layer to it as clipping mask (see the image below for button) to reduce the saturation of mountain 2 layer. Also, add a Brightness/Contrast adjustment layer to reduce the brightness of mountain 2 layer.
Here are the results.
Step 11
Maintain some lights on the mountain 2 layer parts which are illuminated by the light source. To do this hide the selected effect of Brightness/Contrast adjustment layer by painting on the layer mask of Brightness adjustment layer using soft round basic black brush.
Here are the results.
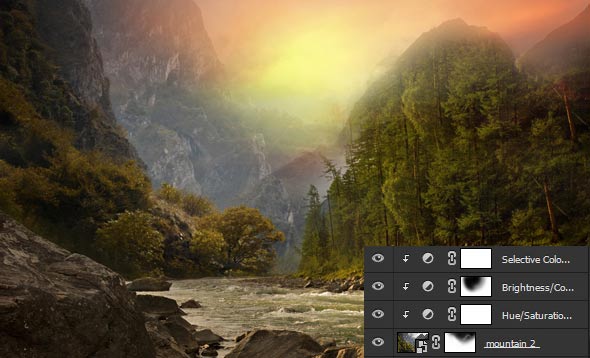
Step 12
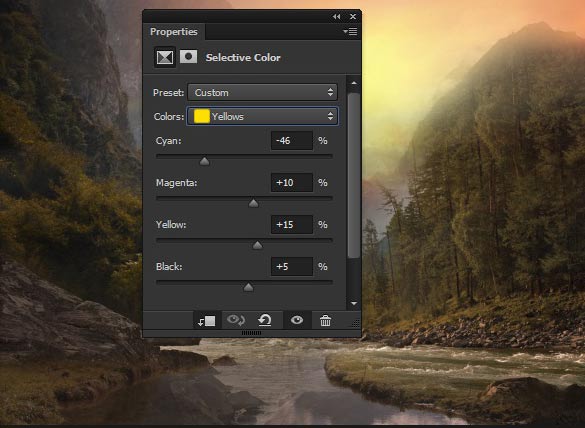
Add a Selective Color adjustment layer to mountain 2 layer to add yellow tone to it. Also, change the blend mode of this adjustment layer to Color.
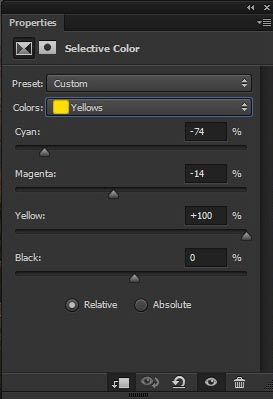
Here are the results.
Step 13
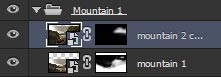
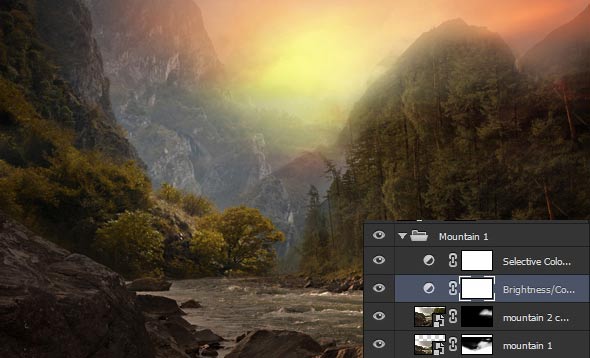
Head back to mountain 1 layer. Now select both mountain 1 layer and mountain 1 duplicated layer and then press ( CRTL + G ) to group them. Name this group ‘Mountain 1’.
Now change the blend of Mountain 1 group to Normal. After that add the Brightness/Contrast and Selective Color adjustment layer above the mountain 1 duplicated layer but inside the group.

Here are the results.
Step 14
Keep some lights in the middle of mountain 1 layer, to do this hide the selected effect of Brightness/Contrast adjustment layer.
Here are the results.
Adding Mountain 3
Step 15
Place the mountain 3 layer to the main document.
We only need the red parts as shown in the image below.
Hide everything except the red areas using a layer mask and here are the results.
Step 16
Now start blending the mountains 3 layer to the rest of the scene using adjustment layers. So add a Brightness/Contrast adjustment layer to it to reduce the brightness.
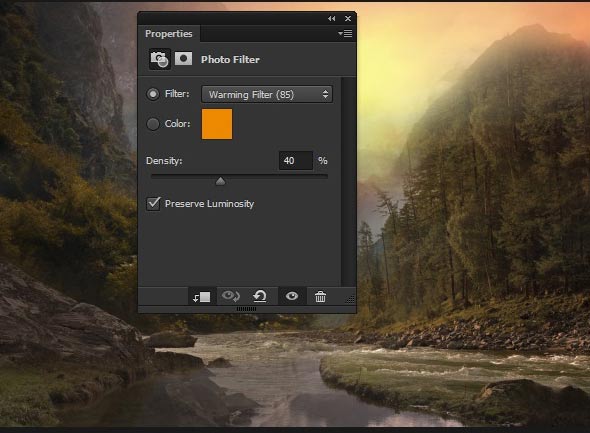
Step 17
Continue coloring it using Photo Filter adjustment layer.
Step 18
Add a Selective Color adjustment layer to mountain 3 layer to add some more yellow tones to it.
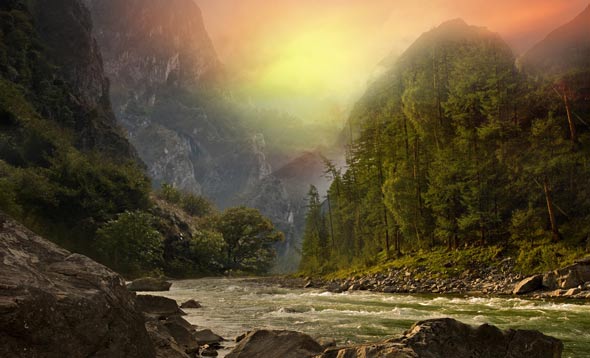
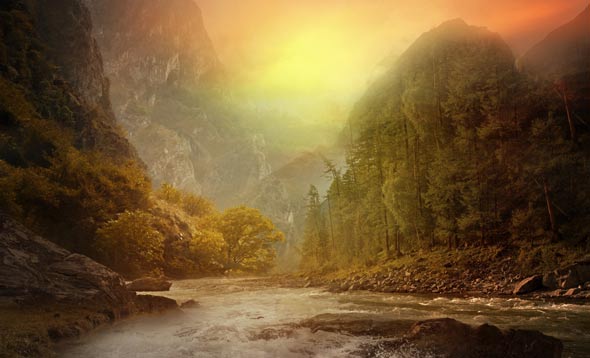
Here are the results so far.
Adding Beach
Step 19
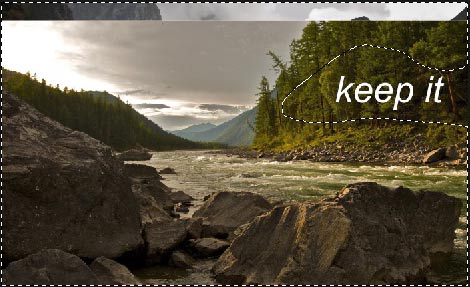
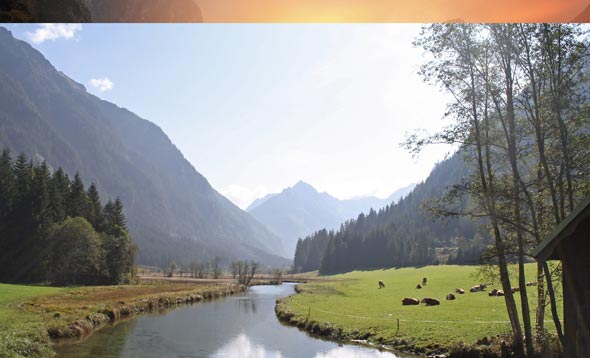
Place the beach image to the main document and place it as shown in the image below as we only want the water waves.

Step 20
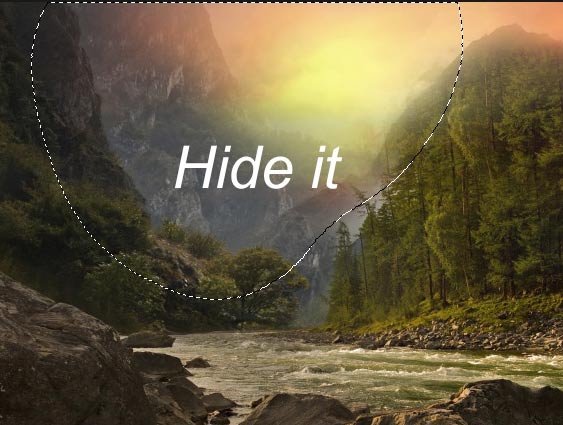
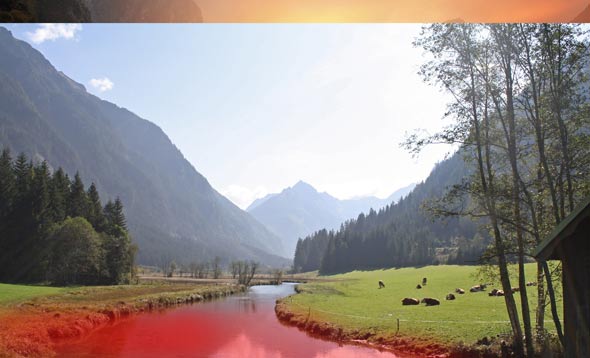
Add a layer mask to beach image and then hide the everything except the water waves. Here are the results.
Step 21
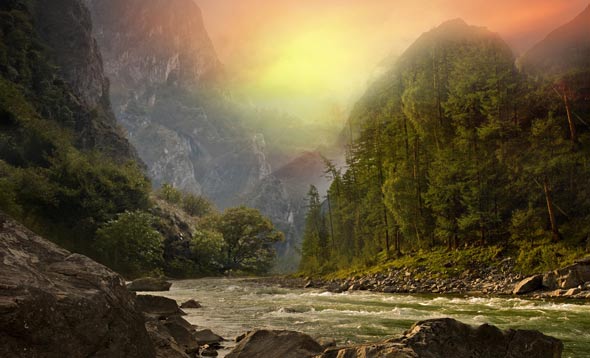
Add a Hue/Saturation adjustment layer to beach image to reduce the saturation.
Creating Final Light Effects
Step 22
Create final light effects for the scene. Create a new layer and name it ‘Final lights’. Change your foreground color to #7d3f19. Paint some more light in the middle of the scene.

Change the blend mode of ‘Final Light’ to Linear Dodge and reduce the opacity to 41%.
Adding the Nebula
Step 23
Place the Nebula image to the main document. Resize it, so it can cover the entire canvas.

Change the blend mode of Nebula layer to soft light and reduce the opacity to 54%. Here are results.
As you can see that nebula image has changed the entire scene. Using texture or nebula or any kind of image, that has only one color or pattern, at the end of the scene can change the overall look of your photo manipulation.
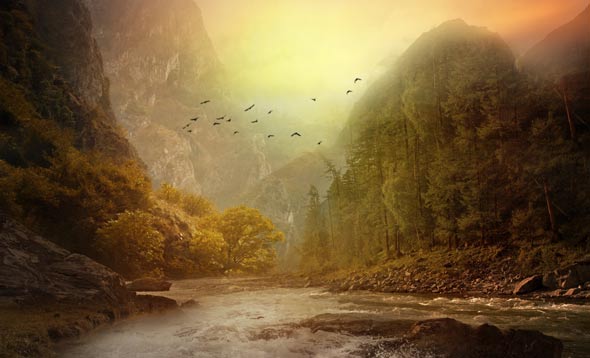
Step 24
Load the bird’s brushes in Photoshop. Create a new layer and then paint some birds using bird brushes (feel free to choose your own brush).
Final Adjustments
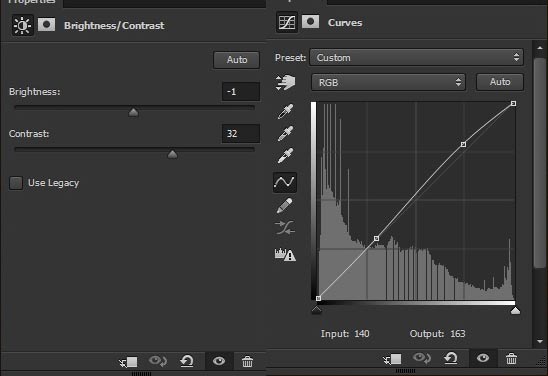
Step 25
We are almost done but still lacking the final adjustments. Add a Brightness/Contrast adjustment to the entire scene. Also make Curves adjustment layer to increase the lightness.
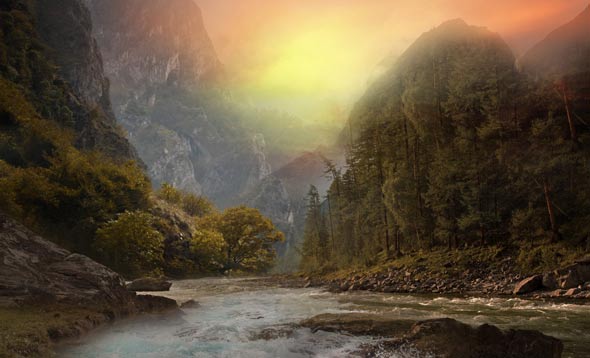
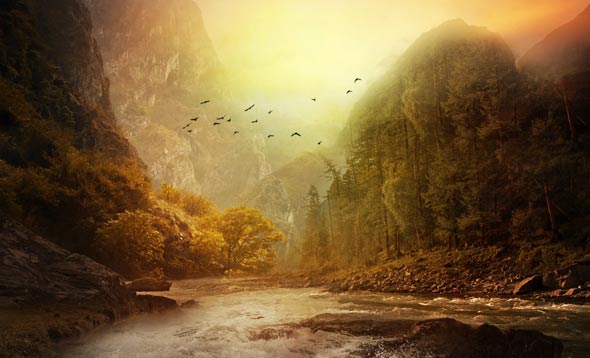
Here are the results.
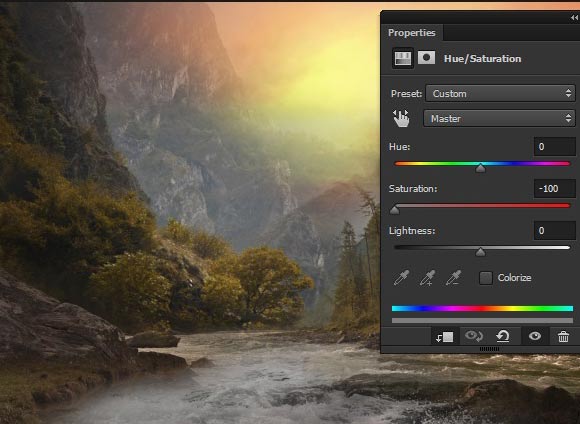
Step 26
Add a Gradient Map adjustment layer (I always choose the 3rd presets in Gradient Editor) and then set the setting as shown in the image below.
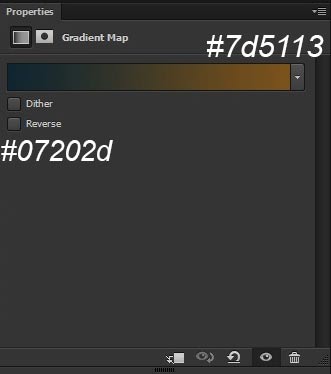
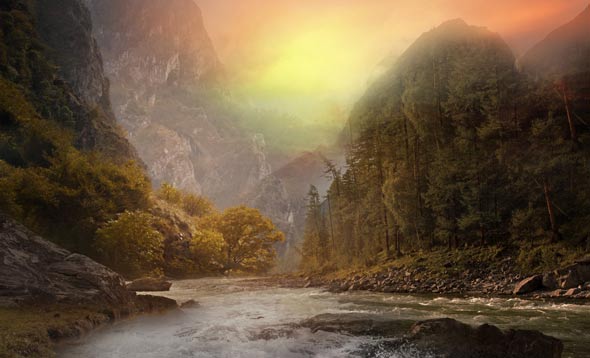
Change the blend mode of Gradient Map to Linear Dodge and then reduce the opacity to 37%. Here are the results.
Step 27
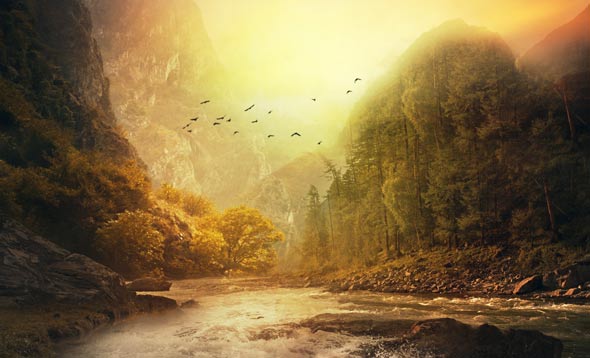
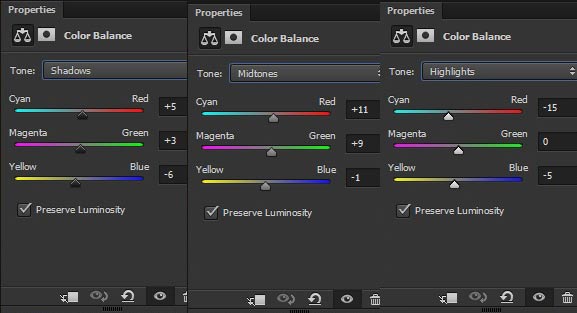
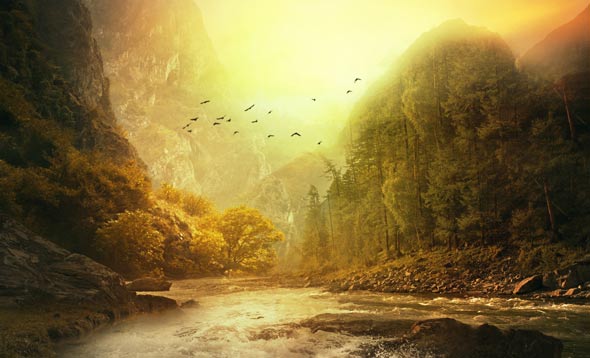
Finally, make a Color Balance adjustment layer to finalize the scene. Also, reduce the opacity to 68% of Color Balance adjustment layer.
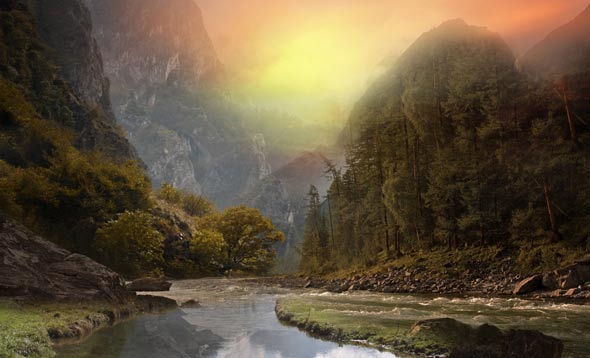
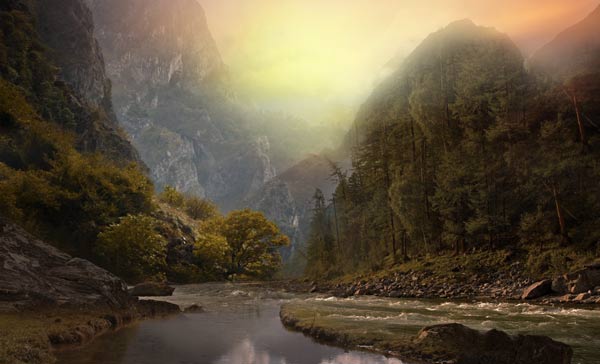
Here are the Final Results.
Conclusion
Thanks for following the tutorial and I hope that you’ve learned something new today. As always if you have any question regarding tutorial then do let me know through comments and I’ll happy to help you.
Need Help With Photoshop or Looking for Professional Support?
Whether you're just getting started with Photoshop or need expert-level assistance, we're here to help! Contact us for personalized Photoshop tutorials, project support, or creative services.
Get in touch today to take your skills or projects to the next level.
CONTACT US NOW📘 Want to Master Photoshop Faster?
🎁 Get Your FREE PDF E-Book "Top 10 Photoshop Tricks Every Designer Must Know" Now – Packed with expert tips, shortcuts, and techniques to boost your creativity & workflow.
👉 Download Your FREE PDF E-Book NOW!

