
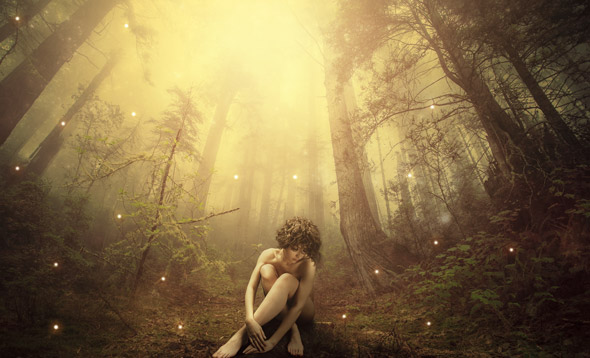

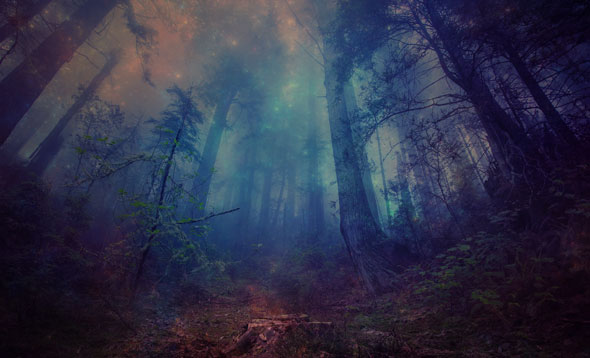
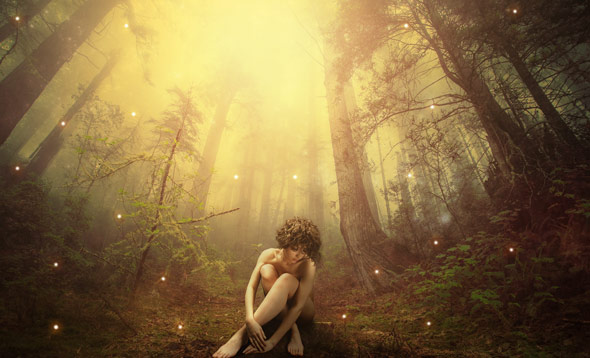
In this tutorial I will show how to create a fantasy photo manipulation of magical forest. You’ll learn how to work with forest stock and then blend them to make a perfect composition. We’ll also learn how to create special light effects using basic to advanced lighting techniques. Moreover, I got two color variants for this tutorial and you’ll get to know about it at the end of the tutorial.
Tutorial Resources
Preparing the Background
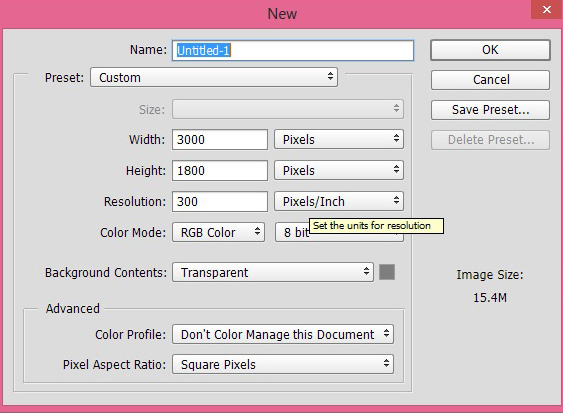
Step 1
Start by creating a new document in Photoshop. Select File > New then use the setting below or feel free to choose your own.
Adding Forest
Step 2
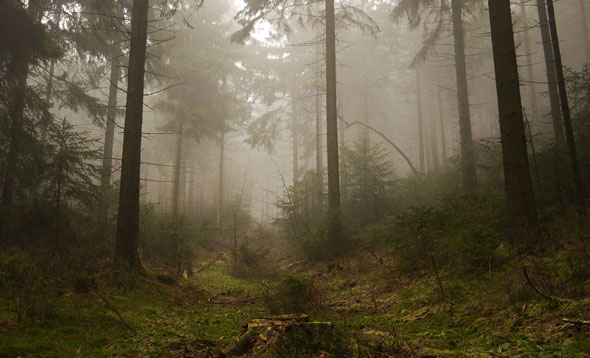
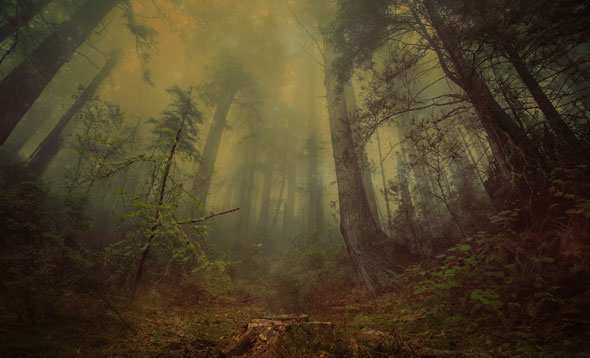
Open up the forest image in Photoshop and drag it onto main document using Move Tool (V). If needed you can also use Transform Tool (CTRL + T) to make it fit on entire document.

Step 3
You may notice that forest has not enough contrast and its look dull and flat now. To fix this, I will use Shadow/Highlights filter. First convert the forest layer into Smart Objects and then select Image> Adjustment Layer > Shadow/Highlights and use the following settings to add contrast on Highlights.
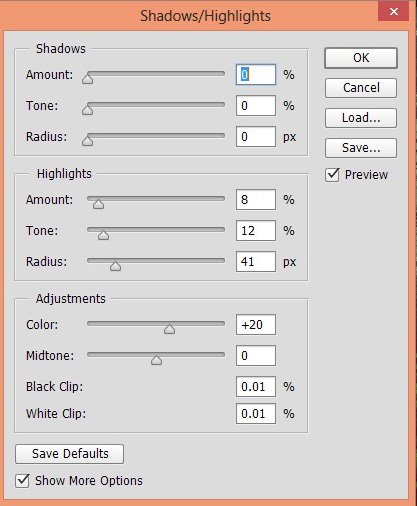
Now you can see that Shadow/Highlights Filter has three section Shadows , Highlights and Adjustment. Each of sections has three slider named Amount, Radius and Tonal except Adjustment section.
In Shadows section, the Amount used to add brightness to shadows tones of the image and Tonal slider determines the range of brightness value and Radius control the overall effects. All of the sliders have same purpose in Highlights section except it works only on Highlights of an image.
In the above setting I reduced the each value of three slider in Shadow section to O because I don’t want any brightness on Shadows. But in Highlights section I dragged the Radius slider to 8%, Tonal Width to 12 and Radius value to 12px to add brightness only on Highlights.
Adjustment section is very simple and it has two sliders. Color slider used to reduce and increase color saturation and Midtones used to add brightness on Midtones parts of image. Now let’s see the effect on our forest image.
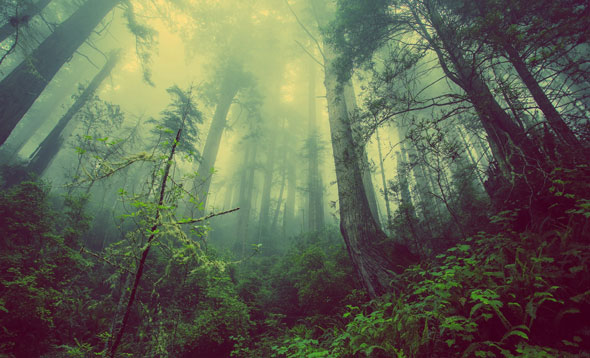
As you can see we’ve increase contrast on forest image and you can use this filter to create HDR effects but just make sure that you are not overdoing it. Overall, it is very useful Filter to bring out the hidden details of Shadow and Highlights of an image.
Step 4
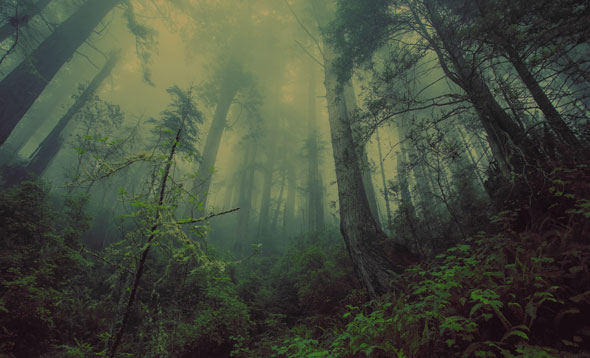
Now move forward and starting making adjustments on forest image using Adjustment Layers . Make a Hue/Saturation(Layer > New Adjustment Layer > Hue/Saturation) adjustment layer to reduce the brightness of forest image.
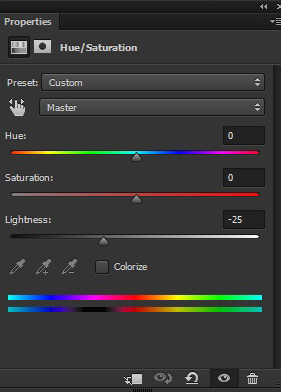
Results:
Step 5
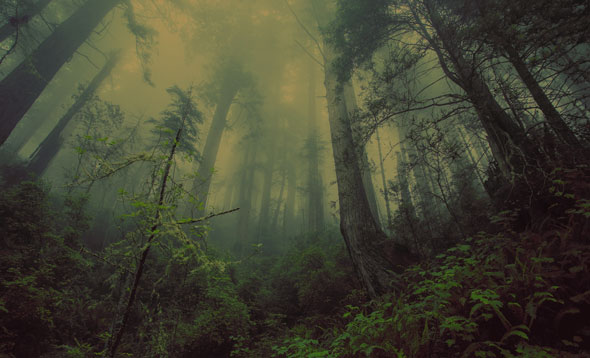
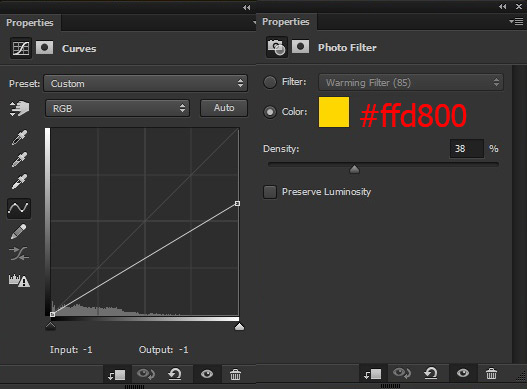
Make a Photo Filter adjustment layer to add warm yellow color with density 29%.
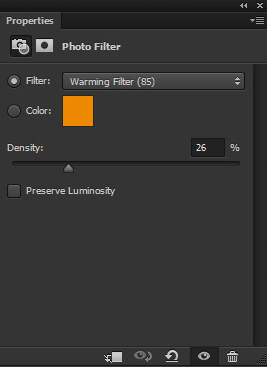
Results:
Adding Forest 2
Step 6
You may notice that forest is incomplete and its don’t have any base on that we can place the model. To add a platform for our model, I am using forest 2 image. So place it to our main document by selecting File > Place and then place it as shown below.
Step 7
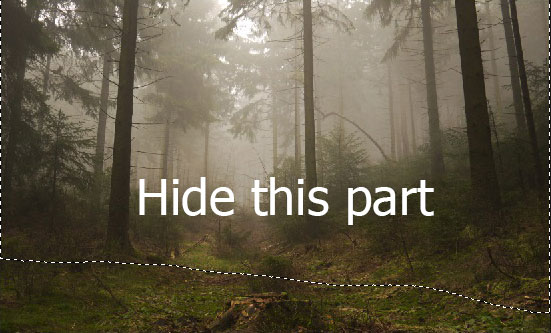
Add a Layer Mask (Layer > Layer Mask > Reveal All) to forest 2 image. Activate the Brush Tool (B) . Set its opacity and flow about 30%. Now using a soft round black brush hide the selected part of forest 2 layer.
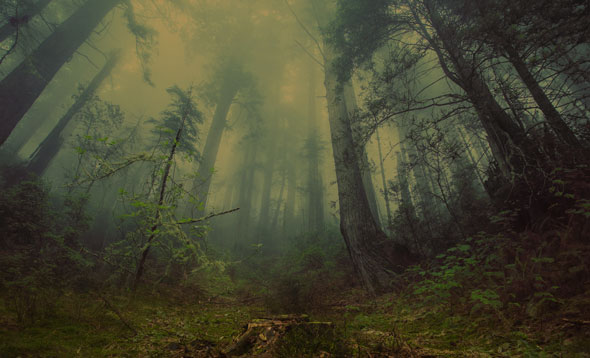
Here are the results and now we have got the base to place the model.
Step 8
Make a Selective Color adjustment to forest 2 layer as clipping mask (click on the red button as shown below). This will match the color of forest 2 layer with existing scene.
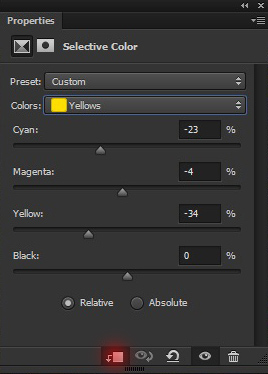
Results:

As you can see we’ve reduced the green color from forest 2 subtly.
Step 9
Make a Curves adjustment layer to forest 2 and reduce its brightness.
Results:

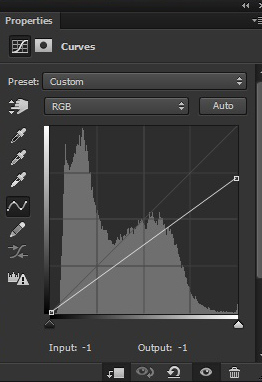
Step 10
On the Layer Mask of Curves I hided the selected effect to maintain some brightness there. Use the same brush settings as in step 7.
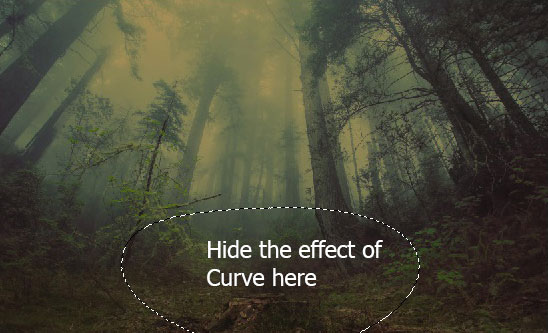
Results:

Adding Celestial Background
Step 11
It’s time to add magical details on forest. Add the celestial background to main document and enlarge it as shown below so it can cover the entire canvas.
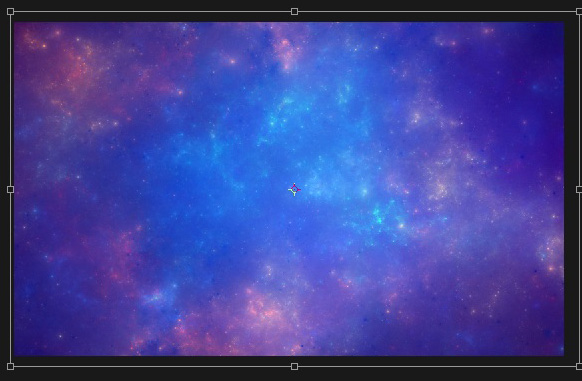
Change the Blend Mode of celestial background to Soft Light.
Step 12
Colorize the celestial background to the scene by making a Hue/Saturation adjustment layer.

Results with matched colors:
Adding Model
Step 13
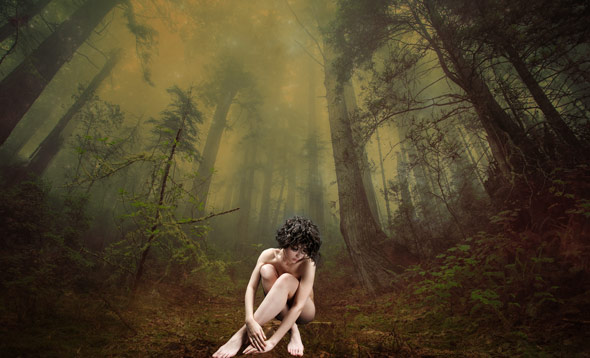
Isolate the model from its background using selection tools and place her on the center of the background as shown below. For hair extraction on model you can visit this link for extracting hair using Refine Edge and here for painting hair using Smudge Tool .
Adding Shadows to Model
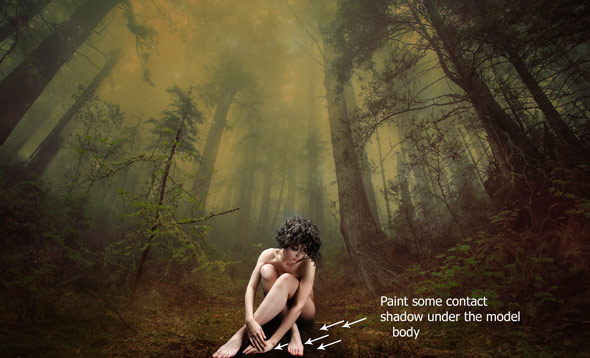
Step 14
Create a new layer under the model and name it ‘contact shadow’. Activate the Brush Tool (B) and set its setting as in Step 7. Use a soft round black brush to create the contact shadows under the model feet, hands, and body. Take your time while making shadows and you can also see the original model image to ensure how the shadows are formed. Here is the image for reference:
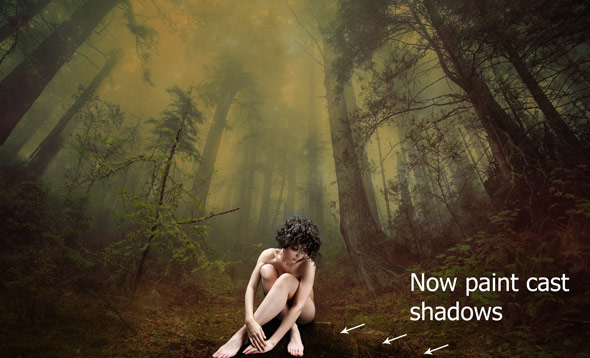
Create a new layer again and name it ‘cast shadows’. Now we creating shadows cast by the model body. Again use a soft round black brush to create casting shadows and remember as go further from the origin of shadow keep decreasing the size of brush in the process.
You can see the image below for instruction and how I did it:
Step 15
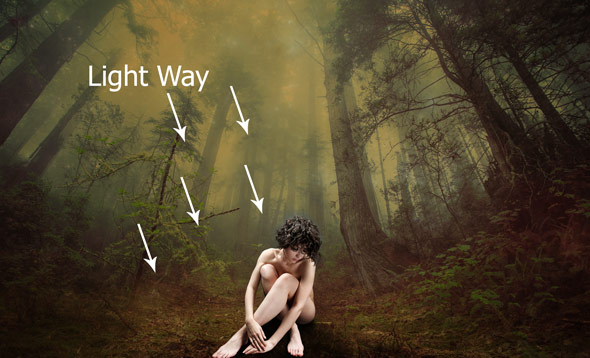
We are done with shadows and now we are going to refine shades and lights of the model. I aim to create light source just above the model and the below image indicate the way of light from the top.
Step 16
Now the lights say that we should add shade on the model bottom right side and we should add light on the model top left parts as these are parts that are going to be reflected by the light source. To keep these things in my mind, I use Gradient Overlay effect from Blending Options. Right click on Model layer and choose Blending Options. Use it with following settings.
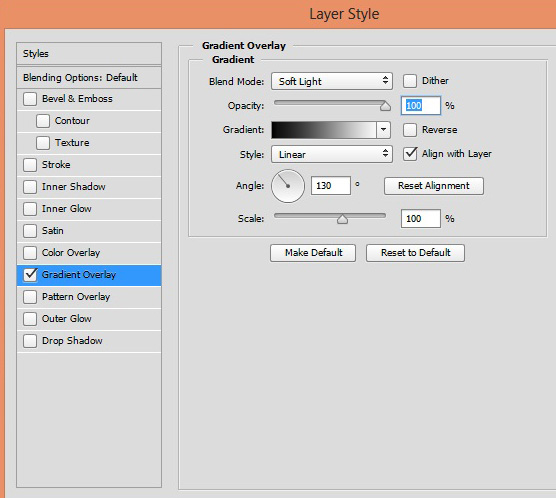
Here are the results:
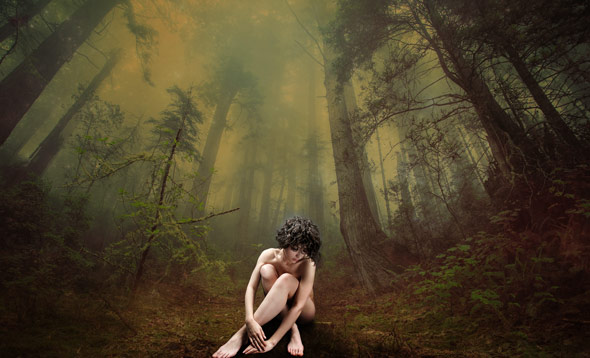
As you can see we’ve added shades and lights on the model but this is not enough. But we can say it that we’ve laid the foundation of lights and shades. Now our task is to further enhance it.
Step 17
To further enhance the lights and shades on the model, I’m going to darken the model right bottom parts. To do this, activate the Gradient Tool (G) and choose a ‘foreground to transparent’ gradient on the options bar. Create a new layer and name it ‘shade’. Choose the black color as foreground and then apply the gradient from the model bottom right side to top left as shown below.
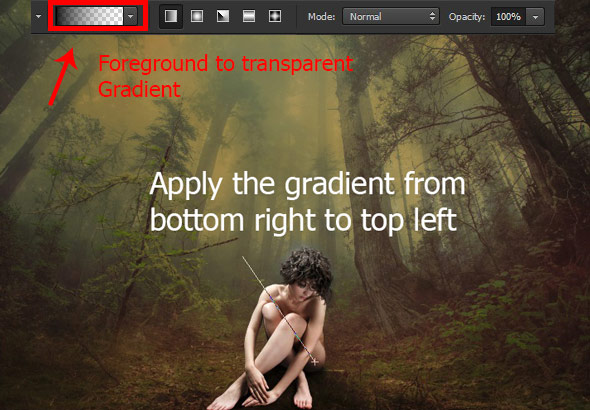
Here are the results:
Looks too dark then reduce the opacity of shade layer to 39%.
That look nice and realistic. Now you know why and how shadows and highlights are important in photo manipulation.
Step 18
At the moment the model looks too bright as compared to background. Make Curves to model and reduce the brightness of model. Also, make a Photo Filter to add some warm yellow colors tones to model as our background has.
Results:
Step 19
Continue coloring the model using Color Balance adjustment layer. Only change the settings for Midtones and Highlights.
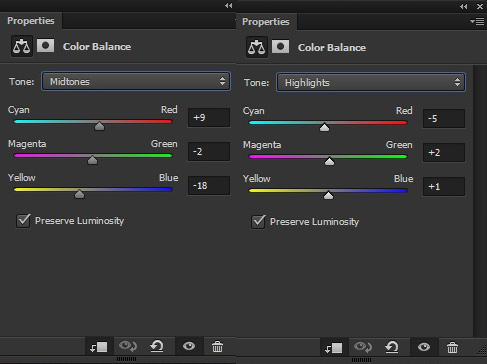
Results:
Step 20
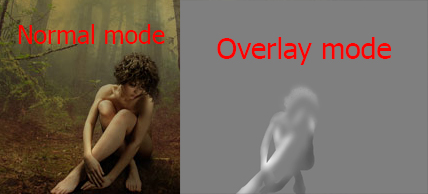
Create a new layer and name it ‘Dodge & Burn’. Fill it with 50% gray color by selecting Edit > Fill then choose 50% Gray on use drop down options. Change the Blend Mode of this layer to Overlay. Activate the Dodge tool by pressing (O) on the keyboard. Set the Range to Midtones and Exposure to 9% on the option bar. Now start refining the shade and lights of model. You can see the below image in Overlay mode that how I did it and the results as well.
Here are the overall results:

Adding Magical Light Effects
Step 21
Create a new layer and paint small white dot using Brush Tool (B) as indicated by red circle.

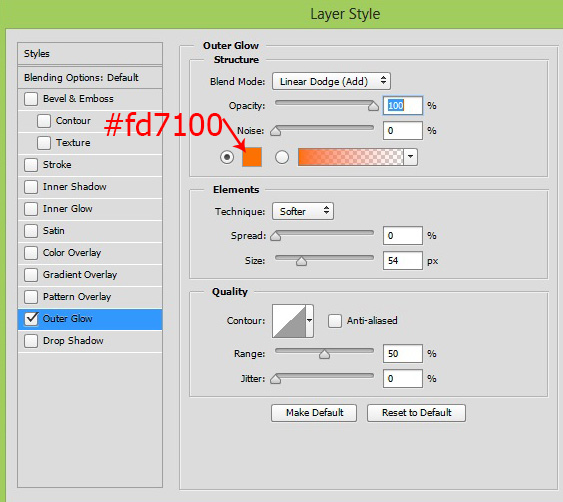
Step 22
To create glowing effect on dot, I use Outer Glow effect from Blending Options. Use it with following setting.
Results:

Step 23
Now arrange these glowing dots around the model as much as you want.
I’ve used more than 25 layers to arrange the glowing dots.

Adding Lights to Fantasy Forest
Step 24
Create a new layer and name it ‘light source’. Set your foreground color to #664429. Use soft round brush with size around 2800 pixels. Paint a big stroke as shown below. You may notice that I’ve only used half of the brush to make lights distributing from the top to everywhere.
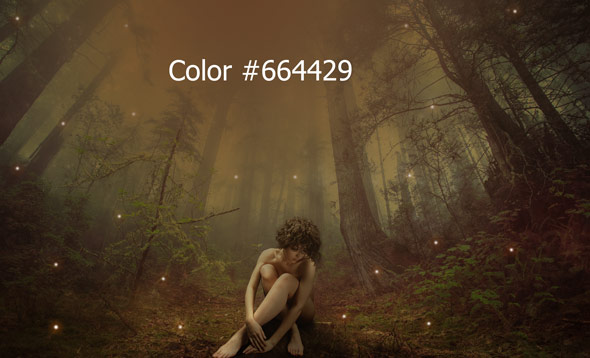
Set the blend mode of this layer to Linear Dodge.
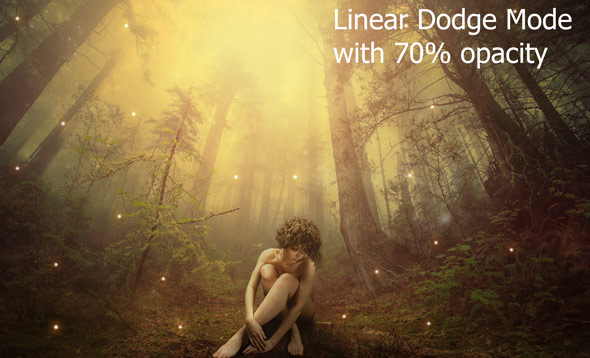
Step 25
Create a new layer again and name it ‘light source 2’. Use the same color as in the previous step and this time change your brush size around 1300 to 1400 pixels to make the lights stronger. This time I’ve used the full brush stroke instead of half of it.
Change this layer Blend Mode to Linear Dodge and reduce its opacity 70%. Reducing the opacity is depends on you as how much lights you want to add.
Final Adjustments
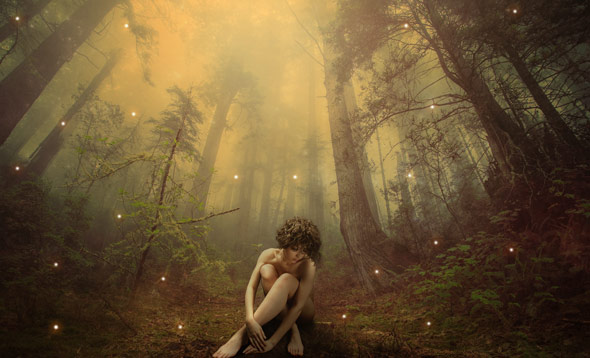
Step 26
Now we are at the end of tutorial and we are going to finalize the entire scene using Final Adjustments layers. Make a Brightness/Contrast (above all layers) adjustment layer to increase brightness and contrast of entire scene.

Results:
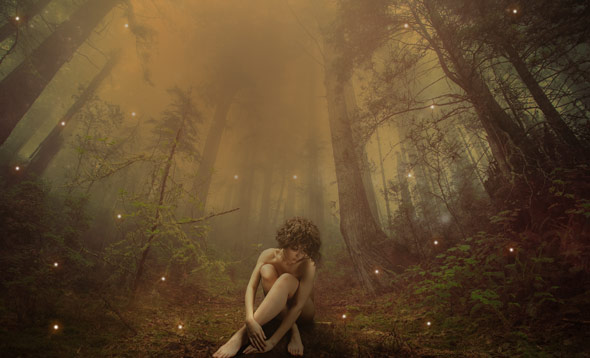
Step 27
Add Gradient Map adjustment layer and use it following settings.
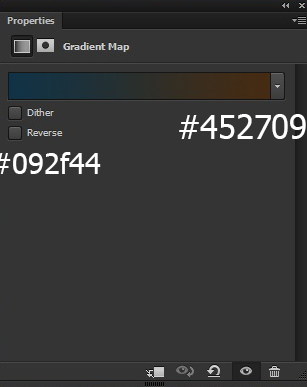
Set the blend mode of this layer to Color and reduce it opacity to 30%.
Step 28
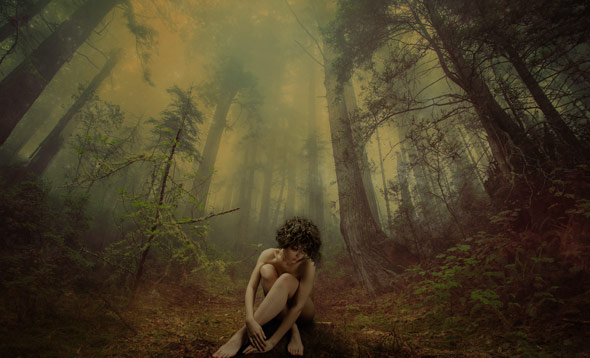
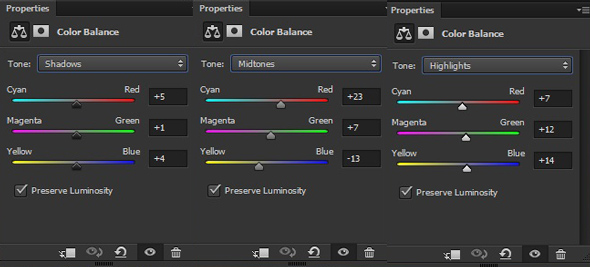
Make Color Balance adjustments layer and use it following settings to add some colors to scene.
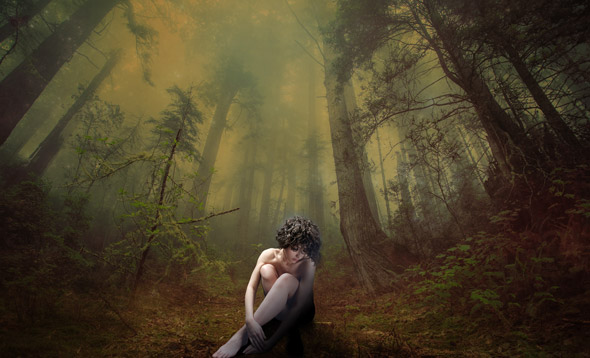
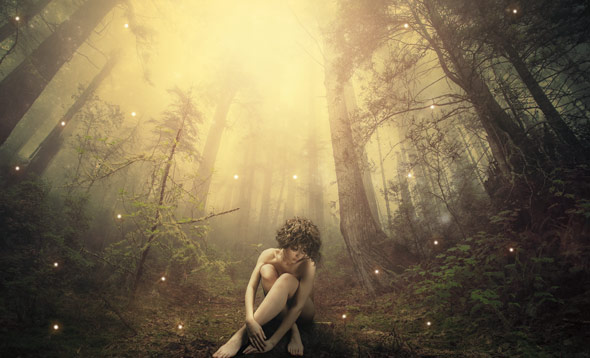
Results:
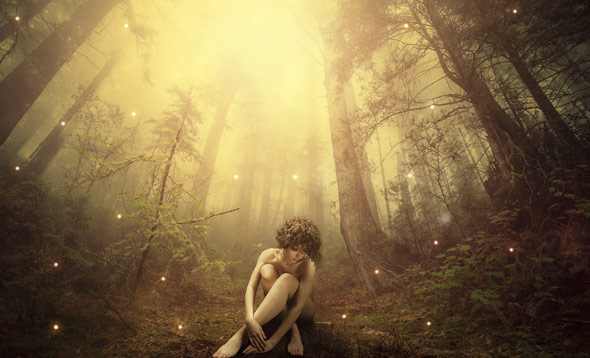
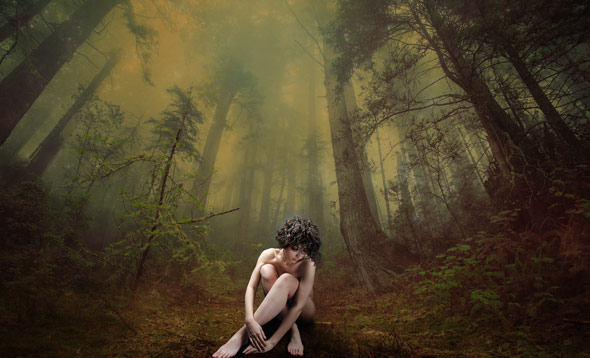
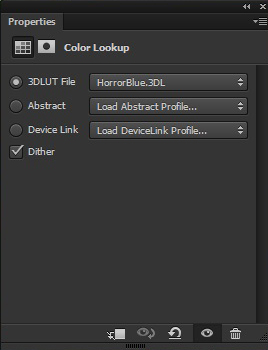
Second Version
As I said I got two color variants of this piece. You can achieve it by adding Color Lookup adjustments . I am using Photoshop CC 2015 but this color lookup filter may not available in other versions of Photoshop.
Results:
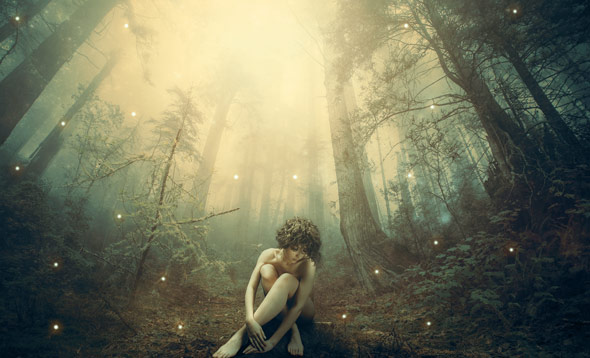
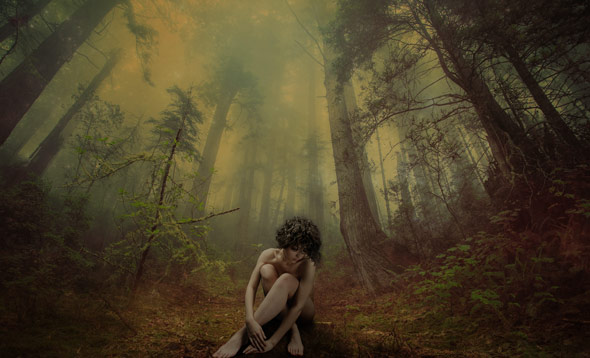
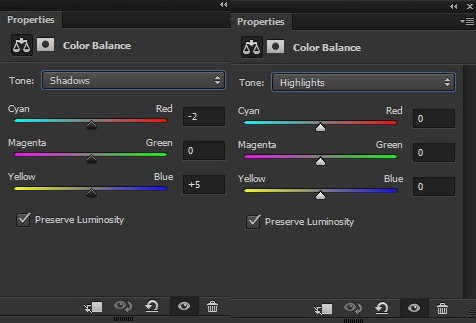
Looks good and if you want you can further add more color using Color Balance adjustment layer. Like I’ve done it with the following setting.
Results:

Conclusion
Thanks for following the tutorial. I extremely apologize for the delays, publishing the tutorials, because I was busy for my exams.
I am free now and this is first work after exams. Wishing you a very happy and prosperous new year 2016 to all of you. Thanks a ton for your patience and support. I hope you like the tutorial!
Need Help With Photoshop or Looking for Professional Support?
Whether you're just getting started with Photoshop or need expert-level assistance, we're here to help! Contact us for personalized Photoshop tutorials, project support, or creative services.
Get in touch today to take your skills or projects to the next level.
CONTACT US NOW📘 Want to Master Photoshop Faster?
🎁 Get Your FREE PDF E-Book "Top 10 Photoshop Tricks Every Designer Must Know" Now – Packed with expert tips, shortcuts, and techniques to boost your creativity & workflow.
👉 Download Your FREE PDF E-Book NOW!

