
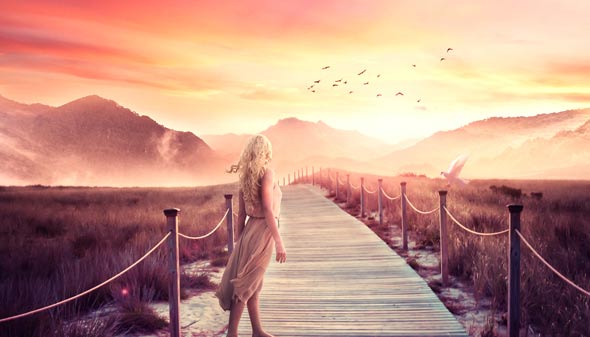

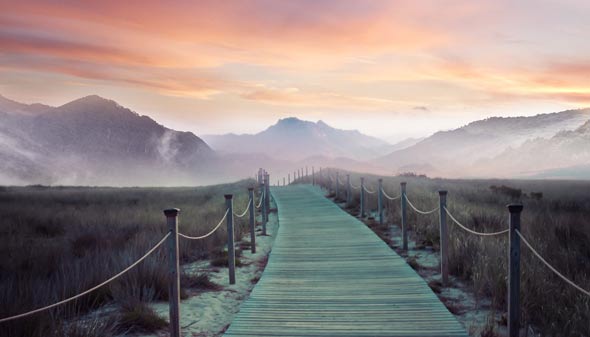
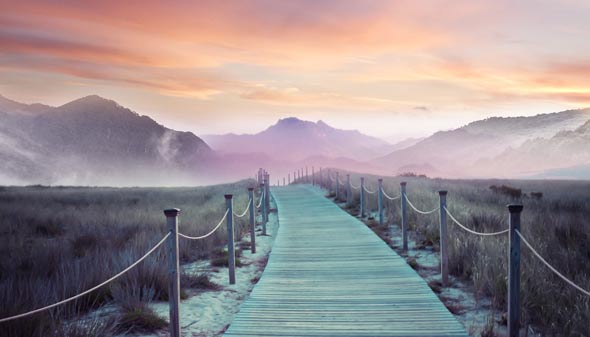
Learn how to create a fantasy landscape matte painting named “Bridge to Mountains”. In this tutorial you’ll learn how you can combine different stock images into a cohesive scene. You’ll also learn how to manage color and atmosphere to achieve a beautiful and colorful result. Follow the tutorial and find out more to enhance your photo manipulation skills.
Tutorial Resources
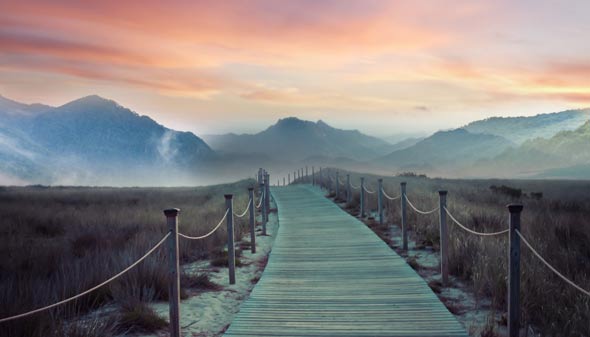
Preparing a Background for Fantasy Matte Painting
Step 1
Create a new document in Photoshop by selecting File > New and use the following settings. Feel free to choose your own setting but make sure it should be wider enough for the scene.

Step 2
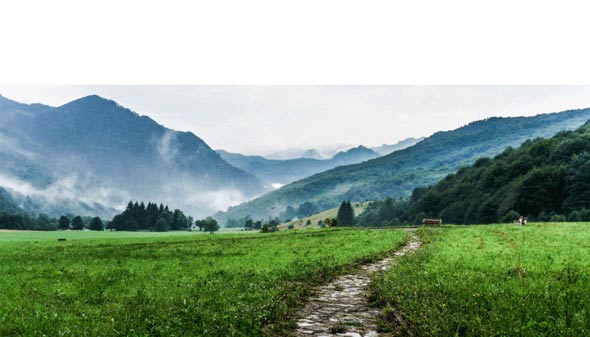
Place the mountain 1 image to the main document by selecting File > Place Embedded or Place . Keep the some space from top of the document.
Step 3
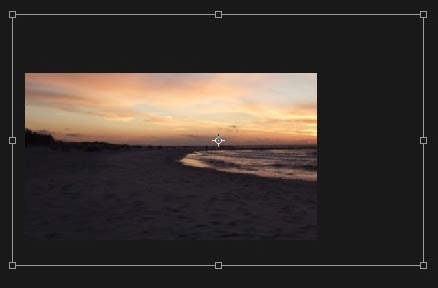
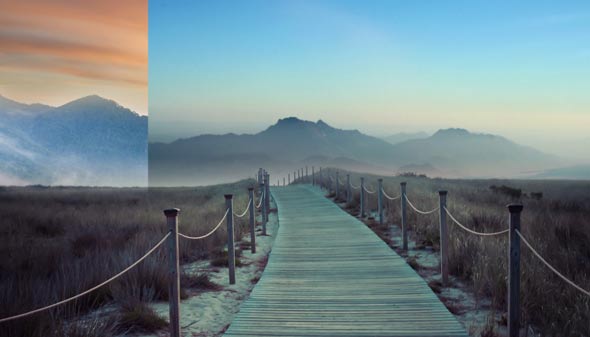
Place the sky to the main document and place it under the mountain 1 layer. Use the Transform Tool (CTRL + T) to resize the sky as shown in the image below.
I also erased the mountain 1 layer so you can clearly see how I placed it.
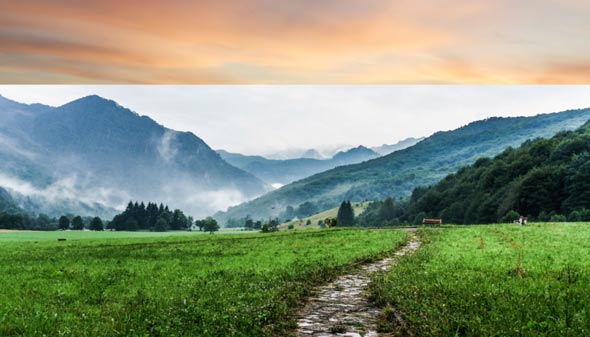
Here are the results :
Adding Bridge
Step 4
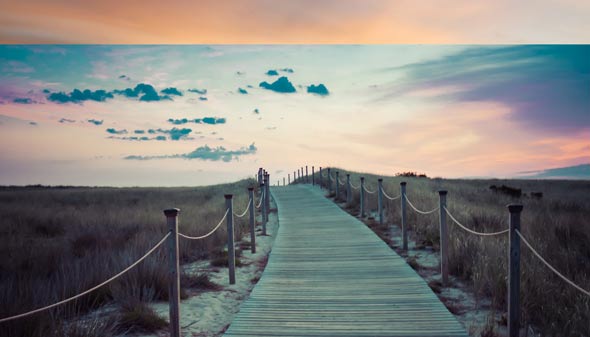
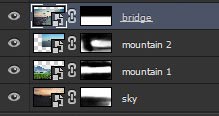
Now place the bridge image to the scene and place it above all layers.
Step 5
Add a Layer Mask (Layer > Layer Mask > Reveal All) to bridge layer. Activate the Brush Tool (B) and set its opacity and flow about 30%. Use a soft round black brush to hide the selected sky part of bridge by painting on the layer mask with black color.
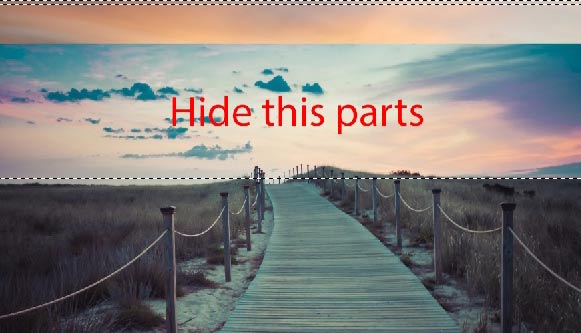
Results after masking :
Step 6
Now select the mountain 1 layer and add a Layer Mask to it. Hide out the selected parts of mountain 1 layer using a soft round brush with the same setting as in the previous step. Don’t worry about the edges of mountains 1 layer and don’t make the selection (instead of this try to hide it using layer mask) of mountains 1 layer otherwise you’ll get sharp edges. Also, try to leave some parts of it for better blending and later we’ll blend them using Adjustment Layers .

Results :
Step 7
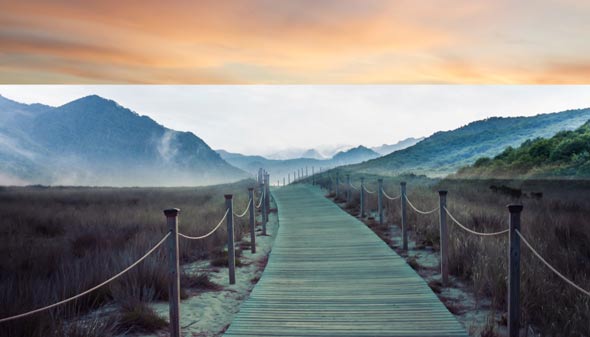
Now add the mountain 2 image to the main document and place it below the bridge layer but above the mountain 1 layer.
Add a Layer Mask to mountain 2 layer and use the layer mask to hide out the selected parts of mountain 2.
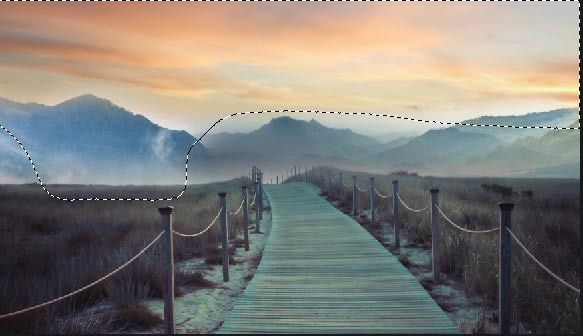
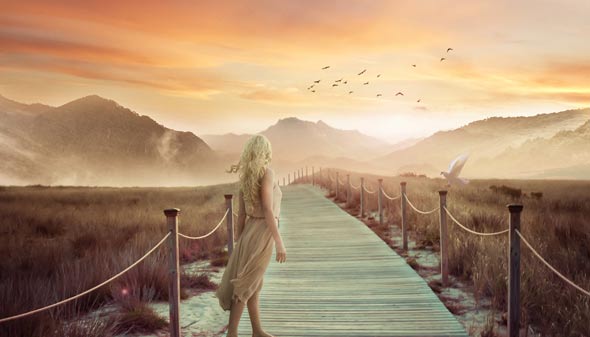
Here is the process so far.
Adjusting the Color of Landscape
Step 8
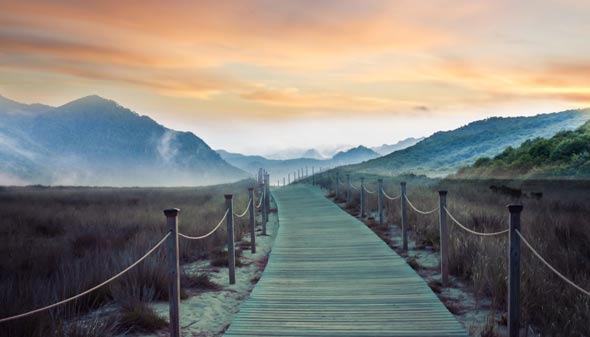
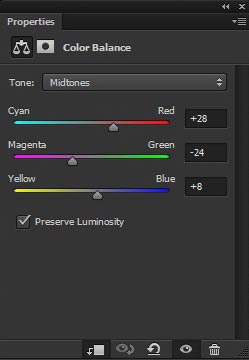
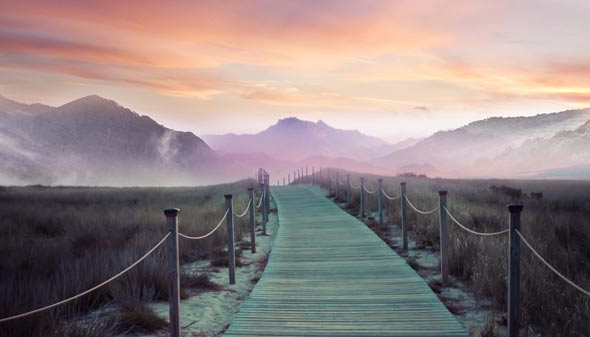
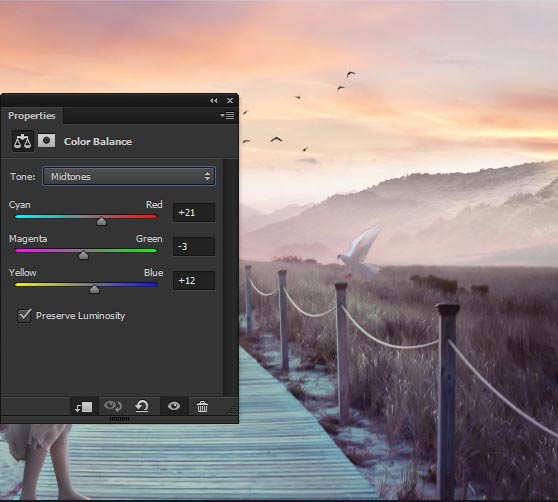
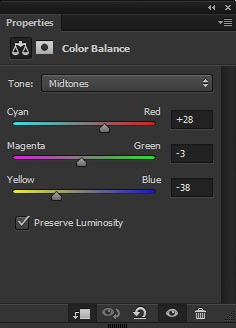
It’s time to adjust the color of all manipulated images so far using Adjustment Layers . We’ll start with sky layer, so add Color Balance (Layer > New Adjustment Layer > Color Balance) adjustment layer to sky and only change the values of Midtones .
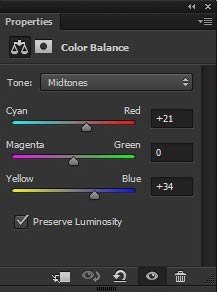
Results with added Magenta Tones to sky.
Step 9
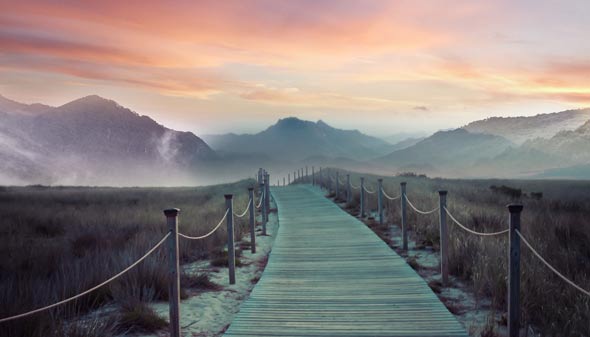
Select the mountain 1 layer and add a Color Balance and Hue/Saturation adjustment layer to it as clipping mask (press the red button for clipping mask).
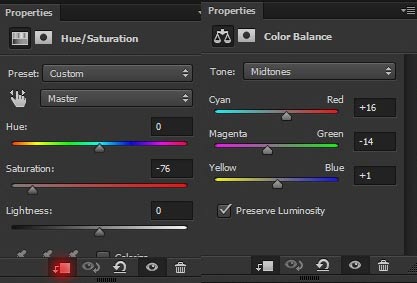
Here are the results with matched colors of mountain 1 with the background.
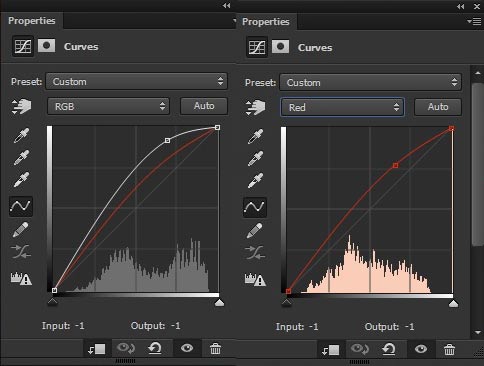
Step 10
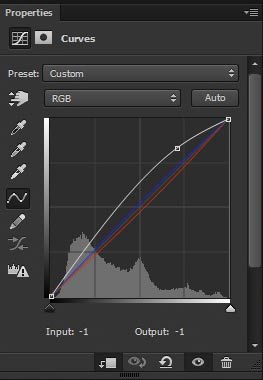
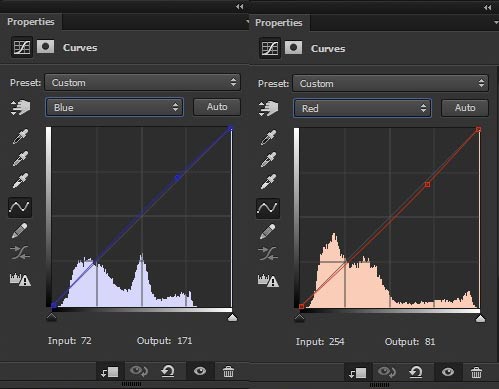
Mountain 2 layer seems darker as compared to the background. To fix this, use a Curves adjustment layer for mountain 2 to increase the lightness and to add red color tones to it. Here are the values for Curves .
Results :
Step 11
Add a Color Balance to mountain 2 to match its color with background. Only change the setting of Midtones .
Results :
Step 12
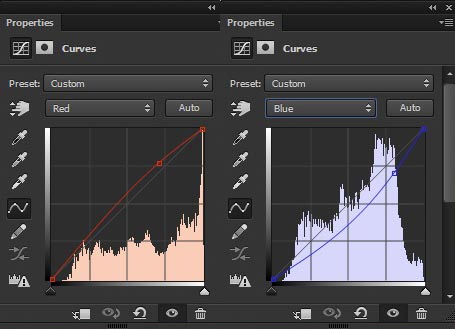
Now it’s time to adjust the bridge. Add a Curves
adjustment layer to increase the brightness of bridge.
I also used the Red and Blue colors to add little bit red and blue tones to bridge.
Step 13
Here are the results after using Curves :
Step 14
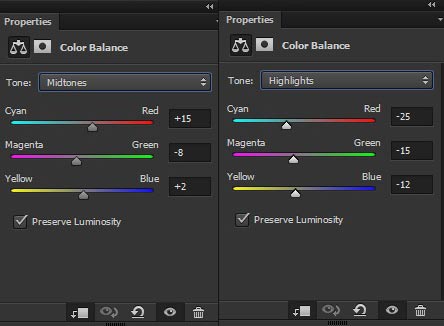
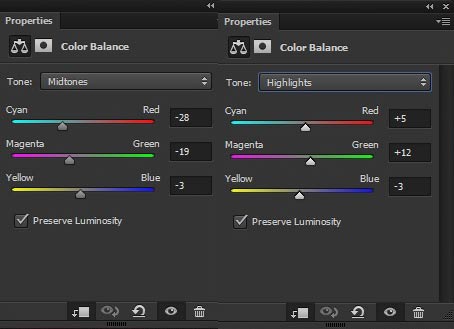
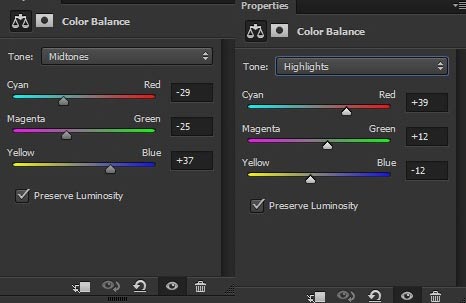
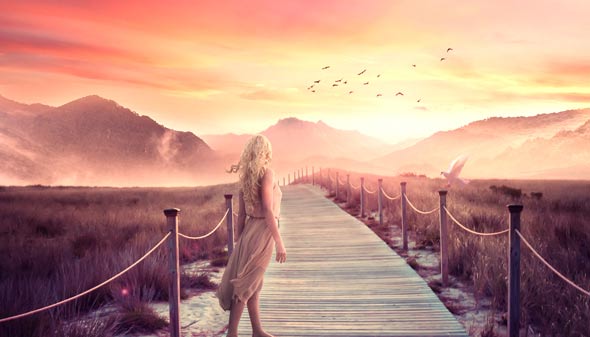
Continue colorizing the bridge using Color Balance adjustment layers. Only change the setting for Midtones and Highlights .
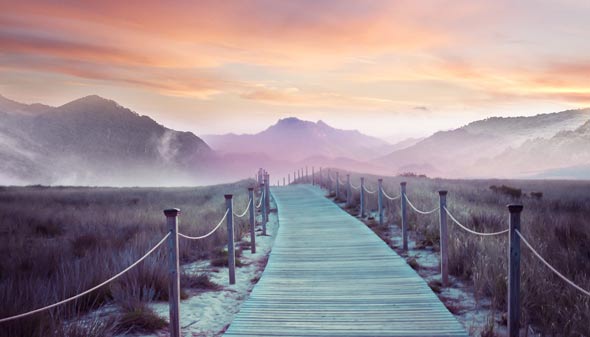
Results :
Step 15
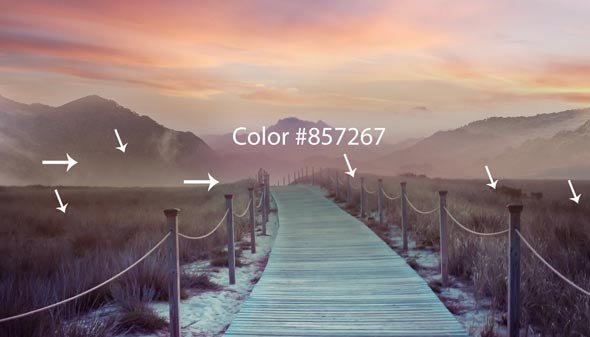
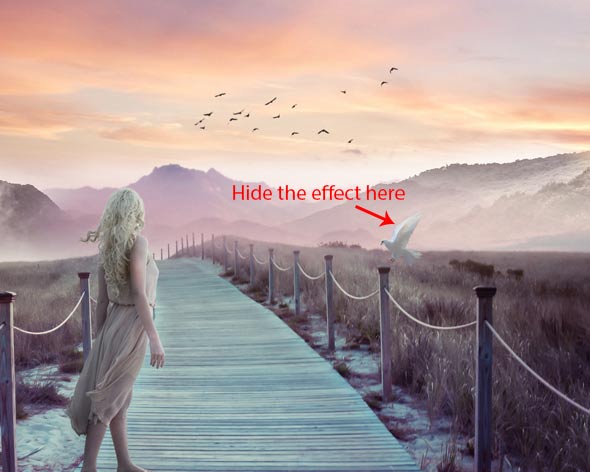
Now we’re going to add subtle lights on the scene. Create a new layer and name ‘light 1’. Set your foreground color to #857267 . Use a soft round brush to paint some lights in the middle of the scene. You can also use the arrow indication for reference.
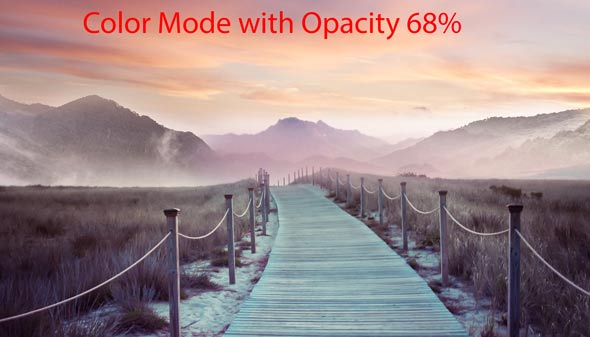
Change the blend mode of this layer to Color and reduce the opacity to 68%.
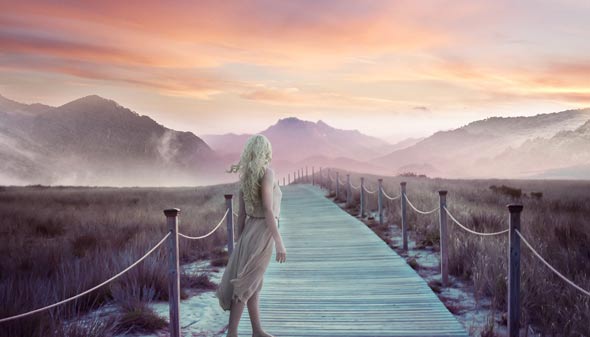
Adding Model
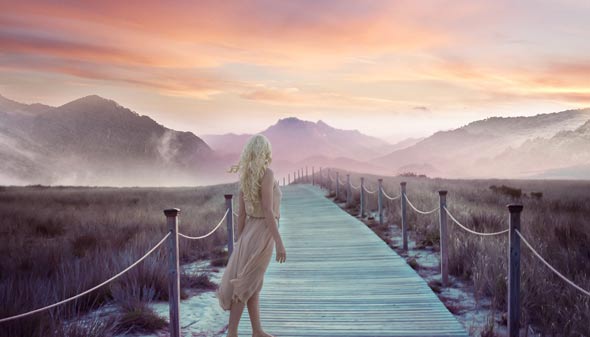
Step 16
Isolate the model from its background and then place it to the main document. Place it exactly as shown in the image below because some of model feet parts are covered by the beach sand so therefore I placed it as shown in the image. For hair I’d say use the combination of Refine Edge Tool and Smudge Tool . I am not going to explain it as I already written tutorial on hair extraction. You can follow link here for Smudge Tool to paint hair and here for using Refine Edge Tool to extract hair.
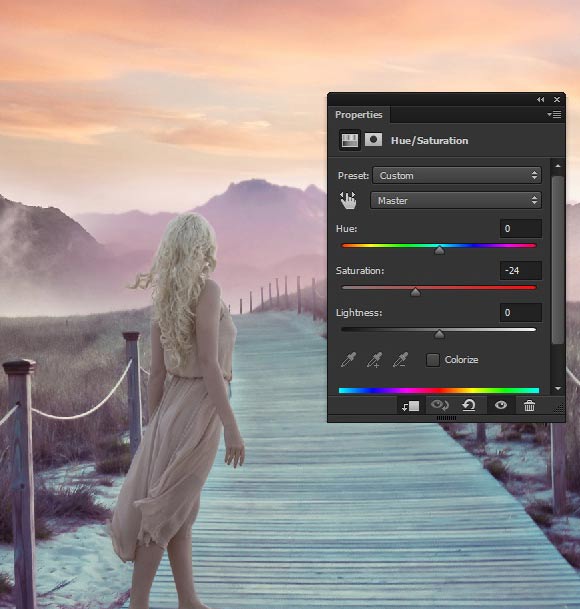
Step 17
Use a Hue/Saturation adjustment layer to reduce the saturation on model.
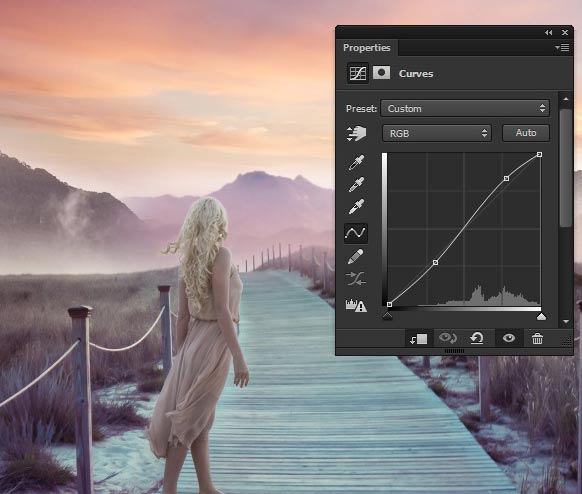
Step 18
Increase the lightness of model using Curves adjustment layers.
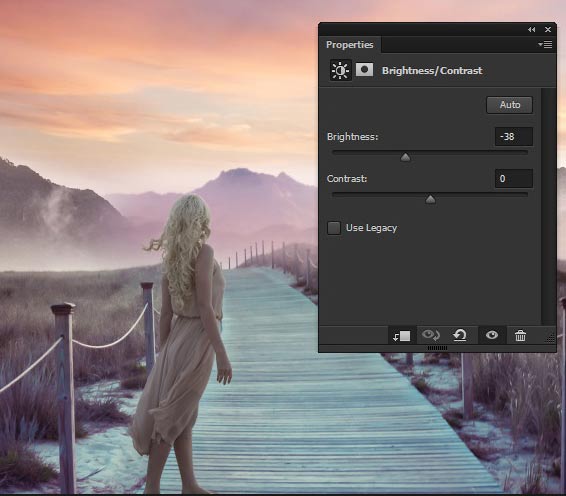
Step 19
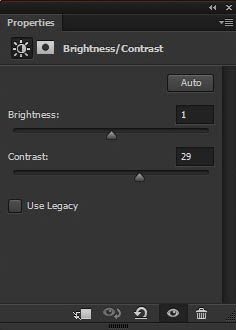
Decrease the brightness of model using a Brightness/Contrast adjustment layer.
Now hide the effect of Brightness/Contrast on the selected parts (highlighted in red color) of model to maintain some light there. Use a soft round black brush to hide the effect using a layer mask.
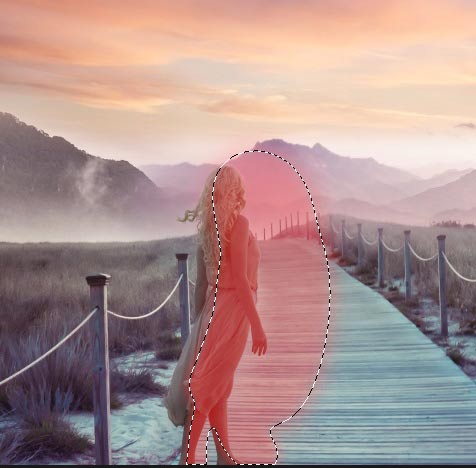
Results :
Step 20
Add a Color Balance to model and only change the value of Highlights and Midtones .
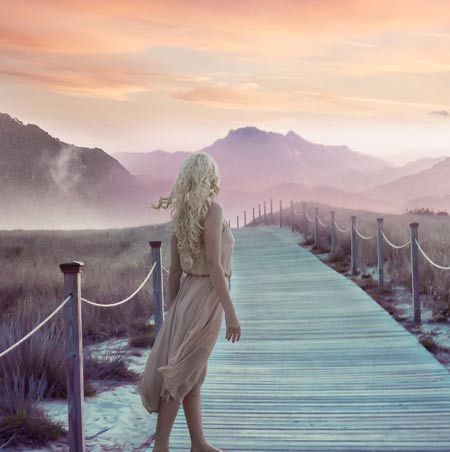
Results :
Refining the Shade and Lights of Model
Step 21
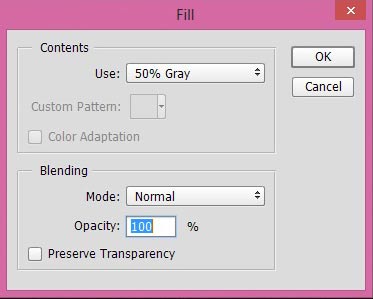
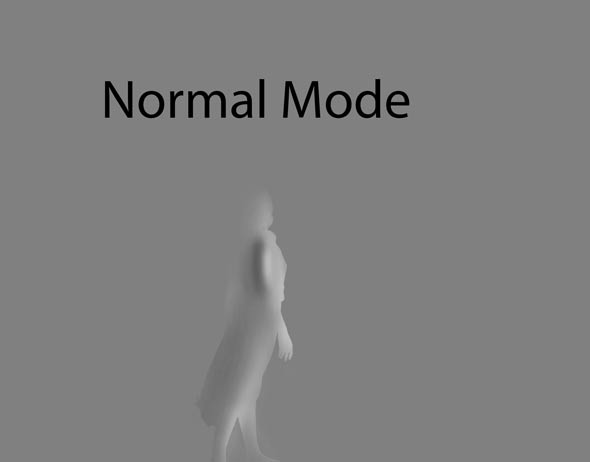
We are now going to refine the shades and lights on the model by using Dodge and Burn Tool non-destructively. To do this, create a new layer and then select Edit > Fill then fill the layer with 50% gray color.
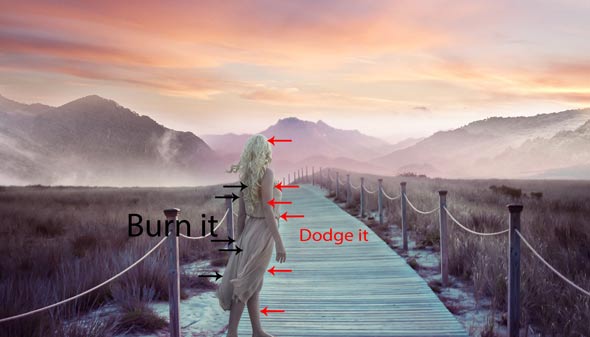
Use the Dodge and Burn Tool (O) with Midtones Range (set it on the option bar), Exposure about 9%-10% to refine the light and shade of model. Use the Dodge Tool to brighten the model front part (indicated by red arrows), and the Burn Tool to the darken the model back parts (indicated by black arrows). Here is the image for reference.
Results on Normal Mode :
Here are the results on Overlay Mode :
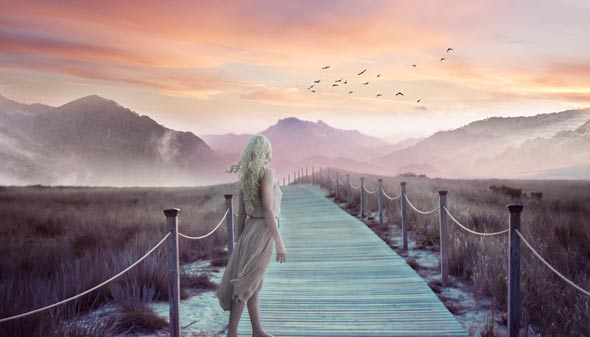
Painting Birds
Step 22
Load the birds brushes in Photoshop and use the bird’s brushes to paint some birds.
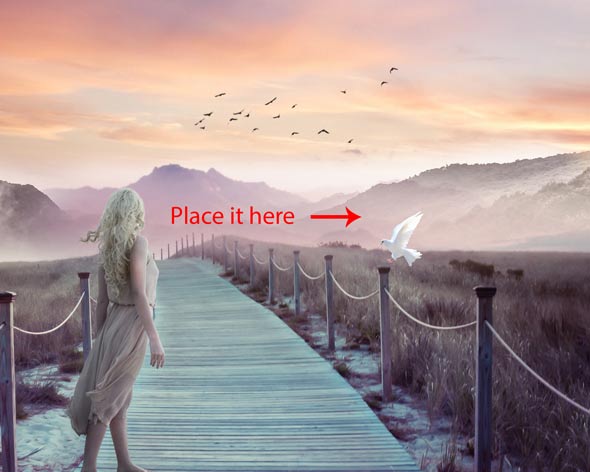
Adding Pigeon
Step 23
Extract the pigeon from its background and then place it as shown in the image below. Don’t forget to flip is horizontally using
Transform Tool (CTRL + T) .
Step 24
Reduce the lightness of pigeon using a Curves adjustments layers.

Step 25
I am aiming to create light source just above the pigeon left-hand side. So we should maintain lights on pigeon wing parts and to do this, I erased the selected effect of Curves on wings.
Step 26
Now match the color of pigeon using a Color Balance adjustment layers.
Creating Light Source
Step 27
Open up the lens flare packs and place the Flare (26) to main document. The aim is to make a light source using lens flare.
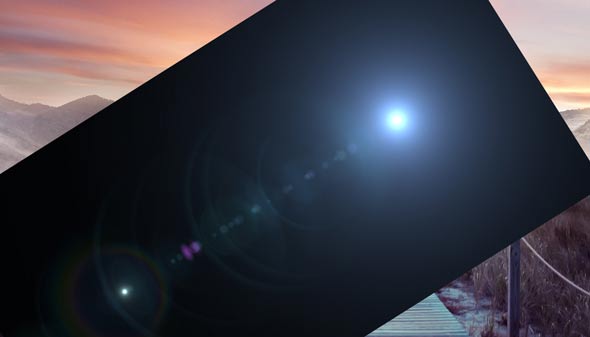
Change the blend mode of lens flare to Screen and reduce the opacity to 50% (I don’t want to make the glow more stronger as I want to make the lights natural as much as I can). Also Use the Layer Mask to get rid from unwanted edges.
Step 28
Use the following adjustment layer for lens flare. By using Level adjustment layer you’ll increase the contrast of lens flare and by using Hue/Saturation adjustment layer you’ll match the color of it.
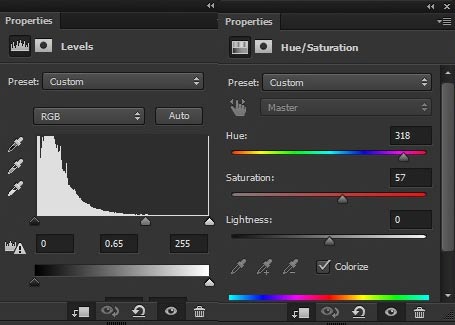
Results :
Step 29
Create a new layer and name it ‘light 2’. Set your foreground color to #59381e and using a soft round brush paint a big stroke (size around 1200-1300 pixels) as shown in the image below to make light source.
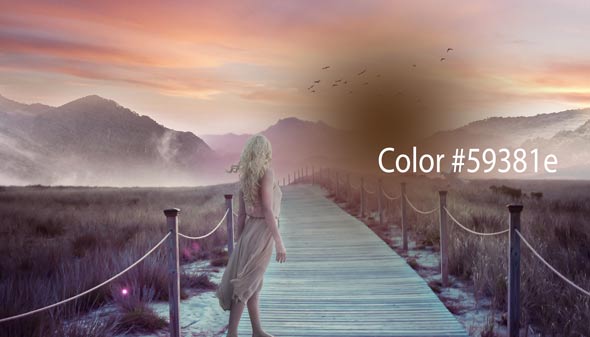
Change the blend mode to Linear Dodge and reduce the opacity to 20%.
Final Adjustments
Step 30
It’s time for Final Adjustment to finalize the whole adjustments. Make a Curves adjustment layer, above all layers, to entire scene.
Here are the results :
Step 31
Make a Color Balance adjustment layer to add colors to entire scene.
Results :
Step 32
Add a Brightness/Contrast adjustment layer to increase the contrast of overall scene.
Results :

Step 33
I’ve noticed that the color on mountain 2 layer not matching with the rest of the scene. So I just slightly changed the Color Balance values for mountain 2 layer. Here are the new setting for mountain 2 Color Balance .
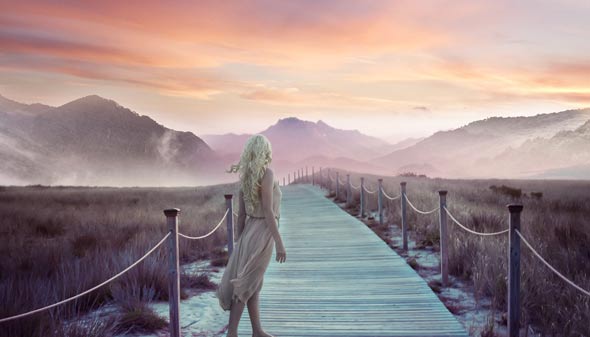
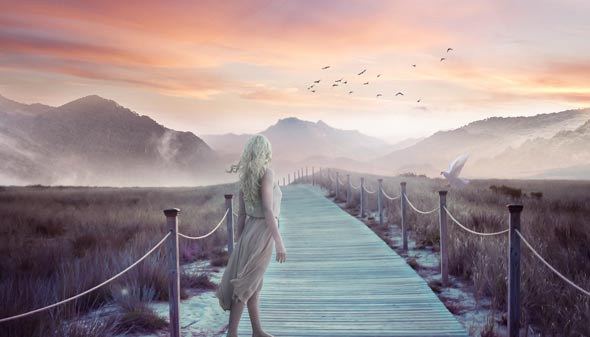
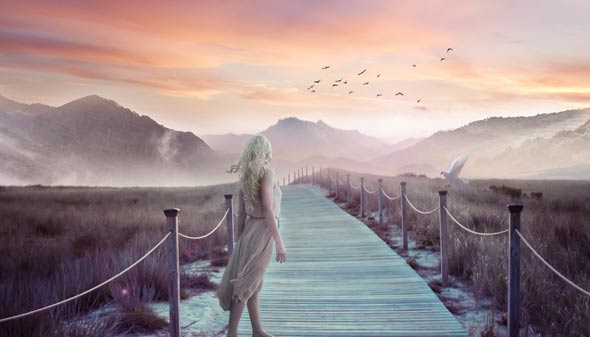
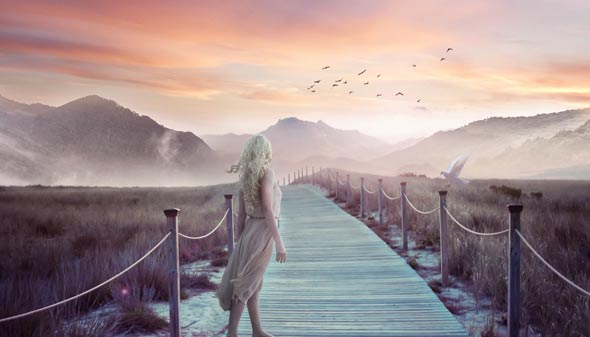
Here are the Final Results :

Conclusion
Thanks for following the tutorial and I hope you’ve learned something new today. I am also excited to hear your feedback on the tutorial. Like it, share it, tweet it and comment on it if you like the tutorial. If I miss anything then do let me know.
Need Help With Photoshop or Looking for Professional Support?
Whether you're just getting started with Photoshop or need expert-level assistance, we're here to help! Contact us for personalized Photoshop tutorials, project support, or creative services.
Get in touch today to take your skills or projects to the next level.
CONTACT US NOW📘 Want to Master Photoshop Faster?
🎁 Get Your FREE PDF E-Book "Top 10 Photoshop Tricks Every Designer Must Know" Now – Packed with expert tips, shortcuts, and techniques to boost your creativity & workflow.
👉 Download Your FREE PDF E-Book NOW!
