
Presets are a wonderful tool and can help you edit your photos quickly while saving your time and energy. It’s no wonder sometimes a preset might nail right off the bat but sometimes it just won’t work no matter what settings you try to apply. With the help of a few tips and tricks, you can make sure that your presets work on every single of your photos. In this article, I’ll show you the top 5 tips that you can use before and during post-production to edit your photos like a pro.
Pairing The Style With The Right Images
9 out of 10 times, I would say pairing is the important factor that can have a big impact on your photos. Choosing the right image for a style should be your number one priority if you really want to nail the editing. No matter, if you are capturing with a DSLR or using your phone, a photo won’t come out as expected if you are not using presets/settings that made for it.
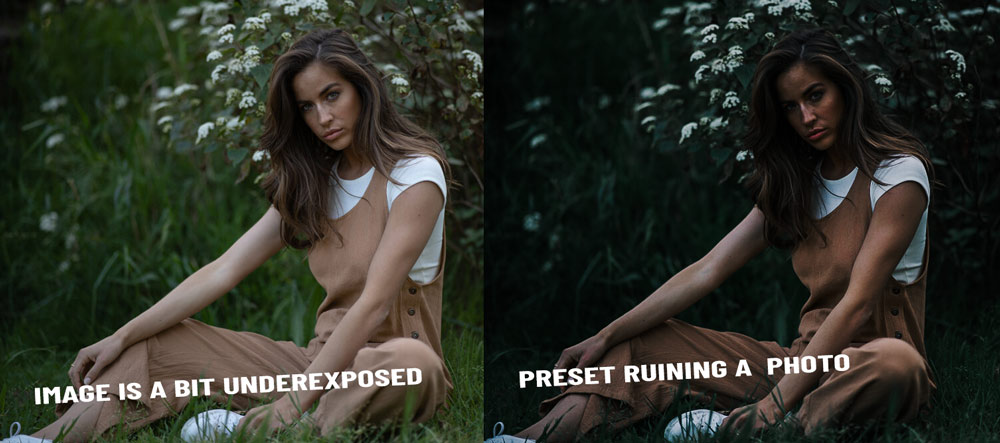
Let’s take the example of the below image. In the image below, you can see I applied a moody preset and you can see it’s not doing anything, and even it made the image underexposed or dark. You don’t want your photos to be ruined by a preset and you might think here you have wasted your money. The problem is not the preset, it’s the image itself. If you notice carefully, you’ll find out that the image is pretty much underexposed and on top of that the moody presets are designed to give a dark look.
So if you are using moody presets and you choose a photo that is already on the dark side or I’d say that is too dark then I am afraid any moody preset won’t be perfect for a photo like the image below.
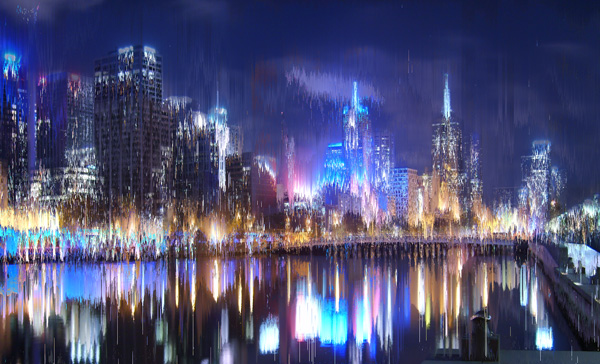
Let’s try the moody preset again but this time on a different image. You can see right off the bat it started working and giving a dark and moody look to the image.
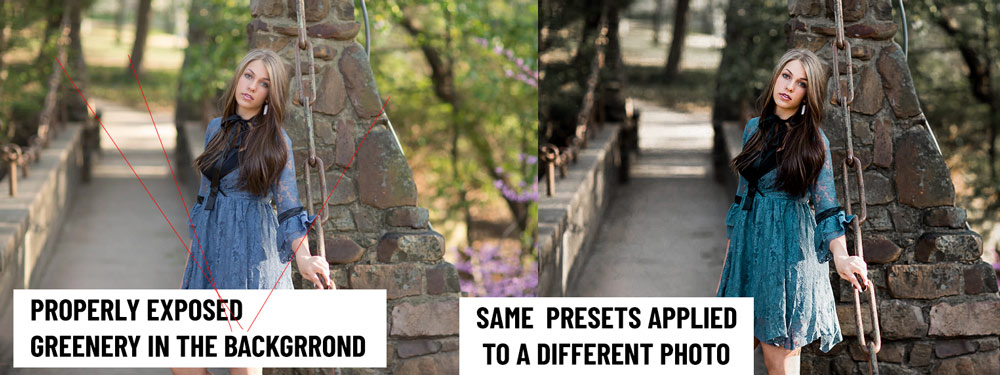
Why is that? First, take a look that the image is properly exposed, it has greenery around it, and most importantly when you choose an image that is already set to natural-looking exposure you can try any preset with that photo.
It’s not just preset, and it always going to be your photos that you decide to edit with any preset collection.
Set The White Balance
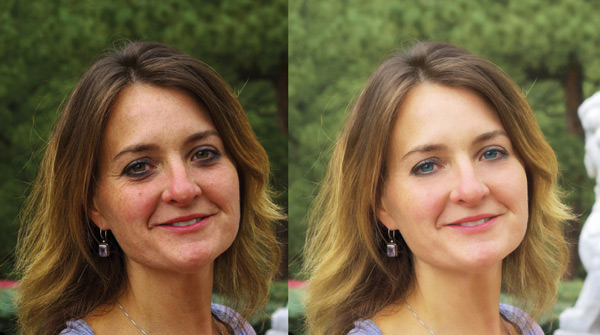
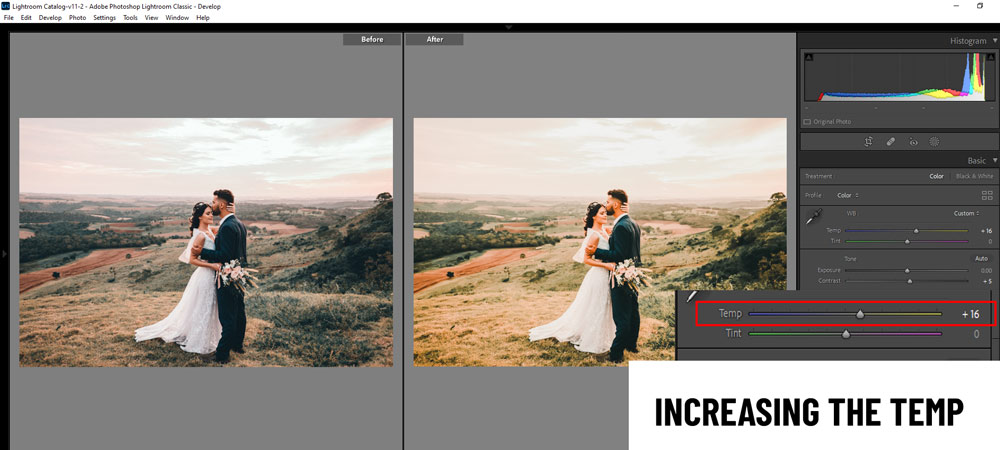
White Balance is the first setting that you have to set before applying any preset or you can try setting it after you use a preset. It has two sliders Temperature and Tint. The temperature slider can add warm and blue tones to your photos. The tint slider controls the greens and magentas in photos. The best part of White Balance is simplicity, you want to add warm tones, increase the temp and you want to add blue tones just decrease the temp. The same thing goes with the tint slider as well.
As you can see in the image below, I increased the temp to add golden yellow tones to the image.
I want to add cool tones to the photo, I decreased the temp.

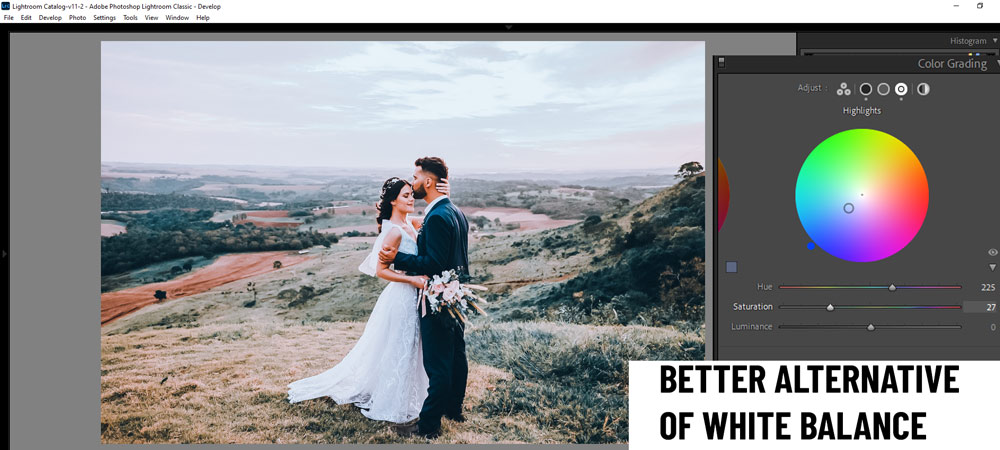
Also, if you want to be more precious with the colors that you are adding to your photos, I would recommend using the New Color Grading Panel. This panel is new but it is more powerful than using the White Balance. You can choose a color, set the intensity, and even control the brightness of the color. You can learn more about the color grading panel here.
Set The Exposure
Exposure is a reference to light and in Lightroom, it is a setting that you can use to make a photo darker or brighter. If you dial up the exposure slider, you make a photo brighter and if you dial it down, you darken a photo.The exposure has a lot to do after applying a preset in Lightroom. Some presets can make your photos a lot brighter, on the other hand, they can even decrease the exposure of the photo.
The only way to fix the exposure, you can play around with the exposure slider. If a preset is making your photo dark, increase the exposure, and if it is exploding the image with a lot of light, simply decrease the exposure value.
But make sure you are setting the exposure for every image as there are no best exposure settings that work on every photo.
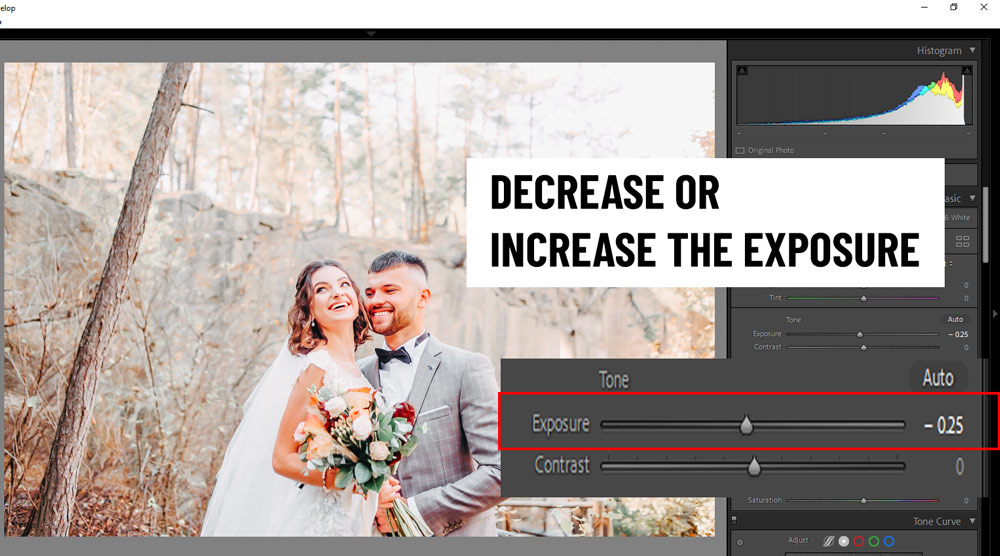
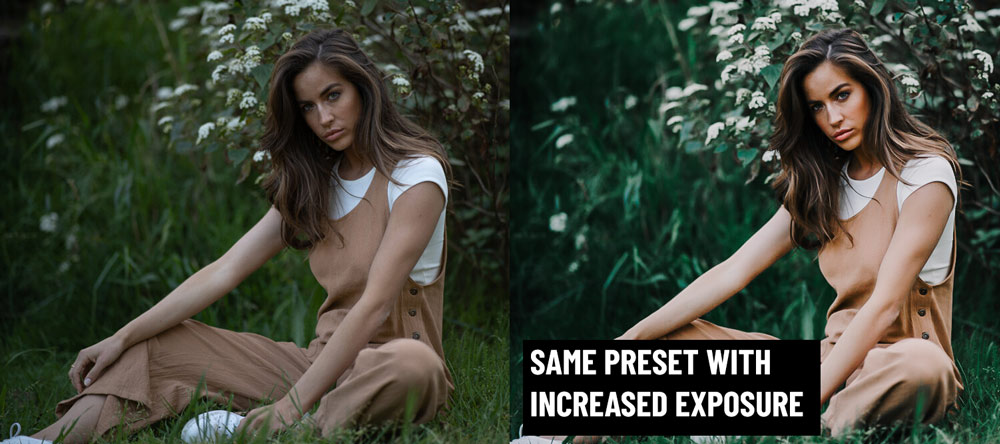
Take a look at the image below, where I applied the moody preset, remember that it made the photo dark but as I increase the exposure it started looking better. This is how the exposure can change the look of the entire photo.
After increasing the exposure:
The Tone Curve
The tone curve is very intimidating at first, but once you know how this powerful tool works it can do wonders for you. I am not going into details about this, but I am gonna share 3 tips where this tool can come in handy while editing in Lightroom.
If you want to learn more about this tool, I have an in-depth article that you can read to learn everything about the tone curve.
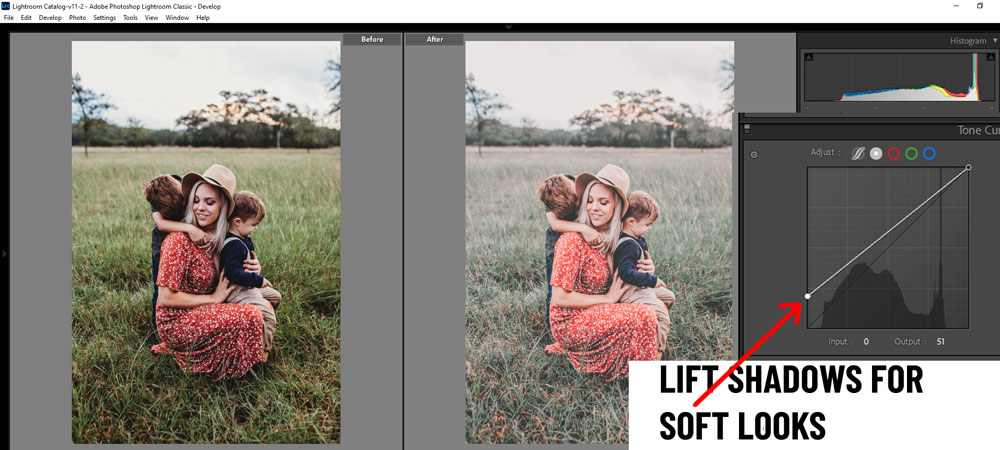
Top 3 things that can tone curve do with your photos, it can brighten your photos, add a soft look, and it can dim the brightness down of your photos.
Let’s say you are going after a matte and faded look, you can simply lift the shadows to add a faded look to your photos. This will increase the brightness of shadows giving you a beautiful soft matte look.
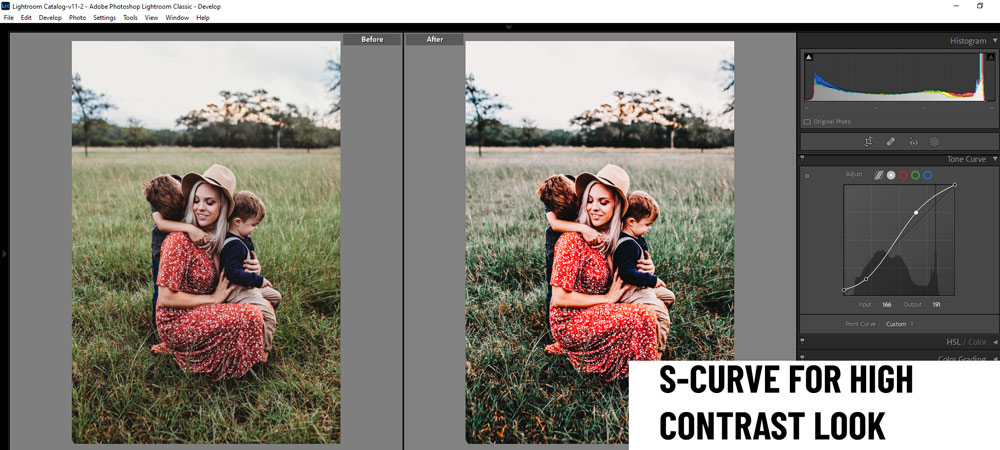
The famous S-Curve settings can be used to add a contrasty and clean look to photos. The S-Curve settings when used, it brightens the photo and at the same increase the contrast of the photo. These settings are great when you want a clean and bright look, especially with family and friends photos.
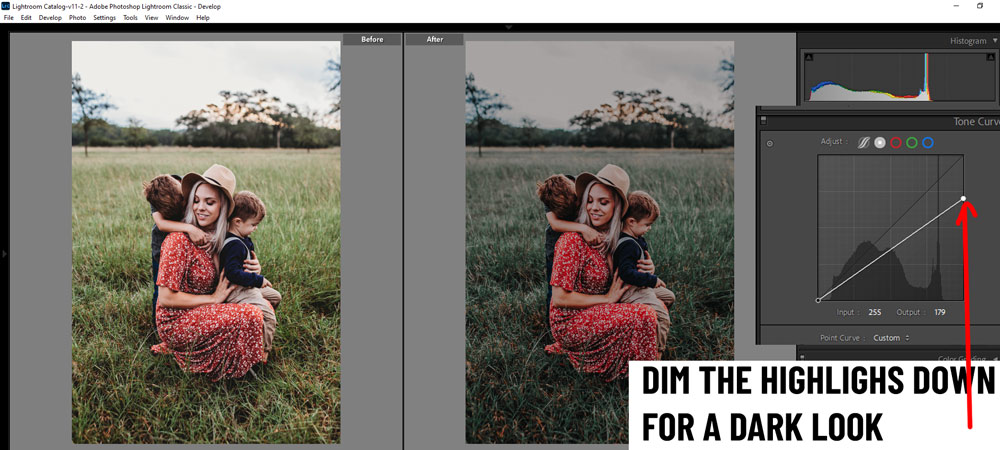
One last thing (there is a lot more you can do) that you can dim down or decrease the brightness of a photo. All you have to do is, drag the highlights point down and the image will be darkened. But why would you do that? There are a couple of reasons for doing it and the first one is if you are going after a dark and moody look. Then you gotta bring the highlights down a bit. The second reason is maybe you are dealing with overexposed photos. When a photo is overexposed that means it has a lot of light, in that case, you can bring the highlights down to fix the exposure.
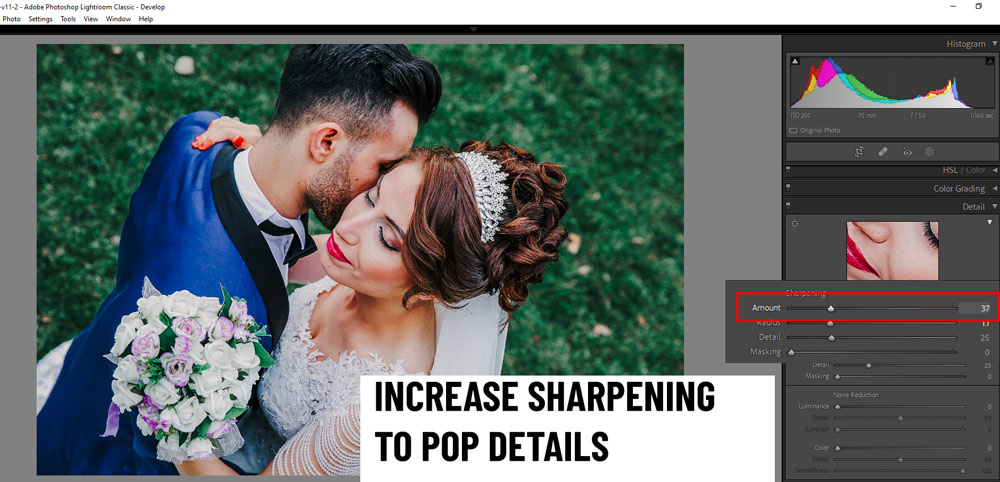
Sharpening & Smoothness
This is something that is really important for any photo that you are editing in Lightroom. Your image should have enough sharpness to pop details especially when you talk about wildlife, landscape, the milky way, sports, and urban photography.
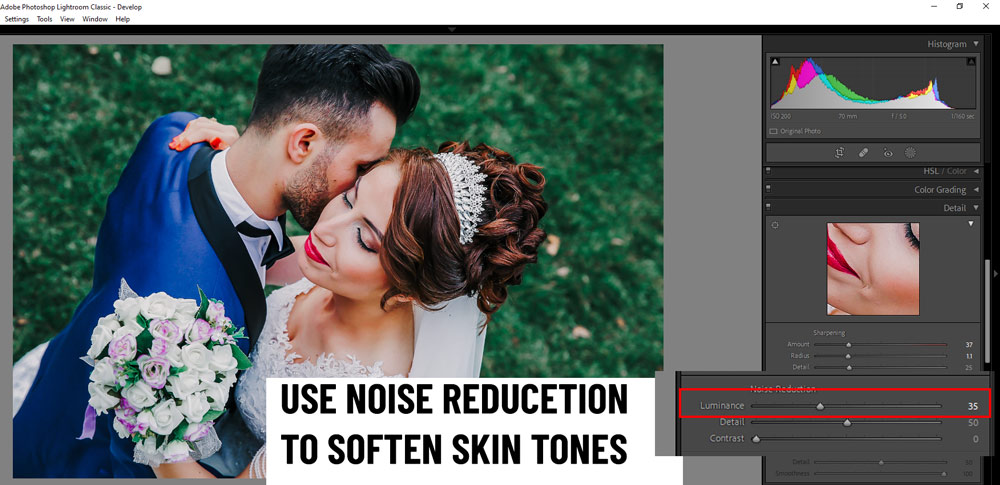
The sharpness of an image can be controlled under the Details panel in Lightroom. This Details Panel has Sharpening & Noise Reduction options. The sharpening slider can increase the sharpness of a photo, which you should use to pop details. Noise Reduction can be used to get smoother skin tones when working with Portraits.
You can either increase or decrease the sharpening of a photo using the Sharpening slider. Make sure to always increase it to the point where you see the details good enough to be noticed by the human eyes.
When working with portraits, Noise Reduction can help you smooth skin tones but make sure to keep it on the lower side otherwise you might get blurry skin tones.
You don’t want to blur skin tones when you use this slider, one thing that you can do is use it very carefully, like don’t use a higher value (choose the value that gives you smooth skin but you still be able to see skin textures) and at the same time use it with the combination of sharpening slider. What it would do is that it retain the texture of the skin while adding softness to the skin.
That’s it for today. I hope you enjoyed these tips. If you have questions, comment down below.
Need Help With Photoshop or Looking for Professional Support?
Whether you're just getting started with Photoshop or need expert-level assistance, we're here to help! Contact us for personalized Photoshop tutorials, project support, or creative services.
Get in touch today to take your skills or projects to the next level.
CONTACT US NOW📘 Want to Master Photoshop Faster?
🎁 Get Your FREE PDF E-Book "Top 10 Photoshop Tricks Every Designer Must Know" Now – Packed with expert tips, shortcuts, and techniques to boost your creativity & workflow.
👉 Download Your FREE PDF E-Book NOW!