
In today’s Photoshop tutorial I’ll show you how to create a pixel sorting glitch art in Photoshop. Pixel sorting glitch art shows an image in a melted appearance either from left to right and more often from top to down. The key to achieving this kind of art in Photoshop is Wind Filter. I’ll show you two ways to create glitch effect in Photoshop. One way would be simple and in another way, we’ll need little bit work to do so.
Tutorial Resources
Pixel Sorting Glitch Art: Simple Way
Step 1
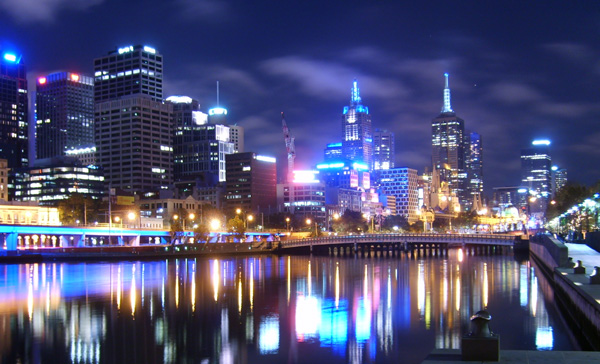
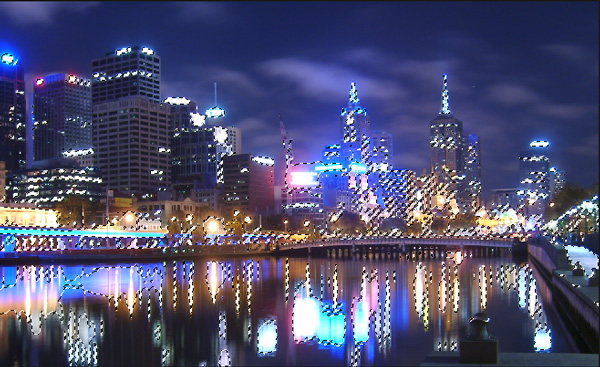
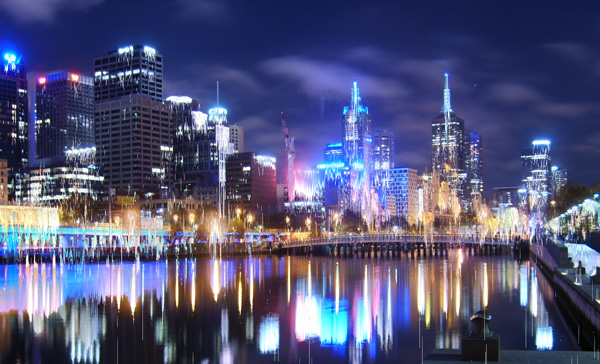
In a simple way, we just need to apply the wind filter to the image. So let’s do it. Open up the city image in Photoshop by selecting File > Open . Here is the image opened in Photoshop :
Step 2
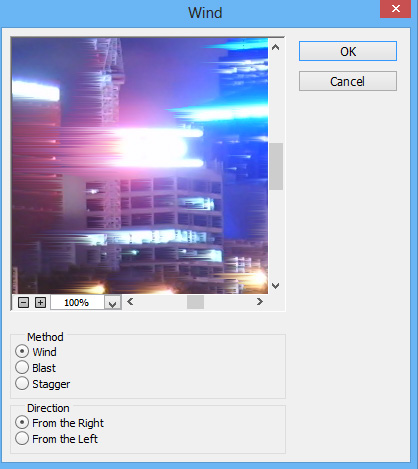
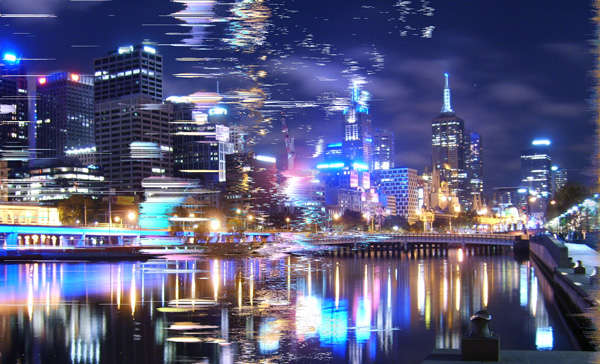
Convert this layer into Smart Objects. Go to Filter > Stylize > Wind. Set the Method to Wind and Direction to From the Right or choose From the Left.
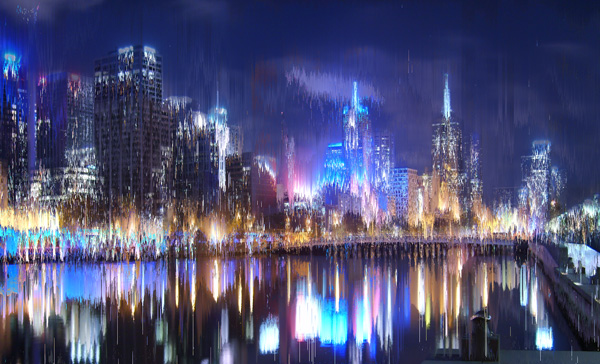
Results with simple pixel sorting effect:

Pixel Sorting Glitch Art: Advanced Way
Step 3
This is the advanced way to apply the pixel sorting effect to the image and you often have seen this. Open up the city image again in Photoshop. Go to Select > Color Range. Select Highlights, set the Fuzziness to 50% and Range to 190. The aim here is to select the highlight parts of the city like the shiny and colorful lights.
Feel free to experiment with Color Range to get selections of your desired city parts.
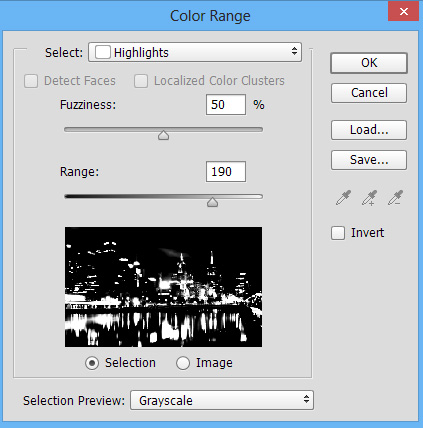
Now click OK and you’ll have the highlighted parts selected as shown below.
Step 4
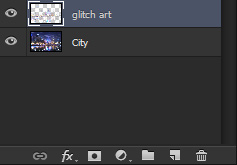
Now press CTRL + C or go to Edit > Copy and copy the selected parts of the city. Create a new layer and name it ‘Glitch Art’. Now select the Glitch Art layer and press CTRL + V or go to Edit > Paste to paste the selected parts.
Here are the parts that we selected using Color Range:
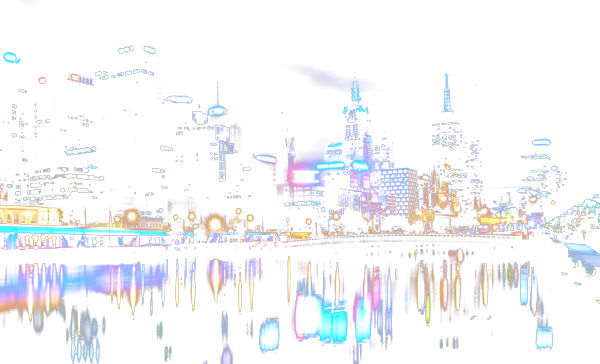
Here you can see that I pasted the selected parts on the new layer and I named it ‘Glitch Art’ as I said.
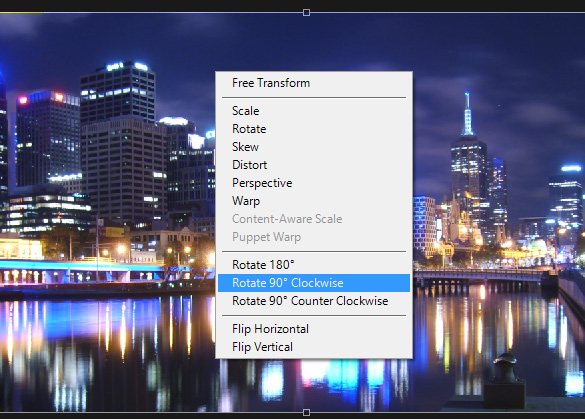
Step 5
Press CTRL + T to activate the Transform Tool. Now right click on anywhere and choose ‘Rotate 90 degree Clockwise’ to rotate the ‘glitch art’ layer.
Results after rotation:

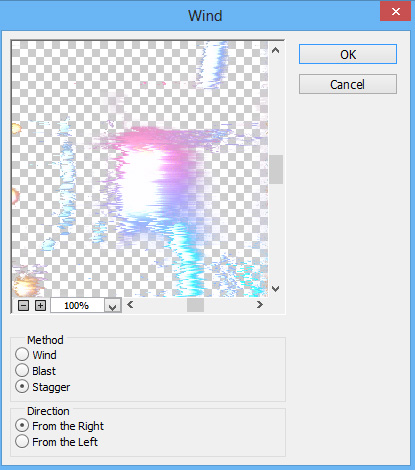
Step 6
Now apply the Wind Filter to glitch art layer but this time with slight changes. This time I changed the Method to Stagger but the direction is same. Apply the filter with following values:
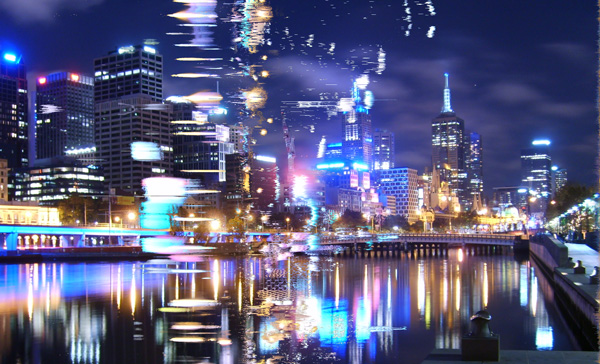
Results with pixel sorting appearance:
Step 7
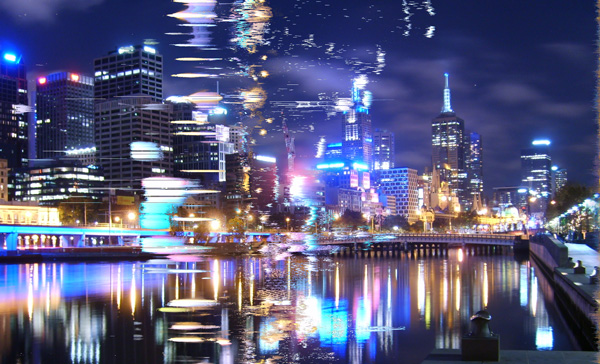
Results after applying the wind filter second time:
Results after applying the wind filter third time:

Step 8
Similarly, I applied the filter 8 to 9 times to get the result of my taste. Feel free to experiment either apply it several times or just 2 to 3 times, it completely depends on you.
Step 9
After satisfying with the results we are going to rotate back the Glitch Art layer. Please note that I didn’t convert the glitch art layer into Smart Objects. The reason is that we need to rotate back the glitch art layer 90 degrees counter clockwise and if the glitch art is Smart Object then we all know that the effect of wind filter also gonna rotate.
If that happens then you’ll get the simple glitch art results which are shown already. So if you converted the layer into Smart Object then be sure to Rasterize the layer. I went crazy with this step that why I am getting the same results but finally I found the mistake and then done it successfully.
Let’s rotate the glitch art layer using Transform Tool (CTRL + T). Activate the Transform Tool and this time choose ‘Rotate 90 Degree Counter Clockwise’. Here we have the pure glitch art created in Photoshop.
Step 10
Remember that we applied the Wind filter on highlights parts of the city. But you can also apply the same techniques on Midtones and Shadows, just select the Midtones parts using Color Range. Like in below image I applied to Midtones.
Here are my results on Shadows parts:

Conclusion
Thanks for following the tutorial. Hope you liked it and please do share, tweet, pin on social media. Just click the social media icon on your screen to share the tutorial with the world. Have a great day!
Need Help With Photoshop or Looking for Professional Support?
Whether you're just getting started with Photoshop or need expert-level assistance, we're here to help! Contact us for personalized Photoshop tutorials, project support, or creative services.
Get in touch today to take your skills or projects to the next level.
CONTACT US NOW📘 Want to Master Photoshop Faster?
🎁 Get Your FREE PDF E-Book "Top 10 Photoshop Tricks Every Designer Must Know" Now – Packed with expert tips, shortcuts, and techniques to boost your creativity & workflow.
👉 Download Your FREE PDF E-Book NOW!