In this Photoshop tutorial, Grzegorz Rutkowski will show you how he created ‘Dovahkiin’ artwork for Momenta. You’ll learn many things from this tutorial like sketching the ideas, separating background and foreground, paying attention to details, giving finishing touches and many industry tips as well. Follow along the tutorial with and find out more about this amazing artwork by Grzegroz Rutkowski!
Here you go with the words of Grzegroz Rutkowski :
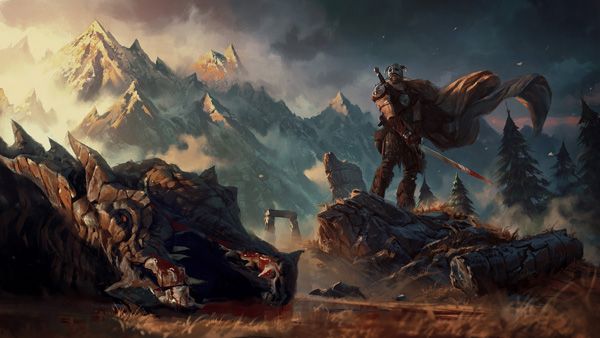
I am a big fan of The Elder Scrolls series. And The Elder Scrolls V: Skyrim is the one that inspired me the most. I spent countless hours exploring darkened caves, traversing snowy mountains and slaying giants, monsters, and dragons. It’s an experience I’ll never forget and I am wanting to share it with all of you by creating a fan-art depicting a part at the beginning of the story.
This artwork was actually an experiment. But I want to show you how I combine bits and bobs to create a fantasy illustration, starting off with the composition and finishing it by polishing the piece. This is a step-by-step walk-through showing you how I create these types of images.
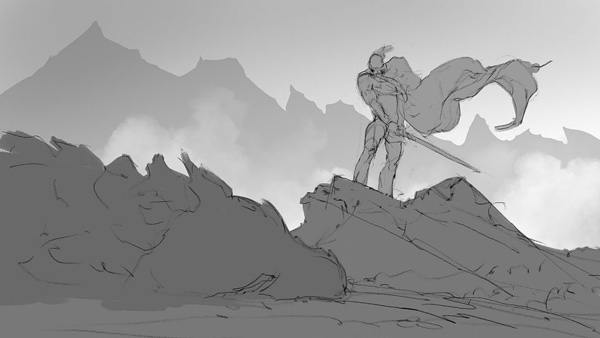
Step 1 – Composition
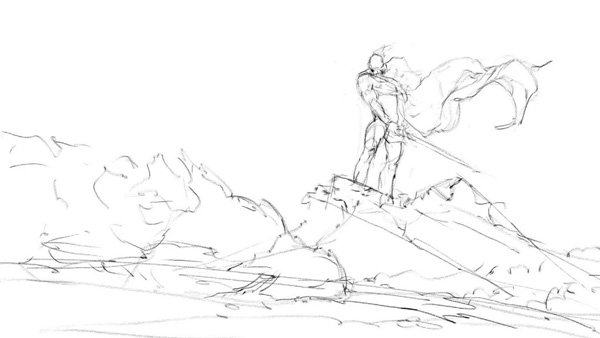
When I am sketching, I am trying to show the whole scene. Sometimes it’s difficult to read at first because it’s a rough sketch but it really does help me. I used the golden section composition for landscape paintings, dividing the piece into nine parts using rectangles and aligning the main elements with the lines. This makes for a balanced artwork.
Step 2 – Separating the Background, Middleground and Foreground
This one is fairly simple, you need to separate all the background, middleground and foreground using colour. I keep everything on separate layers which makes it easier to re-do certain things without ruining the main sketch.
Step 3 – Establishing a Colour Palette
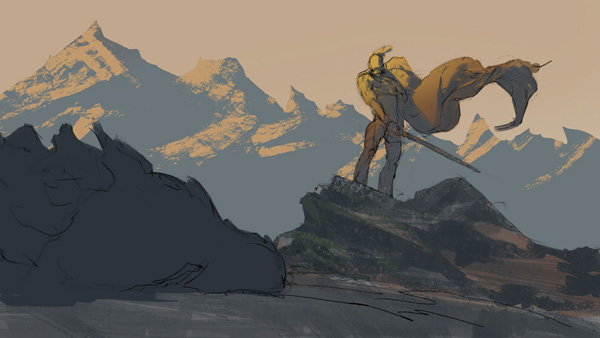
I am beginning to add colour here. This step is really important because it will have an effect on the mood. It’s just a simple colour palette made up of two or three colours for the time being.
Step 4 : Working With Shapes
You need to add more shapes in order to see the scene better. It’s all about the anatomy and the structures for now. I am working with a bigger brush because it gives me more control when I am working on objects like rocks and the mountains in the background.
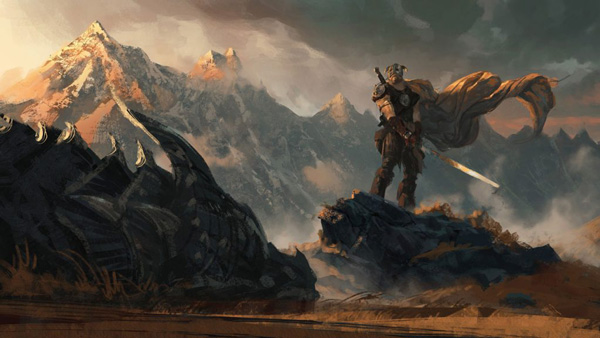
Step 5 : Value
Here, I am playing around with the values, trying to find the perfect brightness and contrast for the background whilst also experimenting with a few things. I was trying to make the snow on the mountains look realistic by messing around with a bunch of brushes until I liked it.
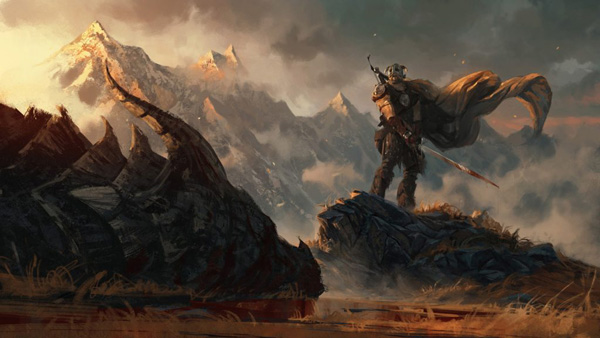
Step 6 – Golden Hour
The mountains are one of the most important things in this piece. They define the location and show how free Skyrim is because of all the space that’s around the character. I am wanting to put some sunlight at the peak of the mountains to further emphasize the mood. The golden hour lighting really helps here!
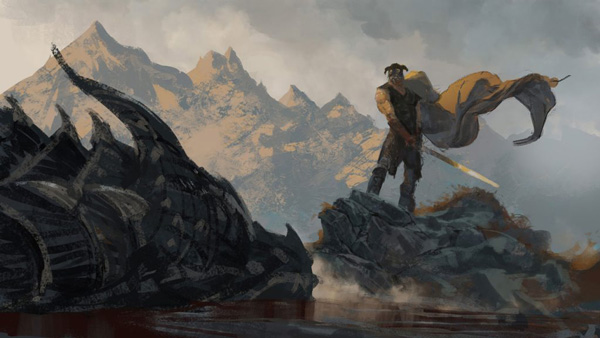
Step 7 : Rougher Brush Strokes to Create Gritty Textures
I am just adding more and more detail to the piece now. I chose to use rougher brush strokes to create a loose painterly feeling and give it a gritty texture.
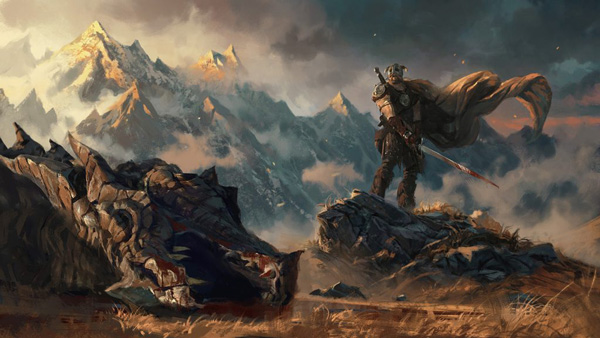
Step 8 : Adding More Details
I am focusing on the rocks in this step. You can see me defining the structure and the whole thing as well, which helps the viewer read the smaller details a bit better. You can do this pretty easily by using three to four colours to highlight cracks in-between the rocks.
I realized there needed to be blood to show that the beast is dead. You can paint believable blood quickly by using a dark red and adding some reflections.
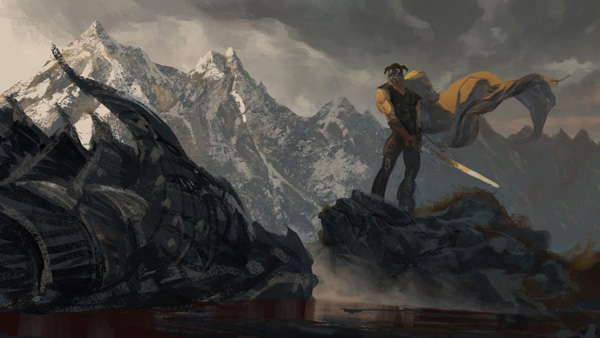
Step 9 : Last-Minute Changes
I needed to make some last-minute changes to the dragon’s head before I moved on to do the finishing touches. It wasn’t very clear in the previous versions but by positioning it so it faces the viewer, it’s a lot easier to see what it is. I added some light bouncing on the dragon’s horns and jaw which gave made for a really nice contrast.
Step 10 : Finishing Touches
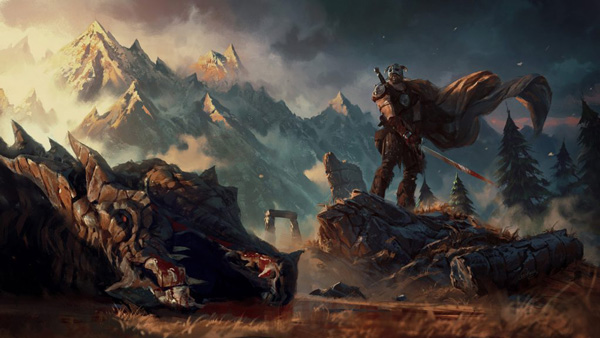
This is mostly the final touches and a little bit of polishing. I made changes to the colour palette by adding some cold blues to the mountain range which separates that bit from it’s complimentary colour. I also threw in a couple of ruins and trees to make it look more like the world of Tamriel.
Conclusion
Thanks for following the tutorial. If you like the tutorial then you’ll find many walk through on Momenta. Do check out the website Momenta! Have a great day!
Need Help With Photoshop or Looking for Professional Support?
Whether you're just getting started with Photoshop or need expert-level assistance, we're here to help! Contact us for personalized Photoshop tutorials, project support, or creative services.
Get in touch today to take your skills or projects to the next level.
CONTACT US NOW📘 Want to Master Photoshop Faster?
🎁 Get Your FREE PDF E-Book "Top 10 Photoshop Tricks Every Designer Must Know" Now – Packed with expert tips, shortcuts, and techniques to boost your creativity & workflow.
👉 Download Your FREE PDF E-Book NOW!