
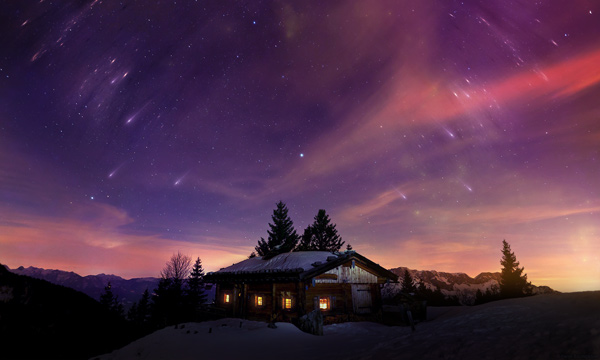

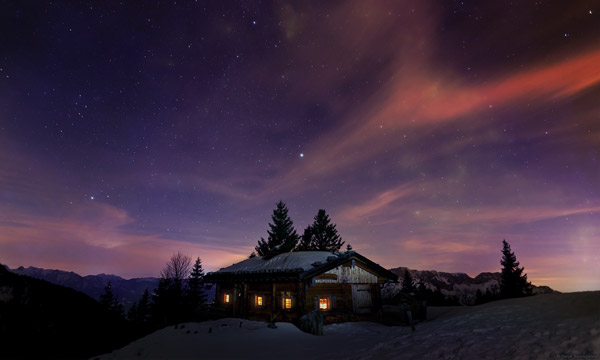
In this Photoshop tutorial I’ll show you how to create a winter night landscape in Photoshop. You’ll learn how to create winter night scene, creating a beautiful atmosphere and working with colors. You’ll also learn how to use textures and nebula to create meteors and shiny stars. Follow the tutorial and level up your photo manipulation skills.
Tutorial Resources
<
Preparing Background
Step 1
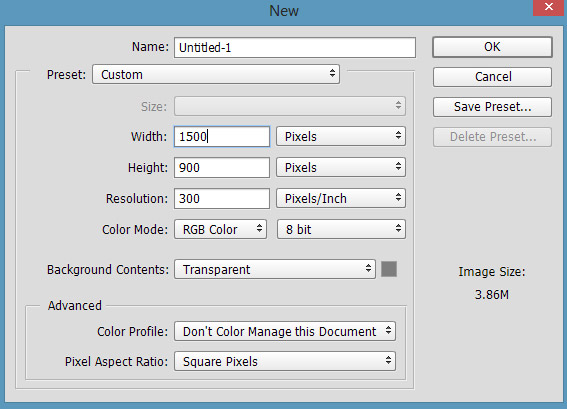
Create a new document in Photoshop with the following settings:
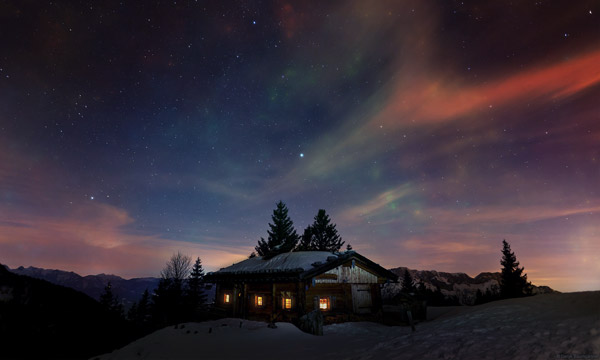
Add the House
Step 2
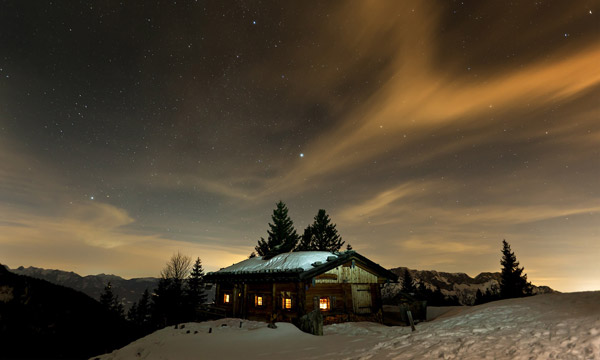
Open up the landscape image in Photoshop and then drag it into our main document using
Move Tool (V).
Step 3
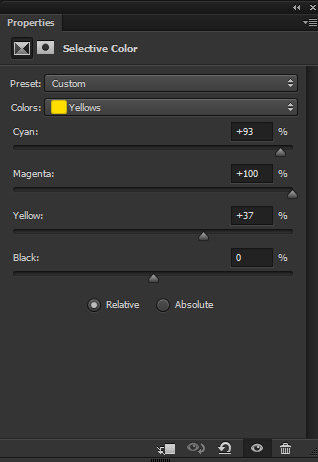
Make a Selective Color adjustment layer for landscape. Go to Layer > New Adjustment Layer > Selective Color and change the color using the following settings:
Results:

Step 4
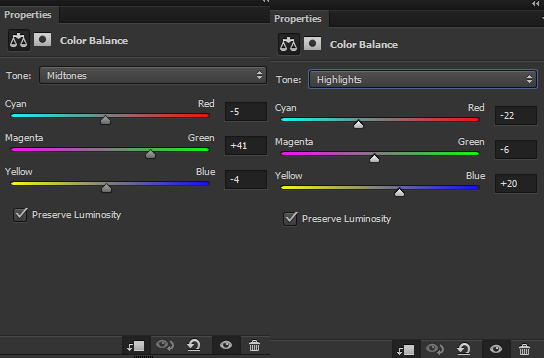
Use the Color Balance adjustment layer to change the color of lower parts. I am aiming to add cyan color to the ground. Only change the value of Midtones and Highlights. Reduce its opacity to 80%.
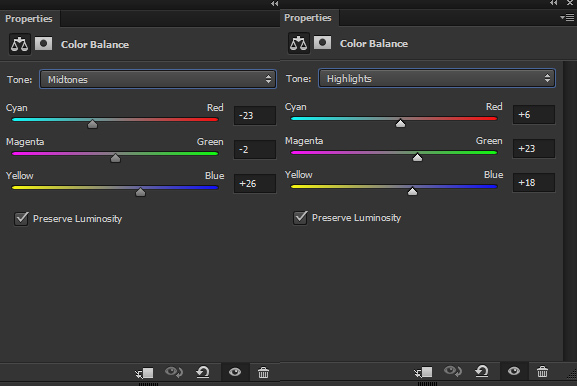
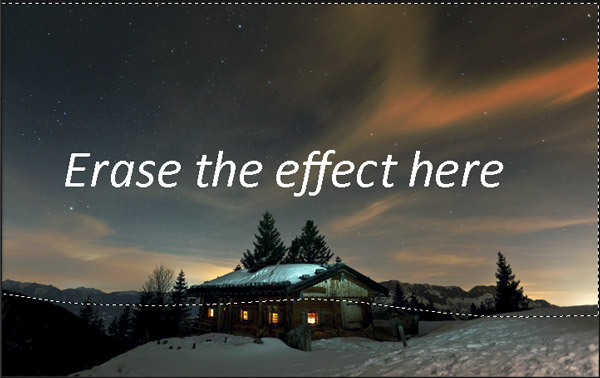
On the layer mask of Color Balance, hide the effect on the upper parts and make the effect visible only on lower parts. Use a soft round black brush for masking the effect with lower opacity around 30%.
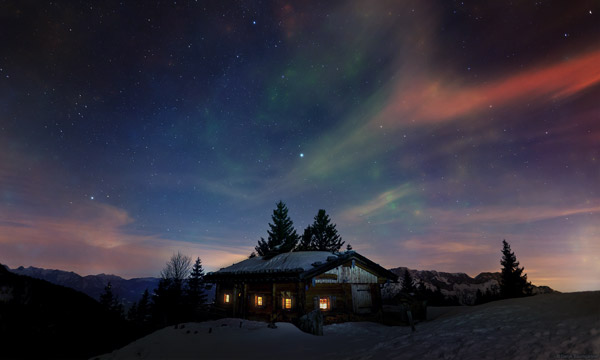
Results:

Step 5
Add a Curves adjustment layer and reduce the brightness. Use it with following settings:
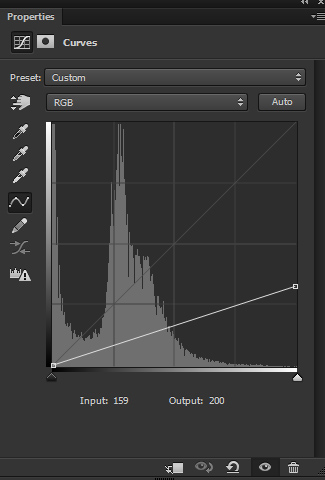
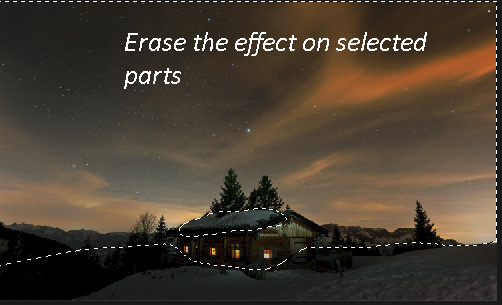
Erase the effect of Curves on the upper parts and keep them brighter.
Step 6
Create a new layer and name it ‘window lights’. Change your foreground color to #6d4d1b. Activate the Brush Tool (B). Use a soft basic brush to paint some light on the windows.
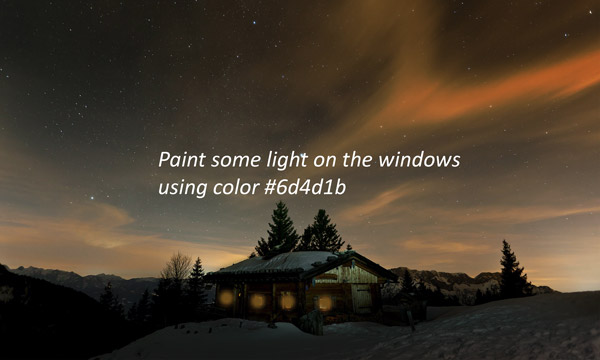
Change the blend of window lights layer to Linear Dodge and reduce the opacity to 36%.

Add the Texture
Step 7
Place the texture to main document and if needed use the Transform Tool (CTRL + T) to enlarge it.

Set the blend mode of texture layer to Soft Light and reduce the opacity to 70%.
Step 8
Convert the texture layer into Smart Objects. Go to Filter > Blur > Surface Blur and soften the texture layer to make it blend better with sky. Set the Radius value to 14 pixels and Threshold Level to 25.
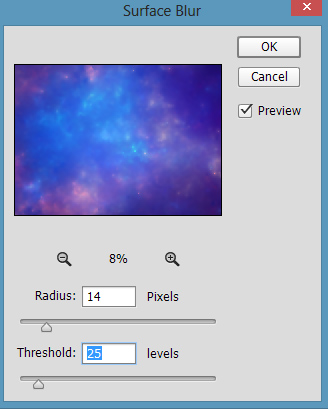
Results:

Step 9
Click the second icon at the bottom of layer panel and add a Layer Mask to texture layer. Using a soft round black brush, mask the parts of texture from the ground and on the upper parts of the house as the texture adding too much blue tones on these areas or wherever you noticed.
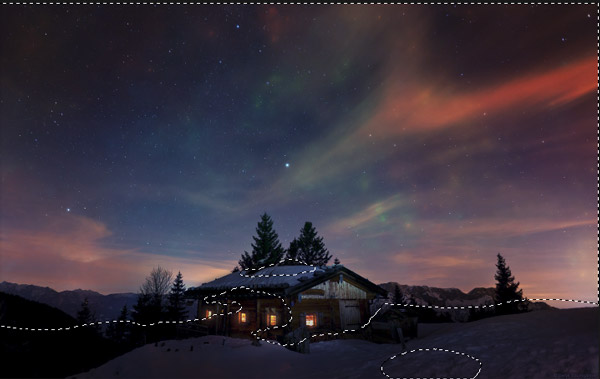
Results:
Step 10
Add a Color Balance adjustment layer to texture and set it as Clipping Mask. Now enhance colors of texture using the following settings :
Results:
Step 11
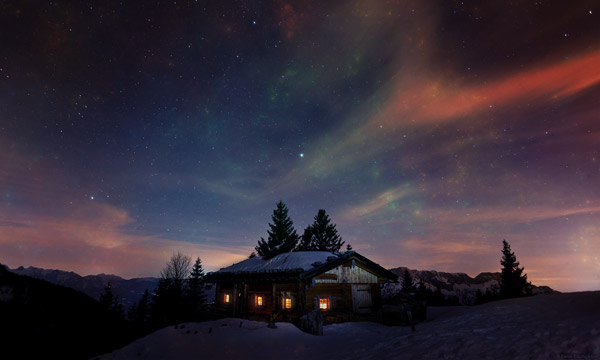
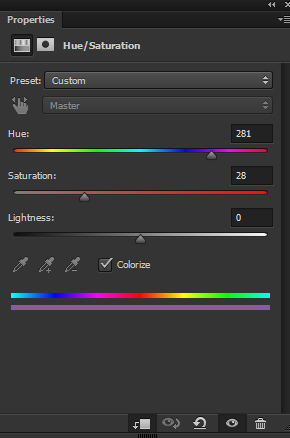
Add a Hue/Saturation adjustment layer and match the color of texture with the existing background.
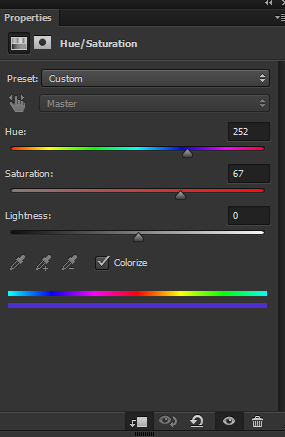
Results:
Add the Texture 2
Step 12
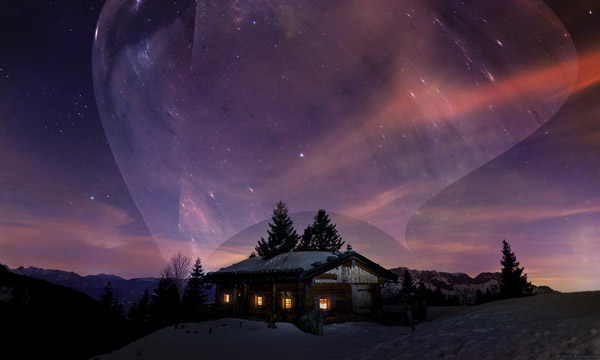
Place the texture 2 image to main document and place it on the middle of the scene.
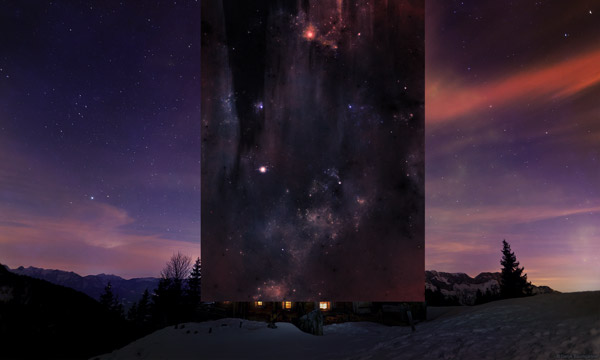
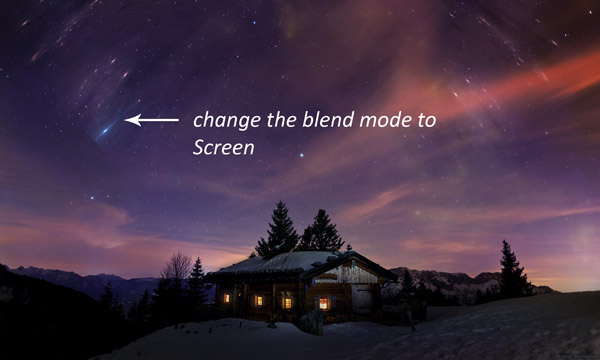
Change the blend mode of texture 2 to Screen.
Step 13
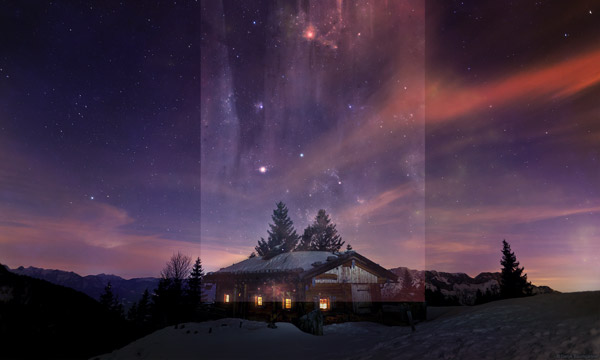
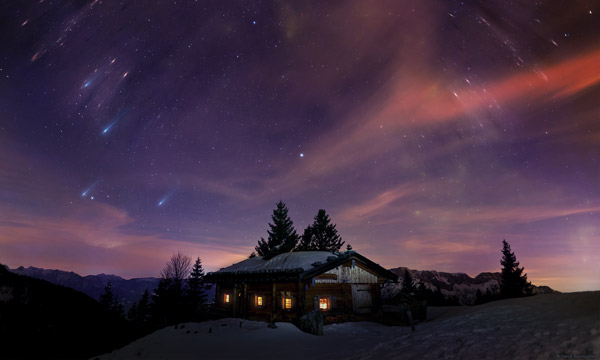
Convert the texture 2 layer into Smart Objects. Now go to Edit > Transform > Warp and alter the shape of texture as shown in below image. Try to alter the shape like a falling meteor and feel free to do it in your own away.
Results so far:
Step 14
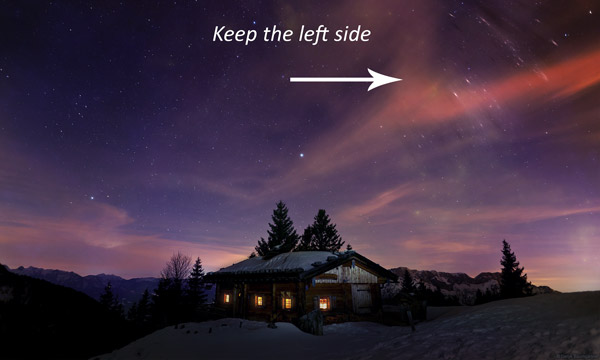
Add a mask to texture 2 and use the soft, basic black to mask the hard edges. Also, keep the left side of it as shown in below image.
Step 15
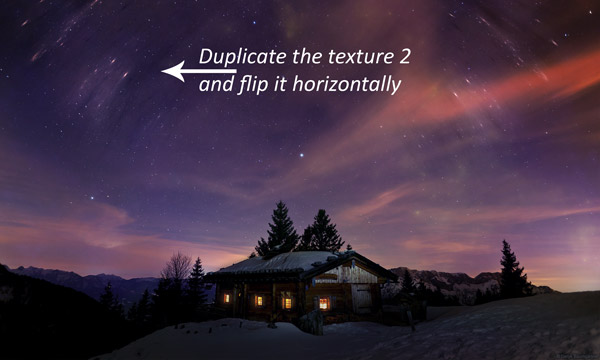
Duplicate the texture 2 layer and flip it horizontally using the Transform Tool (CTRL/CMD + T). To do this, activate the Transform Tool (CTRL/CMD + T) and while the transform tool is active, right click on anywhere and choose Flip Horizontal.
Add the Lens Flare
Step 16
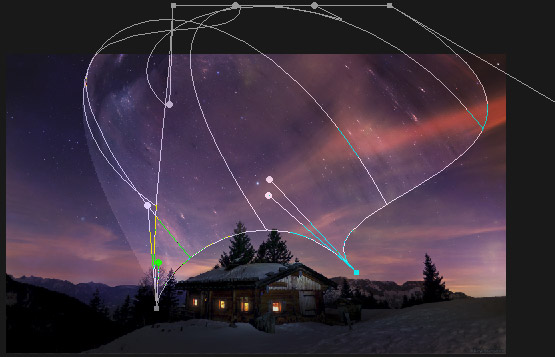
Open the lens flare and place optical flare (26) image to main document. Use the Free Transform (CTRL + J) to rotate in falling shape.
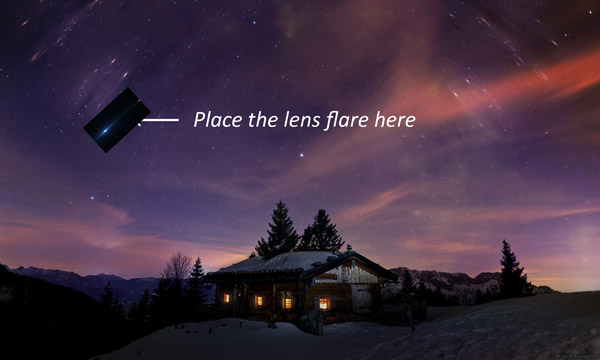
Change the blend of mode lens flare to Screen and get rid from black background.
Step 17
Add a mask to lens flare and mask the hard edges of if. Use soft round black brush for masking.

Step 18
Duplicate the lens flare layer couple of times and arrange them at random position.
Similar do same with the right side of the scene and add the falling meteors there as well.

Step 19
Select all lens flare layers and put them inside the group by pressing CTRL + G. Change the blend mode of this group to Normal. Now make a Hue/Saturation layer, inside the group, and change the colors of all lens flares.
Results:

Create the Light effects
Step 20
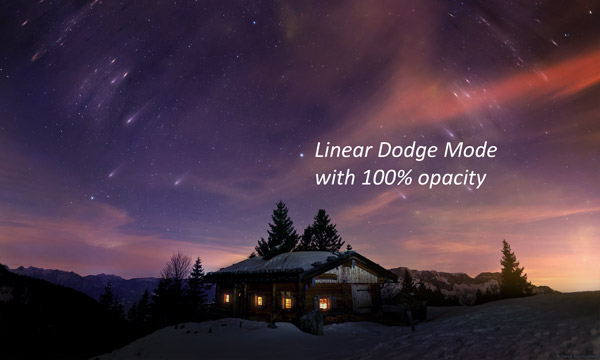
Create a new layer and name it ‘light 1’. Change your foreground color to #583b16 and paint lights at bottom right corner as shown below.
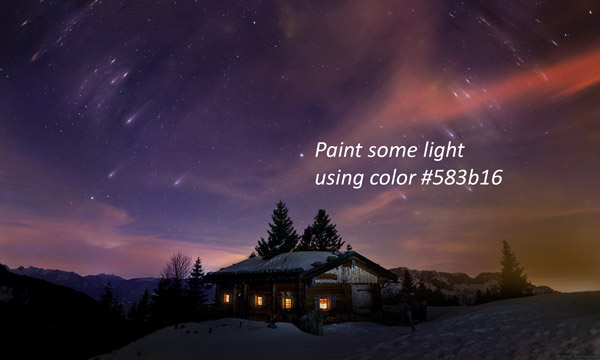
Change the blend mode of light 1 layer to Linear Dodge.
Step 21
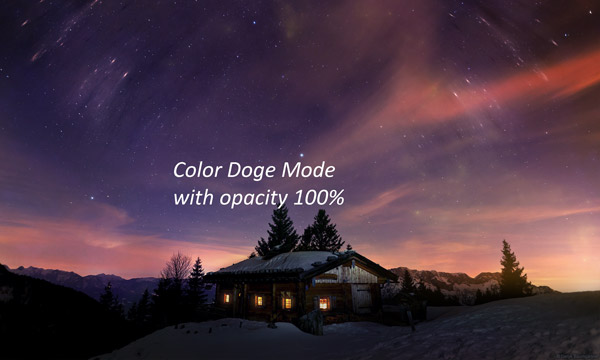
Create a new layer again and name it ‘light 2’. Use the same color and paint some more light as shown in the image below. Also, try to paint light reflection on the parts of the house.
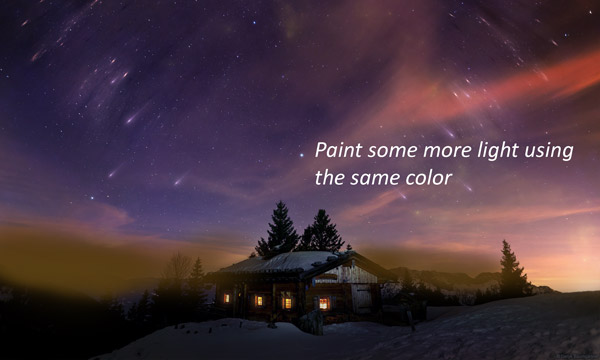
Change the blend mode of this layer to Color Dodge.
Step 22
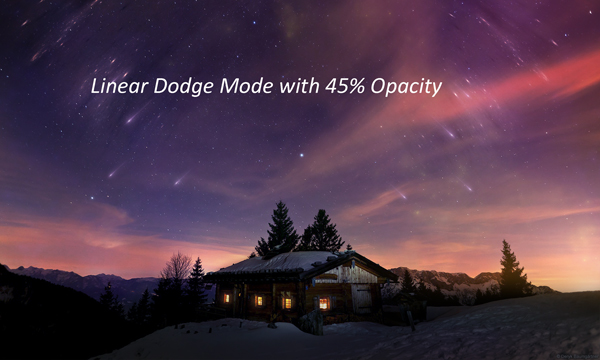
Top right corner looks dark and I want to brighten it. Create a new layer and name it ‘light 3’. Using the color #591e5a, paint some lights at the top corner.
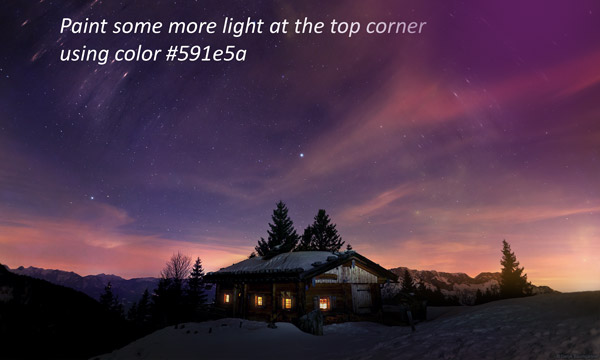
Change the blend mode of this layer to Linear Dodge and reduce the opacity to 45%.
Final Adjustments
Step 23
Make a Color Balance adjustment layer on top of layers and enhance the colors of whole scene.
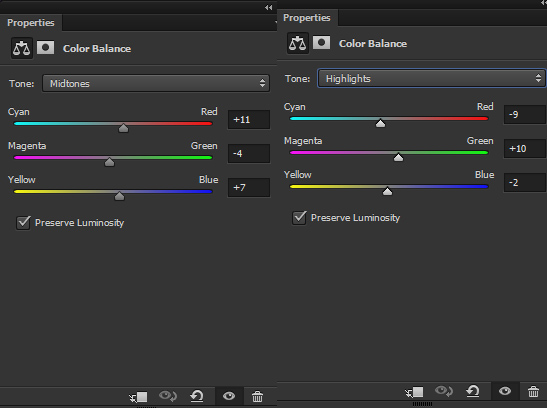
Results:

Step 24
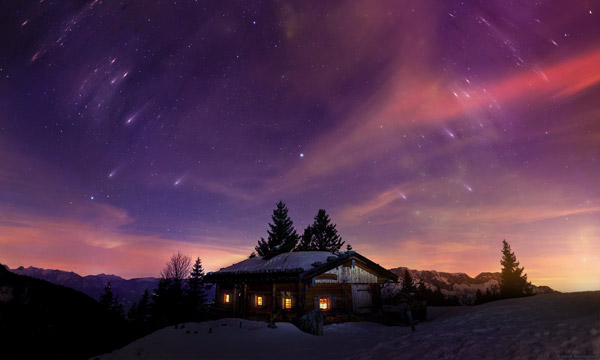
Make a Vibrance adjustment layer and increase the vibrance.
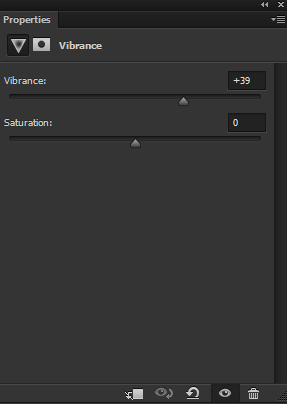
Results:
Step 25
You may notice that there is unwanted highlighted parts at the bottom of right corner. To fix this, create a new layer and fill this layer with 50% gray color. Select Burn Tool (O) with Midtones Range and Exposure about 9-10%. Now using the Burn Tool (O) strengthen the shade on this area as shown below.
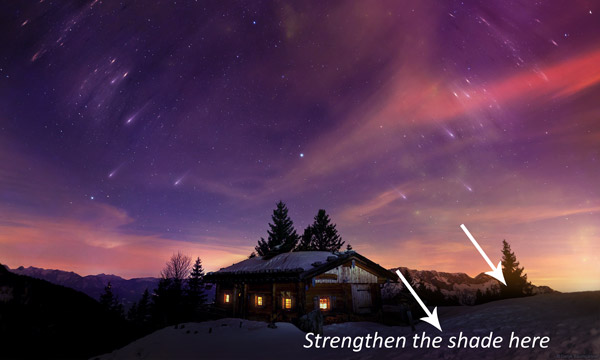
Results:

Conclusion
Thanks for following the tutorial. I hope you enjoyed it and would love to welcome your feedback on the tutorial. Have a great day!
Need Help With Photoshop or Looking for Professional Support?
Whether you're just getting started with Photoshop or need expert-level assistance, we're here to help! Contact us for personalized Photoshop tutorials, project support, or creative services.
Get in touch today to take your skills or projects to the next level.
CONTACT US NOW📘 Want to Master Photoshop Faster?
🎁 Get Your FREE PDF E-Book "Top 10 Photoshop Tricks Every Designer Must Know" Now – Packed with expert tips, shortcuts, and techniques to boost your creativity & workflow.
👉 Download Your FREE PDF E-Book NOW!
