
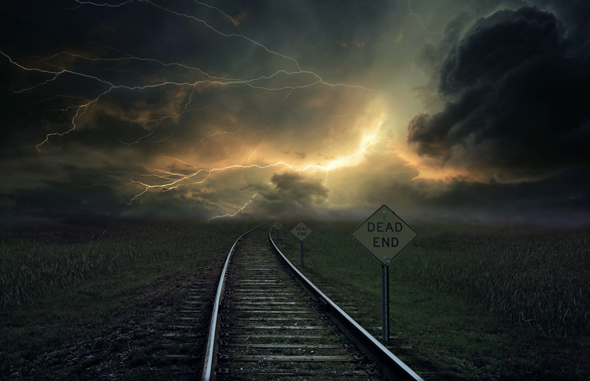

Learn how to create a surreal stormy scene in Photoshop. In this tutorial I’ll show how you can achieve a dark, ghastly and lightning weather atmosphere in Photoshop. The main technique here is blending and making the scene more realistic and believable.
Tutorial Resources
Preparing the Background
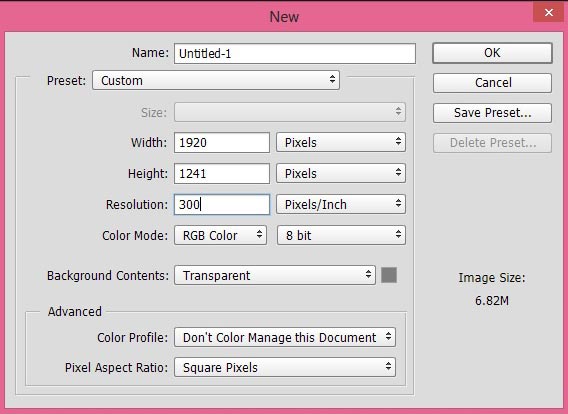
Step 1
Create a new document in Photoshop by selecting File > New and then use the following setting or feel free to choose you own.
Step 2
Place the road image to our main document by selecting File > Place and then place it.

Adding Sky to Make the Scene Dark and Stormy
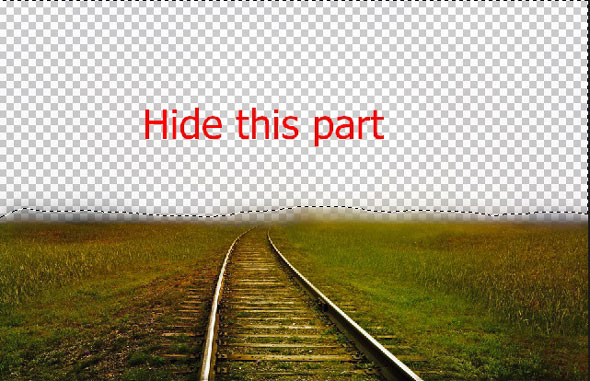
Step 3
Add a Layer Mask (Layer > Layer Mask > Reveal All) to road layer. Activate the Brush Tool (B) and set its opacity and flow about 30%. Now hide the upper parts of road by painting on the layer mask of road using soft round black brush.
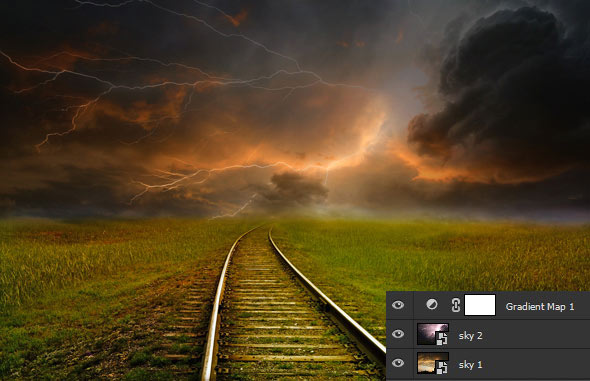
Place the sky 1 image to the main document. Use Move Tool (V) drag it under the road layer.
Step 4
Now add sky 2 to our main document and place it between the road and sky 1 layer.
Set the blend mode of sky 2 layer to Luminosity and reduce the its opacity to 50%.
Step 5
It’s time for adjusting the sky parts of scene using adjustment layer. Make a Gradient Map adjustment layer above the sky 2. Use the color #071625 for Shadows and for Highlights use color #161830.
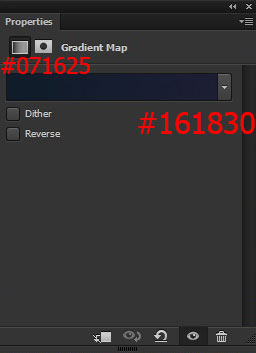
Set the blend mode of Gradient Map to Soft Light.
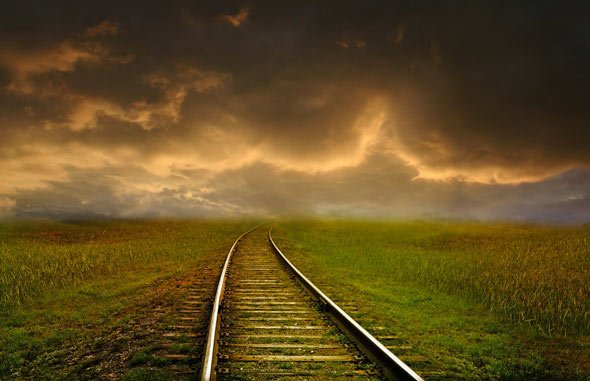
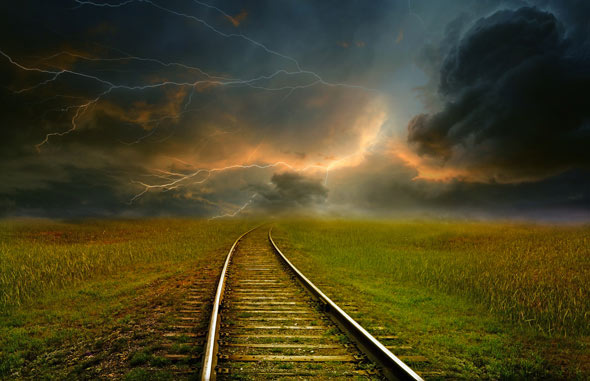
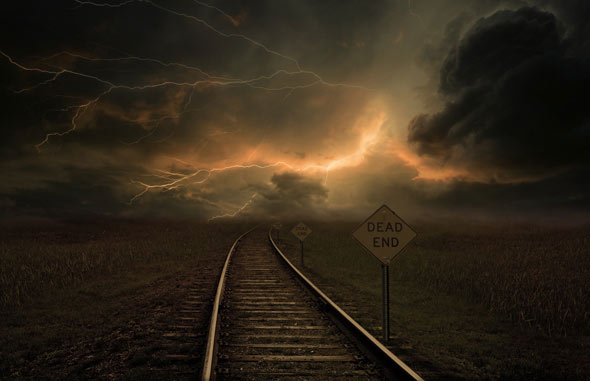
Results :
Step 6
Make a Color Balance adjustment layer to add more colors to sky parts. Use it with the following setting:
Results :
Step 7
Make a Gradient Map adjustment layer again. Here are the values for Gradient Map .
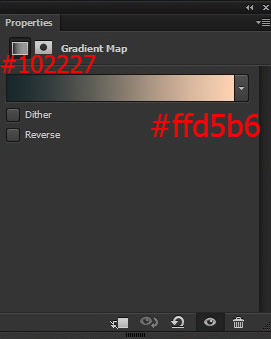
Set the blend mode to Color and reduce the opacity to 30%.
Step 8
Now select the road layer, make a Curves adjustment layer to reduce the lightness of road and also add a Hue/Saturation to reduce the saturation. Don’t forget to clip (press the red button to clip it to road layer) these adjustment layers to road layer.
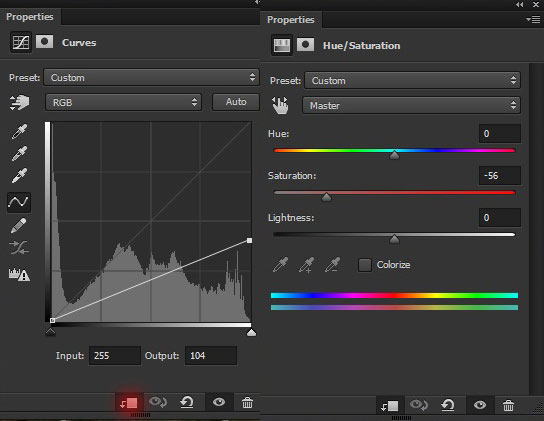
Reduce the opacity of Curves to 80%. Here are the Results:
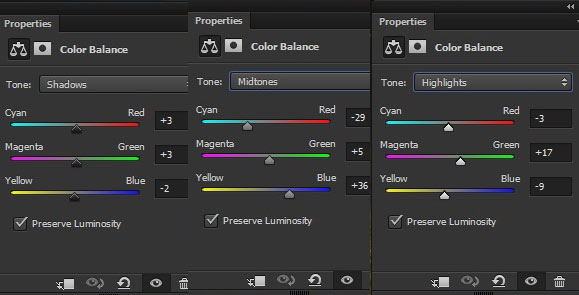
Step 9
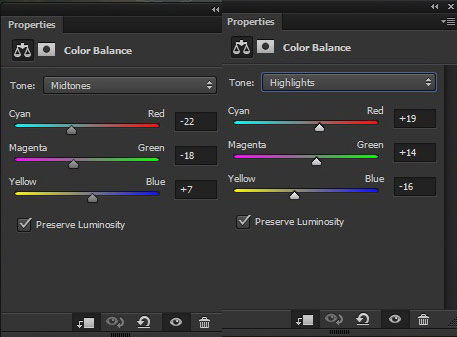
Continue colorizing it using Color Balance adjustment layer. Here are the values:
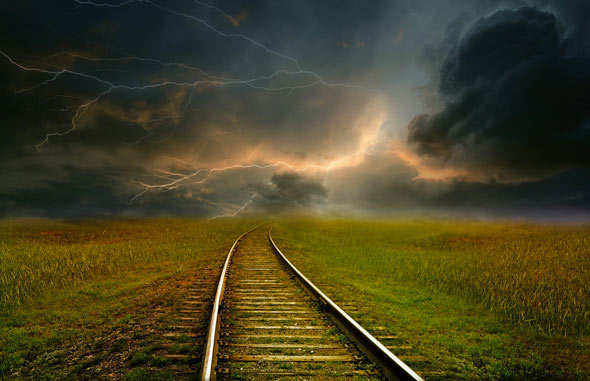
Results :

Step 10
To create more focus on the middle of background, we need to make the center section brighter. To achieve this, create a new layer by pressing (CTRL + ALT + SHIFT + N) on the keyboard. Fill this layer with black color by pressing ALT + BACKSPACE (make sure your foreground set to black, set it by pressing (D) on the keyboard). Now set your color to white one and using a soft round brush, with opacity and flow about 70%, make a brush stroke on the middle of it.

Set the blend mode of this layer to Soft Light and reduce the opacity to 30%.

Adding Dead End Sign
Step 11
Open up the dead sign in Photoshop and extract its background using selection tool.
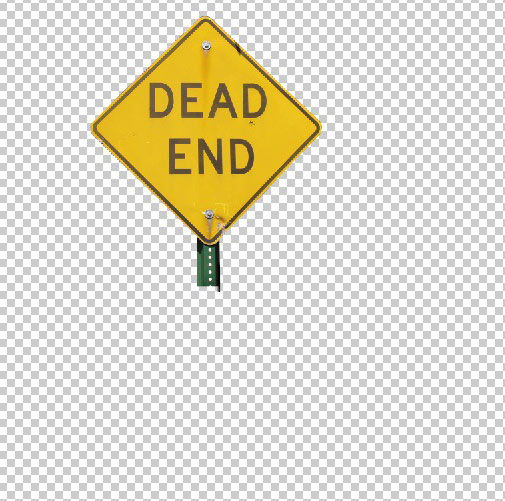
You may notice that sign board is incomplete due to its bottom parts. To fix this create a new and then activate the Clone Stamp Tool (S) and clone it’s below parts to make it complete. Take your time while cloning the sign board and once you’ve done this you’ll have the sign board as shown below image.
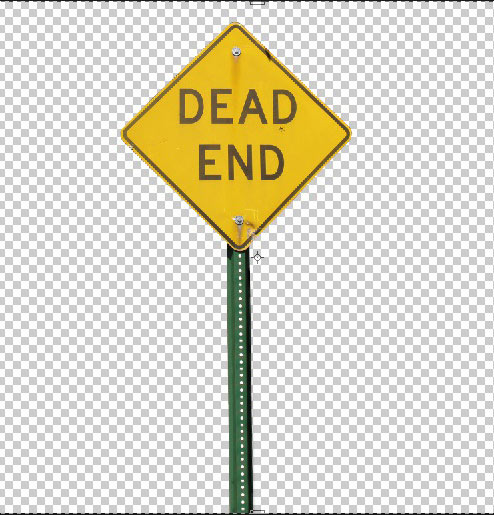
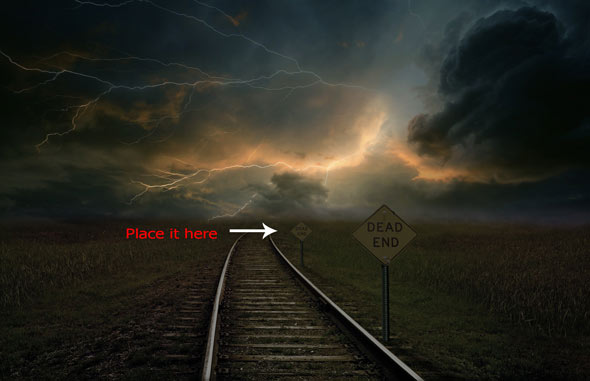
Now place it to the main document and place it either right or left side of the road.
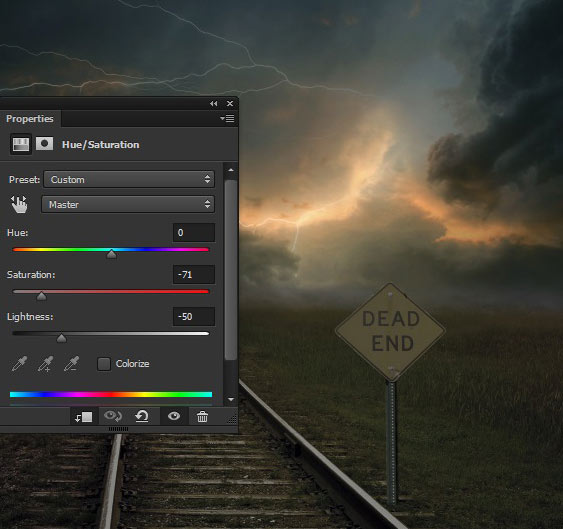
Step 12
I used a Hue/Saturation adjustment layer to reduce the saturation and lightness of sign.
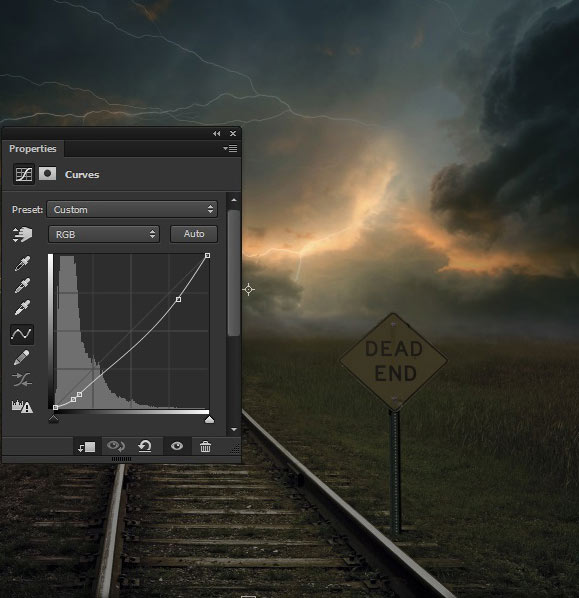
Step 13
Make a Curves adjustment layer to decrease the lightness of sign.
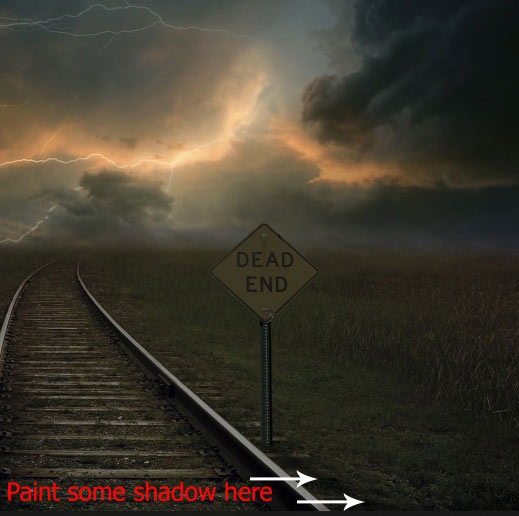
Step 14
The sign doesn’t seem to have the shadow, so make a new layer under the sign. Use a soft round black brush to paint the shadow for sign board. Use the below image for reference.
Step 15
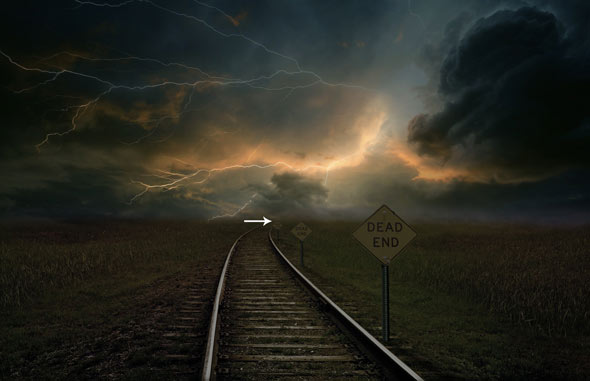
Select all the sign board layer (including adjustment layer and shadow layer) and then duplicate it by pressing CTRL + J . Now use the Transform Tool (CTRL + T) to transform it smaller to make it farther from the previous one.
Step 16
Duplicate it one more time and place it farthermost from the previous ones.
Final Adjustments
Step 17
It’s time for Final Adjustments. Add a Photo Filter adjustment layer to add warm color tones to entire scene. Don’t forget to make it above all layers.
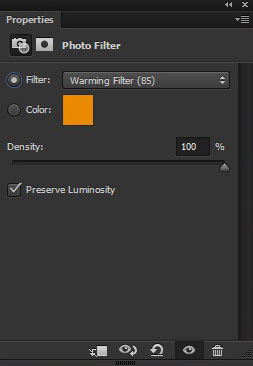
Reduce its opacity to 56%.
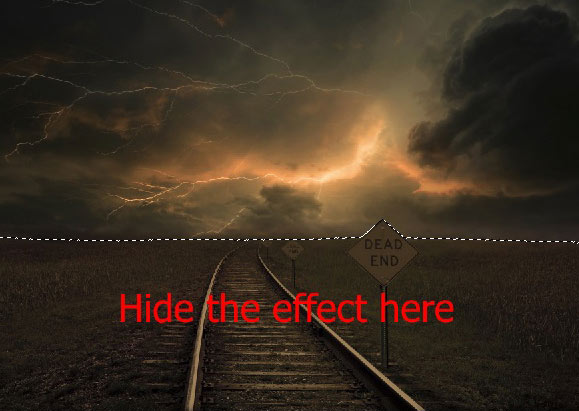
Step 18
Hide the effect of Photo Filter on the road and sing board. Use a soft round black brush to hide the effect from the selected area.
Results after masking the effect:

Step 19
Make a Curves adjustment layer to increase the brightness of entire scene (mostly on highlight parts).
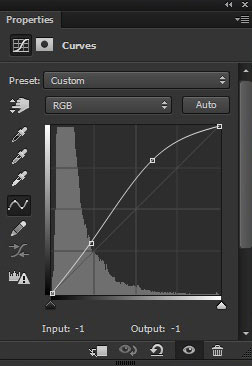
Reduce the opacity of Curves to 50%. Results:
Step 20
Finally make a Color Balance adjustment layer to colorize the entire scene.

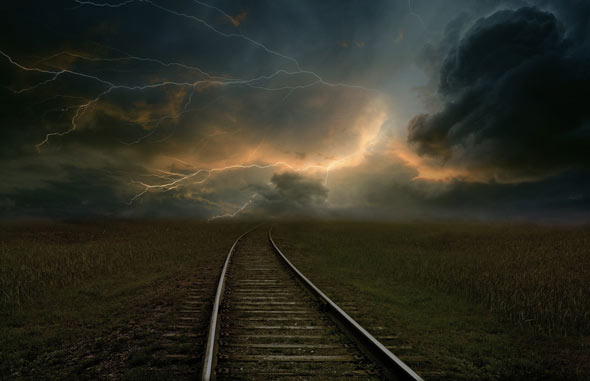
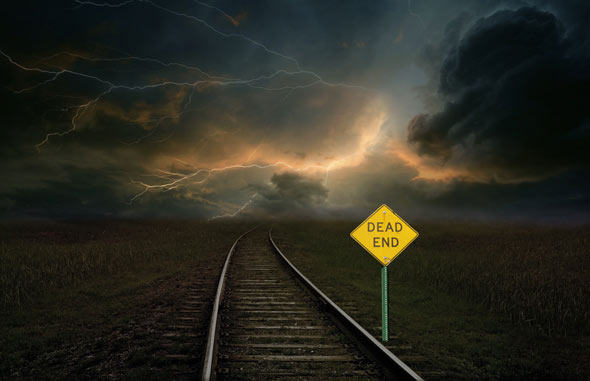
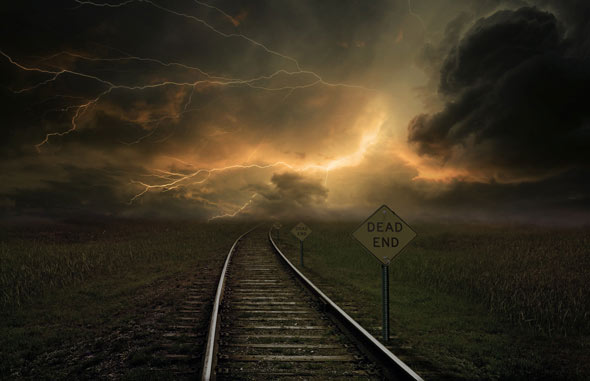
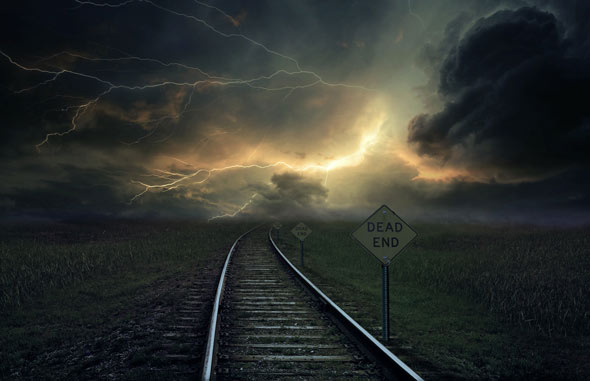
Here are the Final Results :
Conclusion
Thanks for following the tutorial and I hope that you’ve learned something new today. If you have any question regarding tutorial then do let me know through the comments and I’ll happy to help you.
Need Help With Photoshop or Looking for Professional Support?
Whether you're just getting started with Photoshop or need expert-level assistance, we're here to help! Contact us for personalized Photoshop tutorials, project support, or creative services.
Get in touch today to take your skills or projects to the next level.
CONTACT US NOW📘 Want to Master Photoshop Faster?
🎁 Get Your FREE PDF E-Book "Top 10 Photoshop Tricks Every Designer Must Know" Now – Packed with expert tips, shortcuts, and techniques to boost your creativity & workflow.
👉 Download Your FREE PDF E-Book NOW!
