


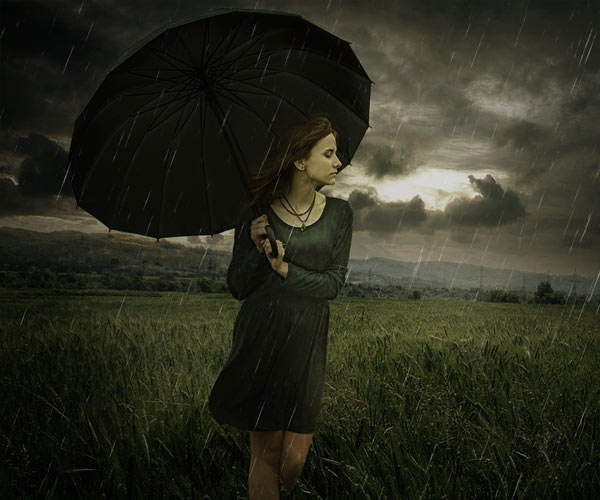
In this Photoshop tutorial, I’ll show you how to create a rainy day scene photo manipulation in Photoshop. You’ll first create a rainy atmosphere using field stock and then we’ll add the rain effect to the scene. After that, we’ll add the model and then we’ll make her part of the scene using blending techniques. You’ll also learn how to paint rain and water drops using brushes in Photoshop.
Tutorial Resources
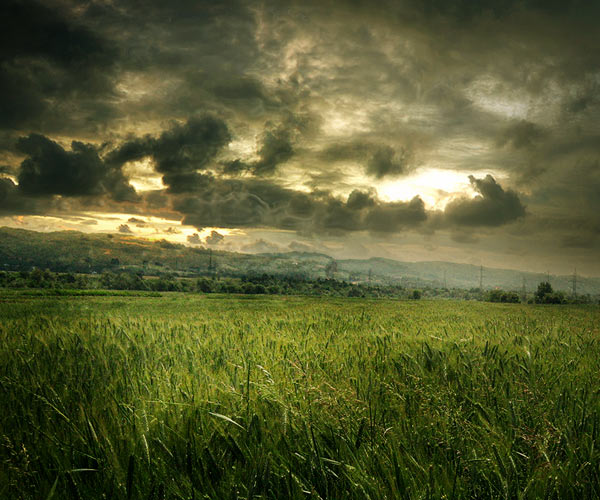
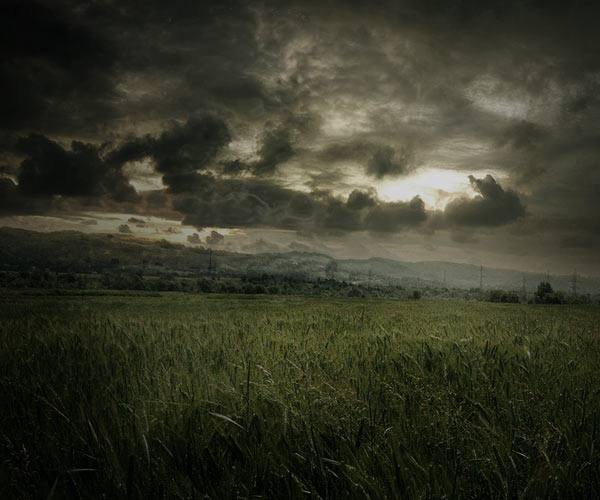
Add the Field
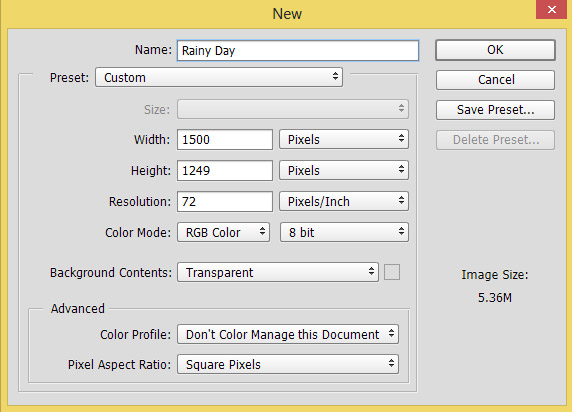
Step 1
Create a new document in Photoshop by selecting File > New and give the following values or feel to choose your own settings.
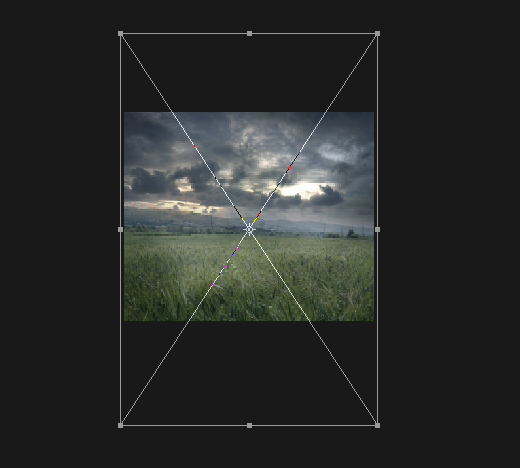
Step 2
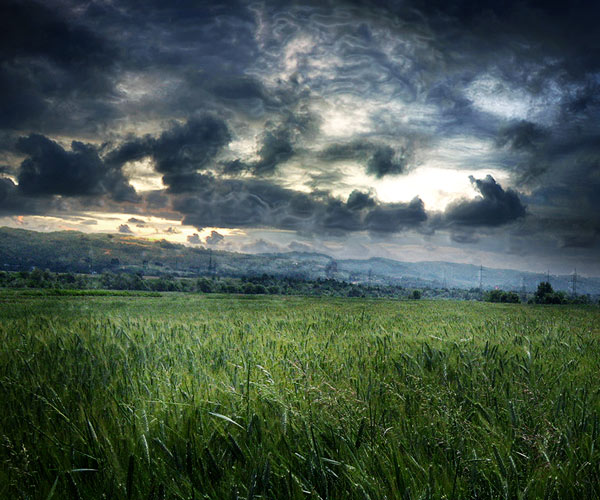
Place the field image to main document by selecting File > Place Embedded and place it. Now activate the Transform Tool (CTRL + T) and then scale it as shown below. Feel free to scale it as you want. See the below image for reference.
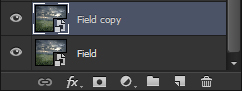
Step 3
Now we are going to add water effect on the field so its looks like that the field are wet and soaked. To do that, duplicate the field layer by pressing CTRL + J.
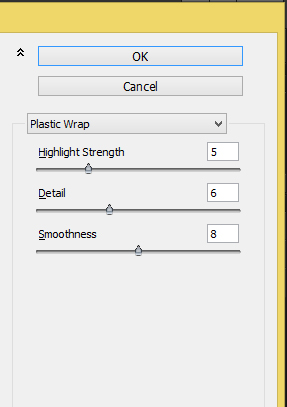
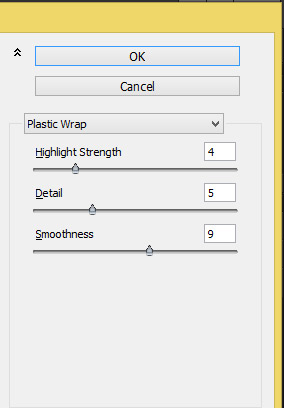
Now go to Filter > Filter Gallery > Plastic Wrap and apply the filter with following values. Don’t forget to play around with settings, maybe it can give even better results.
Here you can see the results:
Step 4
Change the blend of the duplicated field layer to Overlay 100%.
Step 5
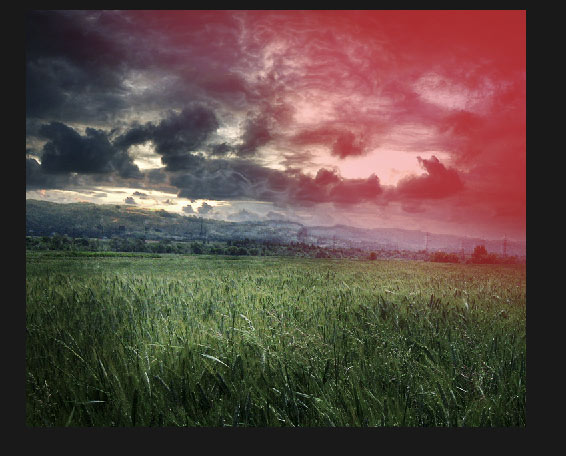
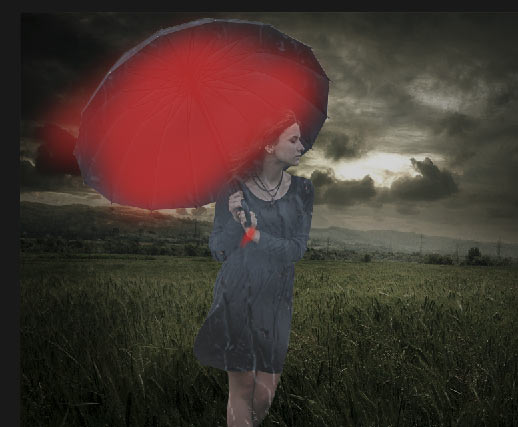
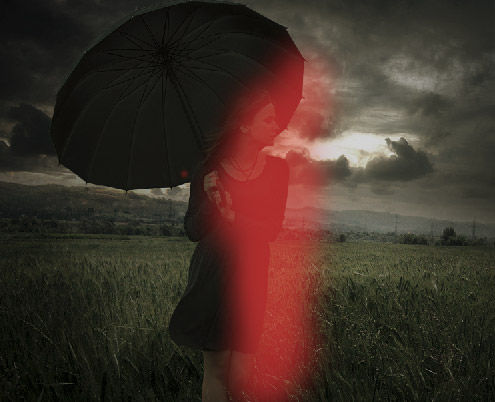
Add a Layer Mask to field copy layer by pressing the second icon at the bottom of layer panel. Using soft, basic black brush mask the field copy parts on the highlighted red area as I don’t want Plastic Wrap effect there and high contrast on that part of the sky.
Also, we’ll create light effect there so this part can mess later.
Don’t worry about the left part it’ll be cover by the model and her umbrella.
Results:
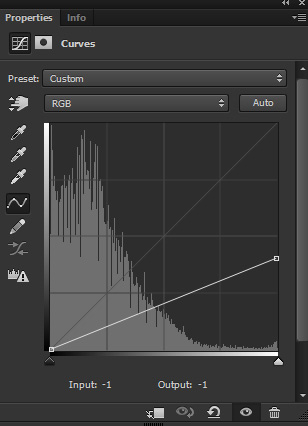
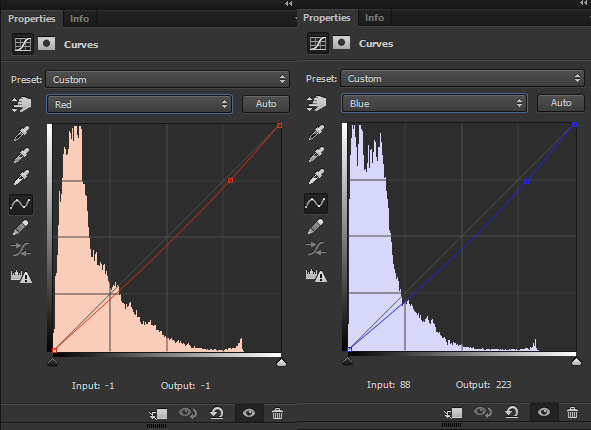
Step 6
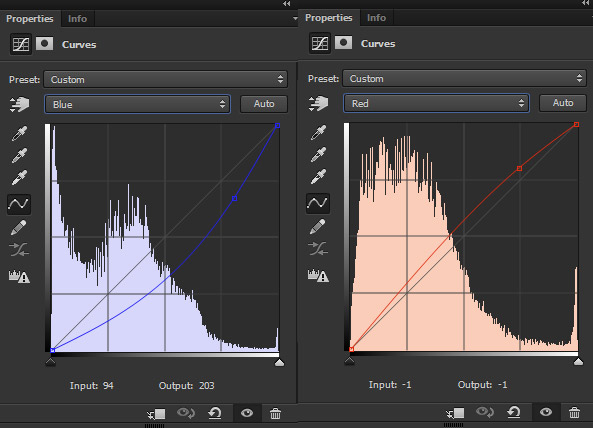
It’s time for basic adjustments for the background. Go to Layer > New Adjustment > Curves and add Curves adjustment layer. Now alter the Red and Blue channel settings :
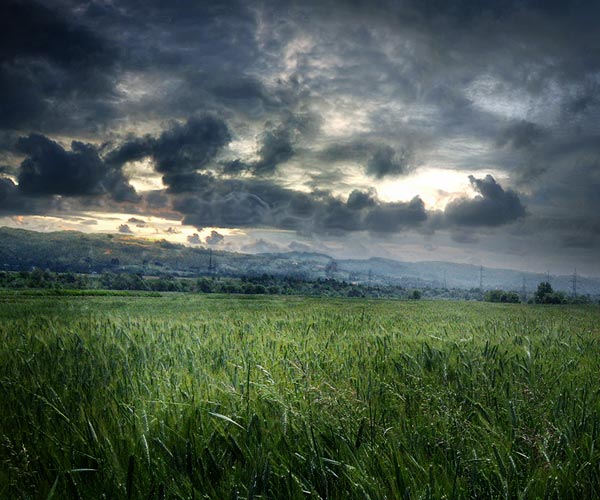
Results:
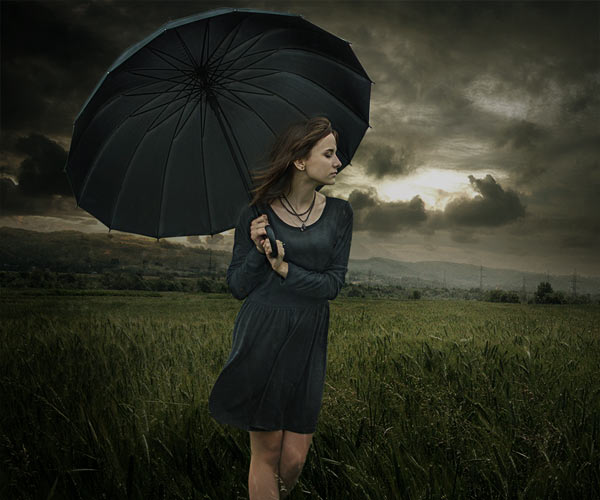
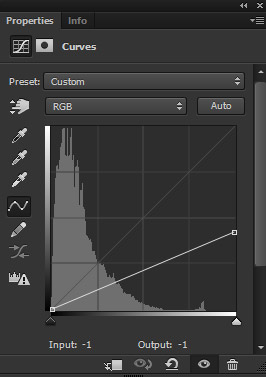
Step 7
Too much brightness on the scene and I don’t want that. Make a Curves adjustment layer again and this time reduce the brightness using RGB channel.
On the layer mask of this, I erased the effect to the right and maintained light there. Use a soft round black brush to mask the effect on the highlighted red area.
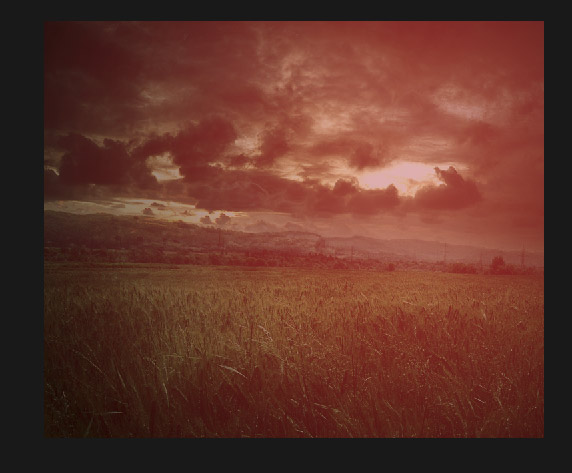
Results with darkness:
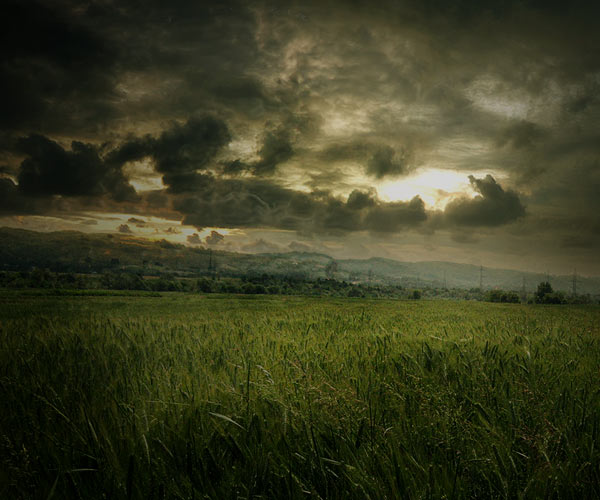
Step 8
Create a Hue/Saturation adjustment layer and decrease the saturation little bit. Bring down the Saturation slider to -41.
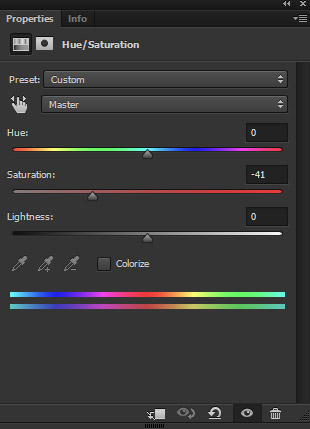
Results:
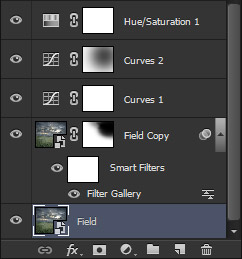
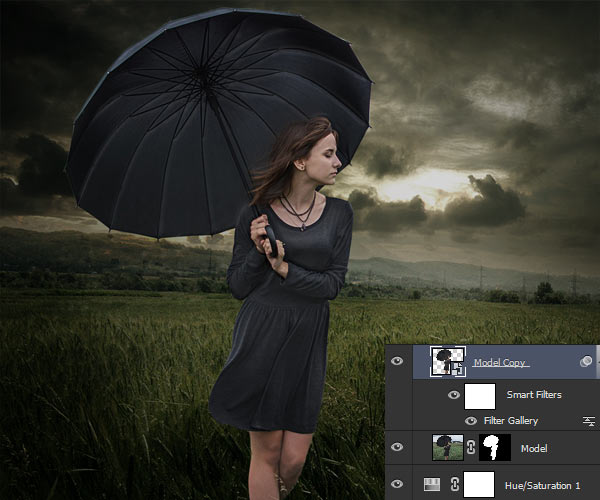
Layer Panel Arranged:
Add the Model
Step 9
Extract the model from background and place her to main document.
Step 10
To create a wet and soaked effect on the model, we are going to apply the same filter to the model as we applied for the field. Duplicate the model layer and then apply the Plastic Wrap filter but this time I changed the settings.
I reduced the opacity of the model layer to 43%.
Here you can see the results on model:
Add the Rain Texture 1
Step 11
Place the rain texture to main document and clip it to model.
Step 12
Add a mask to this rain texture and mask the part on the umbrella. Use a soft black brush and mask the highlighted part of the rain texture.
Change the blending mode of the rain texture 1 to Soft Light.

Step 13
Select all the model’s layers and make group of them by pressing CTRL + G. Now change the blend mode of this group to Normal from Pass Through.
Now make a Curves adjustment layer inside the group, use the settings below to match the color of the model with the background.
Results:
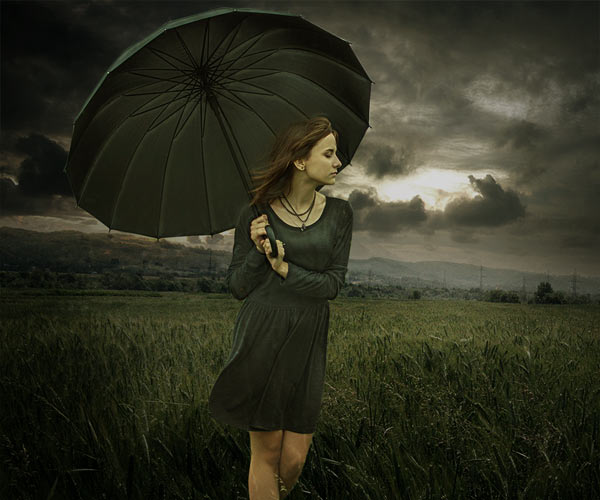
Step 14
Continue coloring the model using Color Balance adjustment layer and only alter the Midtones and Highlights settings.
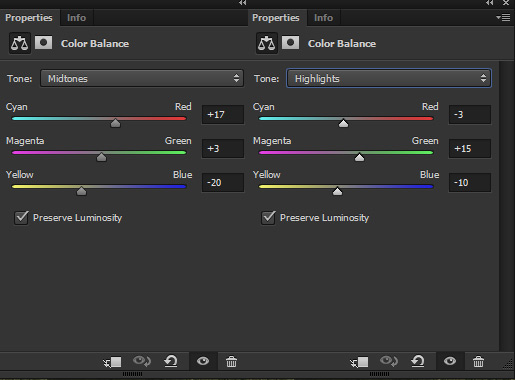
Results:
Step 15
Make a Curves adjustment layer and reduce the brightness of model as she looks too bright at the moment.
On the layer mask of this, erase the effect on the right and keep that part brighten. Use a soft-medium black brush for masking and you can mask the effect on the highlighted red area.
Results after masking the effect:

Layer panel arranged so far:

Add the Rain Texture 2
Step 16
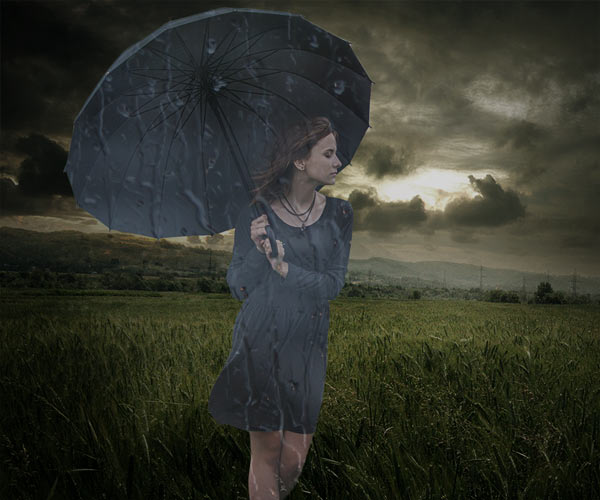
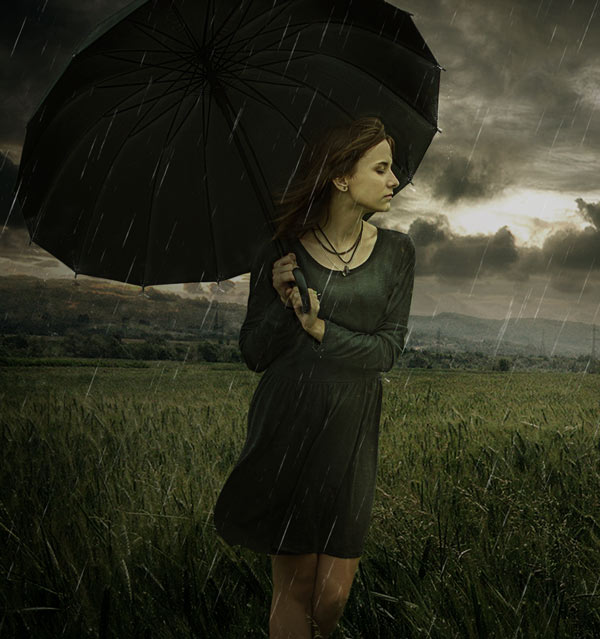
Place the rain texture to main document and change the blending mode to Screen. Also, I rotated the texture to left to change the rain direction from right to left. You can rotate texture to right or may be keep it straight. Here you can see the rain effect:
Step 17
Make a Levels adjustment layer for rain texture 2 and set it as Clipping Mask (press the red icon).
Now drag the black slider to right and reduce the visibility of falling rain drops. The more you drag the black slider to right the less visible the rain drops.
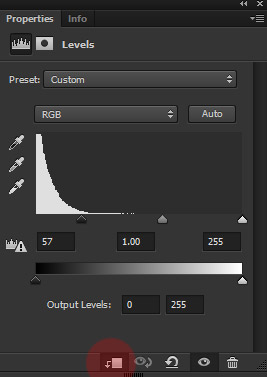
Results:
Add the Water Splash 1 and 2
Step 18
Using water splash 1 and splash 2 image I created rain drop around the model. I used many layers and changed each layer blend mode to Screen. I’m not going to share how I created all the effect because I already shared this techniques in my shooter tutorial.
Step 19
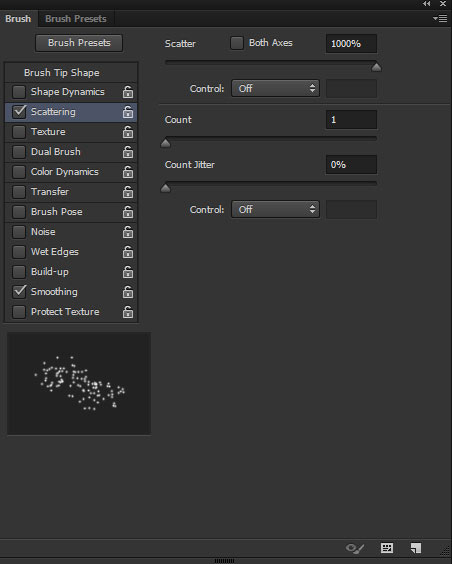
Now we’ll make the rain drops hitting model and umbrella by painting rain drops. To do this, create a new layer and name it ‘painted drops’. Pick up the default hard round brush and press F5 to bring the brush presets panel. Now change the Scattering settings as shown below.
Using 1 pixel white brush with opacity and flow around 30%, I painted some more water drops like on the hand, around the shoulder and on the top of the umbrella.
Final Adjustments
Step 20
Create a Color Lookup adjustment layer on top of all layer and increase the contrast using Bleach Bypass file.
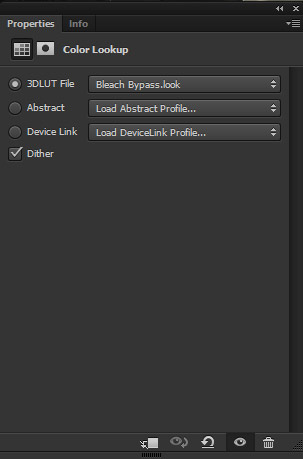
Lower the opacity to 42% and subtle the effect of Color Lookup.
Step 21
Create a new layer and name it ‘light’. Set the foreground color to #4E5137 and make a big brush stroke using soft round brush. You can see where I applied the brush stroke.
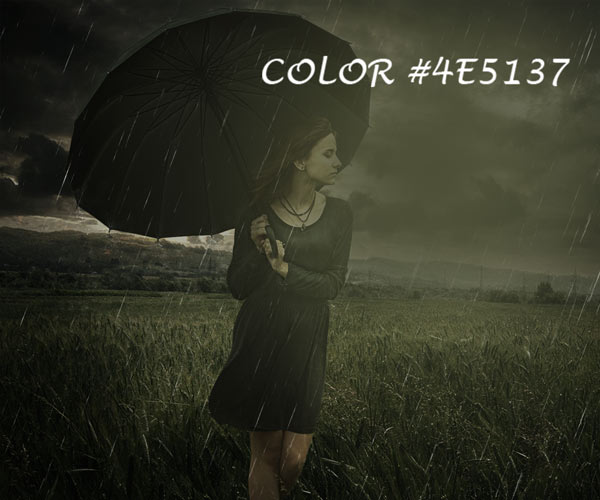
Change the blend mode to Color Dodge and lower the opacity to 46%.

Step 22
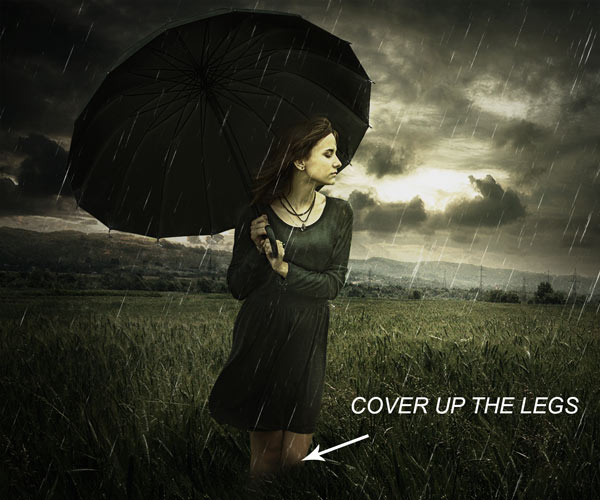
Press ALT + CTRL + SHIFT + E to merge all layers into singe the layers. Use the Clone Stamp (S) tool to cover up the model legs inside the grass. See how I did it.
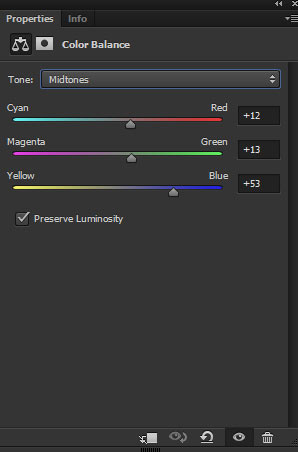
Step 23
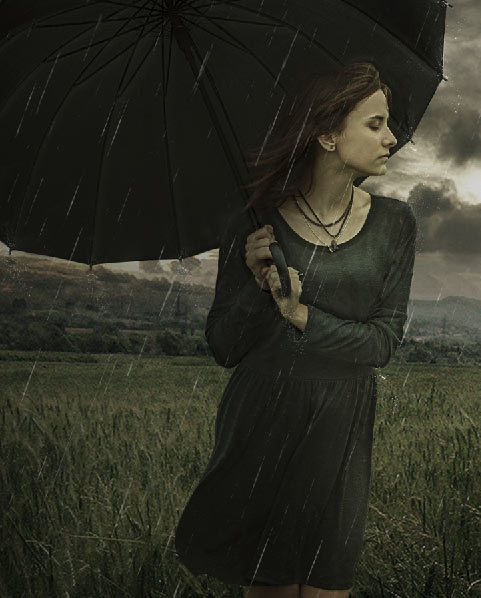
Finally, I changed the color of whole scene using Color Balance adjustment as I changed the mind about colors. Only change the Midtones values :
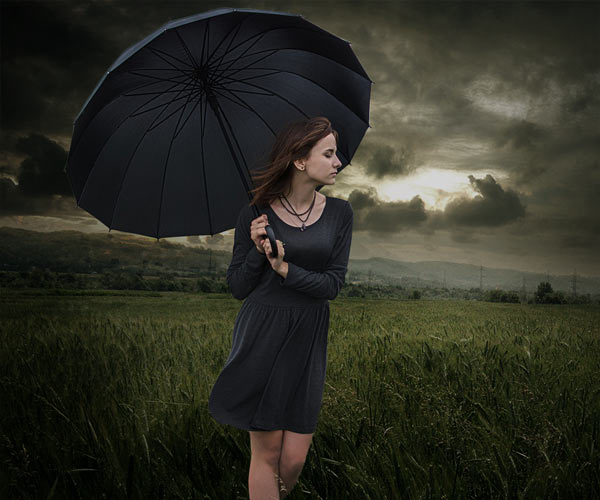
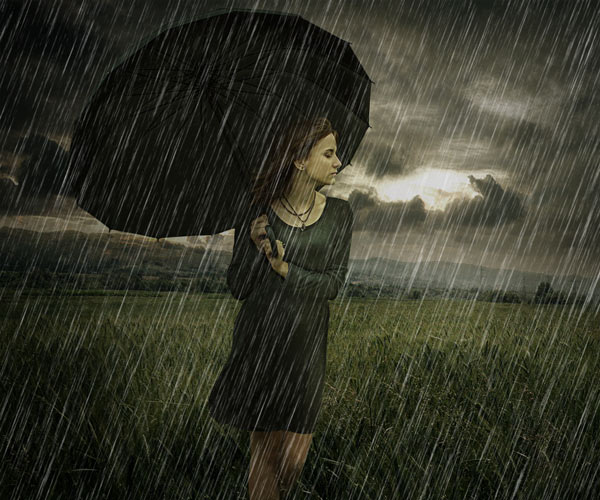
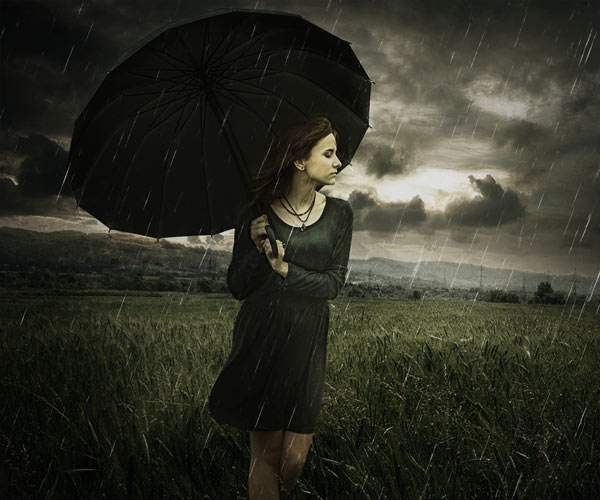
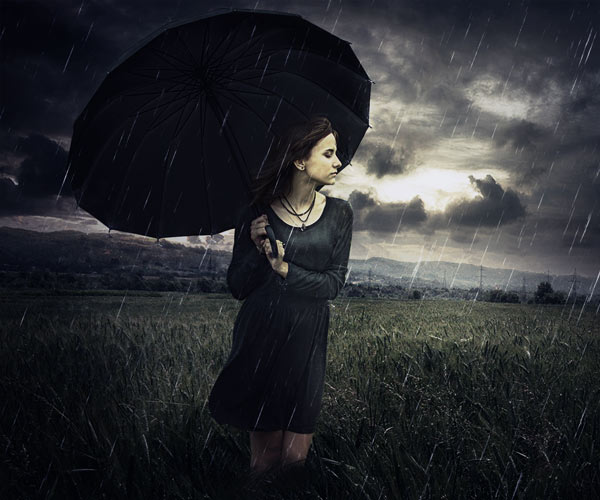
Final Results:
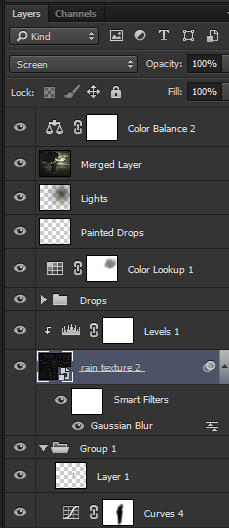
Layer panel arranged:
Conclusion
Thanks for following and I hope you enjoyed the tutorial. If you have any question then do let me know and if you really like the tutorial then do share it with the world. Have a great day!
Need Help With Photoshop or Looking for Professional Support?
Whether you're just getting started with Photoshop or need expert-level assistance, we're here to help! Contact us for personalized Photoshop tutorials, project support, or creative services.
Get in touch today to take your skills or projects to the next level.
CONTACT US NOW📘 Want to Master Photoshop Faster?
🎁 Get Your FREE PDF E-Book "Top 10 Photoshop Tricks Every Designer Must Know" Now – Packed with expert tips, shortcuts, and techniques to boost your creativity & workflow.
👉 Download Your FREE PDF E-Book NOW!
