
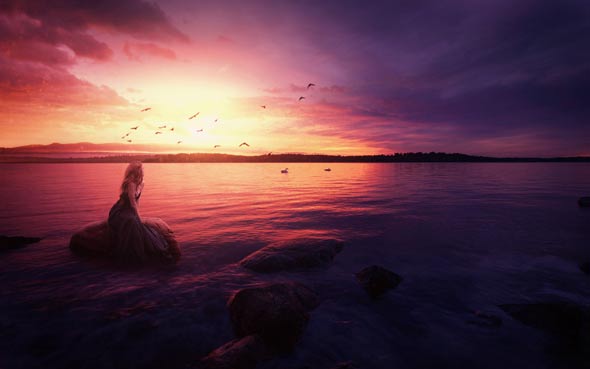

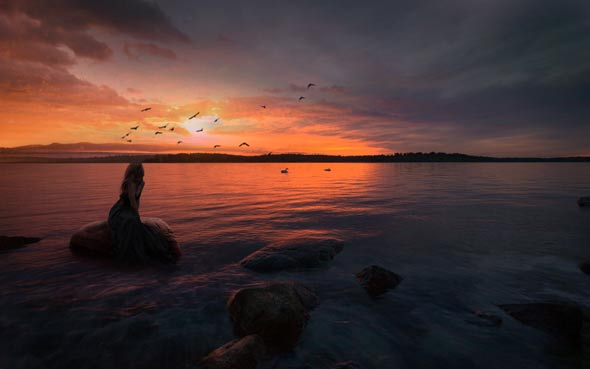
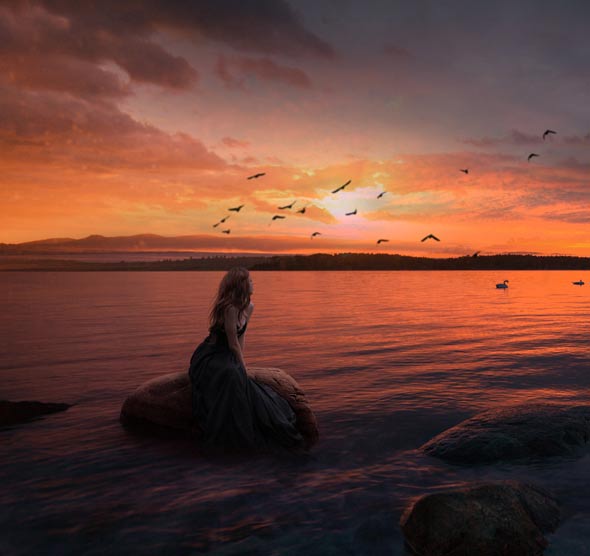
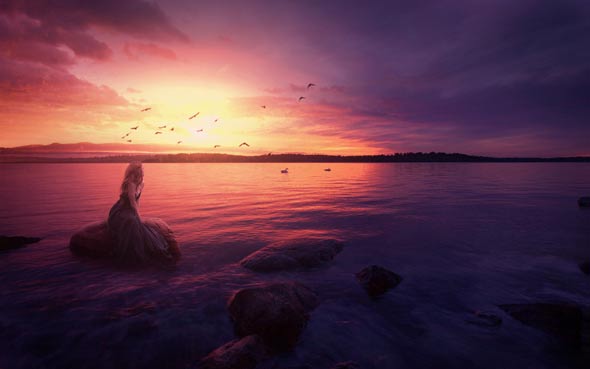
Learn how to create a fantasy, emotional dreamy lake scene with Adobe Photoshop. In this tutorial I’ll show you how to create a beautiful and colorful photo manipulation of the dreamy lake. You’ll also learn how to manage colors to achieve great results and during this tutorial, you’ll learn how to work with a layer mask, adjustments layer, and tools to achieve a perfect composition. Moreover, I’ve two colors variants for this tutorial and you’ll get to know about it at the end of the tutorial.
Tutorial Resources
Preparing the Background
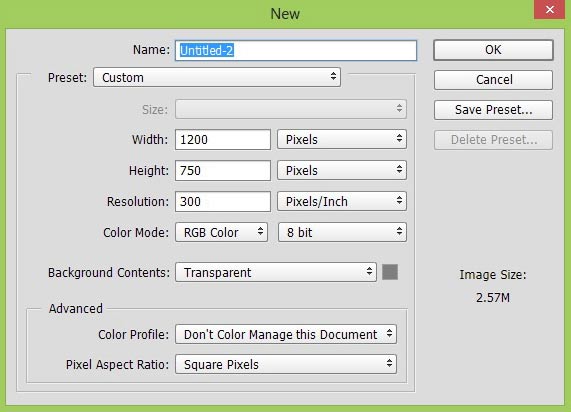
Create a new document in Photoshop by selecting File > New . Use the following settings or feel free to choose your own.
Adding Lake
Step 2
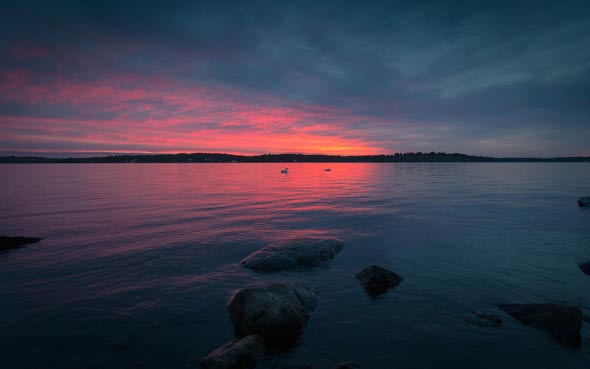
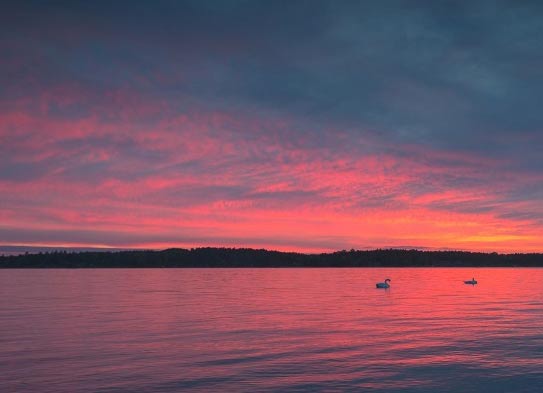
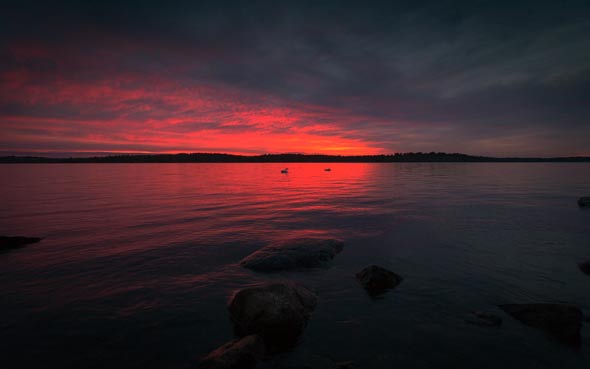
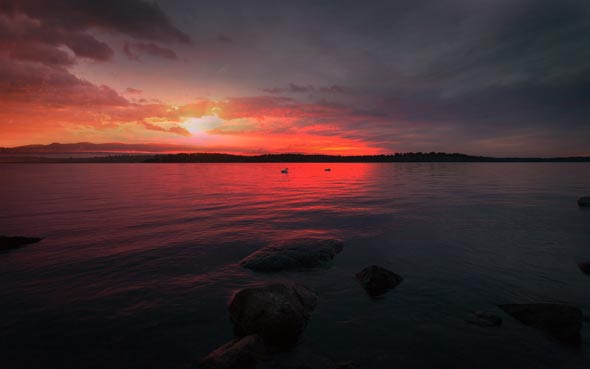
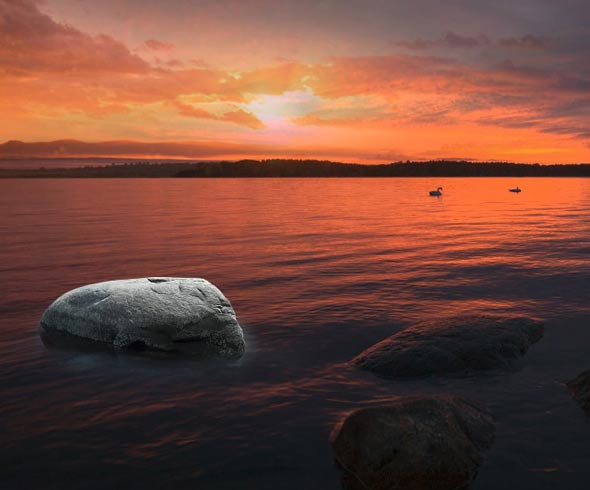
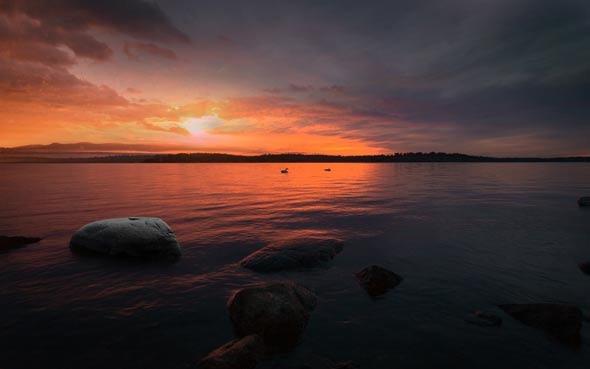
Open the lake image in Photoshop. Drag it into our main canvas using Move Tool (V). If needed enlarge it using Transform Tool (CTRL + T), so it can cover the entire document.
Step 3
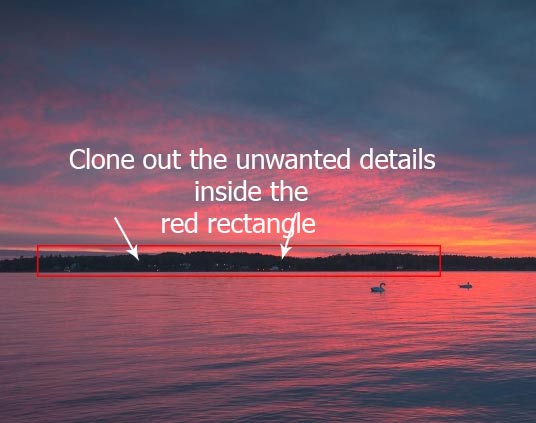
If you zoom into lake, you may notice that there are a lot of unwanted details (indicated by arrows) like houses. Since we are creating a dreamy scene then we should clean up these details. We will use Clone Stamp Tool (S) to remove all these details. Create a new layer and clip it to lake layer (hover your mouse between Lake and newly created layer and then click on them). Activate the Clone Stamp Tool (S) and now start cloning these details. Remember you need to take the source from original layer and then clone it in the newly created layer.
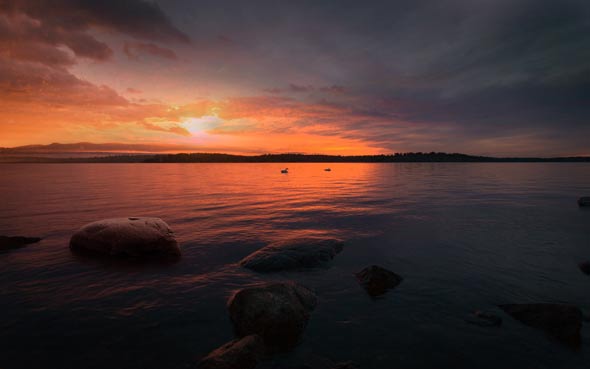
Results after cloning :
Step 4
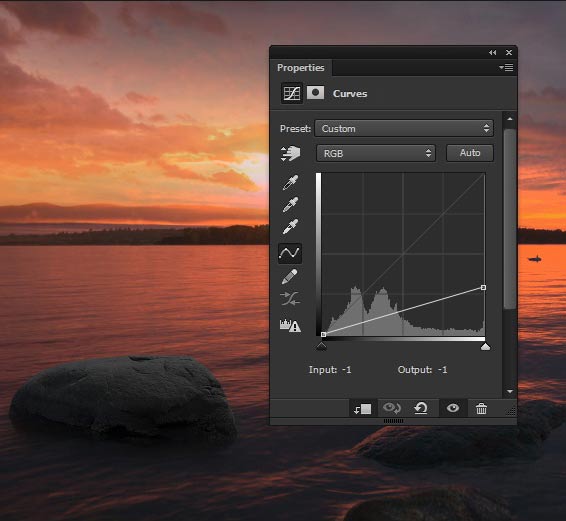
Make a Curves (Layer > New Adjustment Layer > Curves or click the third button at bottom of layer panel) adjustment layer to lake. Now reduce the brightness of lake using Curves. Here the settings for Curves :
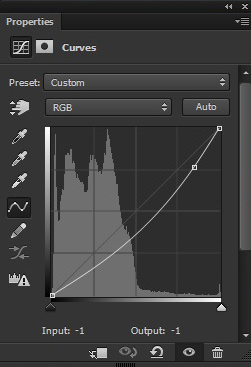
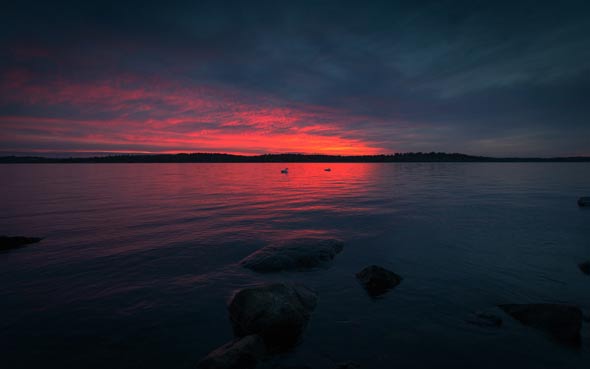
Results with reduced brightness on highlights of lake :
Step 5
Make a Color Balance adjustment layer for lake to add some colors to it. I am aiming to add Yellow and Magenta color tones. Here the values only for Midtones and Highlights.
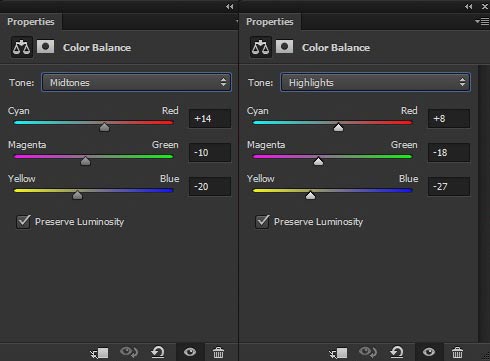
Results :
Adding Sky to Fantasy scene
Step 6
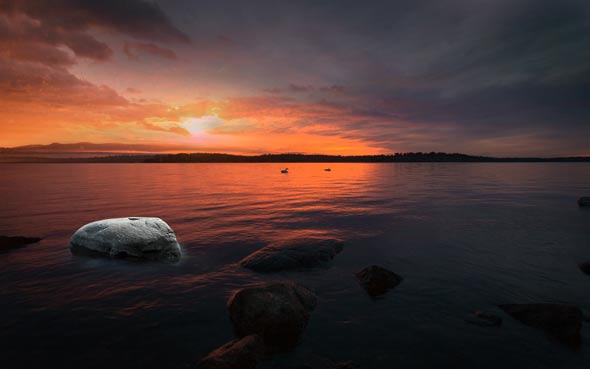
Place the sky image to main document by selecting File > Place Embedded or Place . The aim is to add clouds to scene as the lake sky doesn’t seems to fit for dreamy scene.
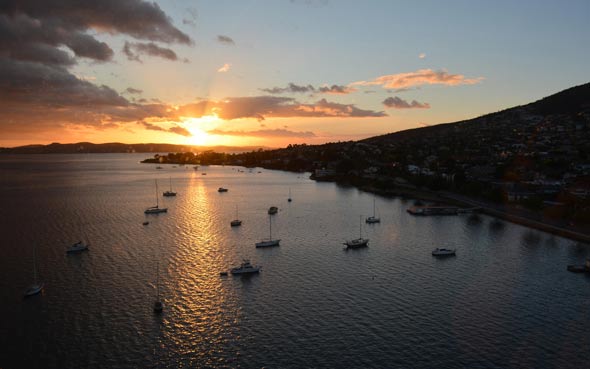
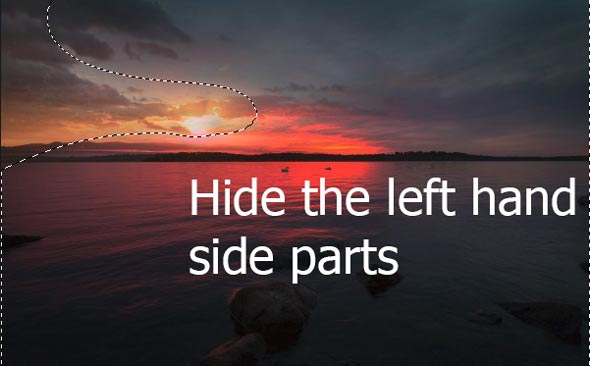
Add a Layer Mask (Layer > Layer Mask > Reveal All or click the second button at bottom of layer panel) to sky layer. Activate the Brush Tool (B). Set its opacity and flow about 30%. Now start masking the selected right side part of clouds using a soft round black brush. You can also vary the brush size and opacity during masking process for better results.
Step 7
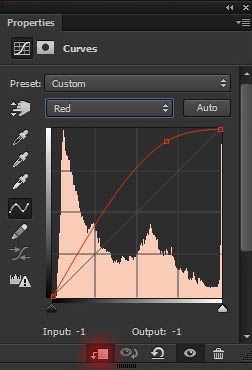
Now our task is to match colors of sky as its color not matching with the rest. To do this, make a Curves adjustment layer to sky as Clipping Mask (click the red icon for clipping mask). Select the Red Channel to add red color tones to it.
Results :
Step 8
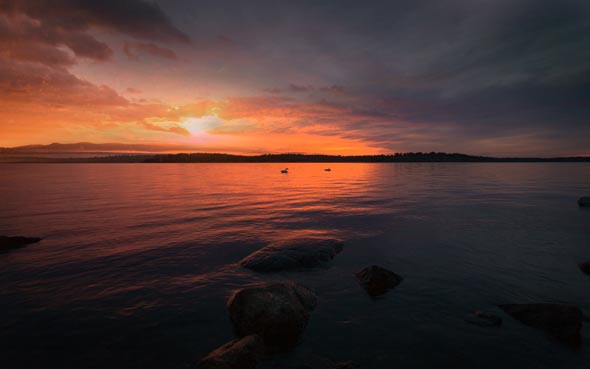
Make a Selective Color adjustment layer above all layers (don’t clip to any layer). Select the Red Color from color list and use the following settings to turn the red color into yellow.
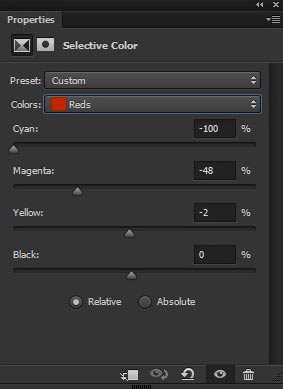
Reduce the opacity of Selective Color to 80%. Results :
Adding Rock
Step 9
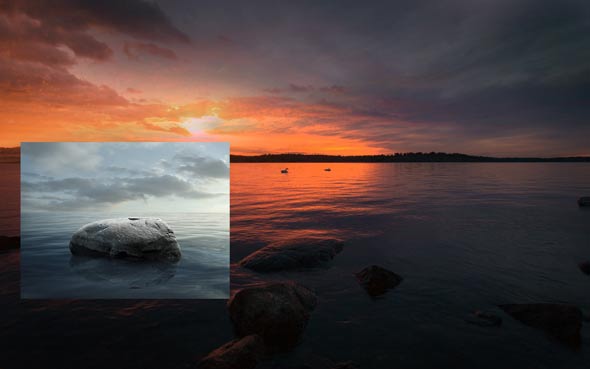
Add the rock to our main document and place it as shown below.
Step 10
Use the Selections Tools to make the selection of rock and to get rid from its background. Only make the selection of upper parts and for lower parts, mask it smoothly using a soft round black brush.
Results :
Step 11
Reduce the brightness of rock using Curves adjustment layer as it looks too bright at the moment.
Step 12
On the layer mask of Curves, hide the effect of Curves on the front parts of rock as these parts will be reflected by the light source. Use a soft round black brush for masking. See the image below for reference.
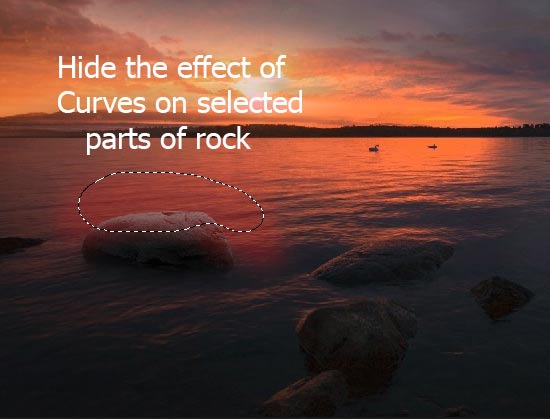
Results with maintained lights on rock front parts :
Step 13
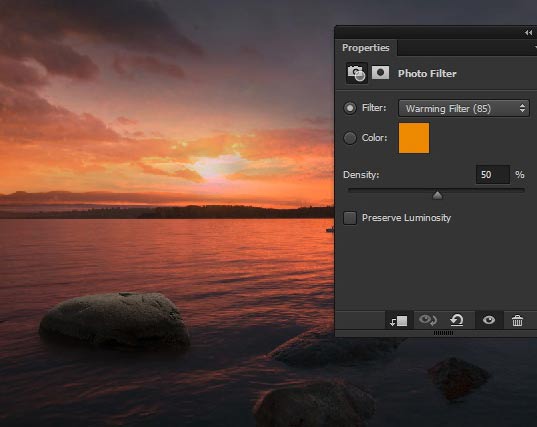
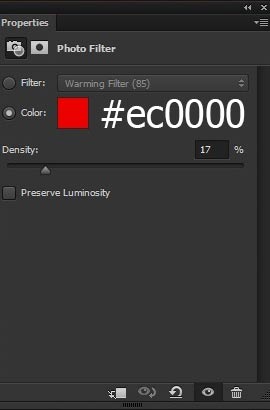
Add a Photo Filter adjustment layer to rock. Use Warming Filter (85) with density of 50%.
Step 14
Continue coloring the rock layer using Color Balance adjustment layer.
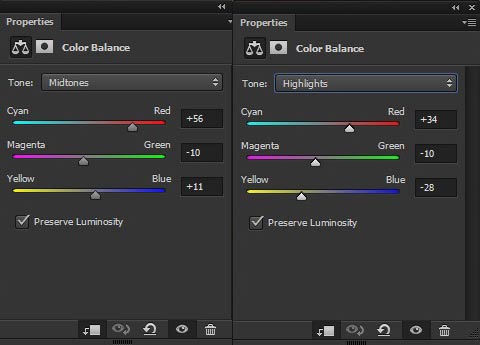
Reduce the opacity of Color Balance to 49%. Results :
Adding Water Waves
Step 15
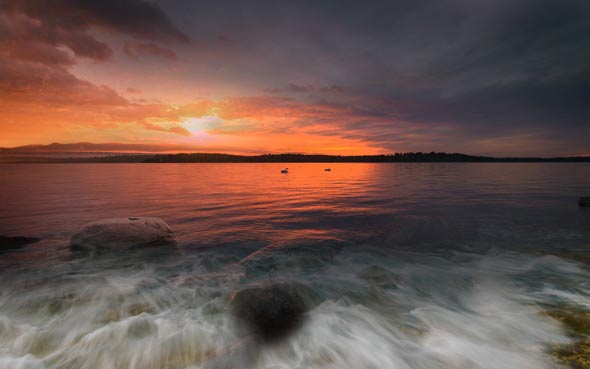
Add the beach image to the main document as shown below. We are using this image to add water waves to the scene.

Add a Layer Mask to beach layer. Mask its upper parts as we only need the water waves. Use a soft round black brush for masking.
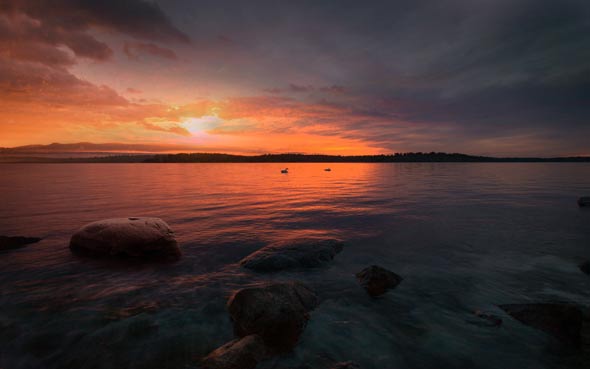
Step 16
Now change the blend mode of beach layer to Soft Light and reduce its opacity to 80%.
Step 17
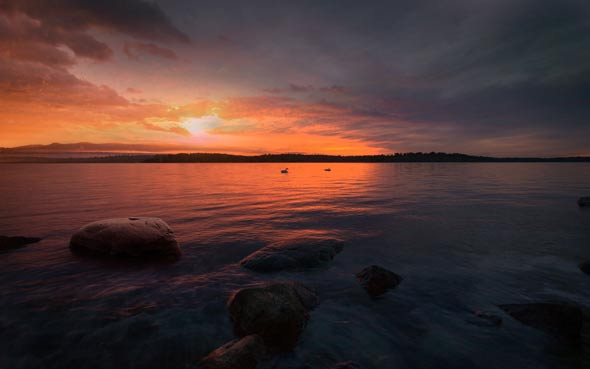
Time to make some adjustments to waves layer. Add a Curves adjustment layer to waves. Choose Blue Channel to add some blue colors to water waves and also, reduce its brightness little bit.
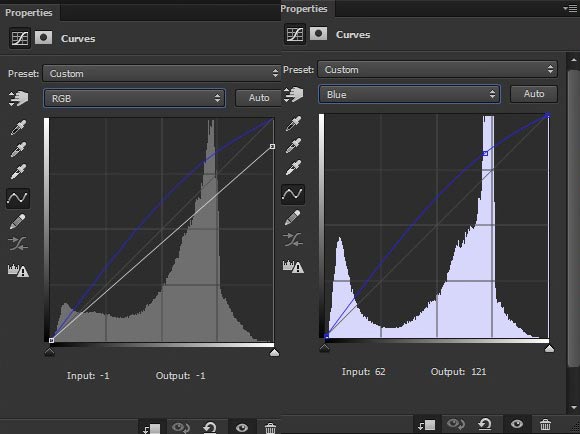
Results :
Step 18
Create a new layer and paint some birds using birds brushes.

Adding Model
Step 19
Extract the model from its background using Selection Tools. Place her above the rock.
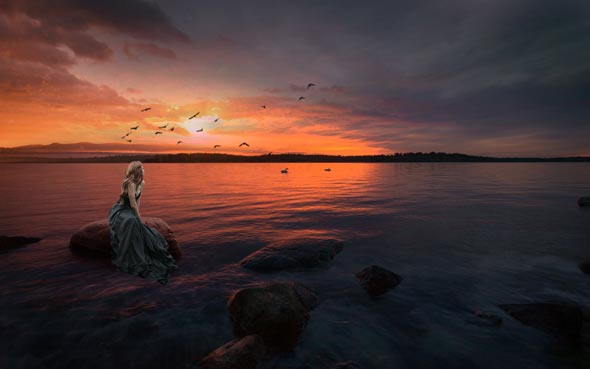
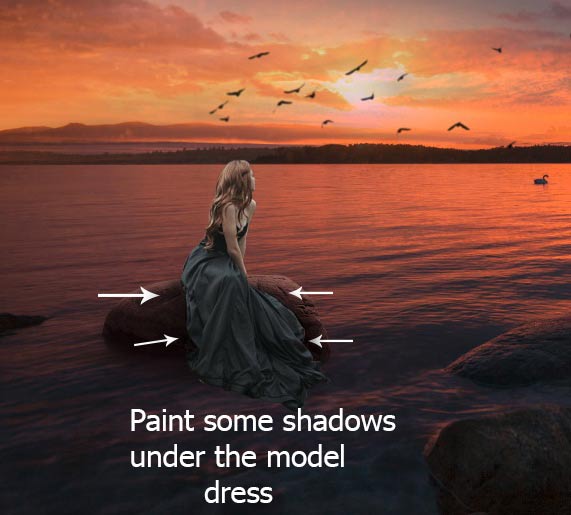
Step 20
Create a new layer under the model and name it ‘contact shadow’. Use a soft round black brush to paint some shadow under the model dress. See the image below for reference.
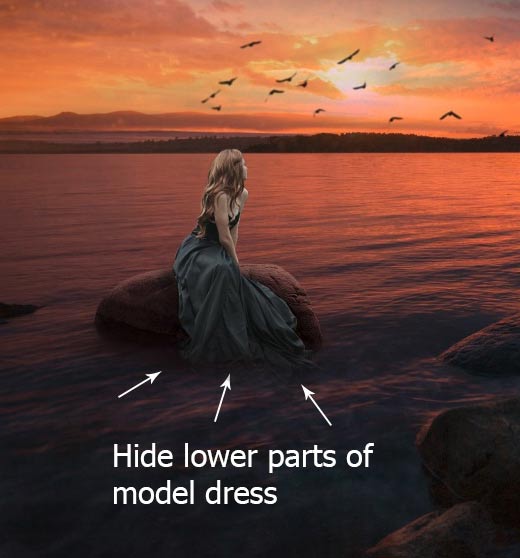
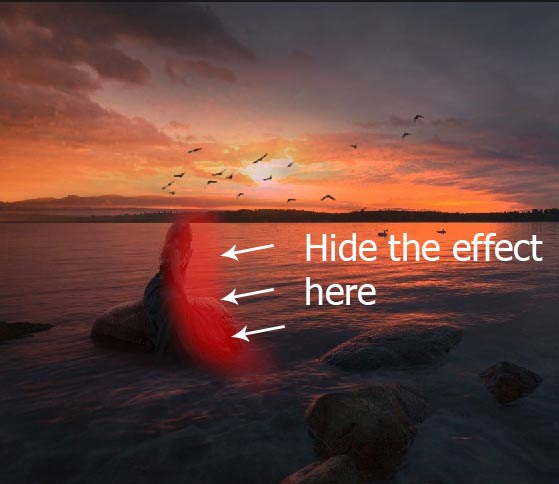
Step 21
You may notice that model lower dress parts are still not blended with the scene. On the layer mask of the model, hide her lower dress parts so it looks like they are inside the water waves.
Step 22
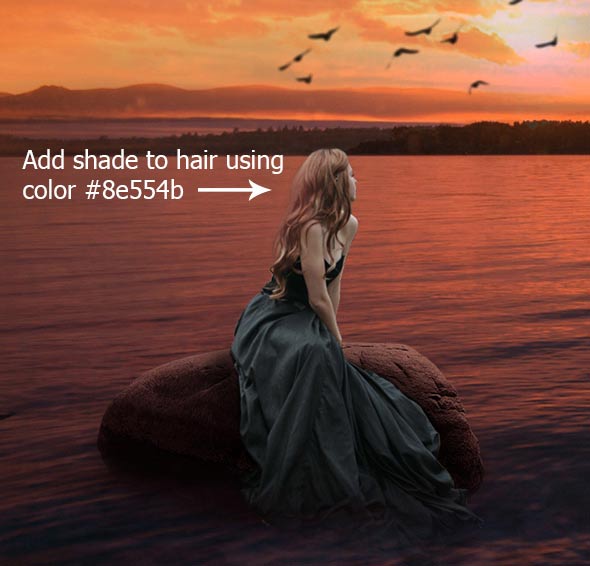
Activate the Smudge Tool. Then paint some little hair strands using Smudge Tool as shown below. You can visit to Smudge Tool tutorial for detail explanations on this tool and how you can use it for painting hairs.
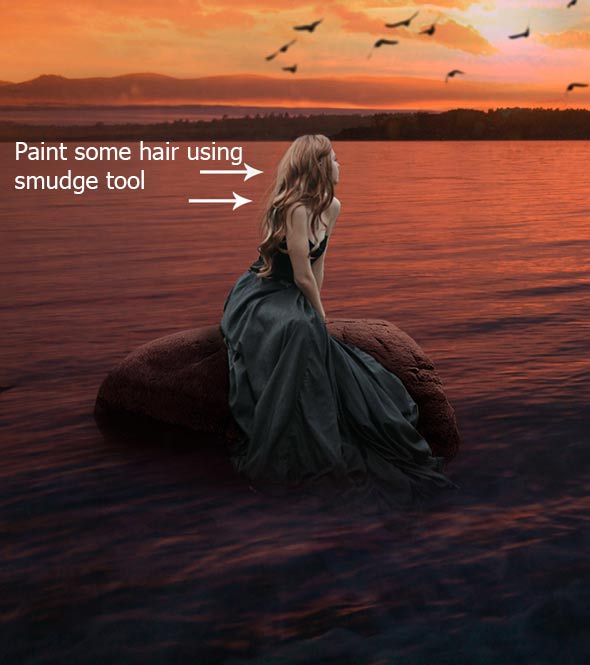
Create a new layer and name it ‘hair’. Clip the hair layer to model layer. Change your foreground color to #8e554b. On the hair layer, using a soft round brush, add some shade to model hair as shown below.
Step 23
Make a Curves adjustment layer to model and reduce its brightness.

Step 24
Continue coloring it using Color Balance adjustment layer. Use it with following settings :
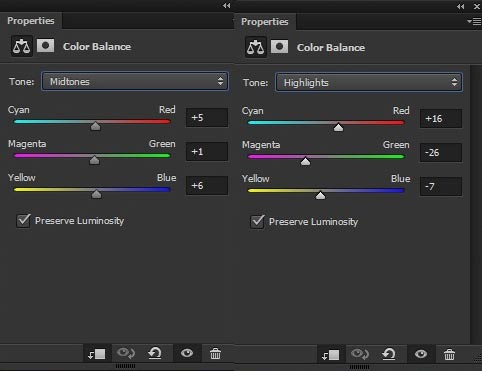
Results :
Step 25
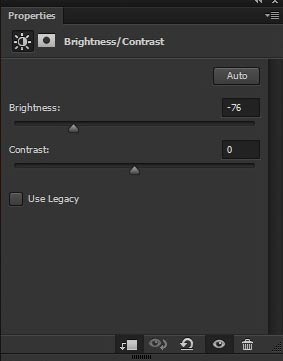
Use a Brightness/Contrast to reduce its brightness.
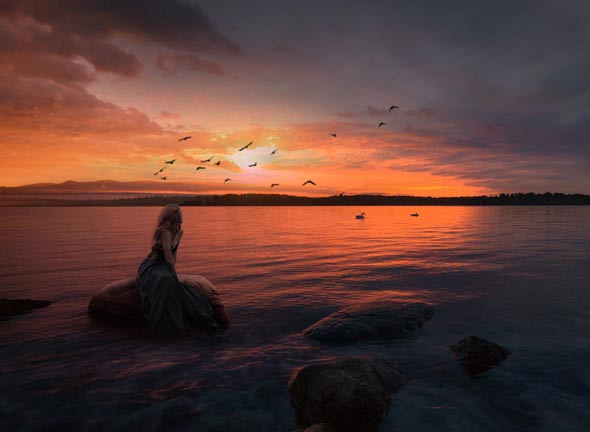
Results :
Step 26
On the layer mask of Brightness/Contrast , hide the effect on the model front parts to maintain some lights there.
Results :

Step 27
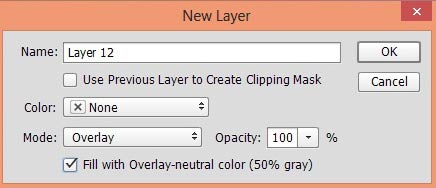
Create a new layer and fill it with neutral 50% gray color. Select Layer > New > Layer and then use the following settings :
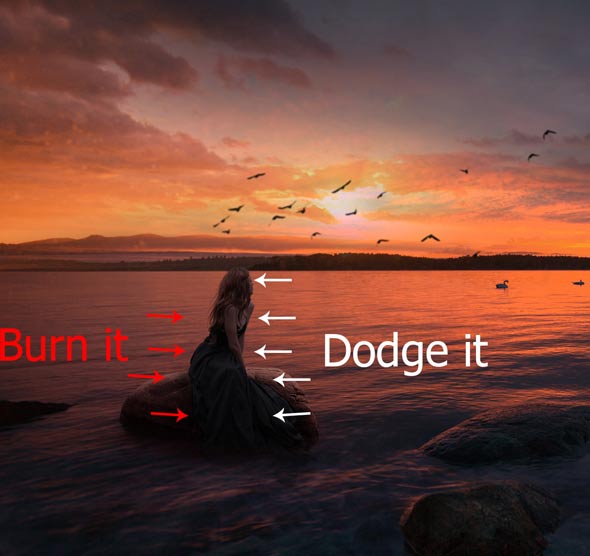
Use the Dodge and Burn Tool (O) with Midtones Range (set it on the option bar), Exposure about 9%-10% to refine the light and shade of model. See the image below for instruction.
Results :
Creating Light Source
Step 28
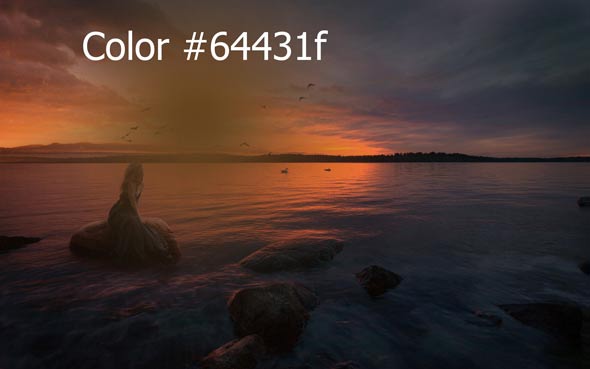
Create a new layer and name it ‘Light Source’. Change your foreground color to #64431f. Use a soft round brush with opacity and flow about 100%, and paint a brush stroke to create a light source as shown below.
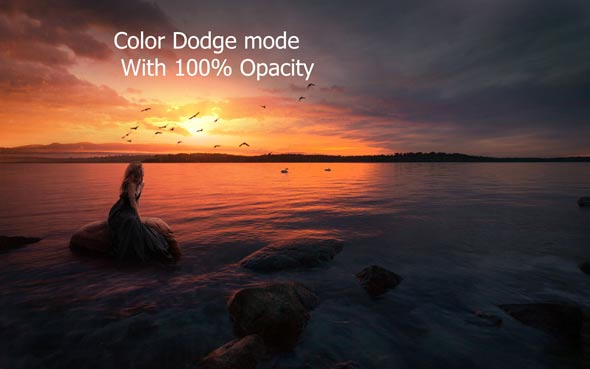
Change the blend mode of light source layer to Color Dodge and we’ve beautiful glowing light effects.
Step 29
Stronger the effect of light source by duplicating the light source layer. Press CTRL + J to duplicate the layer. This time change the blend mode to Linear Dodge.

Step 30
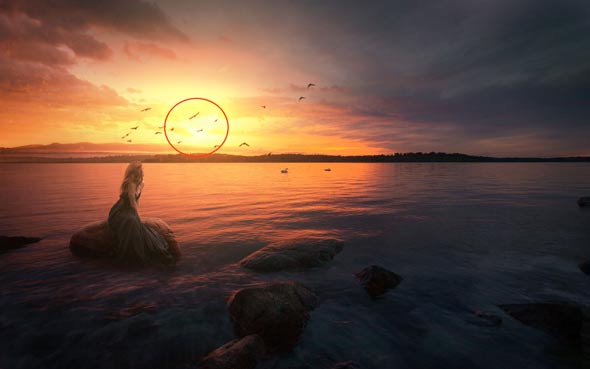
You may notice a freaky and white shiny dot of light inside the red circle. I really hate this kind of lights and in this case, this is because of sky layer. To get rid of this part of sky layer, select the layer mask of the sky and hide the area of it inside the red circle. You need to vary the brush opacity during masking.

You can notice that I hided it subtly and here are the results :
Final Adjustments
Step 31
It’s time for final adjustments. Add a Photo Filter adjustment layer to above all layers. Use it with following settings :
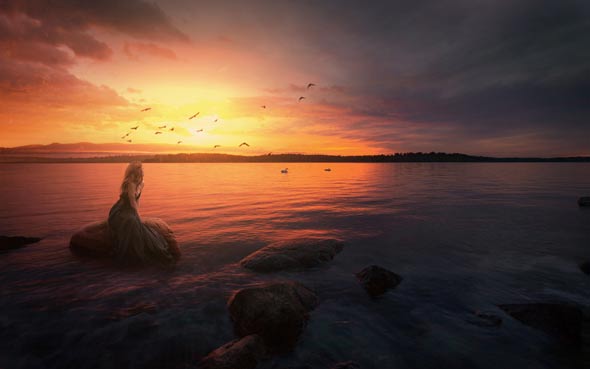
Results :
Step 32
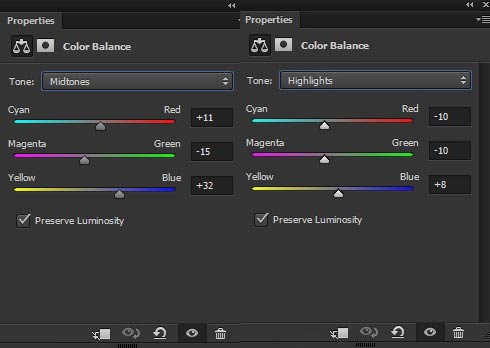
Make a Color Balance adjustment layer to add some dreamy colors to it.
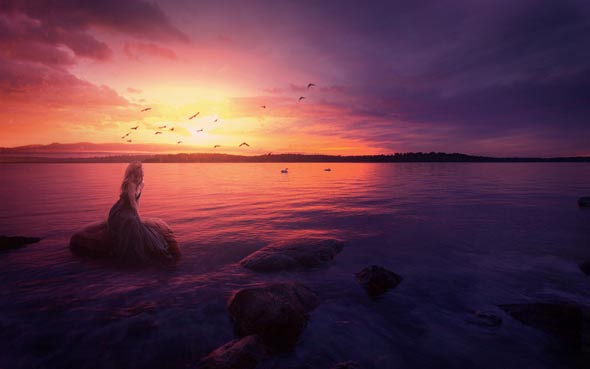
Results :
Step 33
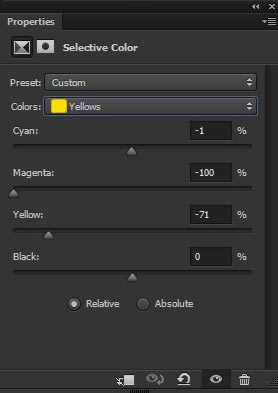
You may notice that yellow color on the scene looks dull and dark at the moment. I want to make the yellow color lighter and shiny. To make yellow lighter, I’ll use Selective Color adjustment layer with following settings.
Results :
Step 34
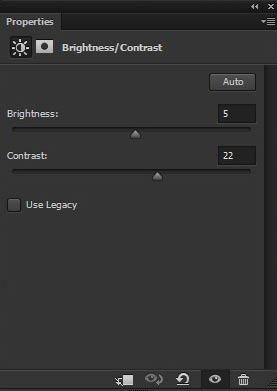
Add a Brightness/Contrast adjustment layer to increase the contrast and brightness of whole scene.
Results :

Step 35
Finally, make a Color Lookup adjustment layer for second color variants of this tutorial.
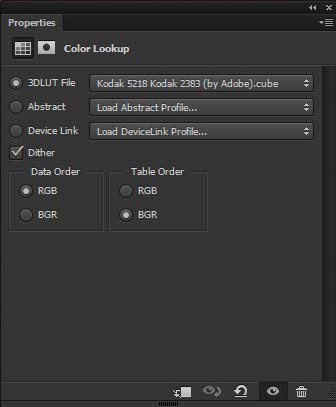
Reduce the opacity of Color Lookup to 39%.

But I didn’t got the second version. Just hide the Color Balance of final adjustment and you’ll have the second version as shown below :
Conclusion
Thanks for following the tutorial. I hope you’ve learned something new today. If you have any questions regarding the tutorial then let me know through comments. I’ll be happy to answer your queries.
Need Help With Photoshop or Looking for Professional Support?
Whether you're just getting started with Photoshop or need expert-level assistance, we're here to help! Contact us for personalized Photoshop tutorials, project support, or creative services.
Get in touch today to take your skills or projects to the next level.
CONTACT US NOW📘 Want to Master Photoshop Faster?
🎁 Get Your FREE PDF E-Book "Top 10 Photoshop Tricks Every Designer Must Know" Now – Packed with expert tips, shortcuts, and techniques to boost your creativity & workflow.
👉 Download Your FREE PDF E-Book NOW!

