
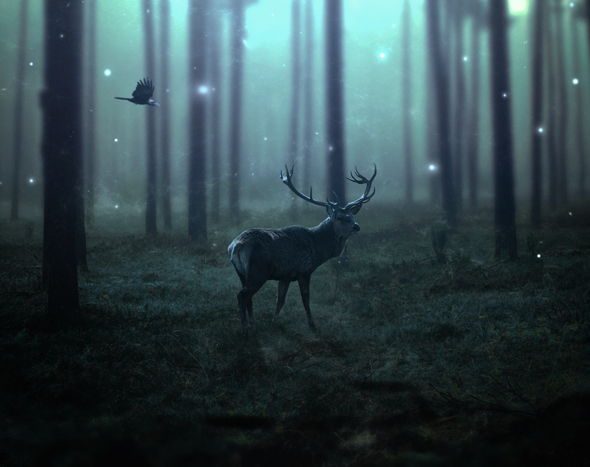

Learn how to create a dark, emotional deer photo manipulation in Photoshop. In this tutorial you’ll learn how you can combine different stock images into a cohesive scene to create a magical and emotional forest scene for deer. You’ll also learn how you can practice adjustments layers, masking, creating light effects and shadows and much more.
Note: I am using Adobe Photoshop CC 2014 for this tutorial but you can use any version of Photoshop to follow this tutorial.
Tutorial Resources
Setting up the Background
Step 1
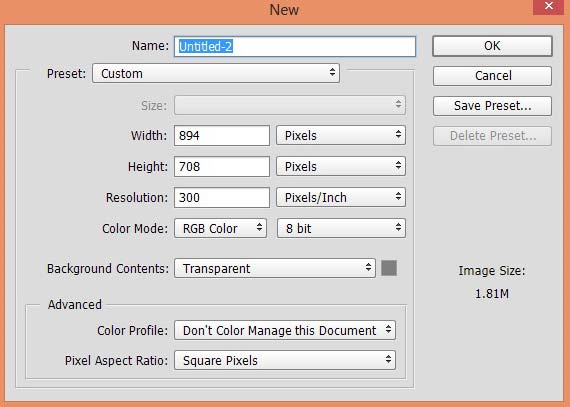
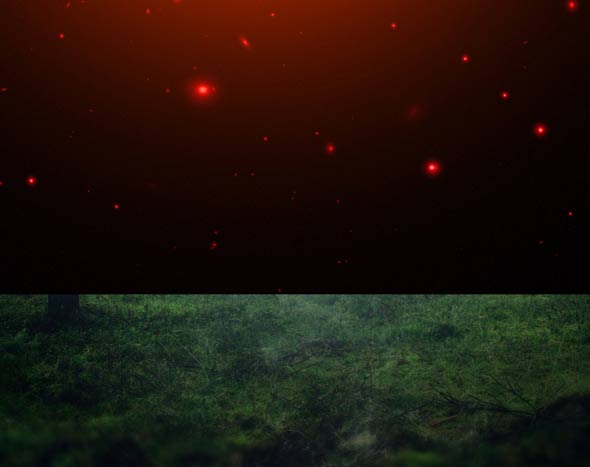
Start by creating a new document by selecting File > New and set the setting as shown in the image below.
Step 2
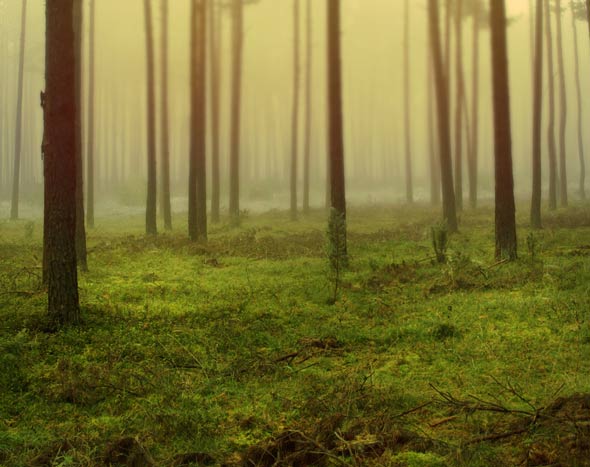
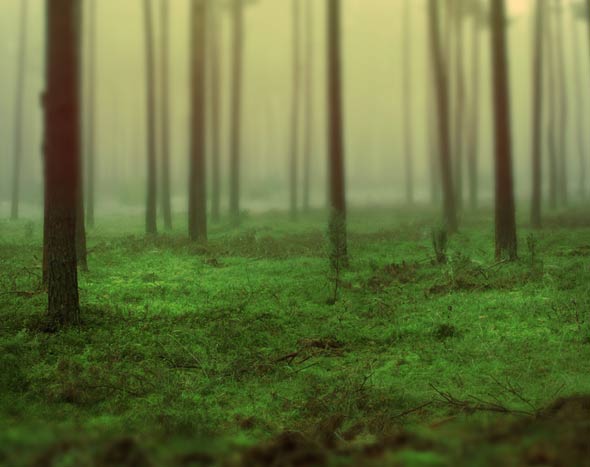
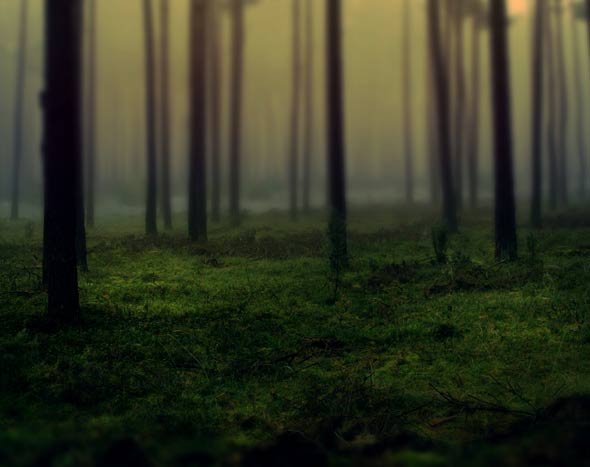
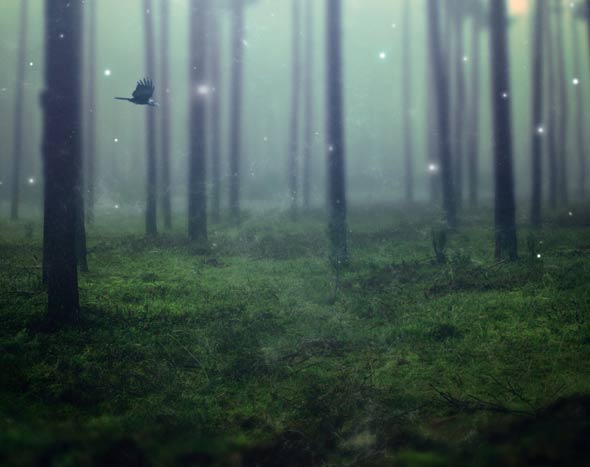
Place the forest image to the main document by selecting File > Place Embedded or Place and then place it into the main document. Also, resize it a little bit so it resembles to below image.
Step 3
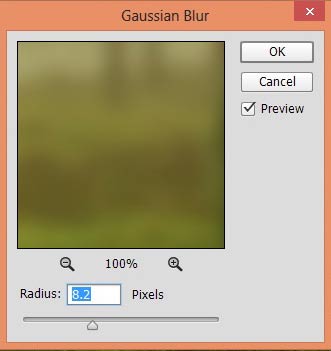
If you’ve read my Photoshop Filters tutorial then you’ll probably remember that I’ve said Gaussian Blur filter is also used to add depth to photos. We are accomplishing it right now by adding depth to forest image. To do this, convert the forest image into a smart object (right-click on it and choose to Convert to Smart Object) and then go to Filter > Blur > Gaussian Blur. Set the radius value as shown in the image below.
Step 4
Activate the Brush tool by pressing (B) on the keyboard. Choose a soft round black brush. Set it’s opacity and flow about 30% then start hiding the selected effect by painting on the layer mask of Gaussian Blur filter.
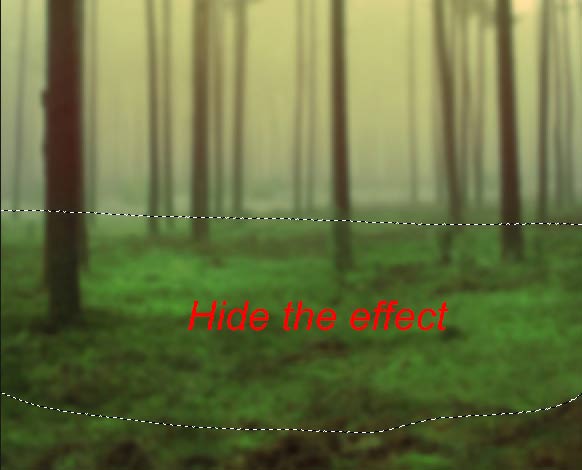
Here we’ve depth added to the scene.
Step 5
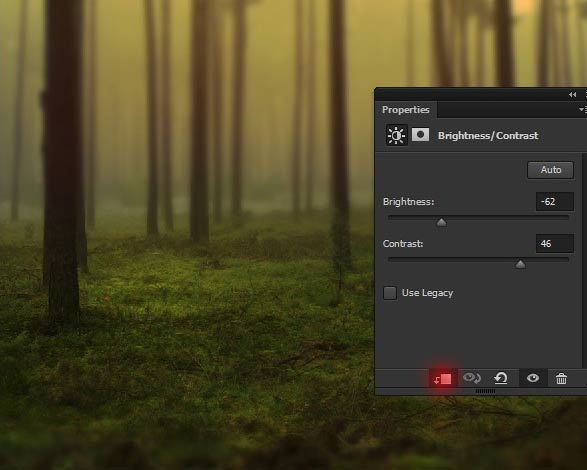
Make a Brightness/Contrast adjustment layer (Layer > New Adjustment layers > Brightness/Contrast) to forest image as clipping mask (red one) to reduce brightness of forest.
Step 6
Use a Color Balance adjustment layer to add some blue tones to the forest.
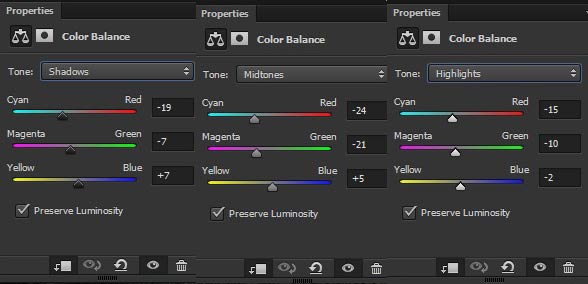
Here are the results.
Step 7
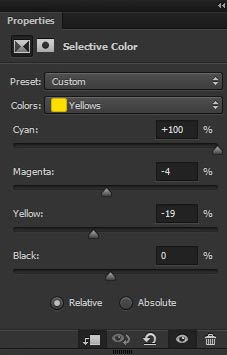
Use the Selective Color adjustment layer to reduce yellow tones from the forest.
Here are the results.

Adding the Nebula
Step 8
Add the nebula image to the scene and resize it as shown in the image below so it can cover the entire canvas.
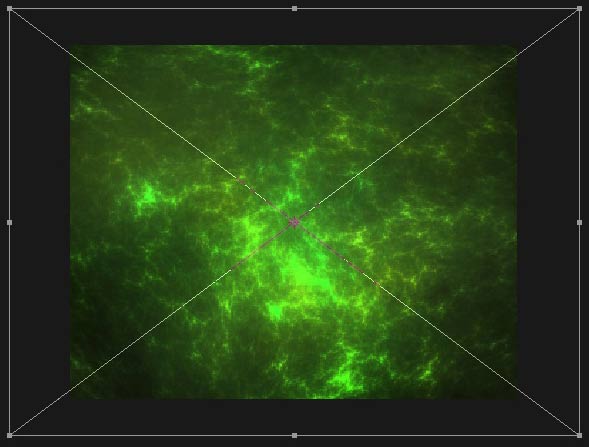
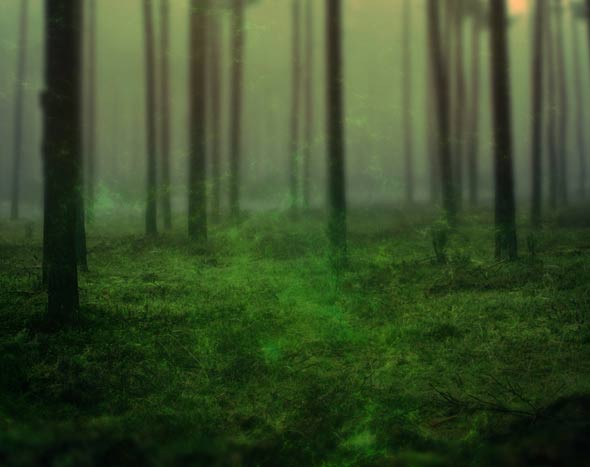
Set the blend mode of Nebula image to Screen and reduce the opacity to 33%. Here are the results and as you can see by adding the nebula image we’ve little bit magical effect added to the scene.
Step 9
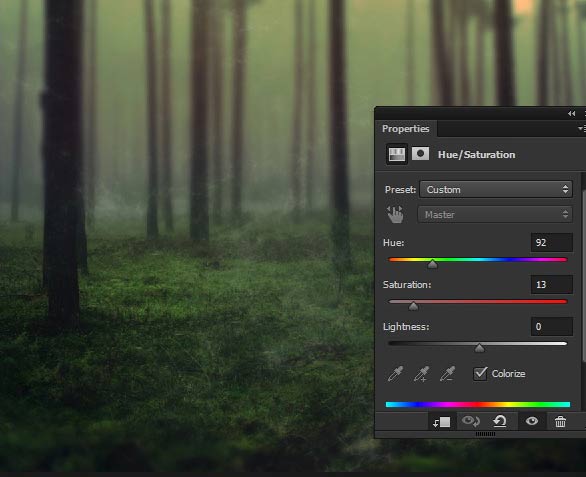
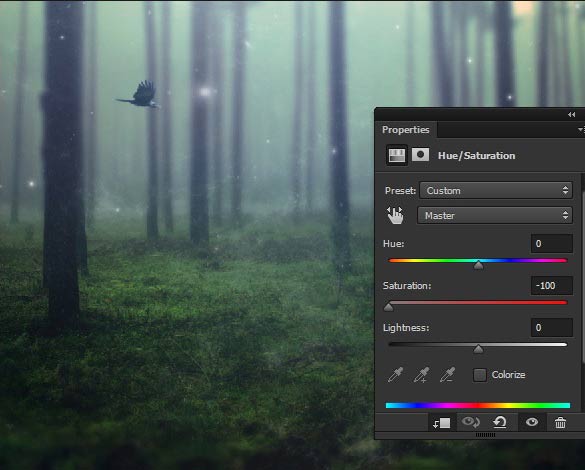
Use a Hue/Saturation adjustment layer to match the color of nebula to the rest of the background.
Step 10
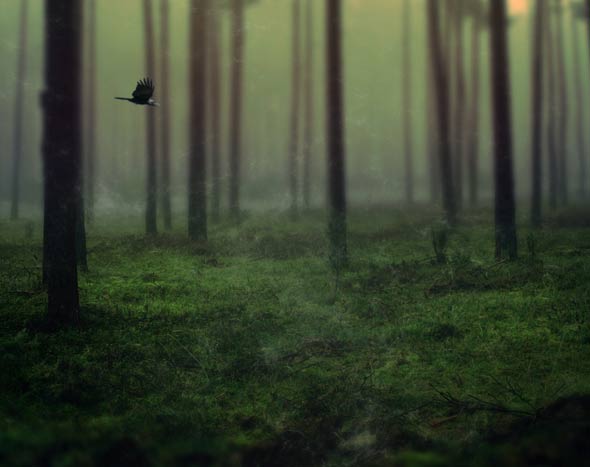
Open up the crow and raven PSD file in Photoshop. Place a raven (feel free to choose your own) to the main document and also add a Gaussian Blur filter to crow so it can blend with forest blur parts.
Creating Light Source
Step 11
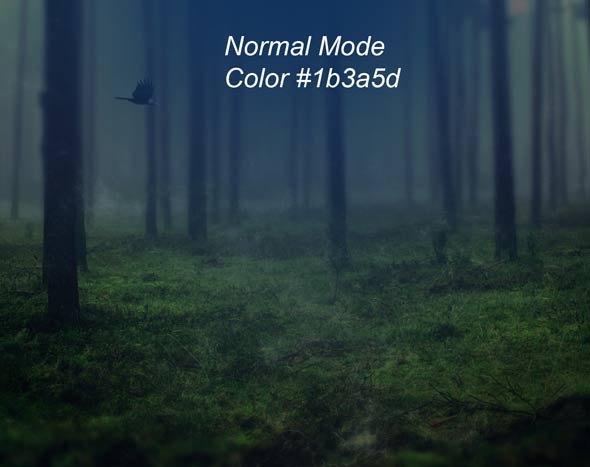
Time to create a light sources using Brush tool. Create a new layer by pressing (CTRL + SHIFT + ALT + N) on the keyboard and name it ‘Light Source’. Now activate the brush tool by pressing (B) on the keyboard and change your foreground color to #1b3a5d then make a big stroke (use half of the brush) as shown in the image below.
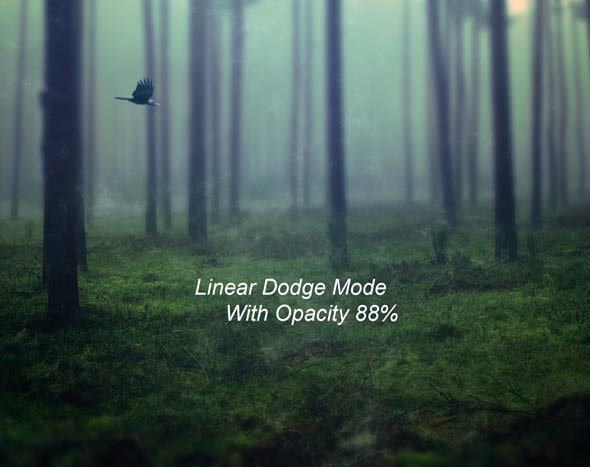
Change the blend mode of the light source to Linear Dodge and reduce the opacity to 88% (reducing the opacity depending on you as how much light you want to add).
Adding Starry Texture
Step 12
Open up the starry texture and place the starry4 image to the main document. Use the half of the texture as we only want the glowing particles not the rest of it. You can the see image below that how I placed it.
Change the blend mode of Starry4 to screen to get rid of black background.

Step 13
Match the color of Starry4 texture using a Hue/Saturation adjustments layer by reducing the saturation.
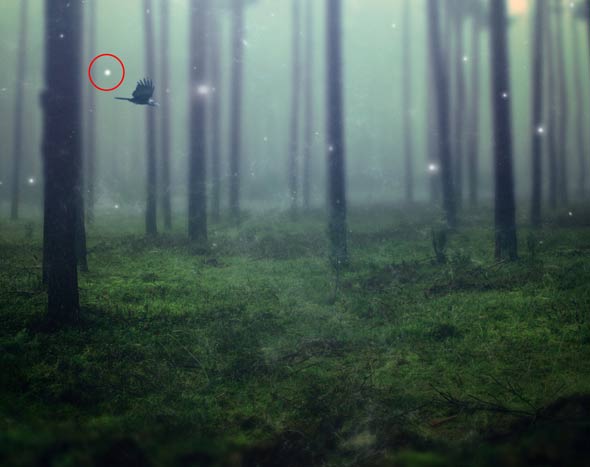
To add some more glowing particles to the scene, create a new layer and name it ‘Little Glow’. Activate the brush tool and using a soft round white brush tool paint a white small dot as indicated by red circle.
Step 14
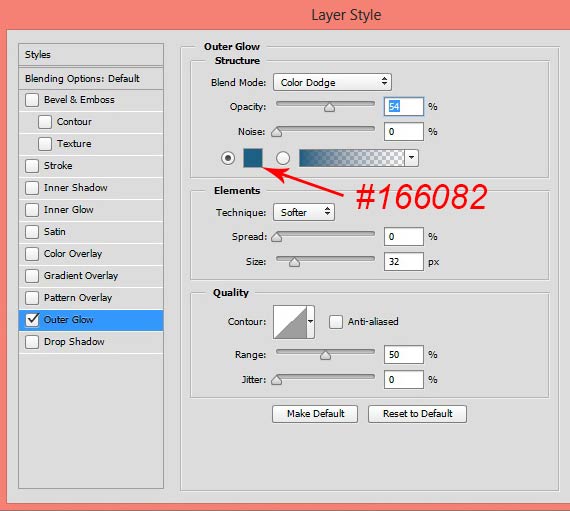
Add a glow to the little glow layer by adding an outer glow effect. To add an outer glow effect, right click on the ‘little glow’ layer and choose blending options then set the setting as shown in the image below.
Duplicate the ‘Little glow’ layer by pressing (CTRL + J) on the keyboard and arrange it to different places as much as you want to add (I’ve used 7 layers to arrange them). Here are the results.
Adding the Deer
Step 15
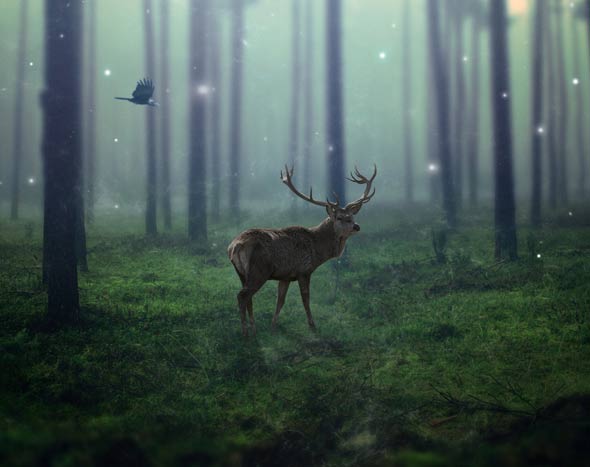
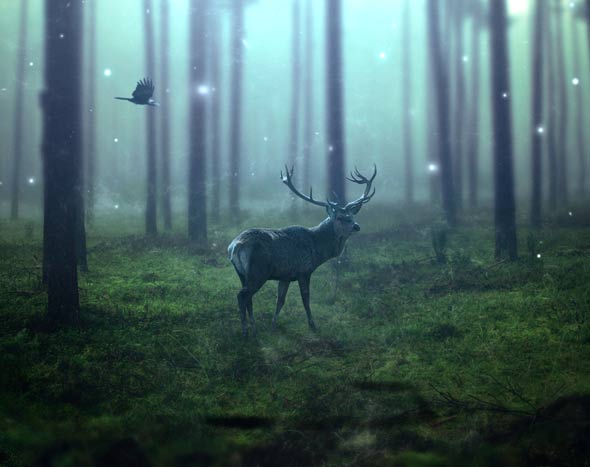
Extract the deer from it’s background and place it to the main document.
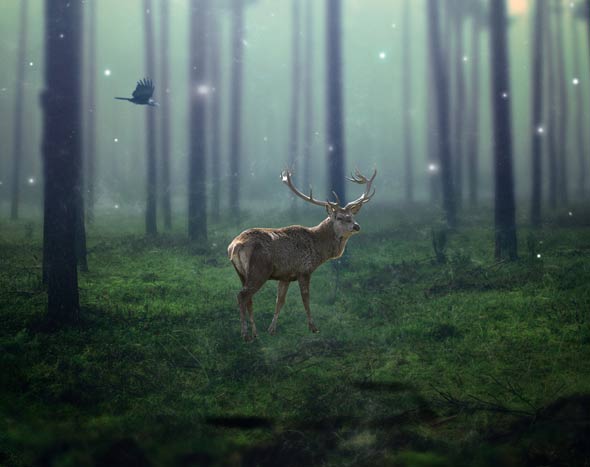
Hide the legs of deer using a Layer Mask so it’s looks like the deer legs are inside the forest grass.
Step 16
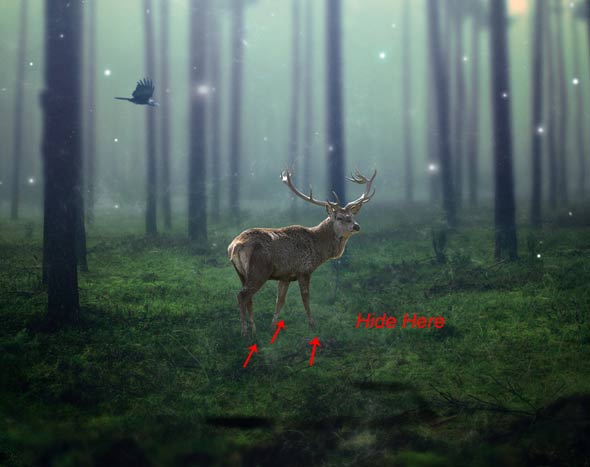
Create some shadow for the deer, to do this create a new layer and activate the brush tool by pressing (B) on the keyboard. Set the opacity and flow of brush tool to 30% and then make a shadow for the deer where the deer legs contact the forest grass (see the arrow indication).

Step 17
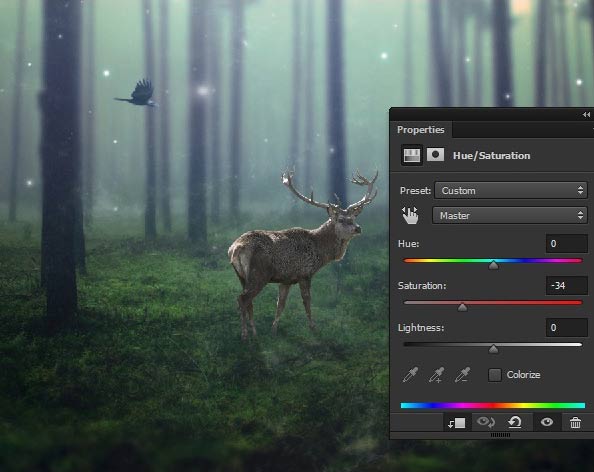
Reduce the saturation of deer by using Hue/Saturation adjustment layer.
Step 18
The brightness of deer doesn’t match with the scene as we have a dark background but deer has more brightness than the background. So reduce the brightness of deer using Curves adjustment layer. Here are values.
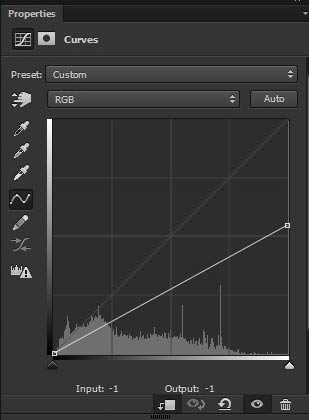
Here are the results.
Step 19
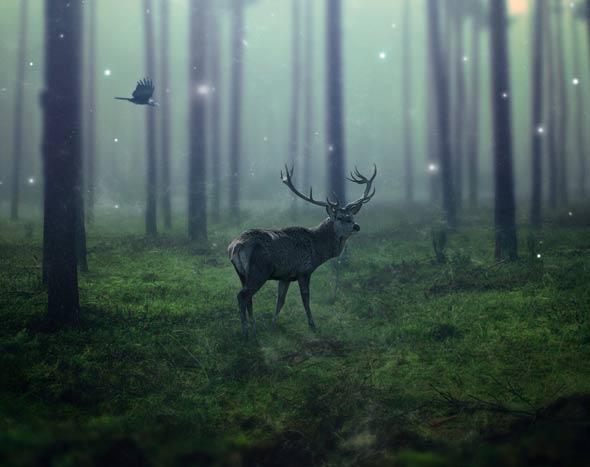
Make a Color balance adjustment layer to deer to blend it properly to the scene.
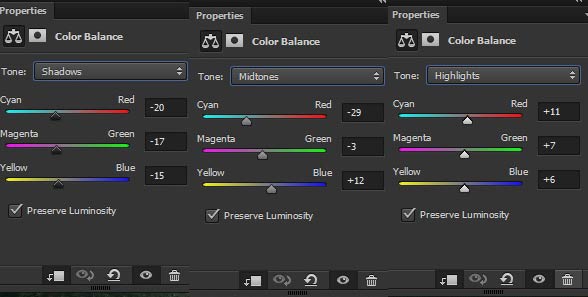
Here are the results.
Step 20
Create a new layer and name it “Highlights”. Change your foreground color to #2b5463 and then using a soft round brush tool with opacity and flow about 30% paint some lights on deer parts that are illuminated by the light source. See the arrow indication as shown in the image below.
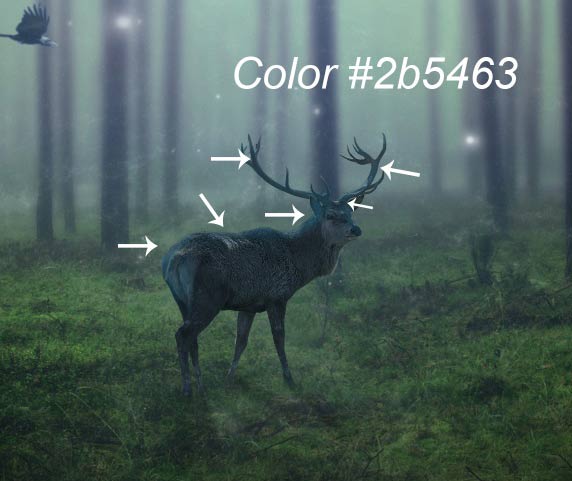
Now change the blend mode of highlight layer to Linear Dodge and reduce the opacity to 55%.
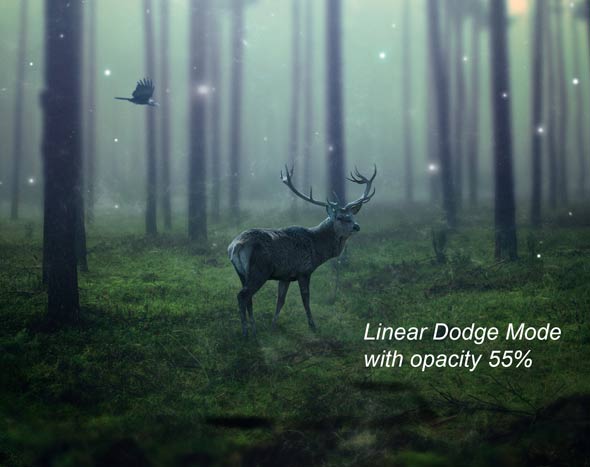
As you can see we’ve very nice glowing highlights for deer.
Step 21
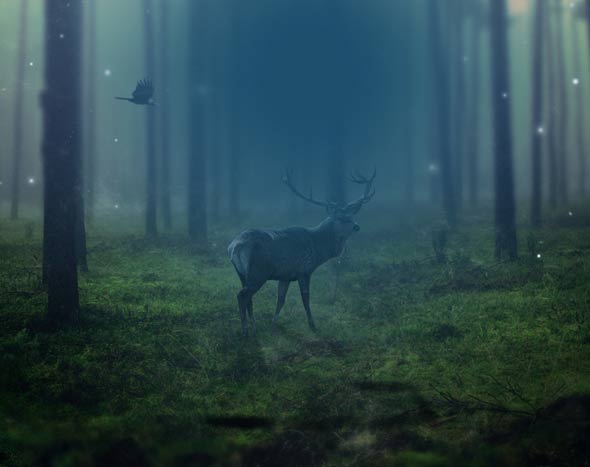
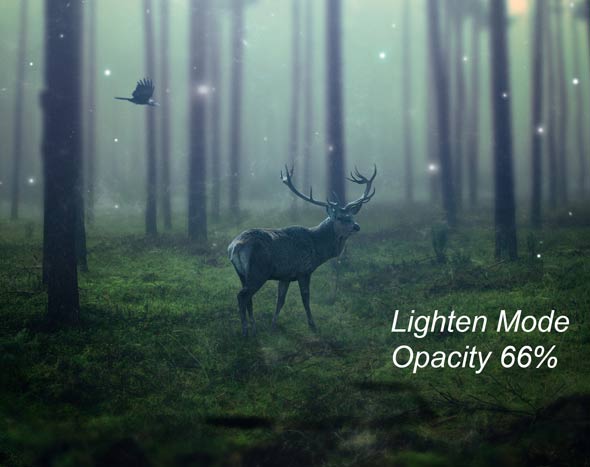
Add some more lights to the scene by using the same techniques in Step 11. This time use the full brush as shown in the image below.
Step 22
Change the blend mode to Lighten mode and reduce the opacity to 66%.
Final Adjustments
Step 23
Time to finalize the scene using the Final Adjustment layers. Add the Gradient Map adjustment to the scene and set the setting as shown in the image below.
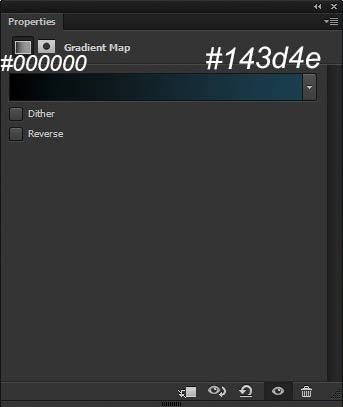
Change the blend mode of Gradient Map to Color Dodge to light up the scene.
Step 24
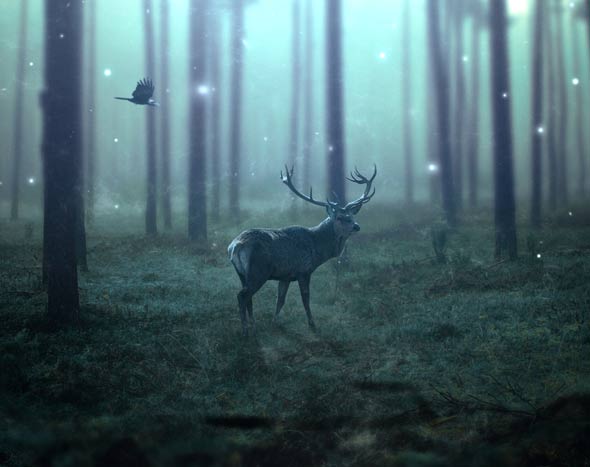
Add the Selective Color adjustment layer to remove the green color from the forest.
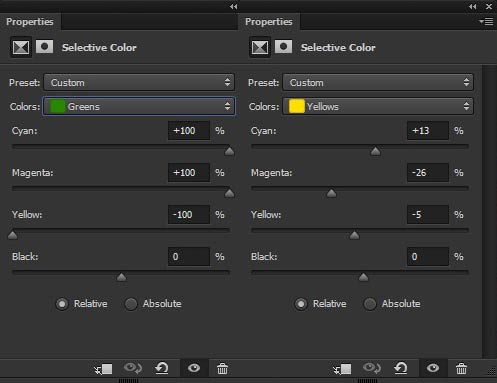
Here are the results.
Step 25
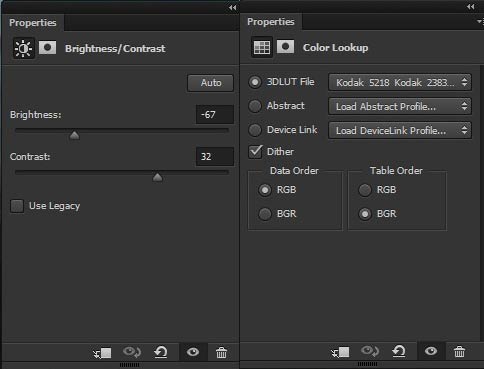
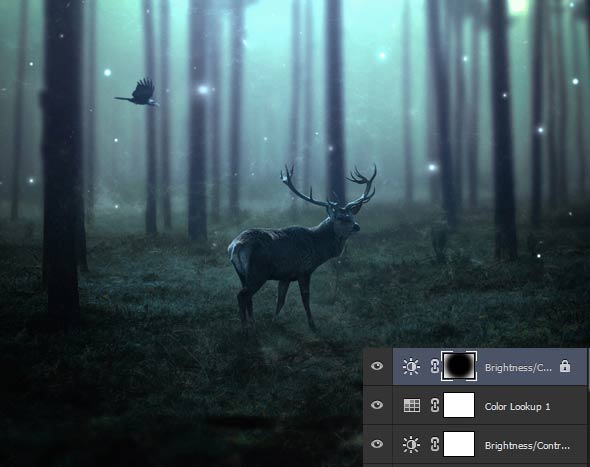
Add the Brightness/Contrast and Color Lookup adjustment layers to the scene. Also reduce the opacity of Brightness/Contrast adjustment layer to 64% and for Color Lookup reduce it to 55%. Note that, in color lookup, I am using kodak 5218 kodak 2383 file and I don’t know if it is available in earlier version of Photoshop as I am using Adobe Photoshop CC 2014. For those who don’t have Photoshop CC, try achieving it using Brightness/Contrast adjustment layer.
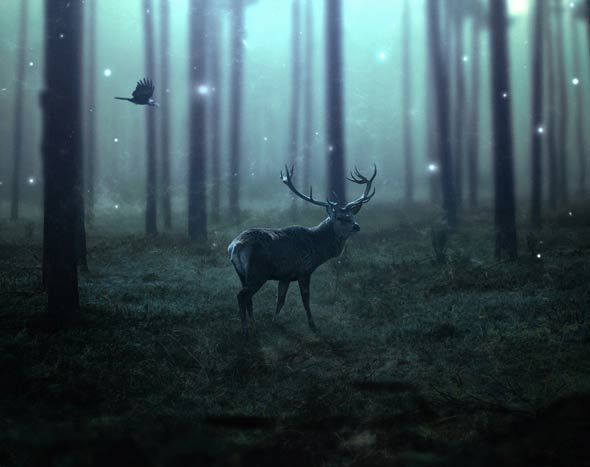
Here are the results.
Step 26
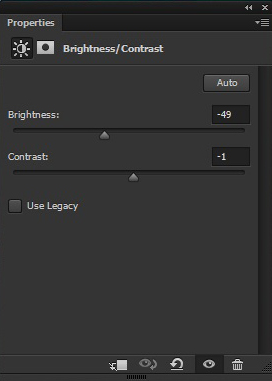
Finally add again a Brightness/Contrast adjustment layer to the scene.
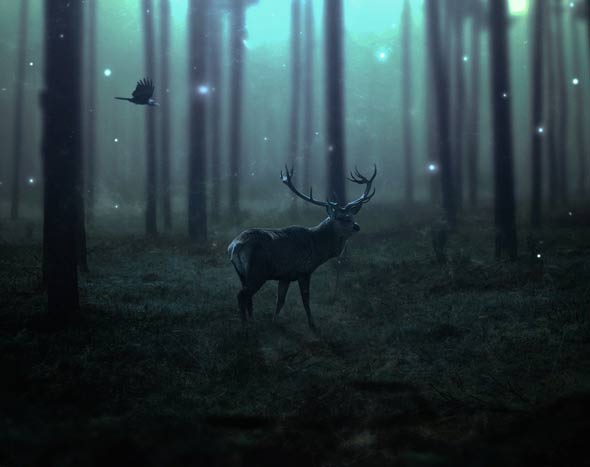
Here are the results.
Step 27
On the layer mask of Brightness/Contrast adjustment layer hide the selected effect using a soft round black brush to maintain some lights in the middle.
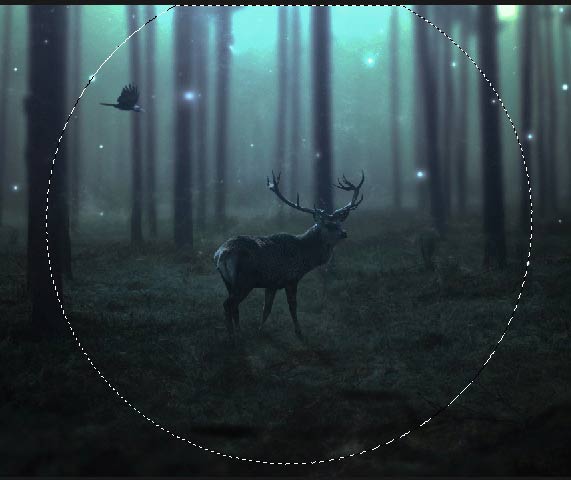
Here are the results.
Step 28
As you can see in the above step we’ve maintained the lights in the middle. But what if I say to you that I only want little bit light in the middle but not too much. The first answer is that I’ll change my foreground color to white and after that, I’ll paint on the layer mask of Brightness/Contrast adjustment layer to reduce the lightness.
But there is no need to do that as we have got the better alternative to controlling the density of layer mask. This feature is available in Adobe Photoshop CS5 or higher version. To control the density of Brightness/Contrast layer mask, double click on the layer mask of brightness adjustment layer and you have a dialog box appear in Photoshop as shown in the image below.
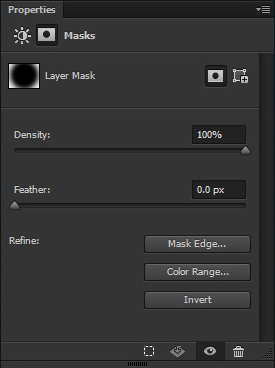
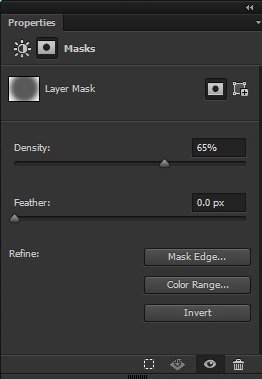
As you can clearly see that density of layer mask is set to 100%. Now reduce the density of layer mask to 69% by dragging the slider to left. As you reduce density you can see that layer mask color now changed from black to gray that means we are revealing the effect of Brightness/Contrast adjustment layer and in more simple words we are painting on the layer mask of Brightness/Contrast adjustment layer with white color.
Let’s see the Final results now.
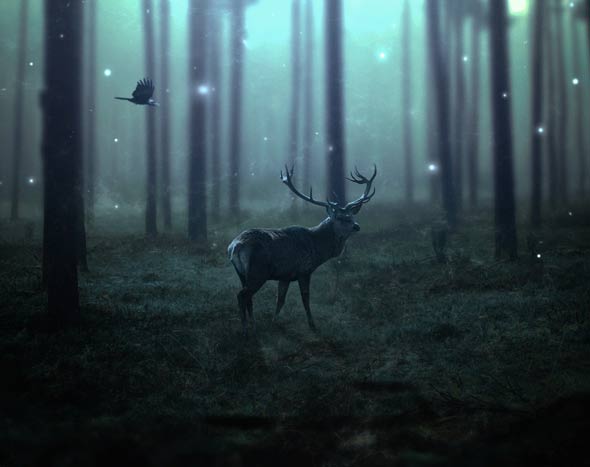
As you can see we’ve reduced lightness in the middle by using the density of layer mask. Always remember by dragging the slider, on the property of layer mask, to left means you’re painting with white color and by dragging the slider to right means that you are painting on the layer mask with black color.
Conclusion
Thanks for following the tutorial and I hope you’ve learned something new today. As always if you’ve any question regarding this tutorial let me know it through comments. I’d also love to hear your feedback and suggestion on the tutorial.
Need Help With Photoshop or Looking for Professional Support?
Whether you're just getting started with Photoshop or need expert-level assistance, we're here to help! Contact us for personalized Photoshop tutorials, project support, or creative services.
Get in touch today to take your skills or projects to the next level.
CONTACT US NOW📘 Want to Master Photoshop Faster?
🎁 Get Your FREE PDF E-Book "Top 10 Photoshop Tricks Every Designer Must Know" Now – Packed with expert tips, shortcuts, and techniques to boost your creativity & workflow.
👉 Download Your FREE PDF E-Book NOW!
