

In this Photoshop tutorial I’ll show you how to create a cool dance photo manipulation with colorful light effects and abstract shapes. We will learn how to use abstract shapes, splatter brushes, abstract light images and Photoshop filters. You’ll also learn how to create special effects using textures and experiment with blend modes and with blending option as well.
Tutorial Resources
Preparing Background
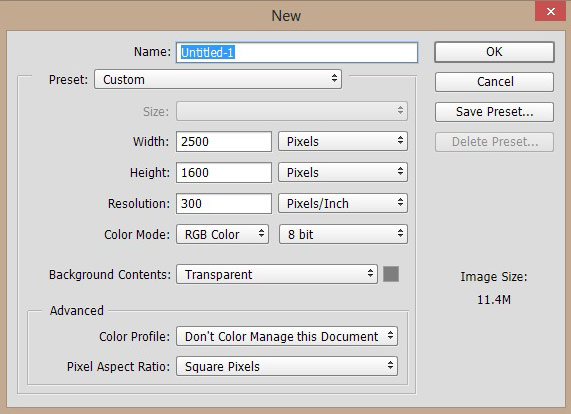
Step 1
Create a new document in Photoshop by selecting File > New and use the following settings :
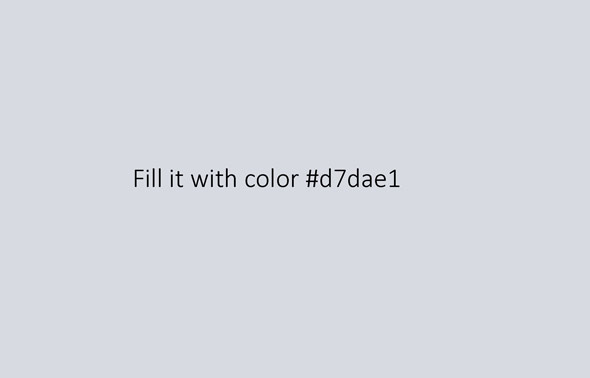
Step 2
Fill this document with color #d7dae1. You can fill it either changing your foreground color and then pressing Alt + Backspace or choosing Edit > Fill.
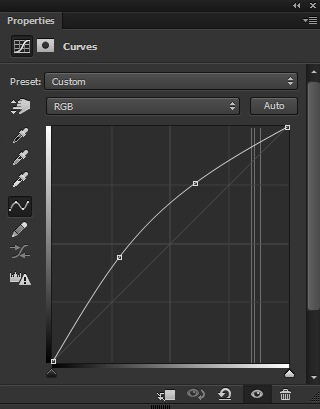
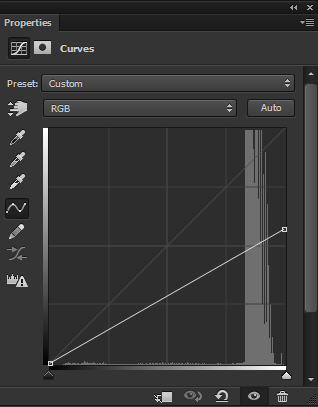
Step 3
Now increase the brightness of document using Curves adjustment layer (go to Layer > New Adjustment Layer > Curves). Use it with following settings :
Results:

If you don’t like this process then simply fill your document with white color or may be near to white.
Adding Dancer
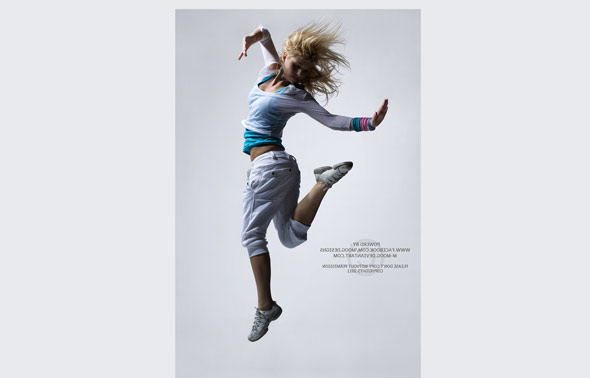
Step 4
Place the model to main document by selecting File > Place Embedded and place it as shown below.
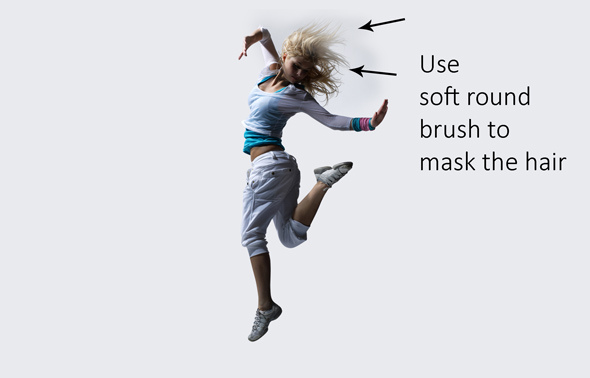
Step 5
Add a Layer Mask to model by clicking on second button at bottom of layer panel. Now use a soft round black brush and mask all the parts of model background except around the hair. For hair, I would say mask it subtly and in next step, we’ll adjust the model using adjustment layer with background.
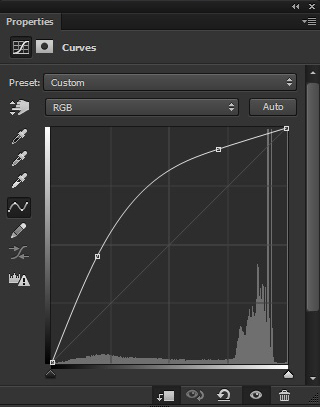
Step 6
You can notice that model looks dark at the moment as compared to our background. Make a Curves to model as Clipping Mask. Now use the following setting to increase the brightness of model.
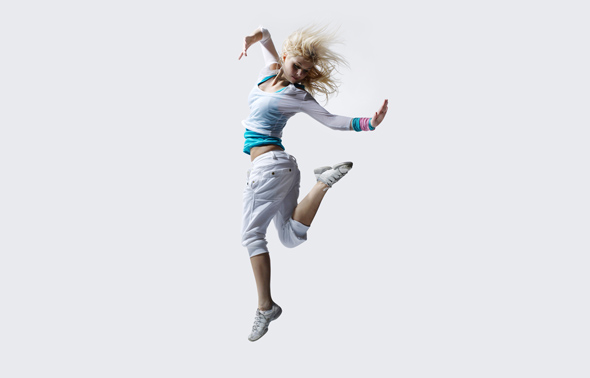
Reduce the opacity of Curves to 71%. Now you can also notice that the hair is blended properly with the background.
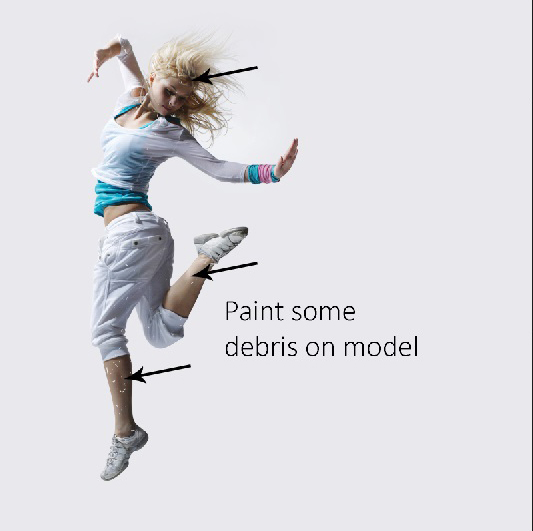
Step 7
Load the debris brush in Photoshop. Activate the Brush Tool (B). Now use a white color to paint some debris on model body using debris brush as shown below. For that, either you can create a new layer or you can paint the debris on the layer mask of model with black color. Both results the same, so do it in which way you like most.
Results:

Creating Light Effects
Step 8
Add the abstract light to main document and place it as shown below.
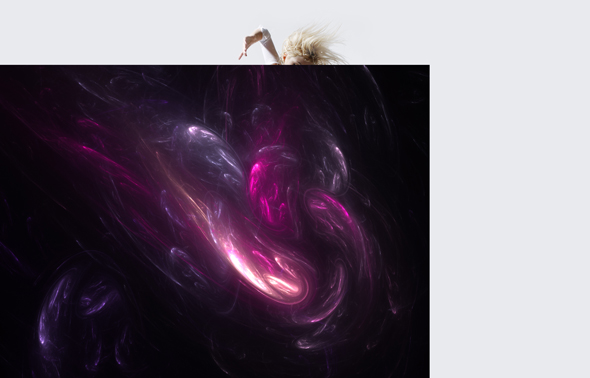
Set its blend mode to screen and get rid of black background. If needed, you can also use Layer Mask to mask the hard edges of this light texture.
Results:
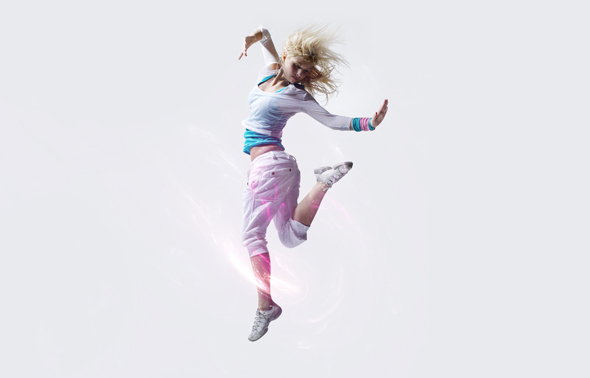
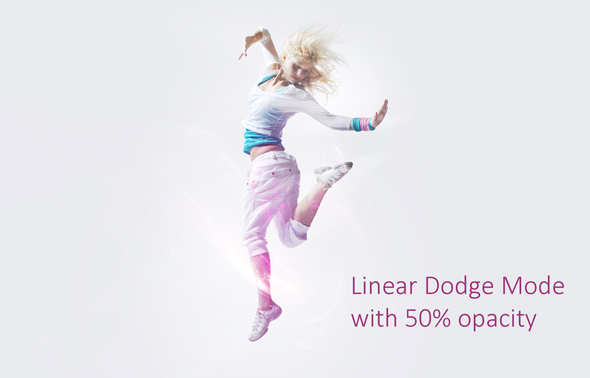
Step 9
Duplicate the model layer and place it above the all layers. You can duplicate the model layer by pressing CTRL + J.
Now change the blend mode of this duplicated layer to Linear Dodge and reduce its opacity to 76%.
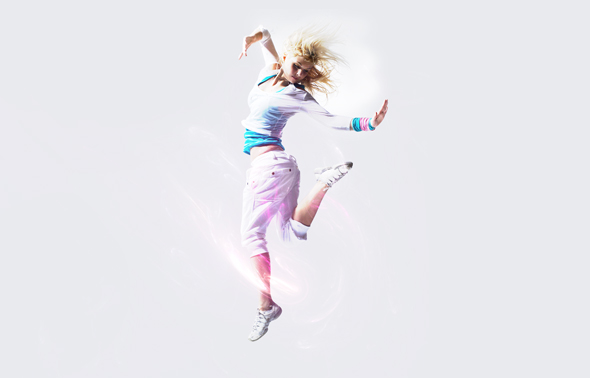
Step 10
Now convert the duplicated model layer to Smart Object. Then go to Filter > Blur > Radial Blur. Set the Amount to 100% and Quality to Zoom. This will add the light rays to our model and whenever you zoom into model, you’ll notice the lights coming out from our dancer.
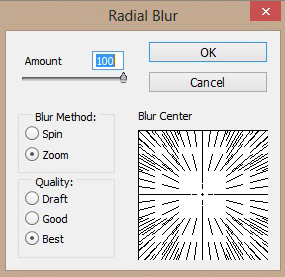
You can notice that I am aiming to apply Radial Blur filter from the middle but feel free to aim it in which way you want. You can also apply the Radial Blur filter many times as much you like.
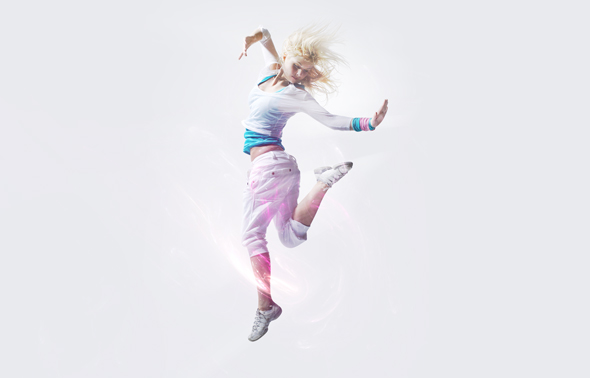
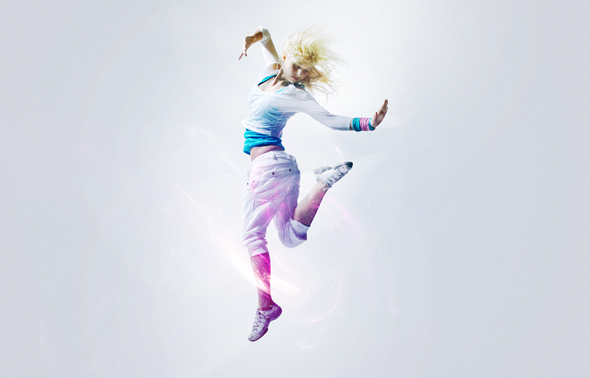
Results:
Adding More Colorful Lights
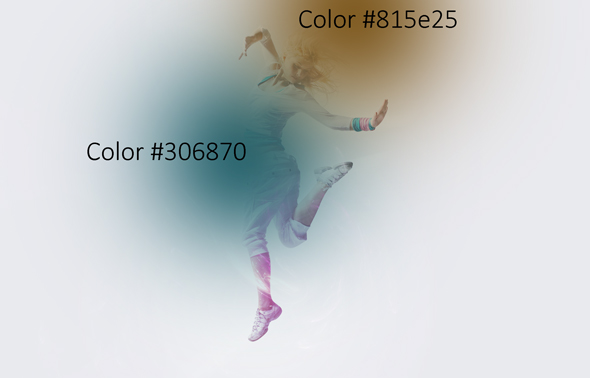
Step 11
Basically, I aiming to add only three color to our model and the colors are Magenta, Blue and Yellow. Create a new layer and name it ‘Magenta’. Set your foreground color to #9e7329 and using a soft round brush, paint a big dot of lights as shown below.
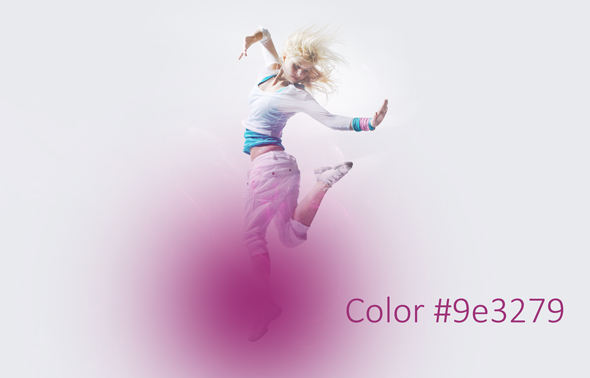
Set the blend mode of magenta layer to Linear Dodge and reduce its opacity to 50%.
Step 12
Similarly, create two more layer and choose the color which you like. I am choosing a blue color #306870 and paint light on the left side of dancer. On other layer, I chosen the color #815e25 and now paint it over the model head.
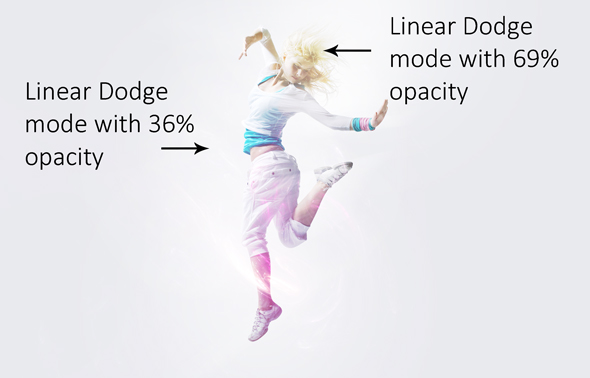
Set the both lights layer blend mode to Linear Dodge but reduce the opacity of blue color layer to 36% and for yellow color layer, reduce it to 69%.
Adding Light Texture
Step 13
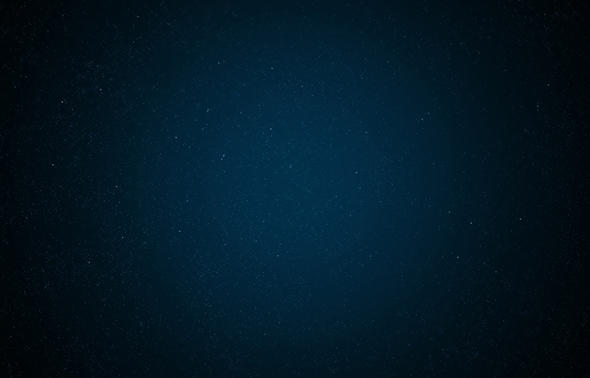
You can notice that colors are looking fade and it is because of too much brightness on the model. We need to fix this so color can come out more beautifully. To do this, open up the starry texture and choose starry3, and then place it into our main document.
Now simply change the blend mode of starry3 to Overlay.
Now the colors and lights look good.
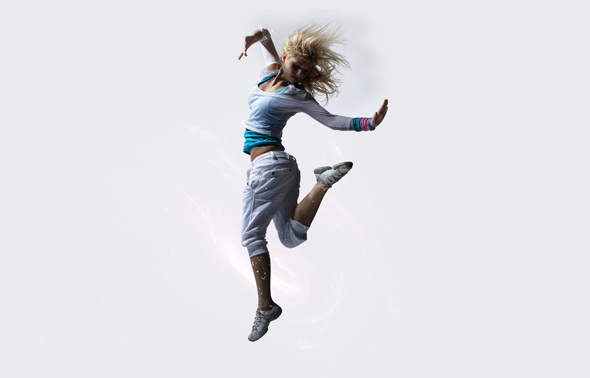
Step 14
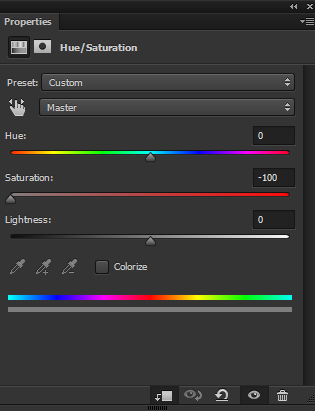
Reduce the saturation of starry3 using Hue/Saturation adjustment layer and get rid from its blue color.
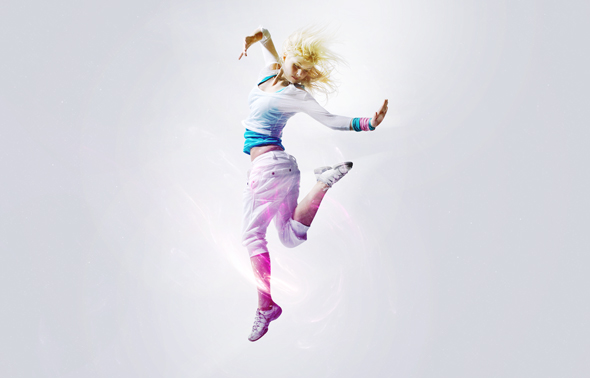
Results:
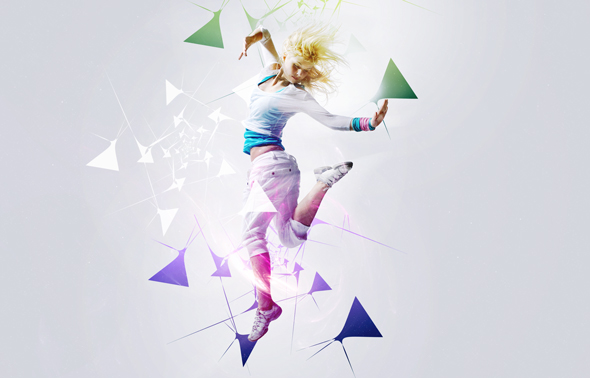
Creating Abstract Shape
Step 15
Load the abstract brushes in Photoshop. Create a new layer in Photoshop and name ‘shape1’. Set your foreground color to white or #ffffff. Use the 1100 pixel abstract brush and create some cool abstract shapes as shown below.
Step 16
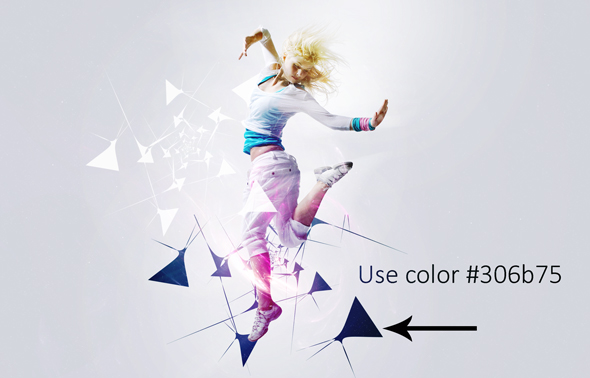
Create a new layer under the model and name it ‘shape2’. Now use the color #306b75 and paint the another abstract shape using the same brush as in step 15.
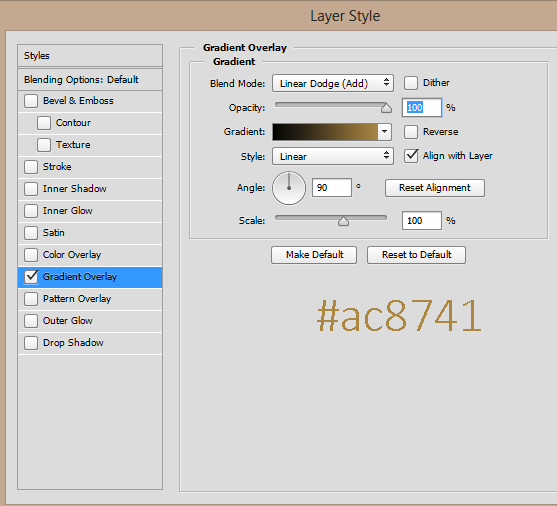
Step 17
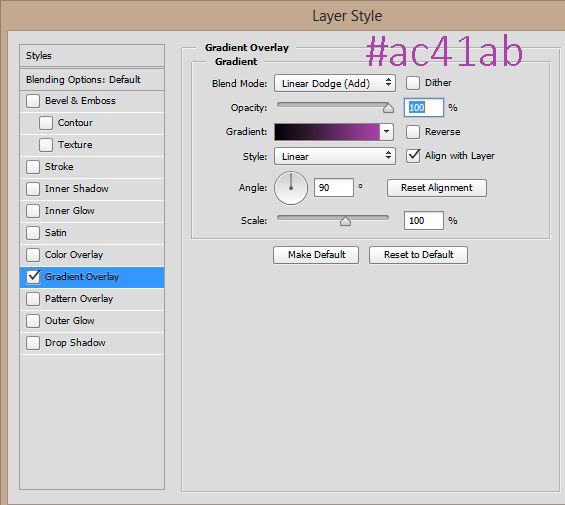
Right click on the shape2 layer and choose ‘Blending Options’. Apply the Gradient Overlay to shape2 layer.
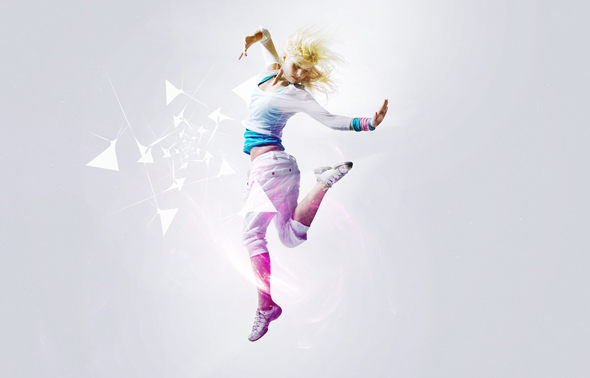
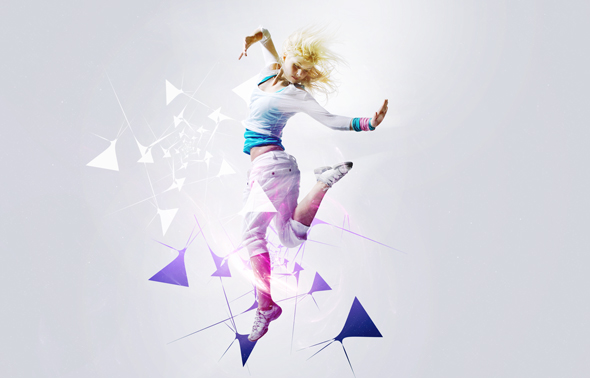
Results:
Step 18
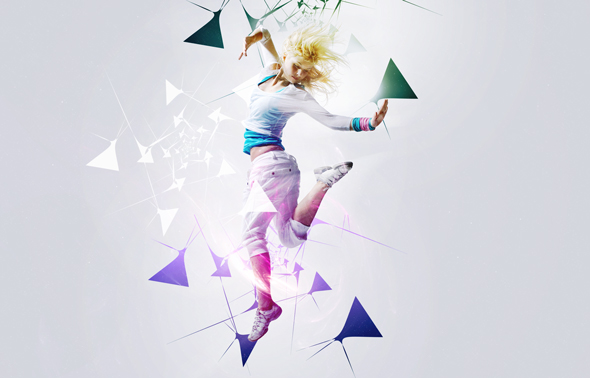
Create the abstract shapes one more time but this time behind the model head. Use the same color and brush as in previous step.
Step 19
Now apply the following blending options effect to shape3 layer.
Results:
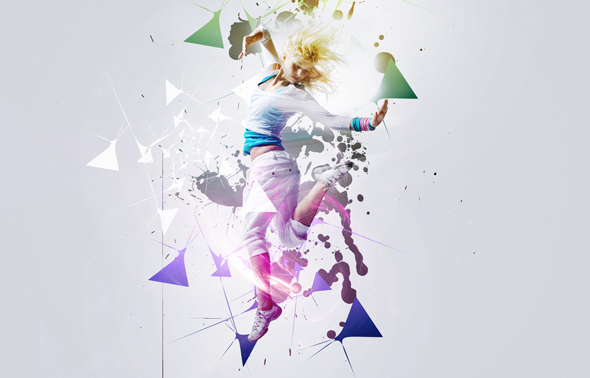
Adding Splatters
Step 20
Create a new layer under the model and name it ‘splatter’. Use the splatter brushes and paint some splatter brush stroke as shown below. Just use different splatter brush to make random effect of splatters. You can also use different color instead of black. So do this and this step completely depends on you. Here how I did it using color #222 with the combination of four splatter brushes.
Final Adjustment
Step 21
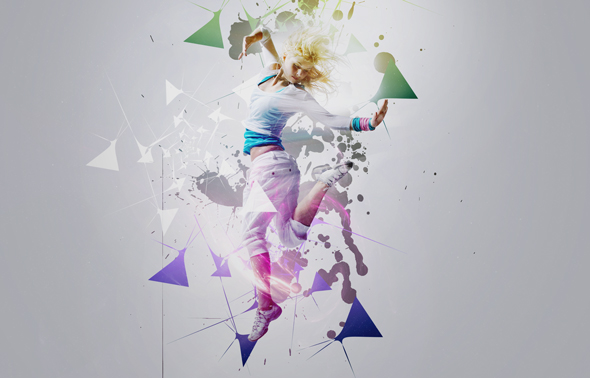
Make a Curves adjustment layer, above all layer, and reduce the brightness. Also, reduce its opacity to 50%.
Step 22
On the layer mask of Curves, hide the effect on the middle, using a soft round basic black brush, to create more focus on dancer.
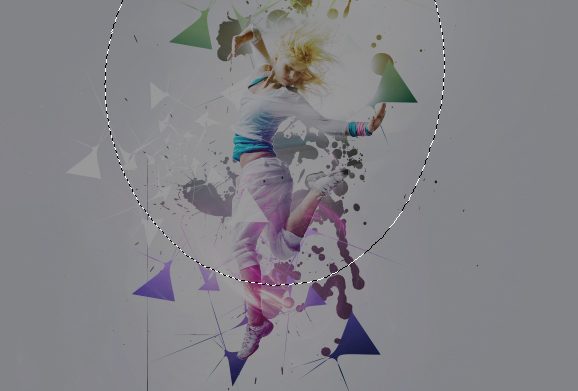
Results:
Step 23
Finally, make a Color Balance adjustment layer to add some color to overall manipulation.
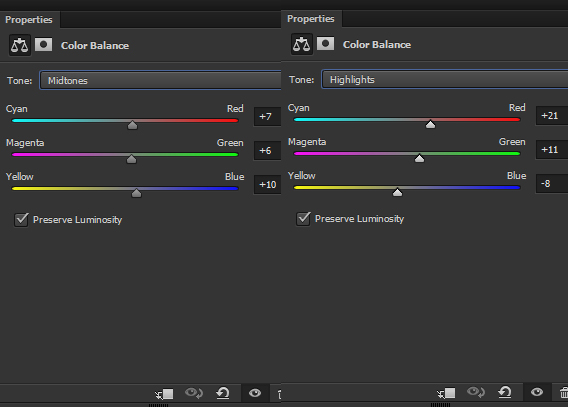
Results:

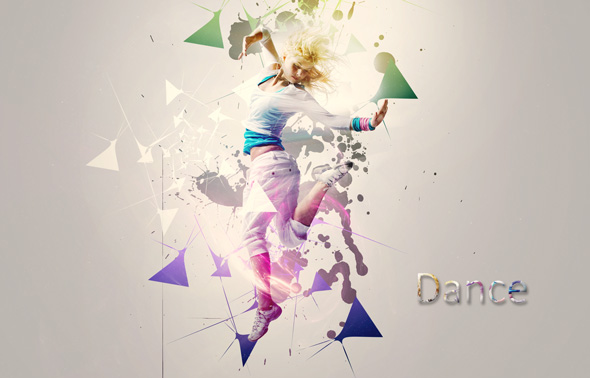
Final Results:
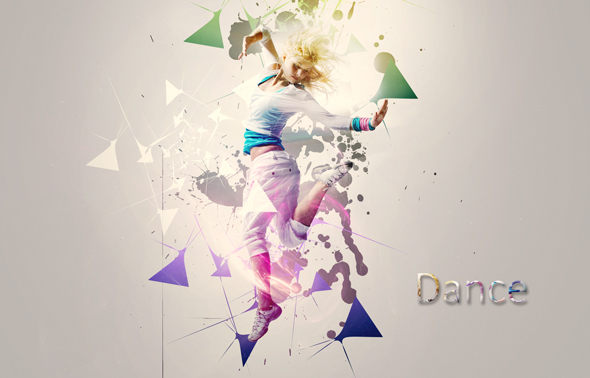
How I created the text effect ? Just type anything and then merge all layers……. Actually, I leave it you.
Conclusion
Thanks for following the tutorial. I hope you enjoyed it and learned some new techniques of creating light and special effects. Do let me know if need any help. I’ll be happy to help you. Have a great day!
Need Help With Photoshop or Looking for Professional Support?
Whether you're just getting started with Photoshop or need expert-level assistance, we're here to help! Contact us for personalized Photoshop tutorials, project support, or creative services.
Get in touch today to take your skills or projects to the next level.
CONTACT US NOW📘 Want to Master Photoshop Faster?
🎁 Get Your FREE PDF E-Book "Top 10 Photoshop Tricks Every Designer Must Know" Now – Packed with expert tips, shortcuts, and techniques to boost your creativity & workflow.
👉 Download Your FREE PDF E-Book NOW!
