

In this tutorial, you’ll learn how to create a surreal deer scene in Photoshop. I’ll show you how you can create surreal moon artwork by placing a moon on the deer head. From simple edits and intermediate blending to painting glows & creating realistic effect all will be taught during this tutorial. You’ll also learn, how to blend a new sky to an existing grass image, creating depth of field and color-matching techniques as well.
Please Note: This tutorial is for advanced users and I will not cover how to add masks, adjustment layers, or any beginner stuff here as this will make the tutorial long. Make sure you have good knowledge of Photoshop fundamentals otherwise you might have a hard time going through this tutorial.
Step 1
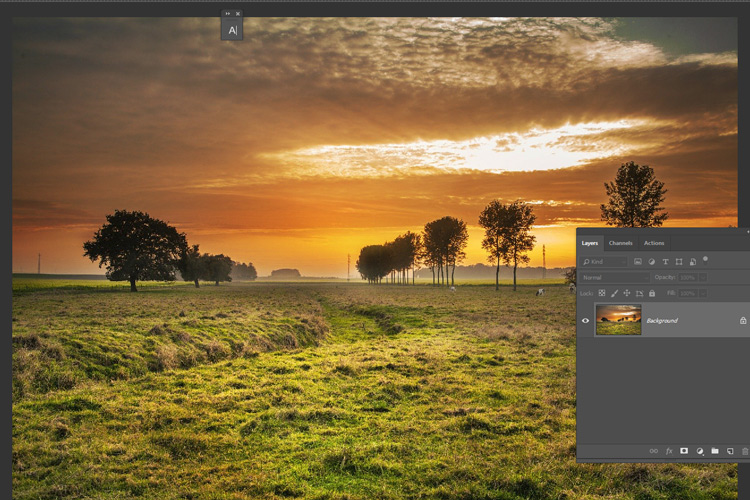
First, I opened the grass image in Photoshop by selecting File > Open. As you can see I have opened the image and this image resolution is my main document dimension but you can also create a new document to create a bigger or smaller canvas. Also, I am not providing any stock images for this tutorial because most of them bought by me. You are free to use your stock images, you’ll find many on pixabay.
Step 2
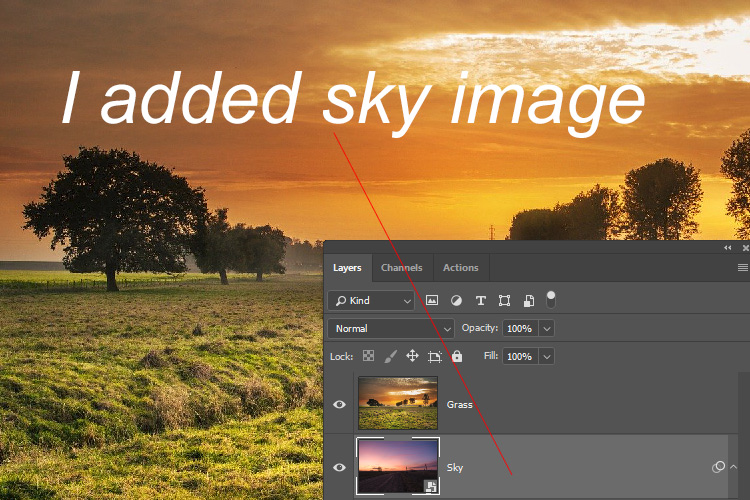
Just below the grass layer, I added a new sky layer. You can use the Place command to place any image to the main document & then use the Move Tool (V) to drag the new sky layer underneath the grass layer. Make sure you have unlocked the grass layer by double-clicking on it before moving the sky layer.
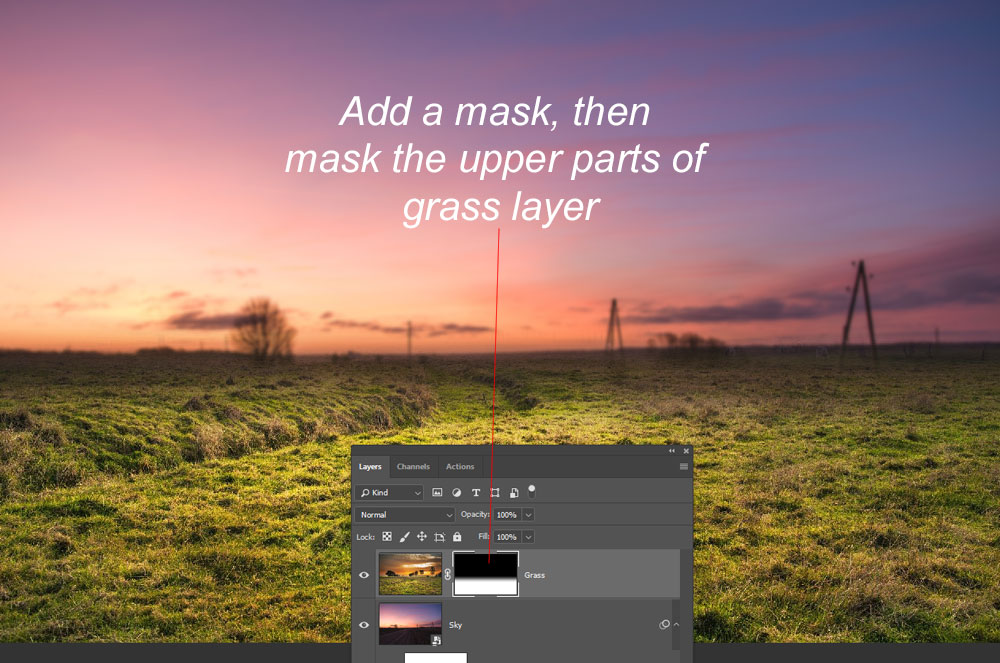
To reveal the sky layer we need to mask the upper parts of the sky layer. Go to Layer > Layer Mask > Reveal All and add a mask to the grass layer and remove the upper parts using a soft round black brush. You can also apply a black/white gradient on the mask for masking.
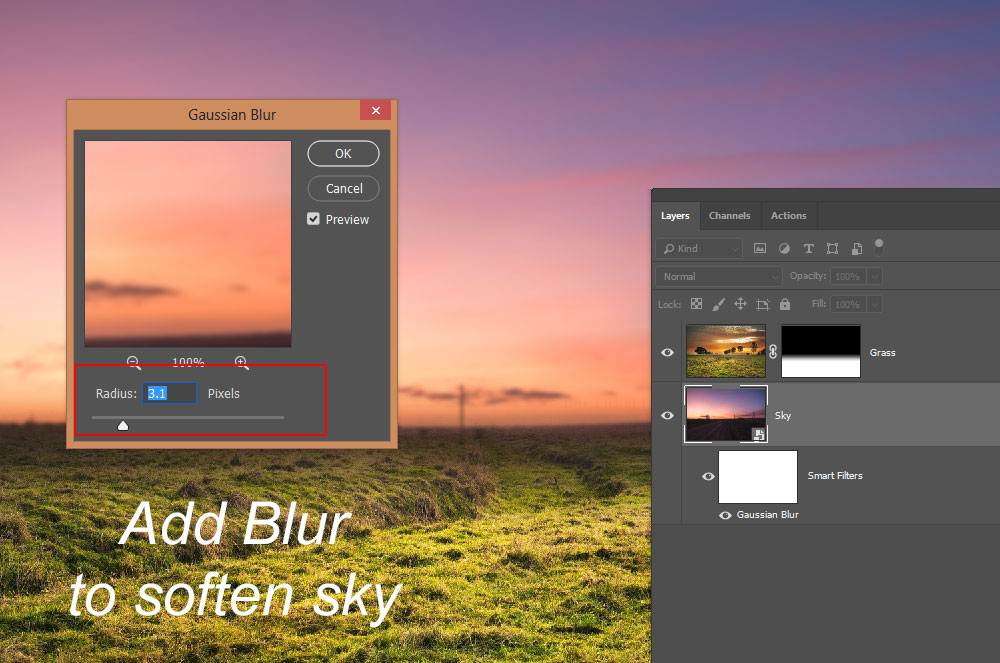
Also, I added a blur filter to the sky and this will soften the sky, will help us draw more attention to deer. Go to Filter > Blur > Gaussian Blur, add a blur with the following settings. Make sure you have converted the sky into Smart Objects by right-clicking on it & choosing convert to smart object.
Step 3
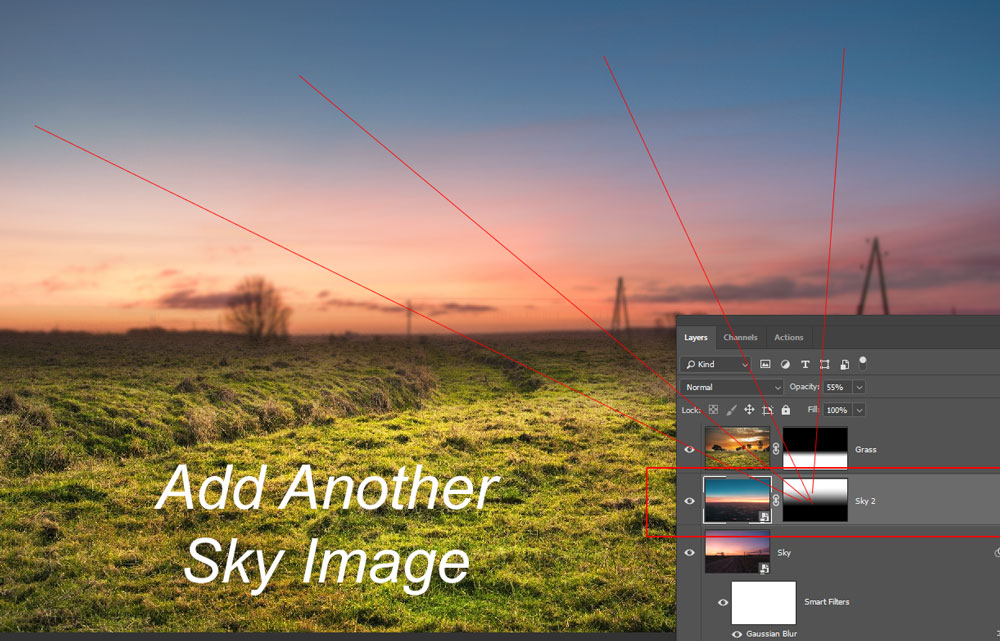
I added another sky layer and this time I picked it to change the color of the sky. I want to add a cyan coloring part on the sky and I picked this image, enlarged it to fit the main document & I masked it’s bottom parts as well. You can use the Transform Tool (CTRL + T) to enlarge this sky layer & use a soft brush black brush to mask its bottom parts.
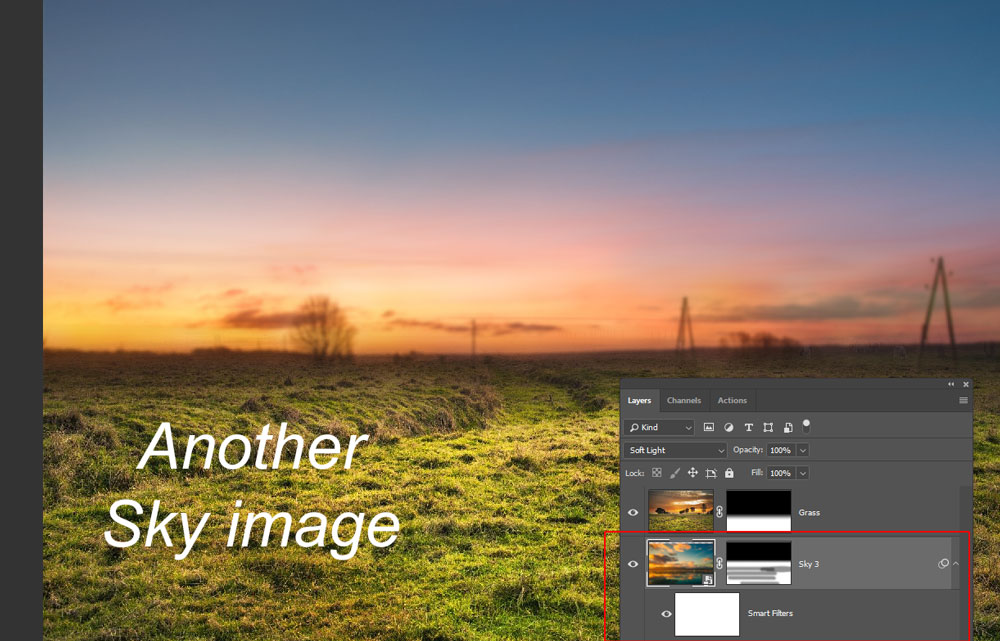
Again I used another sky image, I used it to add coloring on the horizon, you can see that I kept the parts on Horizon and then I masked rest of the parts which I don’t need it. Since I have used the Soft Light mode & this blend mode will help me add some coloring on the horizon by blending the sky 3 layer parts with the rest of the sky layers. I also used the same amount of blur that I used for the sky 1 layer.
Step 4
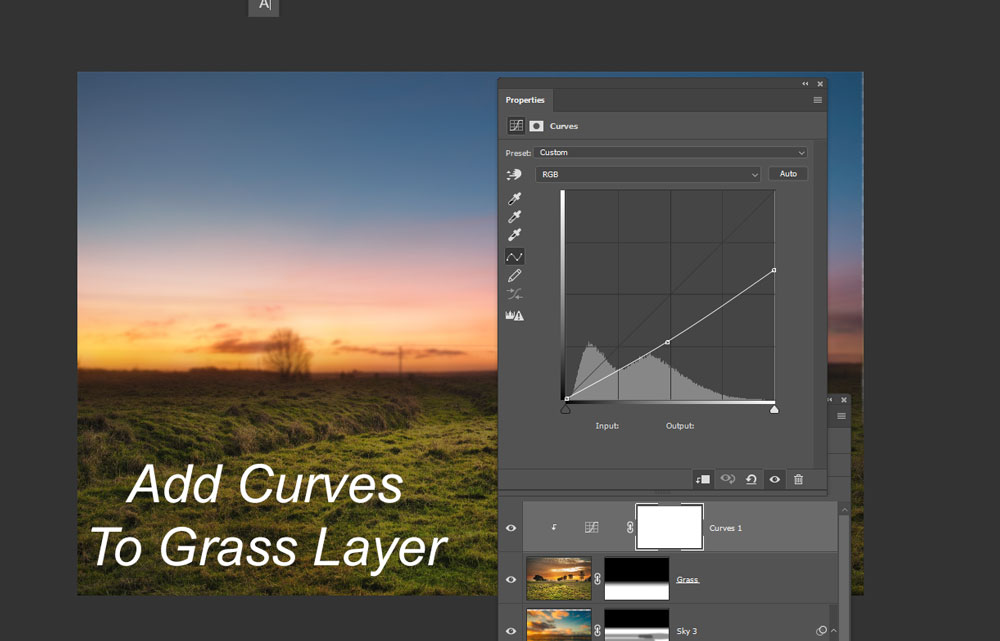
Add a Curves adjustment layer to grass layer and clip it to grass layer by pressing CTRL + ALT + G. This will only affect grass layer not the other layers beneath it. Use the setting below to reduce the brightness.
Step 5
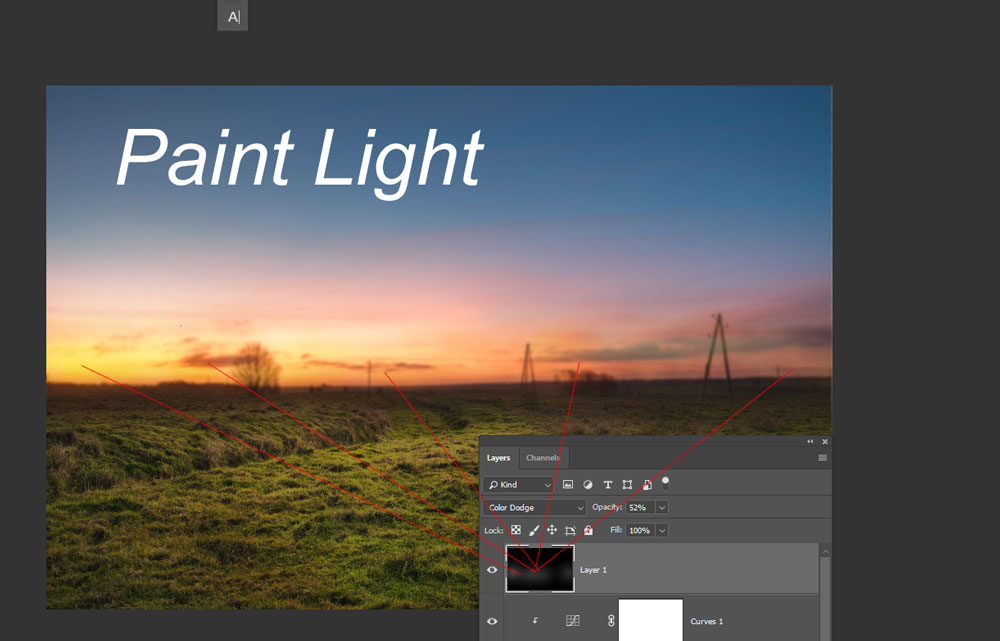
I painted some basic light effect using my black layer lighting technique. Create a new layer by pressing CTRL + SHIFT + N, then fill this layer with black color. Change the blending mode to Color Dodge and start painting on the horizon using a very low opacity & flow (around 20%-30%) with a soft white brush. When you paint make sure to use the white color to paint lights.
Step 6
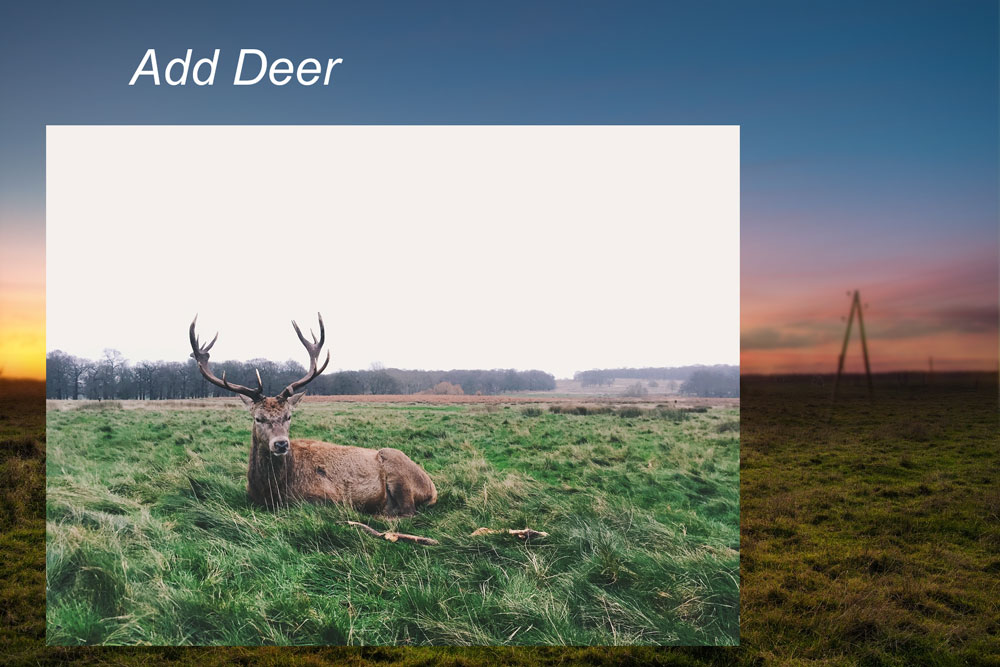
I added the deer image as you can see I have added it to the main document. The best part of using this deer image, it is already on the grass that will help me blend him to my existing grass layer because all the parts are matching. It’s always a good idea to use a subject that has matching parts same as your background.
I added a mask to the deer layer and masked its parts using a soft round black brush. I also used the Pen Tool wherever I needed a more accurate selection especially around the horn & his face.
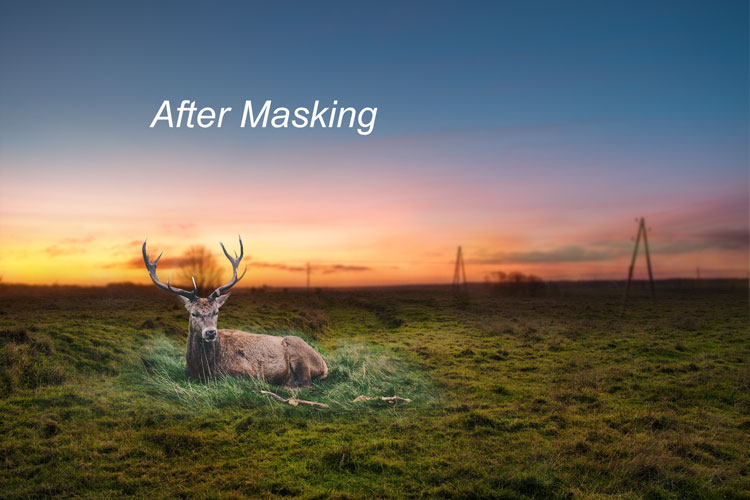
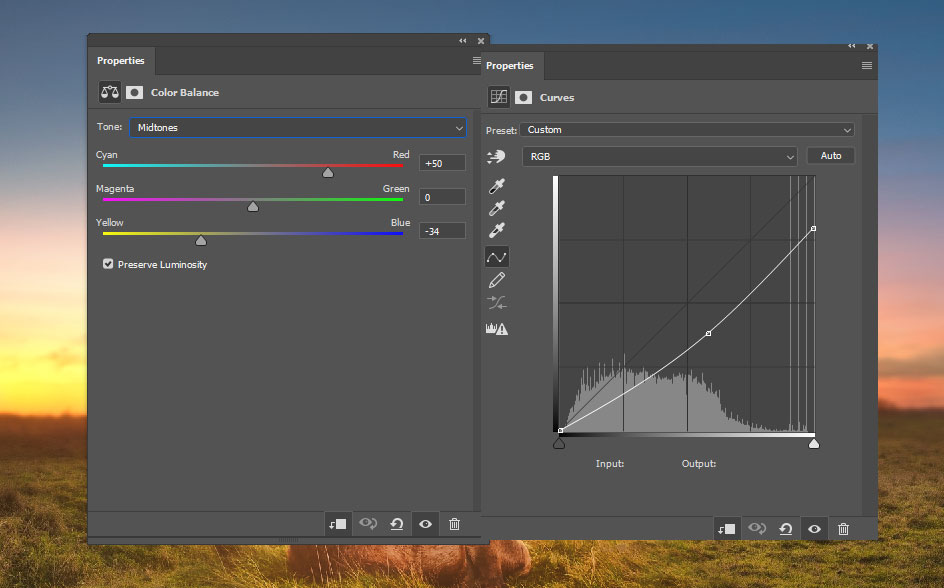
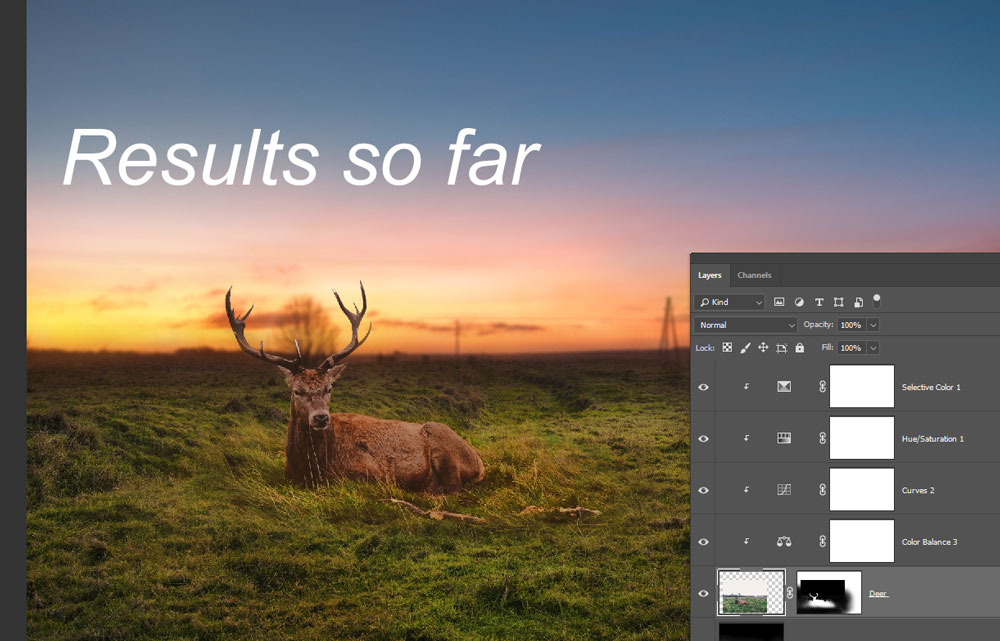
I used some bunch of adjustment layers to match the color & the brightness of deer with the rest of the background. First, I used Color Balance & Curves to start blending him with the scene. I aimed to add red or yellow tones to deer with reduced brightness.
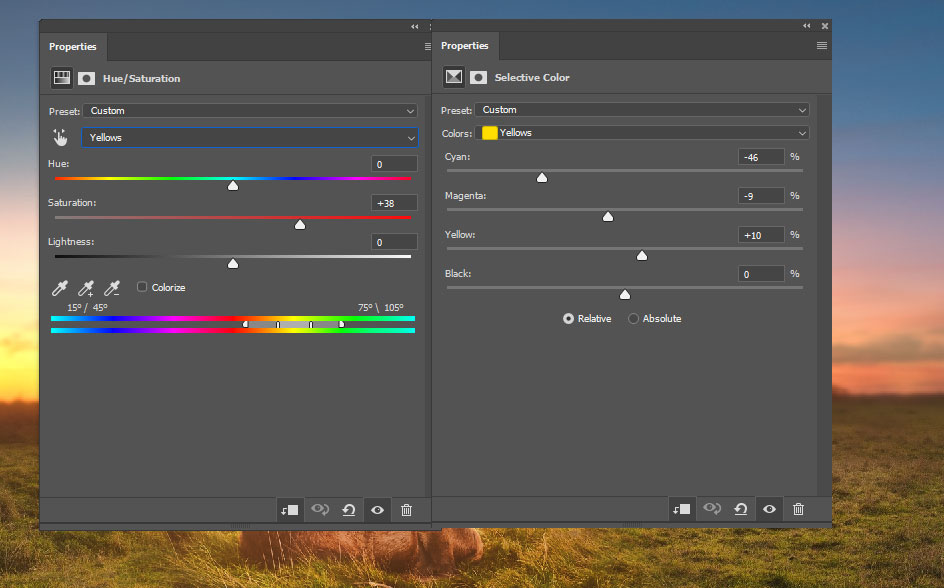
I used Hue/Saturation & Selective Color to further add yellowish coloring to the deer and trying to add the yellow coloring here that’s already in the grass layer. These two adjustment layers are mainly for color matching.
Looks much better now as we have matched the color of grass parts (deer image parts) with the grass layer.
Step 7
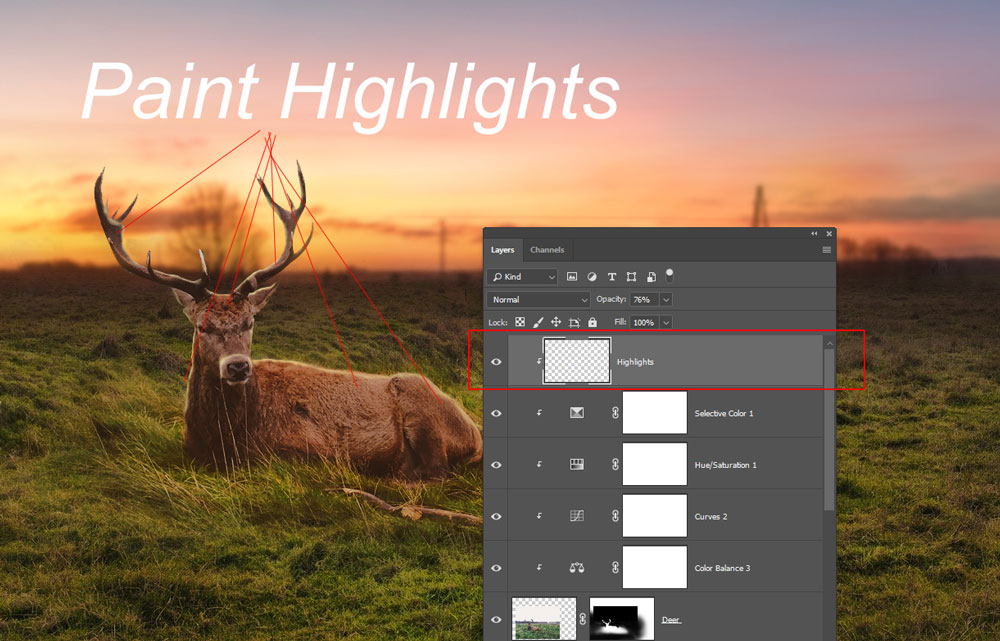
I added a new layer to the deer and make sure it is clipped with the rest of the deer layer by pressing CTRL + ALT + G. I named it “Highlights”. I chose a bright yellow color and painted highlights on deer. This is to add glowing highlights on the deer because the deer is close to the horizon and the horizon is the light source as well. Just paint highlights on the deer parts shown below.
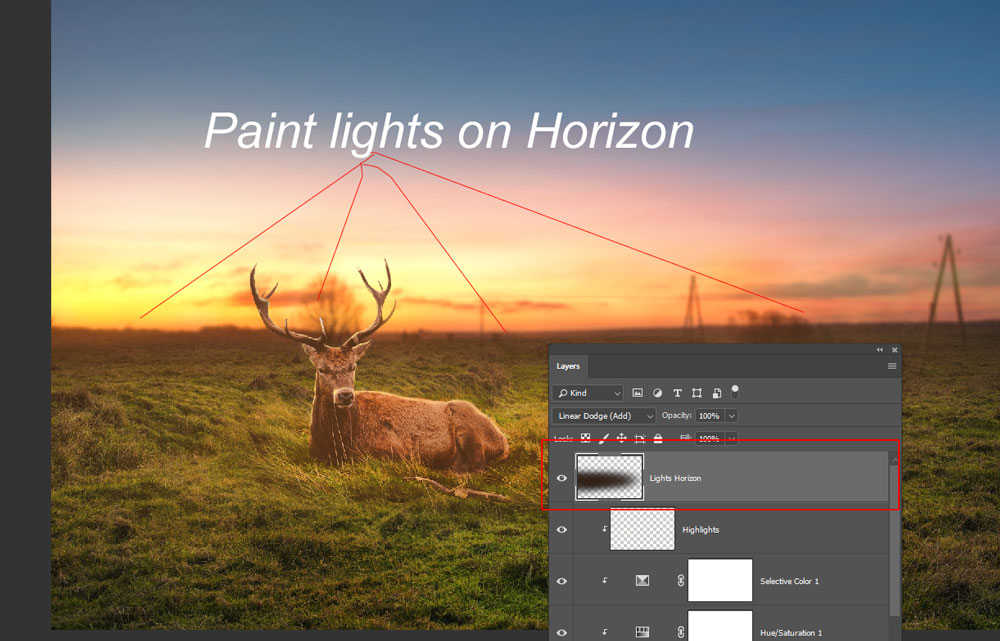
I created another new layer, this time I painted lights on the entire scene using a dark orange color & changing the blending mode to Linear Dodge.
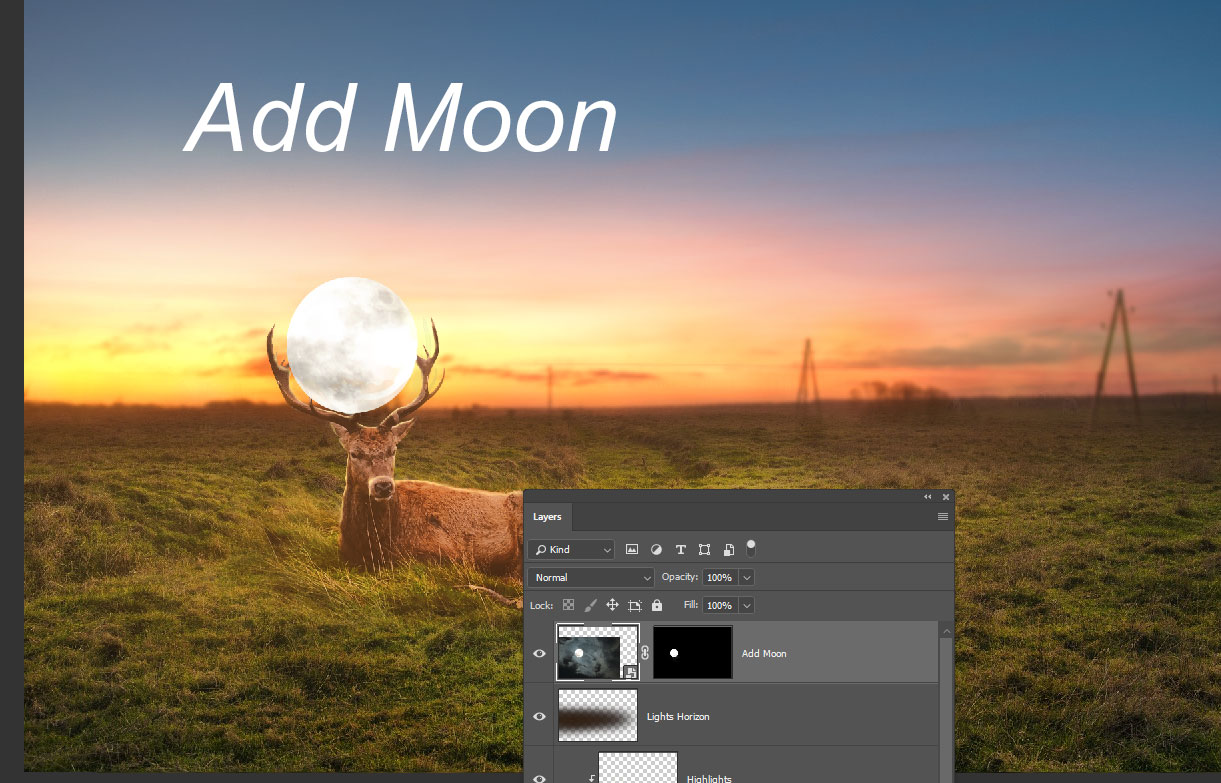
Step 8
I added the moon on the deer head. You can use any moon image here, just extract it and place it on the head of the deer.
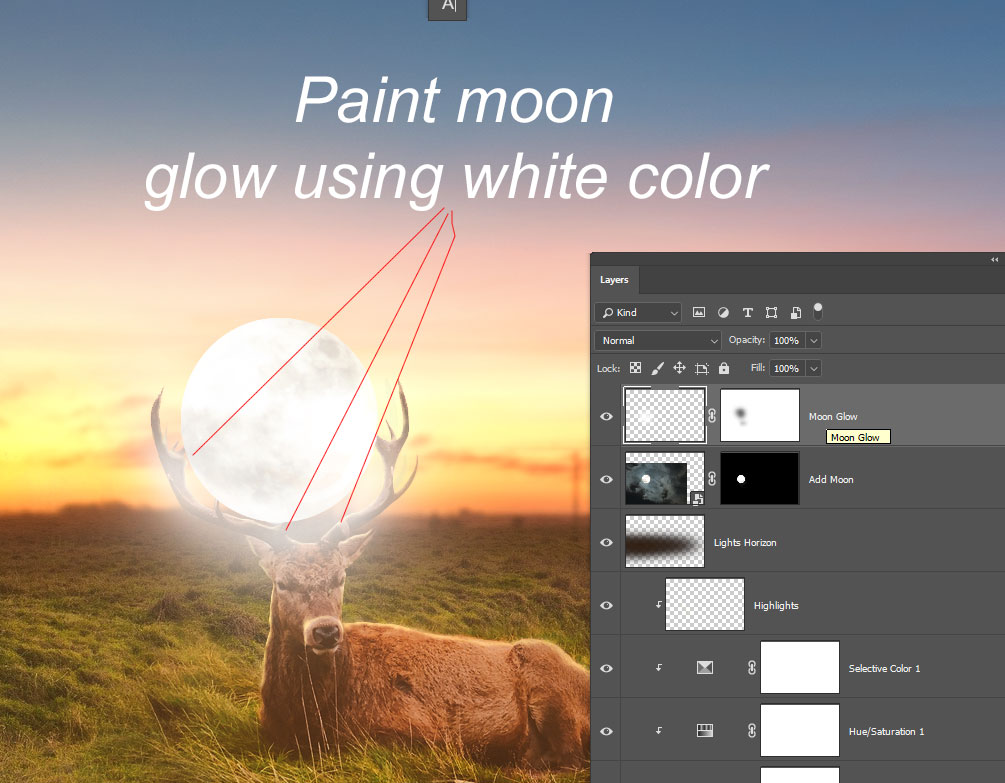
I started painting moon glow around the moon, use a soft round brush with white color, and apply a brushstroke to create a glow around the moon. Make sure to use less than 100% opacity & flow to create a natural-looking glow around the moon.
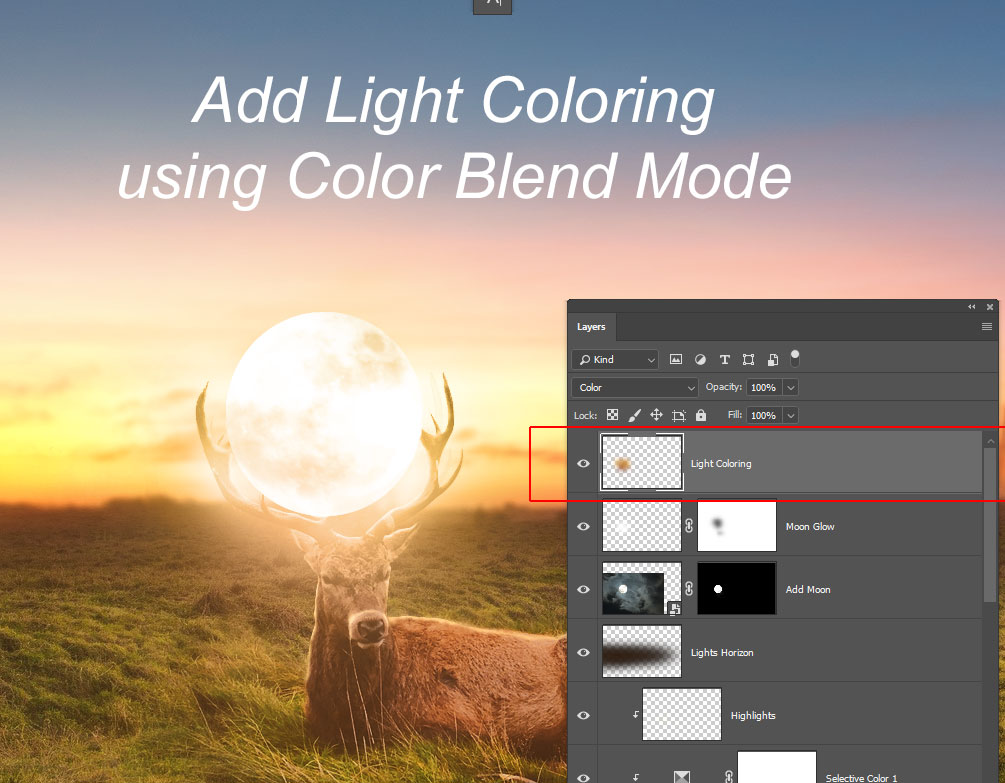
To add light coloring, there is a simple trick that I always use, the use of Color Blend mode. First, I chose the color that I want to be the light coloring, for example, I choose a bright orange color and I painted it using a soft round brush. Then I changed the blending mode to Color to blend the color around the moon glow.
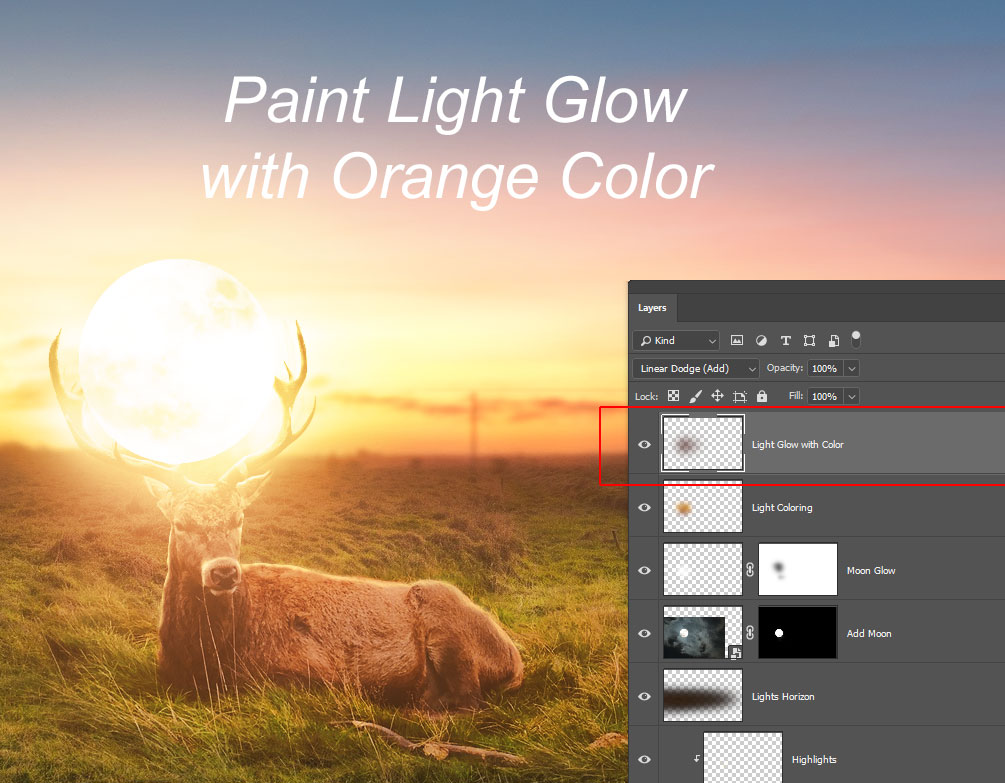
Again, I used a dark orange color and painted the light on the moon using the Linear Dodge blend mode. I keep this doing until I am satisfied with the lighting results & I think it looks much better now.
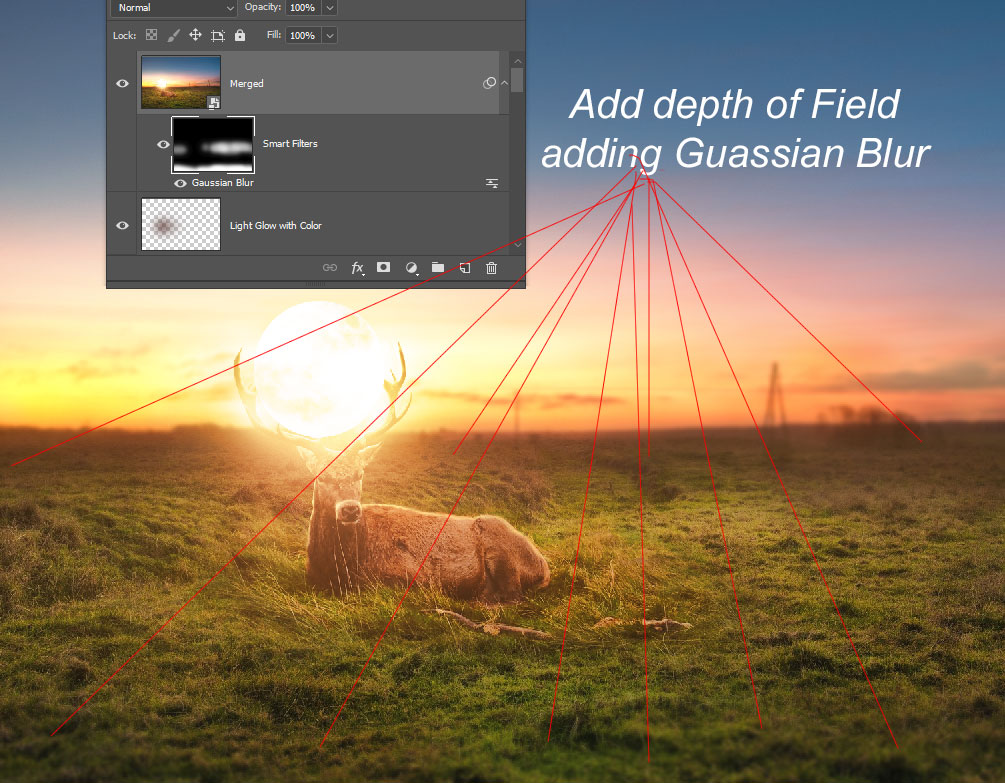
Step 9
In the end, I created a depth of field effect to bring more attention to deer. To do this, create a single stamp layer by pressing CTRL + ALT + SHIFT + E. Name it “Merged”.
Add a Gaussian Blur to this filter by going to Filter > Blur > Gaussian Blur. I filled the Smart Filter Layer Mask (see white rectangular area right underneath the layer) with black color, then I revealed the blur effect in the highlighted parts using a soft round white brush. I kept the blur around the horizon & kept it at the bottom of the main document.
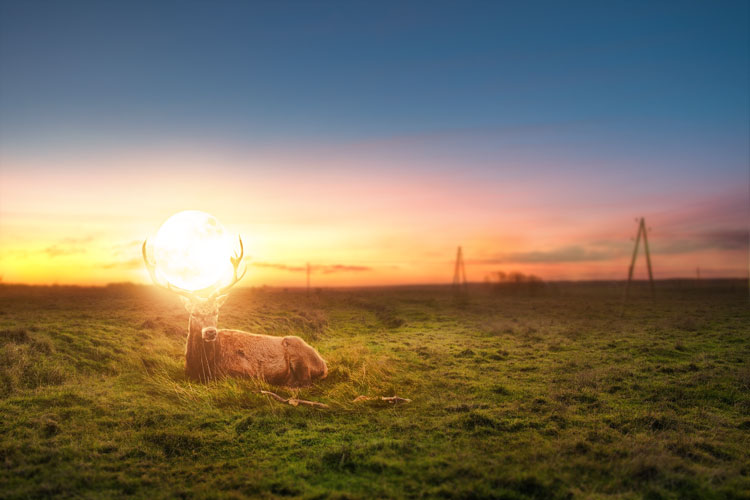
Here are my final results:

I hope you enjoyed the tutorial and you may have some questions regarding this tutorial. Feel free to let me know in the comment section below.
Need Help With Photoshop or Looking for Professional Support?
Whether you're just getting started with Photoshop or need expert-level assistance, we're here to help! Contact us for personalized Photoshop tutorials, project support, or creative services.
Get in touch today to take your skills or projects to the next level.
CONTACT US NOW📘 Want to Master Photoshop Faster?
🎁 Get Your FREE PDF E-Book "Top 10 Photoshop Tricks Every Designer Must Know" Now – Packed with expert tips, shortcuts, and techniques to boost your creativity & workflow.
👉 Download Your FREE PDF E-Book NOW!
