

In this intermediate level tutorial, I’ll show you how to create a landscape scene featuring starry sky and magical lighting effect in Photoshop. We’ll be using a bunch of stock images, blend modes, Color Lookup filters and some lighting techniques to create this composition.
Tutorial Resources
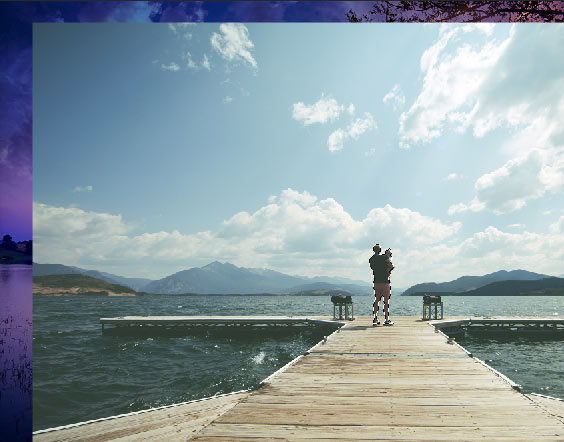
Step 1
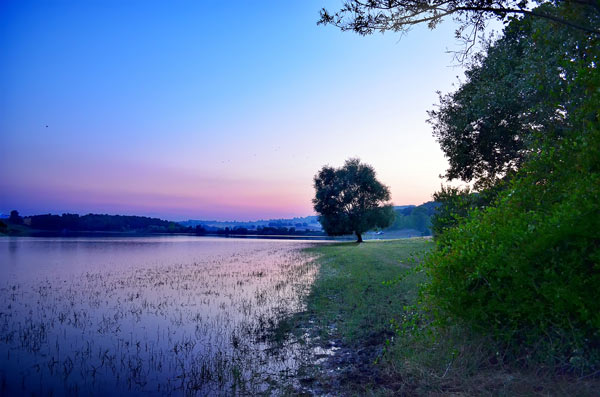
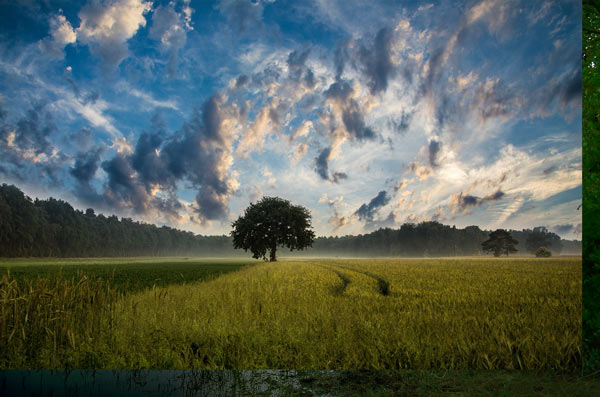
First, open the landscape image in Photoshop by selecting File > Open.
Step 2
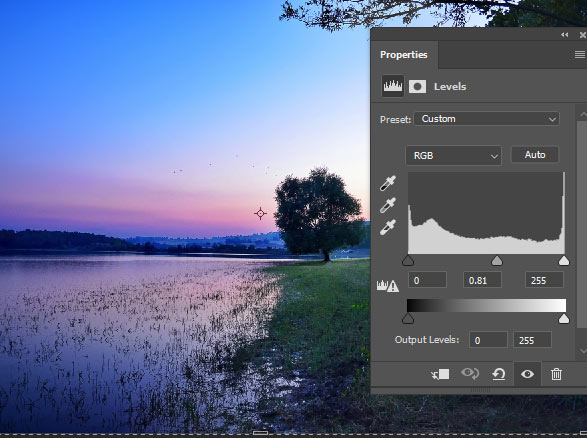
Go to Layer > New Adjustment Layer > Levels and make a Levels layer for the landscape. Then I just slightly changed the settings to increase the contrast of the entire image.
You can see the results and settings in the below image.
Step 3
Here I am using my lighting techniques which I found years ago. Basically, this technique depends on two layers and two blend modes. Let me explain it further first, create a new layer by pressing CTRL + SHIFT + N and then using the saturated orange color paint where you want to create the light using a soft brush. In my case, I painted on the right side.
You can see where I painted it. Remember I need the light in orange color so I have chosen that color. If you are working on the different image and need different light color there then you can change the color.

Change the blending mode of the Color layer to Color so the color can blend with the image.

Step 4
Create another layer and then fill this layer with black color. Change its blending mode to Color Dodge. Once you did that then paint exactly where you painted on the color layer using a soft brush with white color and brush opacity and flow set to 20%.
This will create the basic light effect on the image. Here are my results:

Step 5
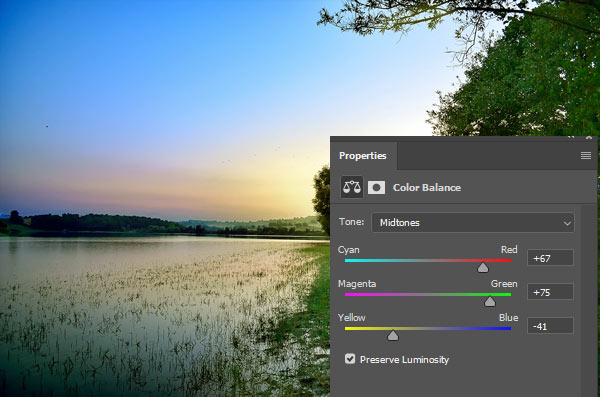
Make a Color Balance adjustment layer and change the color of the entire composition. Don’t clip this layer to any layer just put it on top of all layers.
Step 6
Create a new layer and using the soft brush with black color, paint on the corners to darken them. Use the brush with lower opacity and flow settings like somewhere between 20% – 30%.

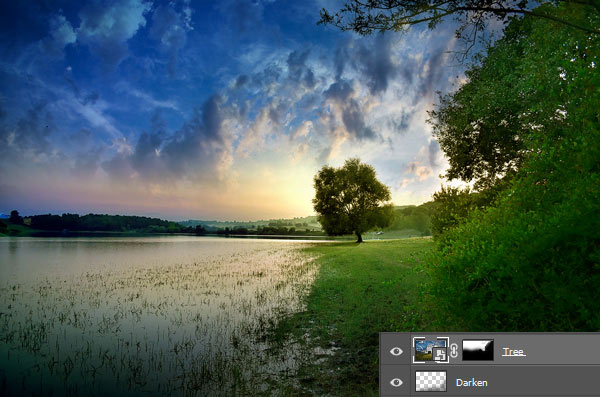
Step 7
Add the tree image to the main canvas by selecting File > Place Embedded and then place it. We are using this image to add clouds to the composition as the sky of the composition looks flat now.
Change the blending mode of the tree layer to Multiply to blend the clouds of the tree with the background. Once you changed the blending mode, you can notice that there are many overlapping parts which need to be erased.

Go to Layer > Layer Mask > Reveal All to add a mask to tree layer to remove those unwanted parts using a soft black brush.
You can face a problem when you go close to the bush parts of the landscape and to make the problem worse the branch which is hanging is difficult to extract. In this case you can head over to my Channels technique tutorial here. Once you read that tutorial, you can then make the selection of the landscape sky and then you can retrieve the selection to properly blend the clouds with the scene here.
Step 8
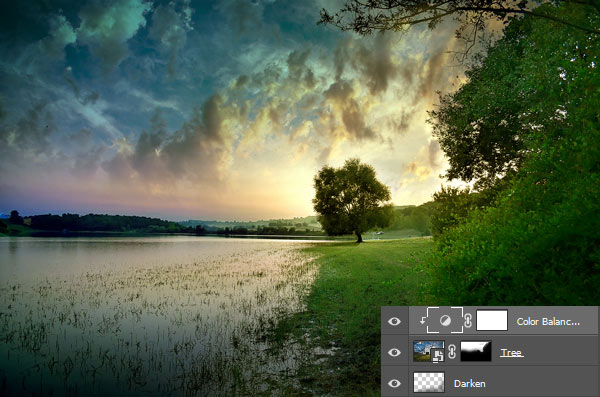
Make a Color Balance adjustment for tree and change the color to blend the clouds with the background.
I used this layer as Clipping Mask (click on the indicated icon to use this layer as Clipping Mask).

Here are the results:
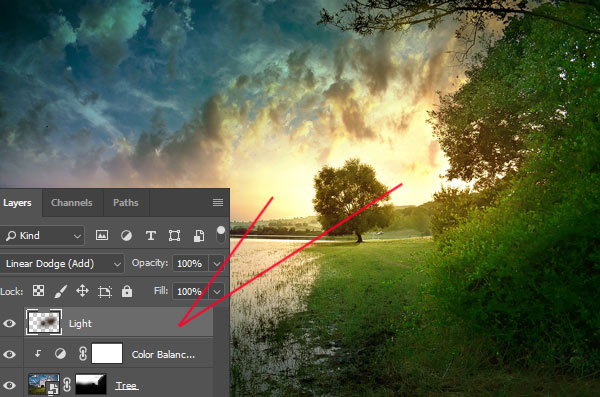
Step 9
Create a new layer and then pick a dark orange color and then use the soft brush to apply bigger brush stroke on the right side to create the light effect.

Change the blending mode of this layer to Linear Dodge.
Step 10
Here again I changed my mind and changed the color of the entire image by putting a Color Balance adjustment on top of all layer with the following settings:

Step 11
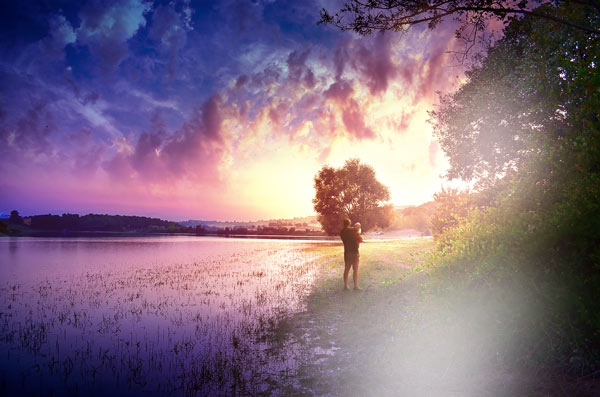
Add the father and child image to the main document. Now flip this image by activating the Transform Tool (CTRL + T) and while the tool is active click anywhere in the document and then choose Flip Horizontal.
After flipping the image, use the Pen Tool (P) to extract them from the background. Here you can see I made the selection using the Pen Tool (P):
While the selection is active, go to Layer > Layer Mask > Reveal All and extract them from the background. After that, I also masked some parts of the man’s shoes so it looks like they are covered by the grass.
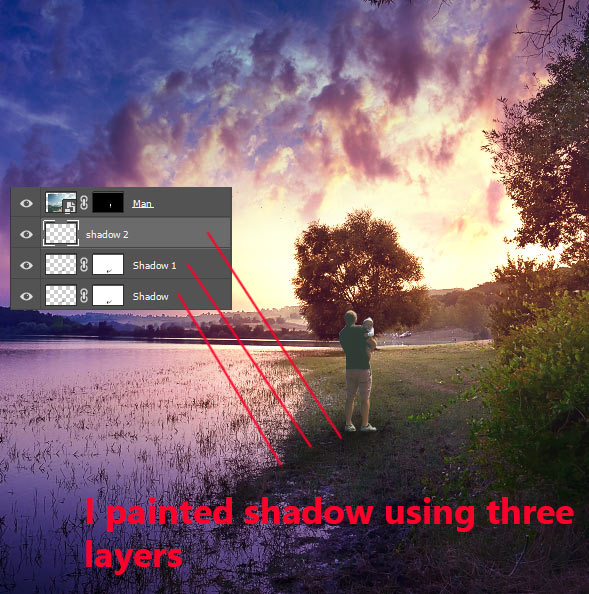
Step 12
I created three layers below the man layer to paint the shadows using a soft round black brush. I try to mask the shadow if I painted too much using layer mask that’s why you see the masks are added to these shadow layers. Also, you can reduce the opacity of the layer to subtle the effect of the shadows or soften the shadows.
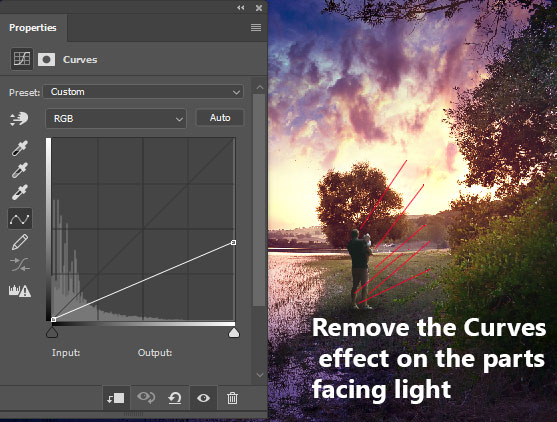
Step 13
Create a Curves adjustment for man and reduce the brightness. Once I reduced the brightness, I masked the dark effect of the Curves on those parts which are facing the lights. You can remove the Curves dark effect by painting on the layer mask using a black brush.
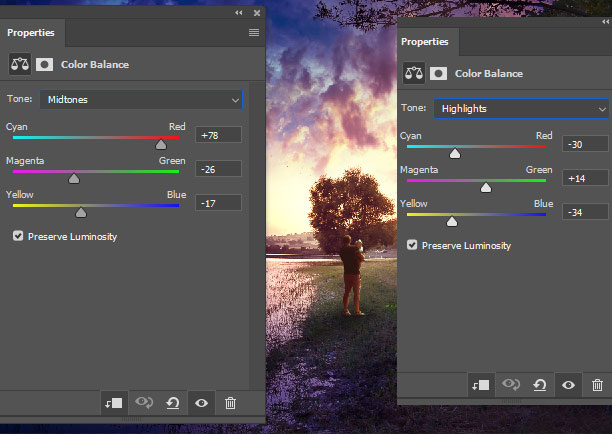
Step 14
For changing the color of the man, I used the Color Balance with the following settings:
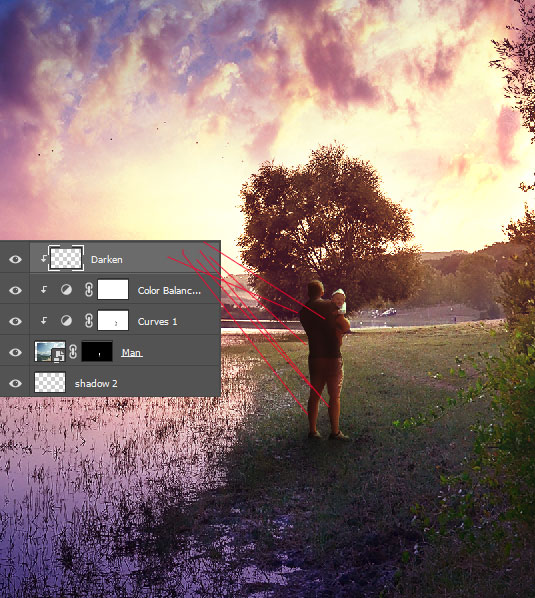
Step 15
I created a new layer and I’m clipping it to previous Color Balance layer which is already clipped to man layer. Now I am using a soft brush with black color to further darken the parts which need to be. These are the parts which are not going to be illuminated by the lights.
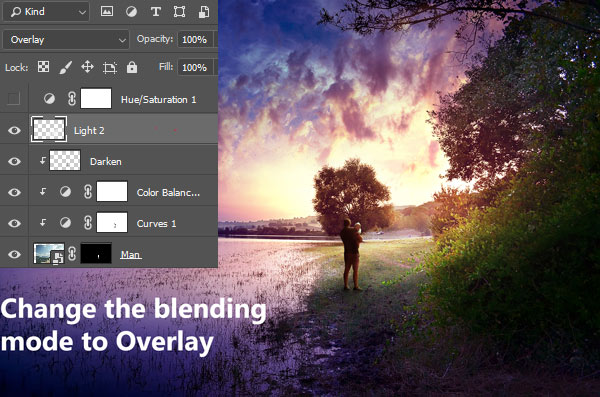
Step 16
Another technique which I used to create the light effect is the combination of white color and Overlay blend mode.
First, create a new layer and then use the white color with soft round brush to paint where you want to lighten up the things like you can see in the below image.

Now change the blending mode to Overlay to create the lights. You can also adjust the opacity of this light layer to subtle the effect if the light is too strong.
Step 17
Now again using the dark orange color I painted the light but this time I increased the range to the left side as well. This will make the light looks like it is coming from the right and be ending on the left side.
Change the blend mode to Linear Dodge.

Step 18
Again, I used the white color to paint more light.
After painting with white color, I changed the blending mode to Overlay.

Step 19
Now I’ll add the stars to the composition. Add the star texture image to the main document and then flip this image using the Transform Tool (CTRL + T) like we did for the man image in step 11.
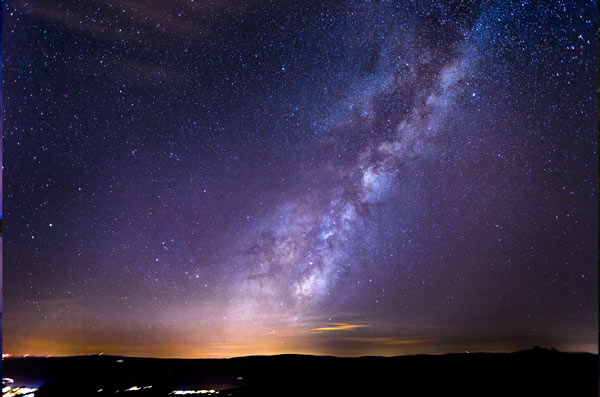
Change the blending of the texture to Hard Light.

I only want to add the stars to the sky and you can see some overlapping parts visible which I don’t want. Add a mask to star texture and then mask the highlighted parts in red color. Remember if you made the selection of the tree bushes which I said earlier, then you can retrieve the selection to make sure that star texture parts don’t go over the branches.

Here are the results after masking:

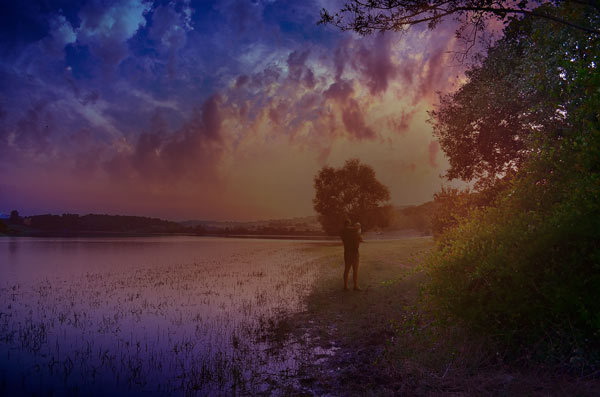
Step 20
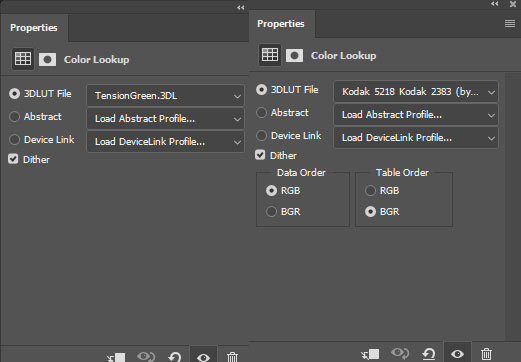
To finish this piece, I used two Color Lookup adjustment layers. The first one, which is TensionGreen, will change the color of the whole image and the second one, which is Kodak 5218 Kodak 2383, will give a boost of brightness and contrast.
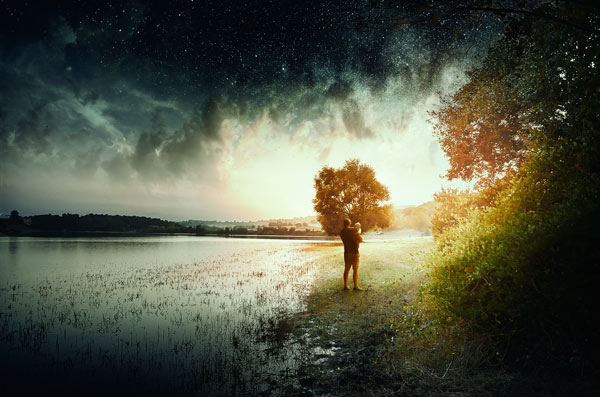
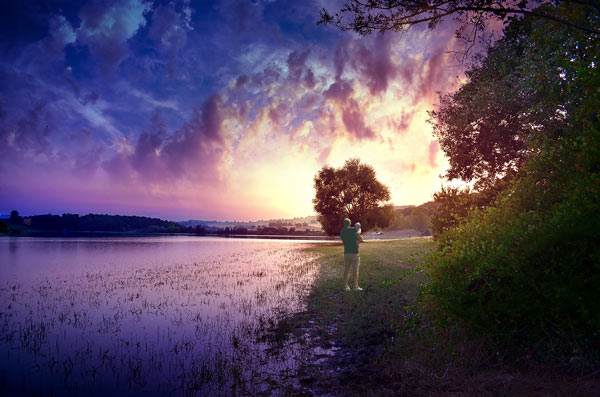
Here is the final outcome:

Need Help With Photoshop or Looking for Professional Support?
Whether you're just getting started with Photoshop or need expert-level assistance, we're here to help! Contact us for personalized Photoshop tutorials, project support, or creative services.
Get in touch today to take your skills or projects to the next level.
CONTACT US NOW📘 Want to Master Photoshop Faster?
🎁 Get Your FREE PDF E-Book "Top 10 Photoshop Tricks Every Designer Must Know" Now – Packed with expert tips, shortcuts, and techniques to boost your creativity & workflow.
👉 Download Your FREE PDF E-Book NOW!
