


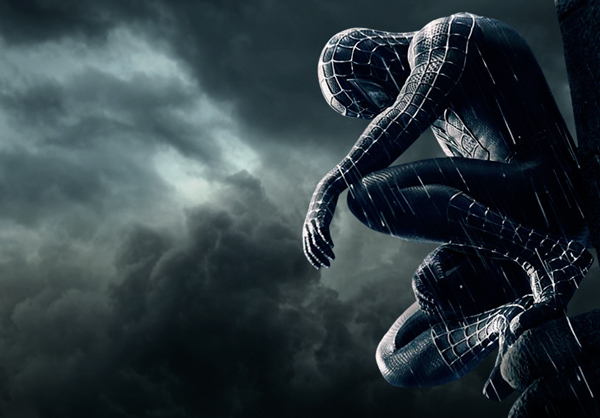
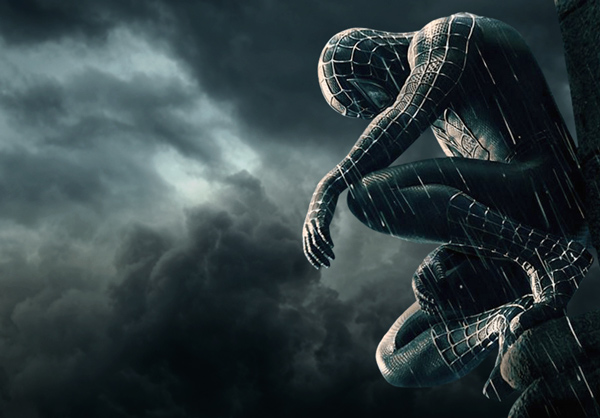
In this Photoshop tutorial, I’ll show you how to create a dark Spiderman photo manipulation in Photoshop. We’ll first create a dark, ghastly and stormy background for our hero Spidey. After that, we’ll add our hero to the main scene and then we’ll blend him using blending techniques. After that, we’ll add rain effect and finalize the whole scene using the adjustment layers.
Tutorial Resources
Preparing Dark Background for Spiderman
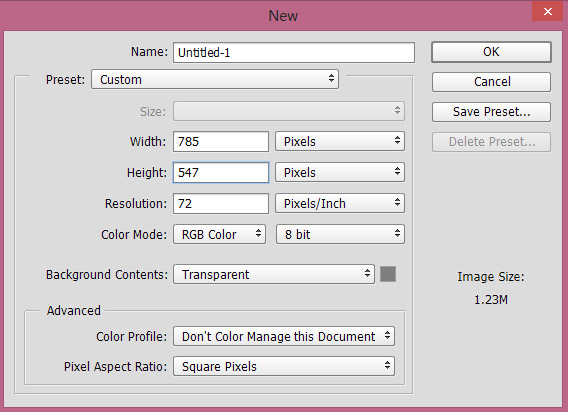
Step 1
Start by creating a new document by selecting File > New and give the following values or feel to choose your own. I’m working with lower settings due to reduced quality of Spiderman image and that’s an only regret for me. If you find this pose of Spiderman in good quality, then do let me know I want to recreate this piece in the bigger document in good quality.
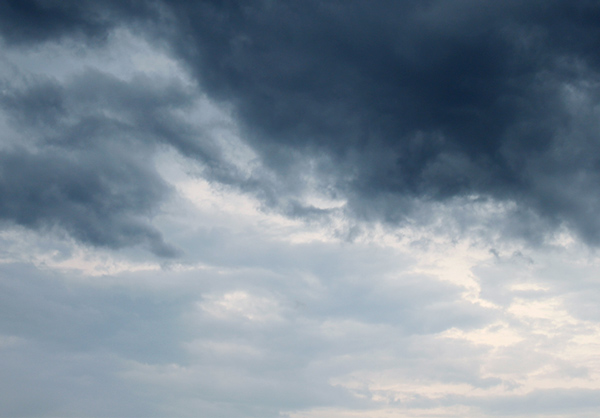
Step 2
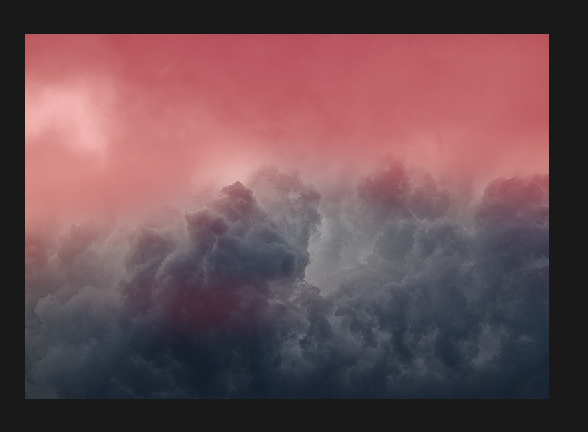
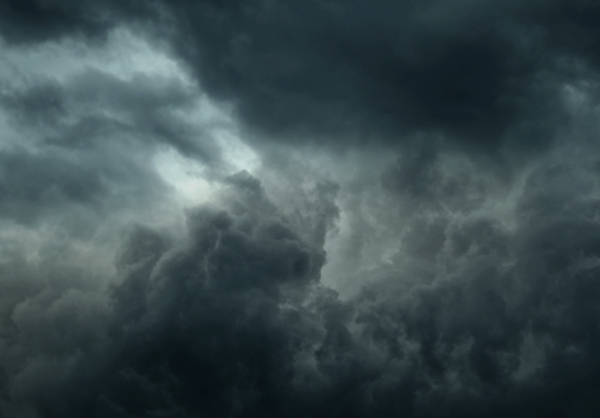
Place the sky 1 image to main document by selecting File > New and place the sky 1 to main document.
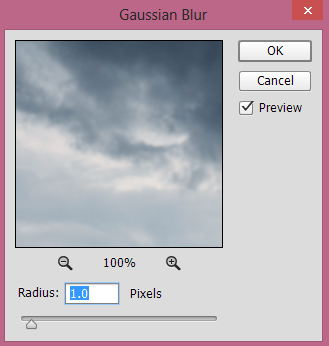
Step 3
Convert the sky image into Smart Objects. Go to Filter > Blur > Gaussian Blur and set the radius value to 1.0 pixels and blur the sky as I want more focus on Spidey.
Results:

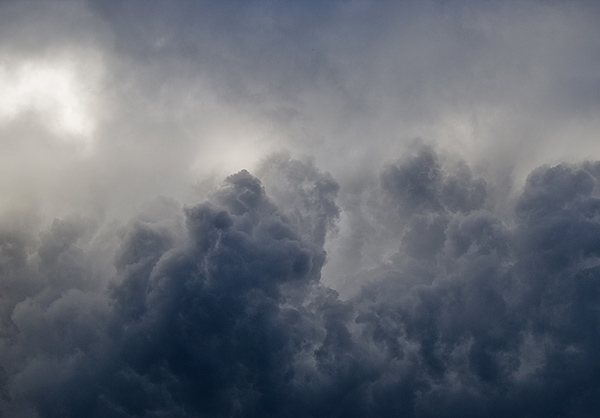
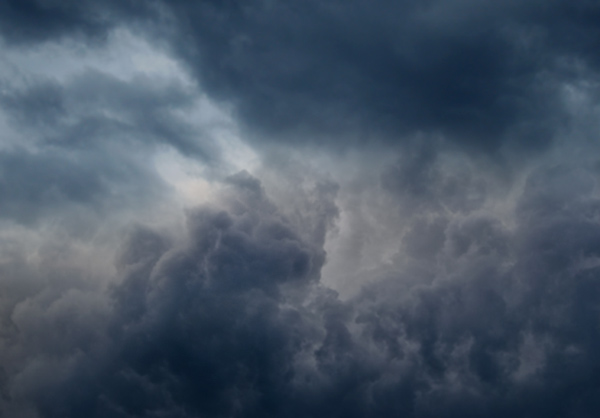
Step 4
Add the Sky 2 image to main document using Place command. Here you can see how I placed it:
Step 5
Add a Layer Mask to sky 2 by clicking on the second icon at the bottom of layer panel. Now using a soft round black brush mask the highlighted red area of sky 2 and blend the sky 2 with Sky 1.
Results after masking:

Step 6
I used same amount of Gaussian Blur for sky 2 which I used for sky 1 to blur it. Here you can see the results applying adding blur:
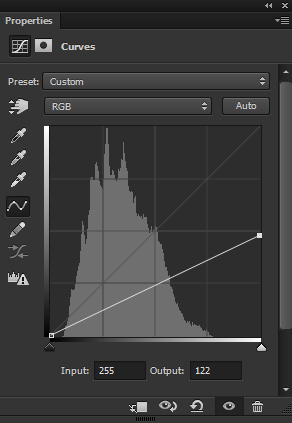
Step 7
Make a Curves adjustment layer by clicking on third icon at the bottom of layer panel. Now reduce the brightness and darken the entire scene. Use the following settings :
Results:
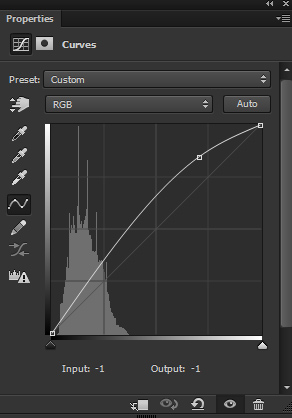
Step 8
In heavy rainy weather, we see high contrast or kind of thunder white lightning in the sky. To achieve that, I used again a Curves adjustment layer and this time I increased the brightness on the highlights.
Reduce the opacity to 90%.
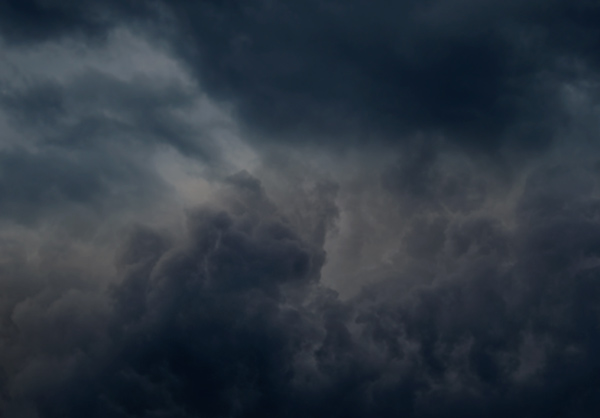
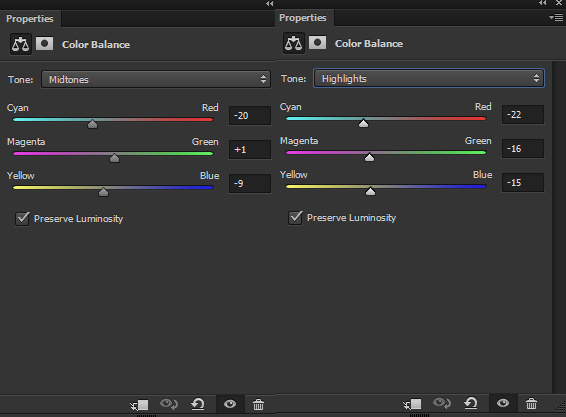
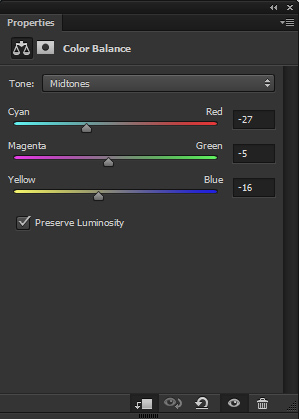
Step 9
Now make a Color Balance adjustment and, using the following Midtones and Highlights setting match all the elements into one color.
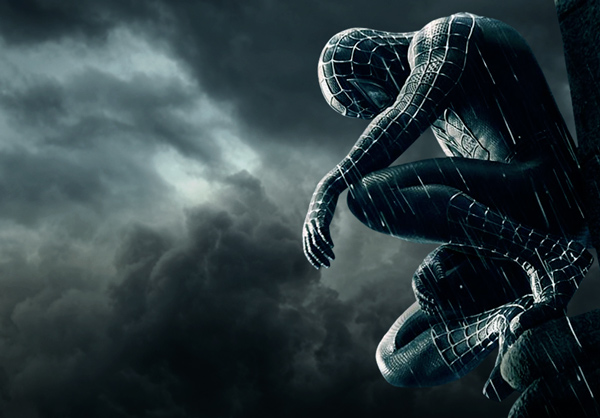
Results:
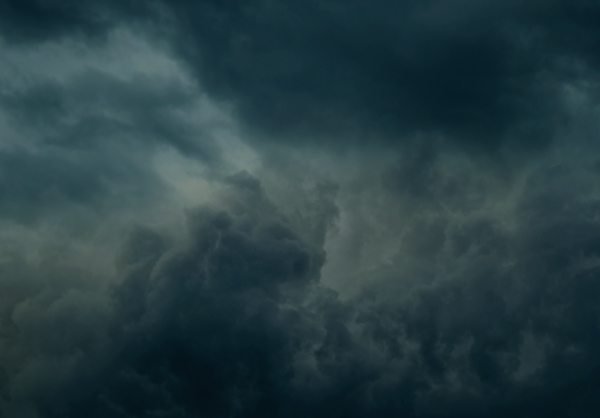
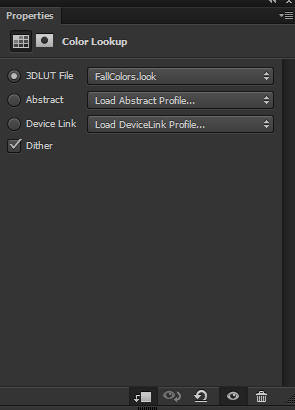
Step 10
Make Color Lookup adjustment layer and increase the contrast using the Bleach Bypass file.
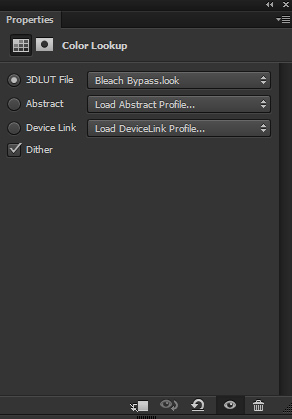
Reduce the opacity to 70%.
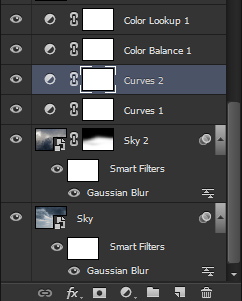
Layer panel arranged so far:
Step 11
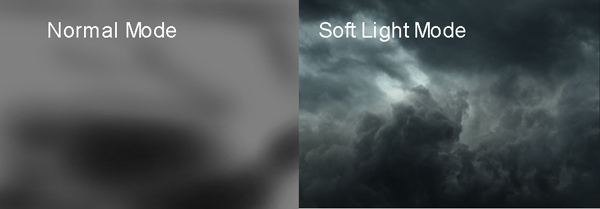
Create a new layer and change the blend mode to Soft Light, and fill this layer with 50% gray color.
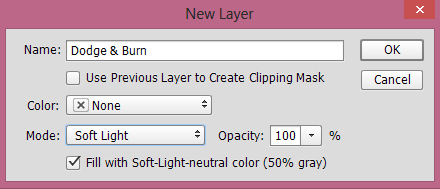
Activate the Dodge & Burn Tool (O) with Midtones Range, and Exposure about 9-12. Now start refining the light and shade on the background. Use the Dodge Tool to add more light at the top and wherever you see the brighten parts on the sky. Similarly, use the Burn Tool to strengthen shade to darker parts. Don’t forget to switch between the Range and varying the Exposure during dodge & burn.
Adding Spiderman
Step 12
Open up the PSD file of Spiderman in Photoshop. Then drag the Spiderman to main document using Move Tool (V).
Step 13
I used a Color Balance adjustment layer to match the color of Spiderman with the background.
Results:
Step 14
Make a Color Lookup adjustment layer and use it with following settings to washed out the contrast from the Spiderman.
Results:
Step 15
I used Level adjustment layer to increase the brightness on Spiderman.
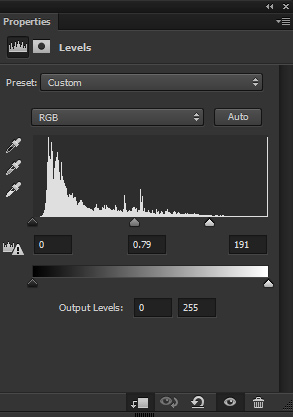
Results:

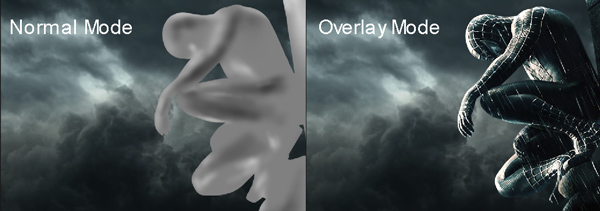
Step 16
Create a new layer with blend mode changed to Overlay. Fill this layer with 50% Gray color and don’t forget to set this layer as Clipping Mask.
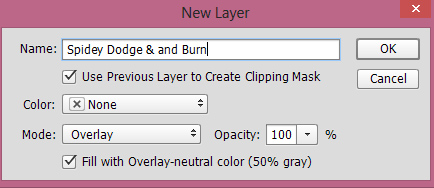
Using the Dodge and Burn (O), refine the shade and light on the Spiderman using the same settings which we used for the background. Here you can see how I did it in both modes.
Adding Rain
Step 17
I created rain using Add Noise and Motion Blur filter. I am not going to explain how I created the rain because I’ve already devoted a full tutorial on creating rain and achieving realistic rain effects as well. You can read Shooter Photoshop Tutorial. So visit the page and learn how to create realistic rain or otherwise you can also use rain brushes to paint rain.
Here are the results after creating rain:

Step 18
I used splash image to create water splashed on the shoulder and thigh of the Spiderman. Again this technique is used from Shooter Photoshop tutorial. You can see the water splash effect here.

Final Adjustment
Step 19
Everything is set up and we can proceed to final adjustment. Create a Selective Color adjustment layer and finalize the whole with the color you want. You can see the settings below for White and Neutrals Color:
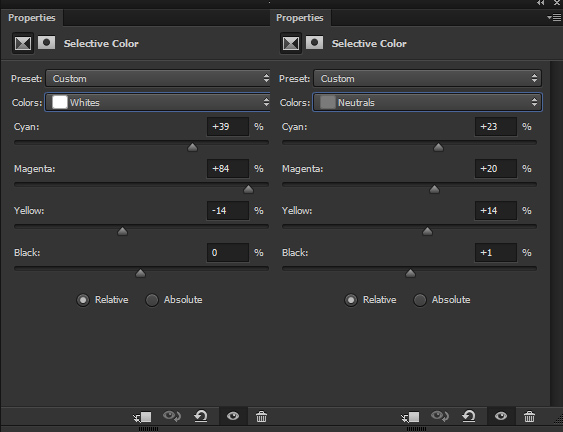
Here are the settings for Blacks:
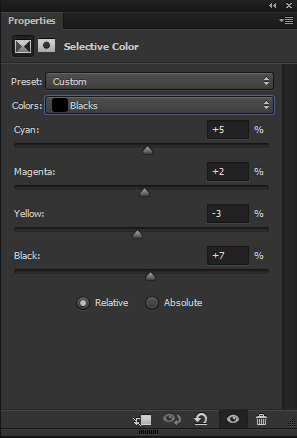
Here are the results:
Step 20
You can notice some colors like green on the sky, red on Spidey shoes or kind Magentas colors as well. To get rid of that you can Hue/Saturation adjustment layer then select the color you want to remove in the drop down menu. After that simply reduce the saturation. Like I removed the all yellow and reds using the following settings:
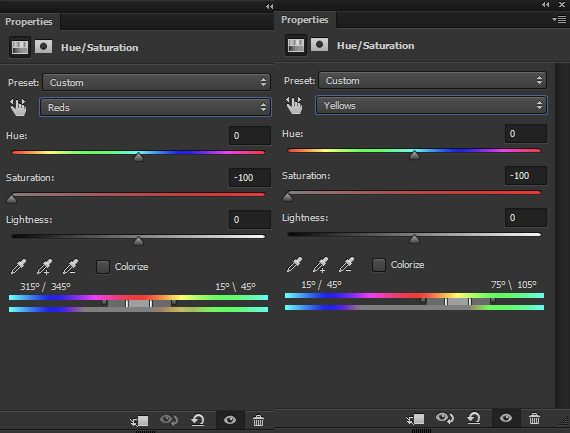
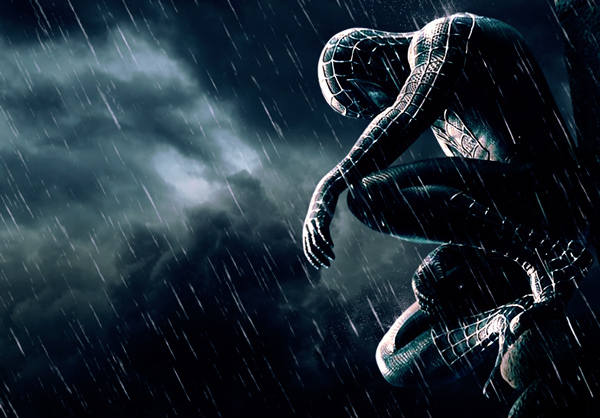
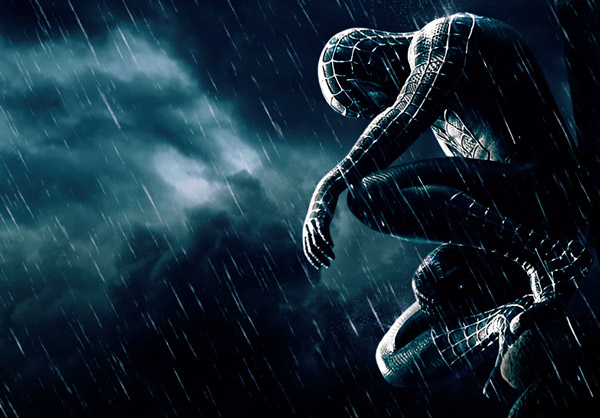
Similarly, if you find any kind of color cast you can remove it using this technique. Here are the final results:
Conclusion
Thanks for following the tutorial and you enjoyed the tutorial. If you like the tutorial then do share it with the world. Have a great day and keep photoshopping who knows what you can create!
Need Help With Photoshop or Looking for Professional Support?
Whether you're just getting started with Photoshop or need expert-level assistance, we're here to help! Contact us for personalized Photoshop tutorials, project support, or creative services.
Get in touch today to take your skills or projects to the next level.
CONTACT US NOW📘 Want to Master Photoshop Faster?
🎁 Get Your FREE PDF E-Book "Top 10 Photoshop Tricks Every Designer Must Know" Now – Packed with expert tips, shortcuts, and techniques to boost your creativity & workflow.
👉 Download Your FREE PDF E-Book NOW!
