


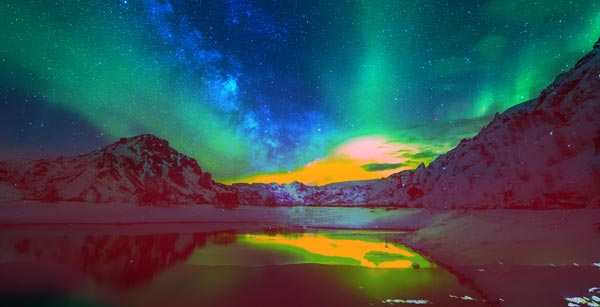
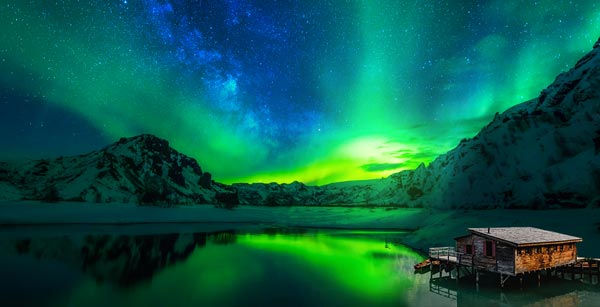
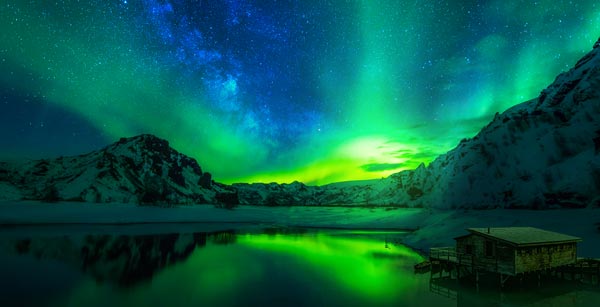
In this tutorial, you’ll learn how to create an aurora landscape in Photoshop. You’ll how to create the magic of polar light or northern light by blending images and using starry or aurora textures. We’ll also add a house on the lake and I’ll give you some tips on creating light effect.
Tutorial Resources
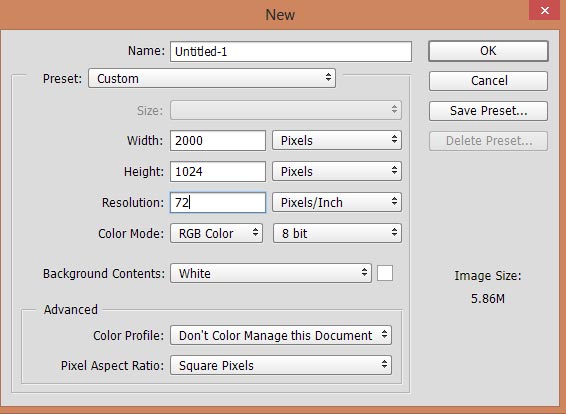
Step 1
Open a new document in Photoshop (File > New) and give the following settings:
Step 2
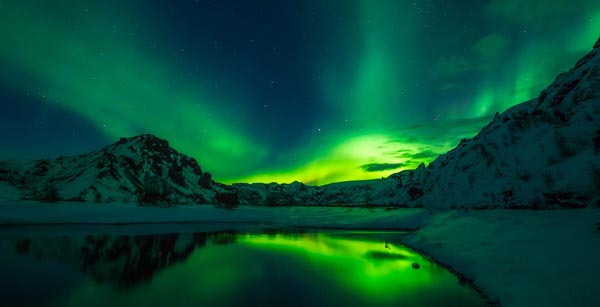
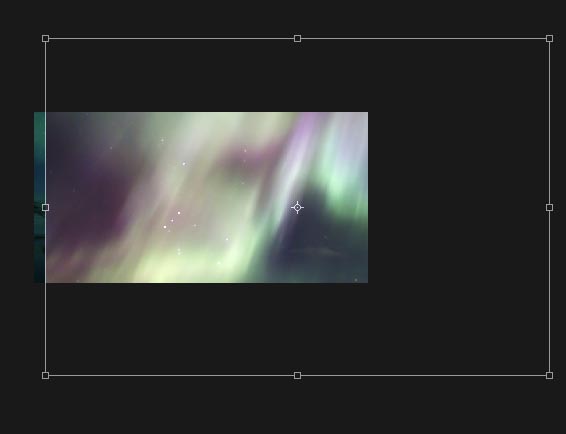
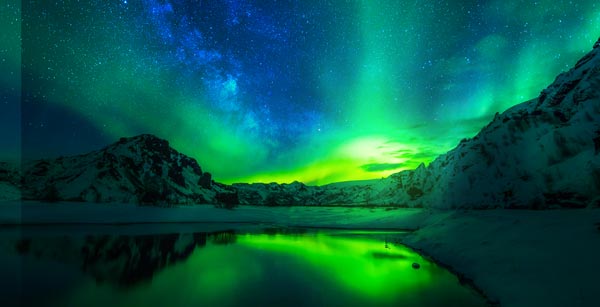
Add the iceland image in Photoshop. Go to File > Place Embedded to the add the image on the newly created document.
Step 3
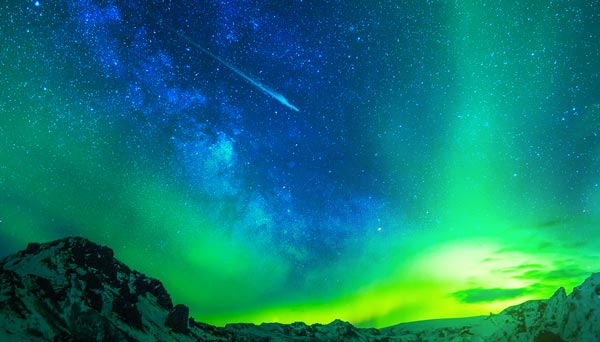
Add the texture 1 to the document. The goal here is to add the stars in the sky.
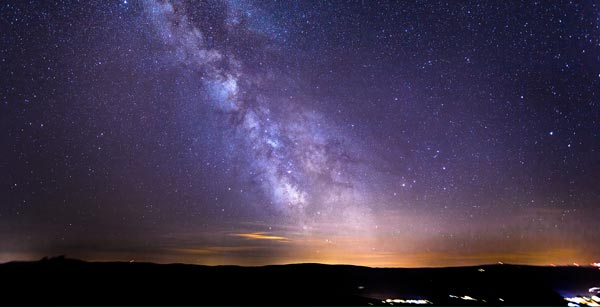
To blend the star image to existing background, simply change the blending mode to Color Dodge and this will also light up the sky.
Step 4
Since we used the Color Dodge, then we all know its gonna light up everything whatever below it. As as result, you can notice that some parts like the lake area, has been affected as well. Also, we got lots more light there and I don’t want that.
Add a mask to star layer by clicking on the second icon on layer panel. Then, use a soft, basic black brush to erase the parts shown in red color. Remember, you can keep the parts wherever you want the light.
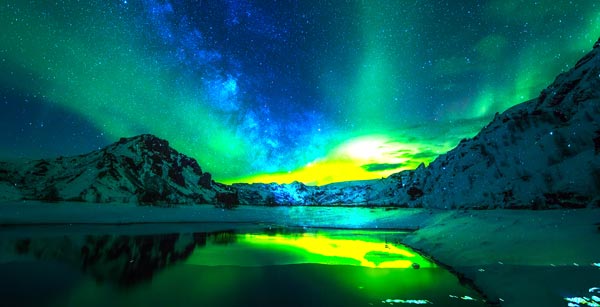
Results so far:

Step 5
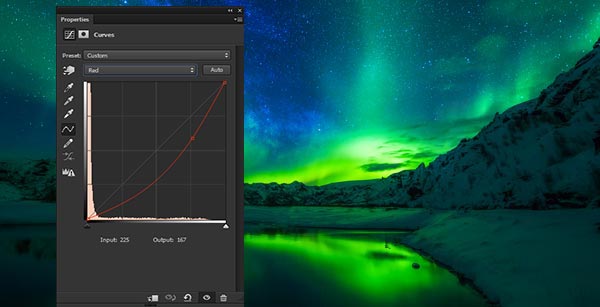
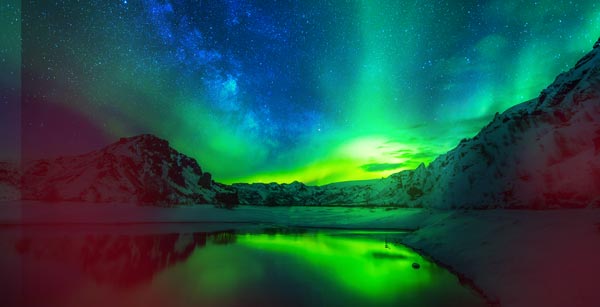
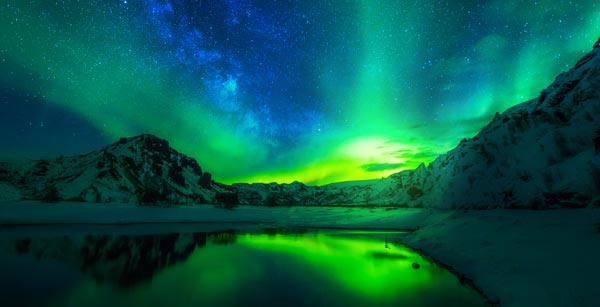
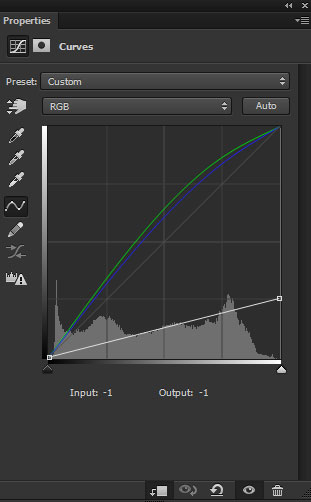
I noticed some yellow tones in the aurora light and I want to keep them completed green by changing the color.
Go to Layer >New Adjustment Layers >Curves and alter the Red channel settings. Please do compare the before and after results.
Step 6
It’s time to paint the light. Press CTRL + SHIFT + N and create a new layer. Pick a saturated green color, I chose (#21490e), using a soft brush, paint the light as shown below.
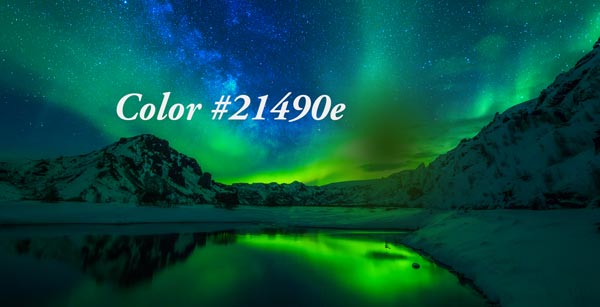
Alter the blending mode to Linear Dodge 100%
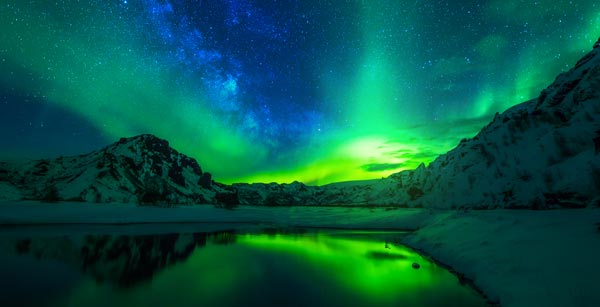
Step 7
Open up the texture 2 and then add it to our main canvas. Use the Free Transform Tool (CTRL + T) to enlarge it like shown below. Do resize it this will help us to add the northern light rays coming from the sky. Of course, you can experiment with the size to get the results of your taste.
How I transformed it, you can see it below:
Set the blend mode to Overlay 51% and blend it properly with the background.
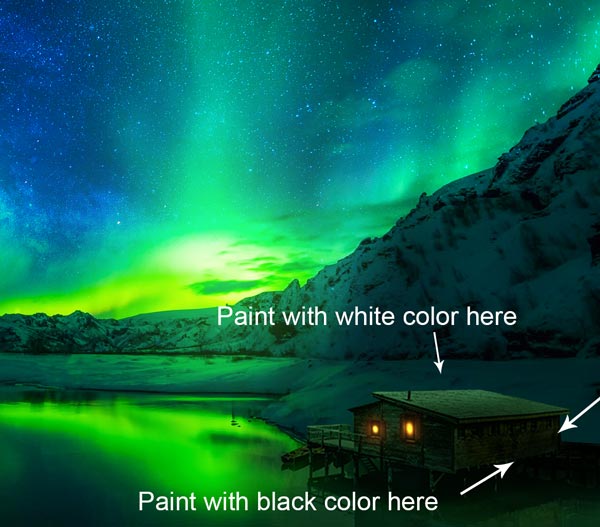
Step 8
You can see the flaws like dark edge on the left side due to Overlay blend mode. We need to get rid of it using a layer mask. Add a mask and remove the unwanted parts, highlighted in red color, using a basic black brush.
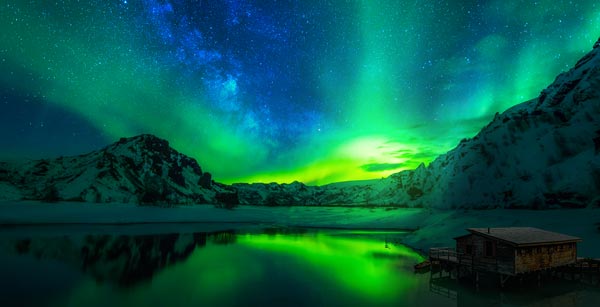
Your results should resemble to below image:
Add the House
Step 9
Place the house image to the right bottom corner.

Extract the house using Pen Tool (P) and try to keep the water reflection parts of the house. This will make the things easier and we don’t need to make the reflection of the house.
Step 10
I used the Color Balance adjustment layer for house as Clipping Mask (click on the red icon) in order to darken it and for changing the color similar to the background. You can see the values below.
Results on house:
Step 11
Make a Color Balance adjustment layer for house and now match its colors by altering only Midtones and Highlights settings:
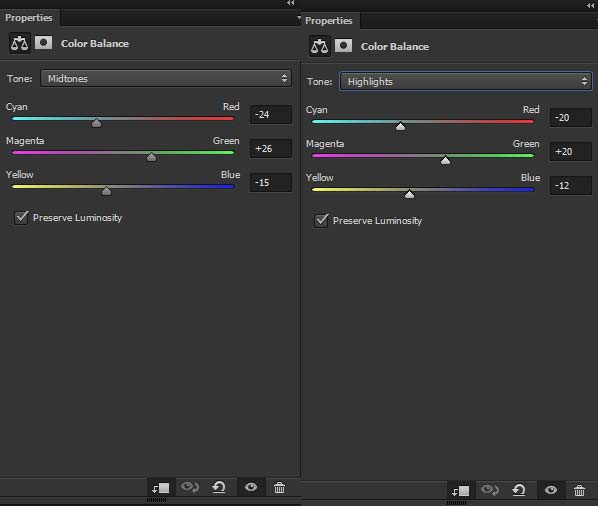
Effect of Color Balance:
Light up the Windows
Step 12
Now we’ll light up the windows using the combination of blend modes and colors. First, create a new layer with blend mode changed to Color and clip it to house layer (just click between newly created layer and house layer).
Use a saturated orange color #573508, then paint over the windows using soft brush. Remember, the lower you set the opacity and flow of the brush the better the results will be.
After that, create another layer with blend mode changed to Color Dodge and use it as clipping mask. Go to Edit > Fill and choose black in the drop down list to fill this layer with black color.
Using a soft round brush with white color paint over the windows again to light them up. Do reduce the opacity and flow of the brush around 20%.

Step 13
I further created glow on the window by painting more lights. Create a new layer and set its blend mode to Linear Dodge. Using a saturated orange color, I paint the light glow using a basic brush on the windows.
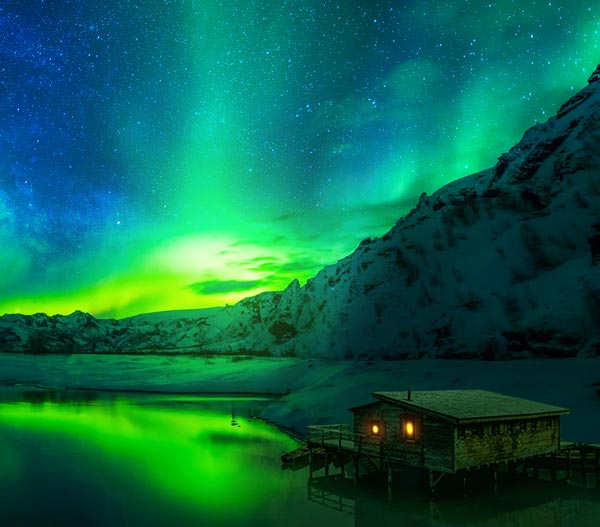
Step 14
Now we’ll correct the light and shadow on the house. Create a new layer and change its blend mode Overlay.
Use the soft brush with white color to paint on the rooftop and create light reflection. Similarly, use the brush with black color to darken the areas of the house indicated by arrows.
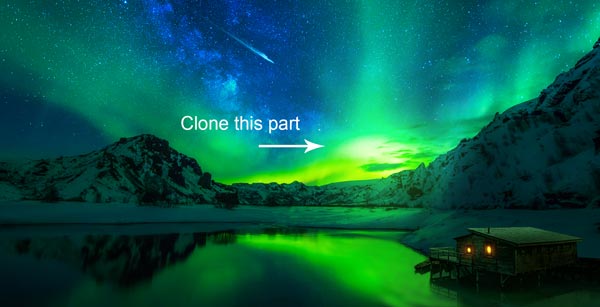
Step 15
Light reflection on the lake doesn’t look good because some parts added there while adding the house. I decided to clone them and the parts which I am going to clone, indicated in red color.

On a new layer, I cloned the lake parts using Clone Stamp Tool (S). You can see the results in the below image.
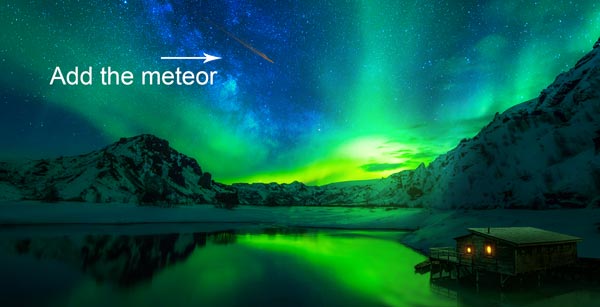
Add the Shooting Star
Step 16
Download the meteors pack and choose the meteor 2 png and then add it to main document.
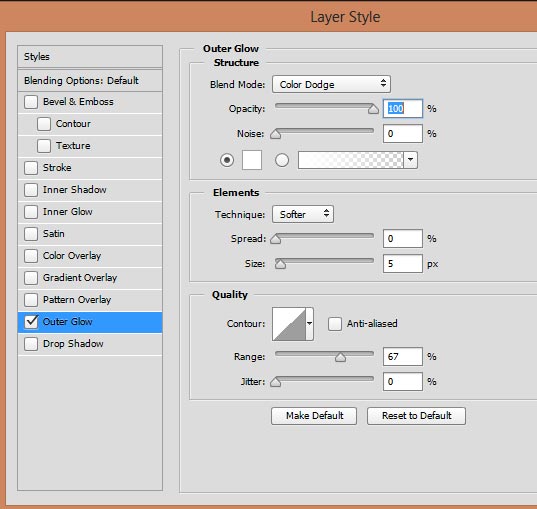
Step 17
Right click on the meteor layer and then select Blending Options. Click on the Outer Glow effect to apply it to meteor with the following settings:
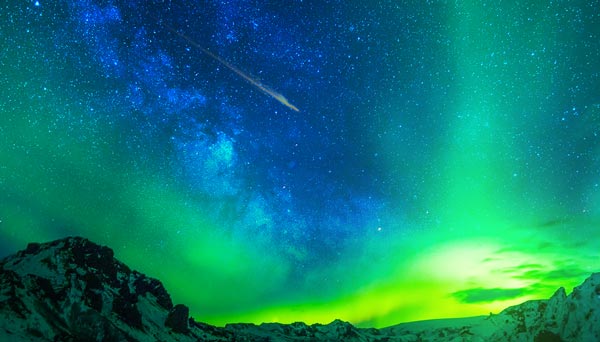
Added glow on shooting star:
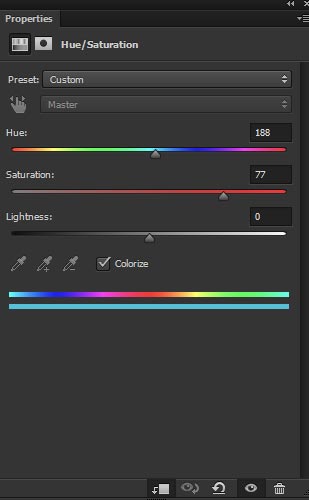
Step 18
Colorize the color of meteor using Hue/Saturation adjustment layer. I aim to alter its color to cyan.
After changing the color:
Step 19
In order to add more light glow to meteor, I used the same trick which I used for lighting up the windows of the house. The difference is about the color, for windows I chose a dark orange color, here I used the dark cyan color.

Step 20
Finally, I cloned the indicated cloud parts as I don’t this freaky white light on the sky.
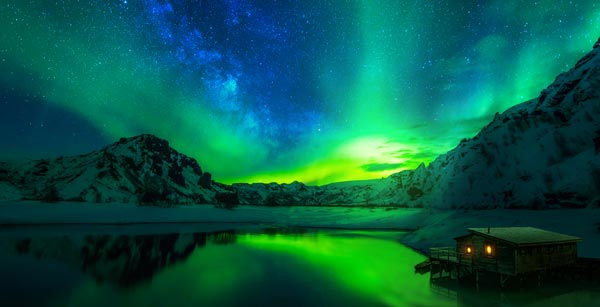
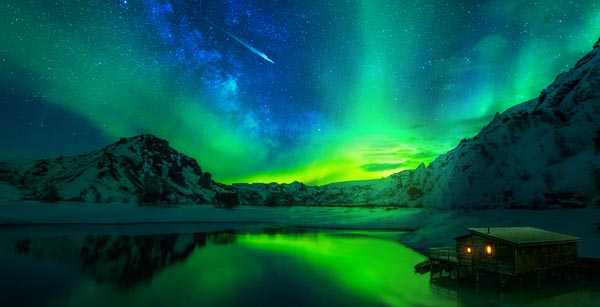
Final results:
Conclusion
Thanks for following the tutorial. Hope you like the tips in order to create aurora landscape. If you have any question, then do let me know. Till then keep creating new artworks with Photoshop!!
Need Help With Photoshop or Looking for Professional Support?
Whether you're just getting started with Photoshop or need expert-level assistance, we're here to help! Contact us for personalized Photoshop tutorials, project support, or creative services.
Get in touch today to take your skills or projects to the next level.
CONTACT US NOW📘 Want to Master Photoshop Faster?
🎁 Get Your FREE PDF E-Book "Top 10 Photoshop Tricks Every Designer Must Know" Now – Packed with expert tips, shortcuts, and techniques to boost your creativity & workflow.
👉 Download Your FREE PDF E-Book NOW!
