


In this tutorial, I’ll show you how to create a sunrise landscape in Photoshop. You’ll learn how to achieve sunrise mood by using stock images, working with lights and by painting mist. You’ll also learn how to enhance light and contrast to get the best landscape scenery in Photoshop. Let’s jump right in!!
Tutorial Resources
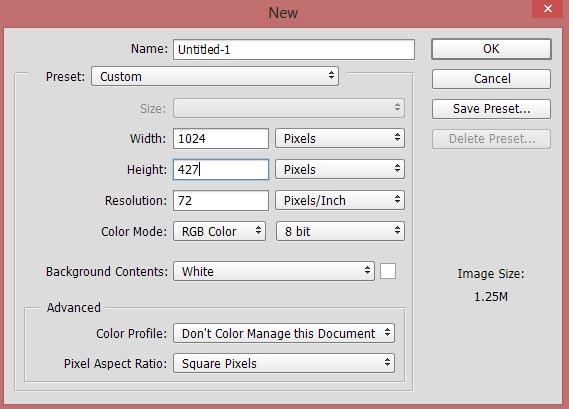
Step 1
As always, start by creating a new document by selecting File > New and give the following values:
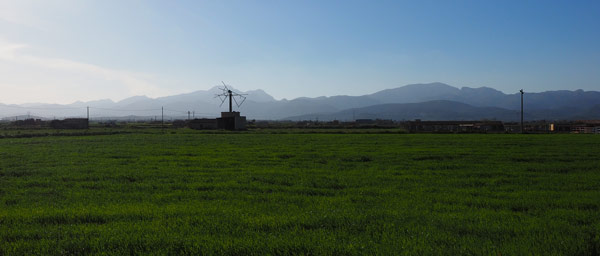
Step 2
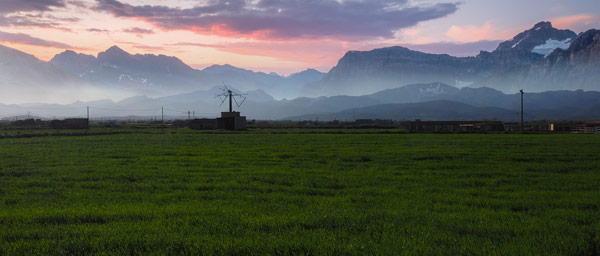
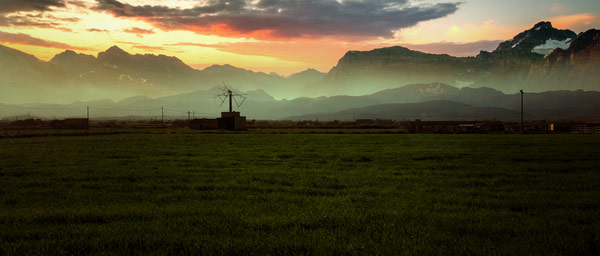
Open up the field image in Photoshop and then drag it to our main document using Move Tool (V). You can also place it to the main document using File > Place Embedded command, both do the same task. You can notice the image is perfect for a sunrise mood as it has the mist in the background, hills and a perfect light as well.
Step 3
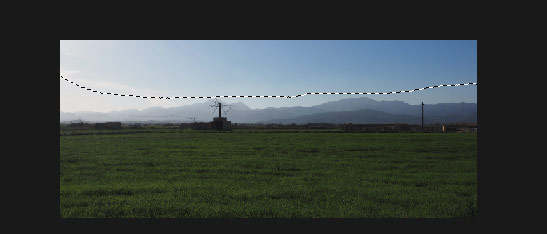
Place the mountain image to main document. We’ll use this image as sky and for adding some misty mountains in the background. Once you have added the image, flip it horizontally by activating the Transform Tool (CTRL + T) and then click anywhere on the document and choose Flip Horizontally in the drop down menu. Also, drag this mountain layer below the field layer.
Here you can see the image how I placed it:
We need to reveal the mountain layer in order to add the sky to our main scenery. To do this, add a mask to field layer by clicking on the second icon at the bottom of the layer panel. Now select the soft round black brush and mask the selected part of the field to reveal the layer below it. Here is the image for reference:
Here are the results:
Step 4
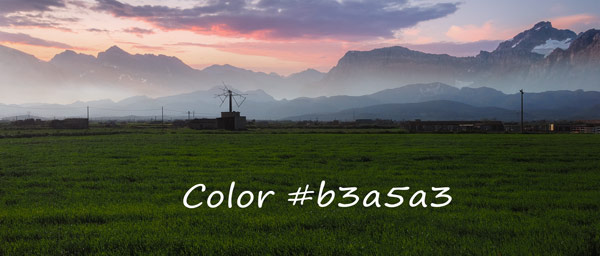
Press CTRL + SHIFT + N to create a new layer. Drag this layer below the field layer, but above the mountain. Name it ‘mist’. Choose a light color, I chose #b3a5a3, and then paint the mist using a soft round brush over the mountains.
Step 5
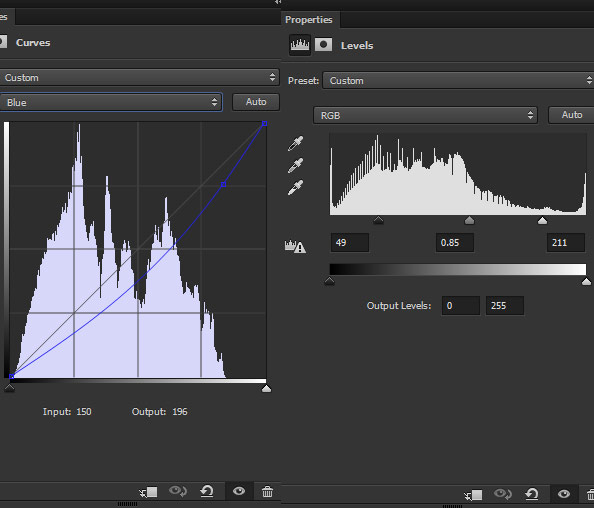
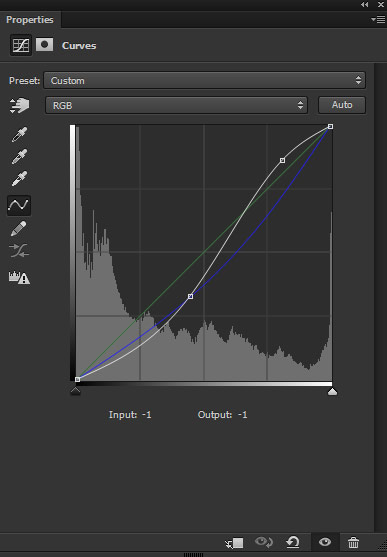
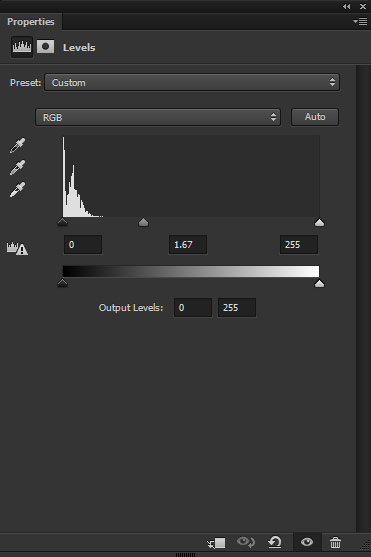
Let’s adjust the mountain layer using adjustment layers. Go to Layer > New Adjustment Layers > Curves and use the blue channel, to add the yellow tones to the mountain. I also used the Levels adjustment layer to increase the contrast.
You can see the settings of the both adjustment layers in below image.
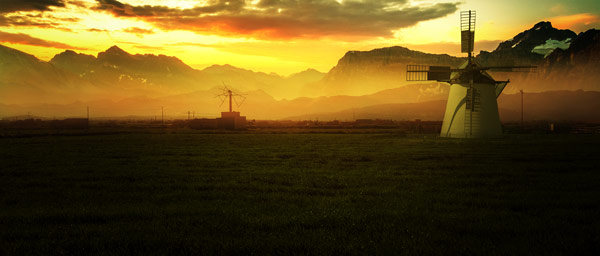
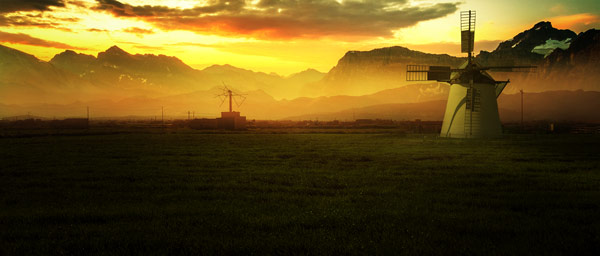
Here are the results:

Step 6
Now we are done with the background mountains and let’s get back to the field layer. Select the field layer and make a Curves adjustment layer. Set it as Clipping Mask by clicking on the icon highlighted in red color. Using the following settings decrease the lightness of the field.
On the layer mask of Curves, I masked the effect in the middle of the background using a soft round black brush. The goal here is to brighten the middle area as its close to the light source (light coming from the sky).
Step 7
Here are the results:
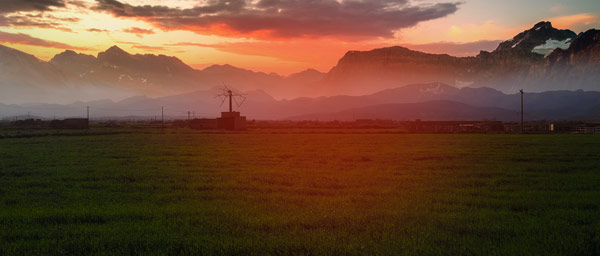
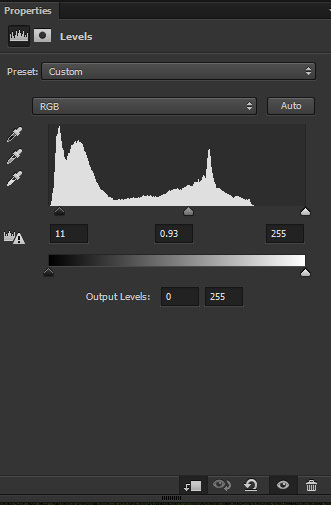
Step 8
I used Levels adjustment layer for field to increase the contrast.
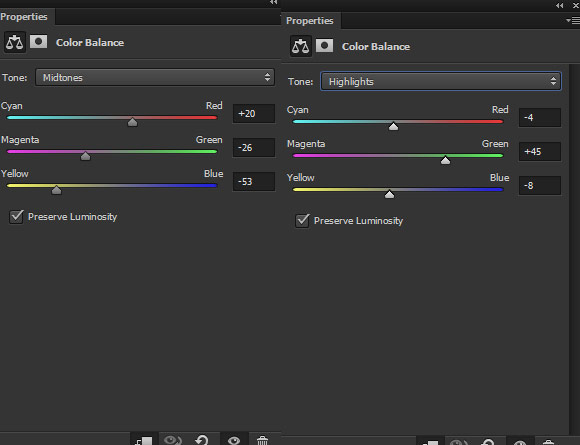
Using Color Balance adjustment layer, I matched the color of the field with the background.
Results so far:
Step 9
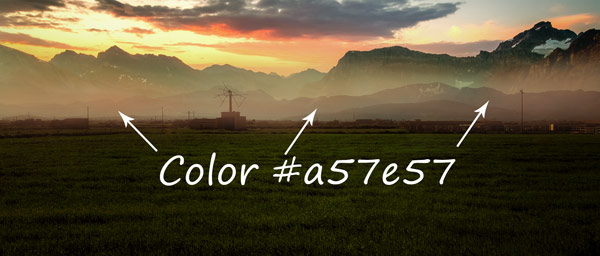
Create a new layer on top of all layers. Set the foreground color to #a57e57 and paint some mist using a soft brush over the background.
Step 10
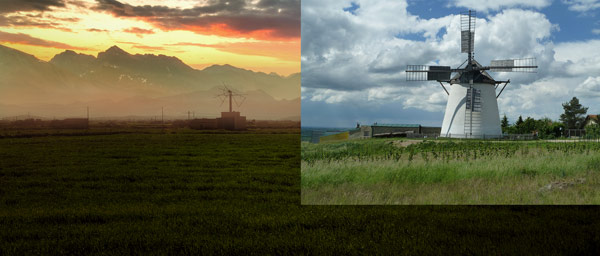
Add the windmill to the main document and place it to the right side of the document. Don’t forget to flip it horizontally like we did for mountain layer.
Use the Pen Tool (P) to extract out the windmill from the background (mostly from the sky). Now use the soft round black brush to mask its lower parts patiently as it clearly matches with the existing background.

Step 11
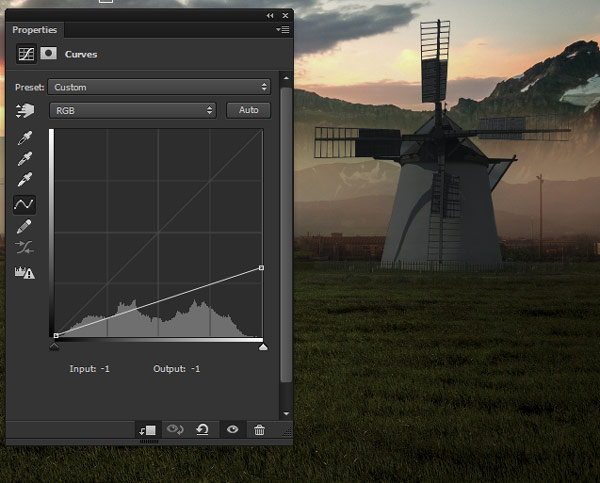
Make a Curves adjustment layer for windmill. Lower its brightness using the following settings:
Mask the dark effect of Curves, mostly on the left side parts as they will be reflected by the light source which we will create in the next couples of step. Here you can see the image which indicates where you need to mask the effect:
Step 12
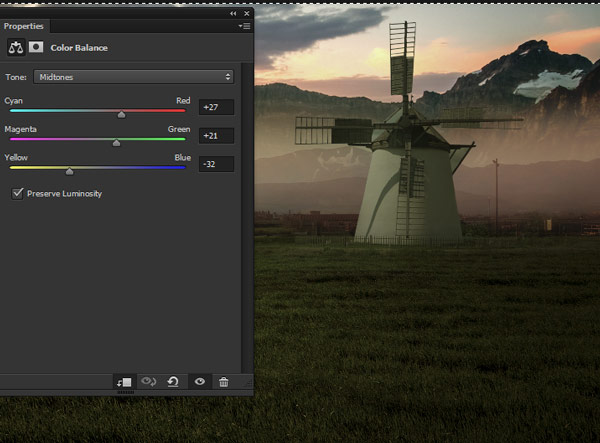
Continue coloring it using Color Balance adjustment layer and match its color with the background. Only use the Midtones settings :
Step 13
Create a new layer and name it ‘light source’. Choose a dark orange color like #412911 and using a soft round brush paint some lights.
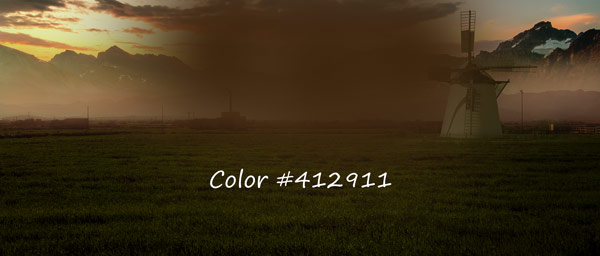
Set its blend mode to Linear Dodge.
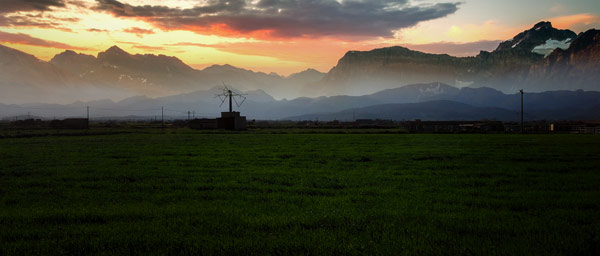
Step 14
Create a Curves adjustment layer on top of all layers. Alter the RGB and Blue channel settings to match color and contrast of the entire composition.
Results:
Step 15
Use a Levels adjustment layer to increase the lightness.
I don’t want to increase the lightness on the scene with this adjustment layer. I created it for adding some highlights coming from the sky and reflecting on the field. What you should do now, is that mask the effect of Levels in the rest of the parts, but leave it on the highlighted red parts as shown in the below image.

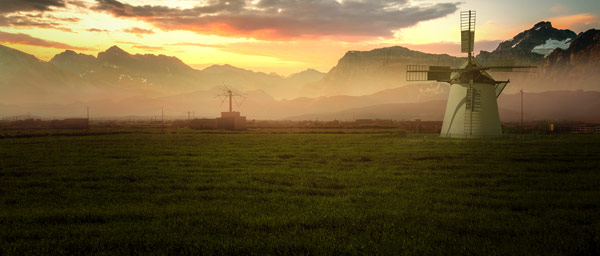
As you can see you we created the light which is coming from the sky and it is illuminating the field as well. Results so far:
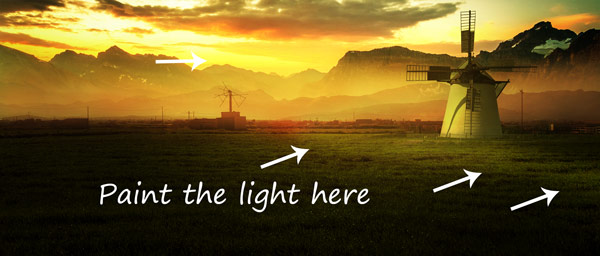
Step 16
Now we’ll enhance the light further which we just created in the previous step. Create a new layer and change its blend mode to Overlay 100%. Use a soft round brush with white color to paint the lights on the indicated area in the below image. Remember create the light diagonally coming from the left side of the sky to the bottom of the right side of the landscape. See the below the image for instructions.
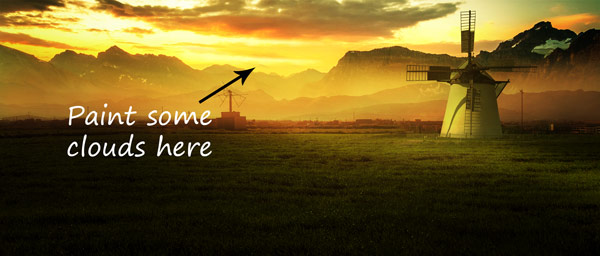
I didn’t like the clouds in the middle of the sky and I just painted it using cloning techniques. First, press CTRL + SHIFT + ALT + N to merge all layers into single one. Activate the Clone Stamp Tool (S) and then paint the clouds as shown in the below image.
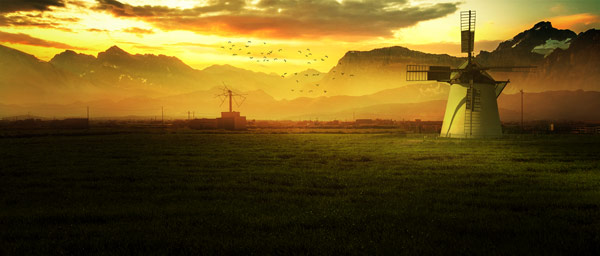
Step 17
Use the bird brushes for painting the birds on the background.
Step 18
Load the light rays brushes in Photoshop. Using any light brush to paint the light rays with white color. Name this layer ‘light rays’
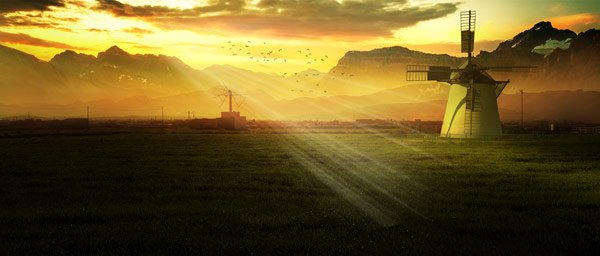
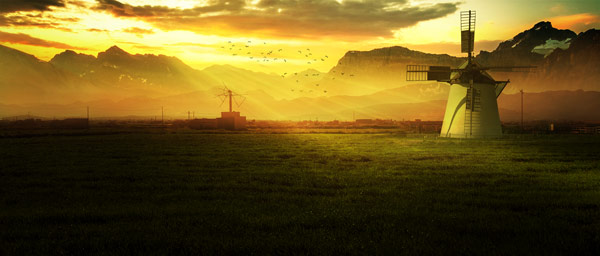
Change the blending mode of the light rays layer to Overlay 100%. Here are the final results:
Conclusion
Thanks for following the tutorial and I hope you like it. If you have any suggestion regarding this tutorial, then do let me know through comments.
Need Help With Photoshop or Looking for Professional Support?
Whether you're just getting started with Photoshop or need expert-level assistance, we're here to help! Contact us for personalized Photoshop tutorials, project support, or creative services.
Get in touch today to take your skills or projects to the next level.
CONTACT US NOW📘 Want to Master Photoshop Faster?
🎁 Get Your FREE PDF E-Book "Top 10 Photoshop Tricks Every Designer Must Know" Now – Packed with expert tips, shortcuts, and techniques to boost your creativity & workflow.
👉 Download Your FREE PDF E-Book NOW!
