
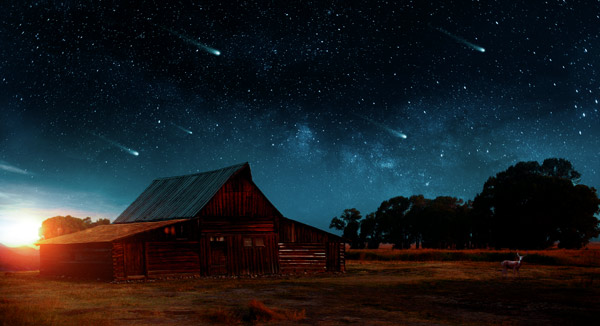

In this tutorial, we’ll be creating a sci-fi deer scene in Photoshop. We’ll use a landscape image first to set up the base for the main scene and then we’ll continue adding more images to composite. As the tutorial progress, we’ll make adjustments to images, use a layer mask and last but not the least we’ll do some color experiment at the final stage of the tutorial.
Tutorial Resources
Step 1
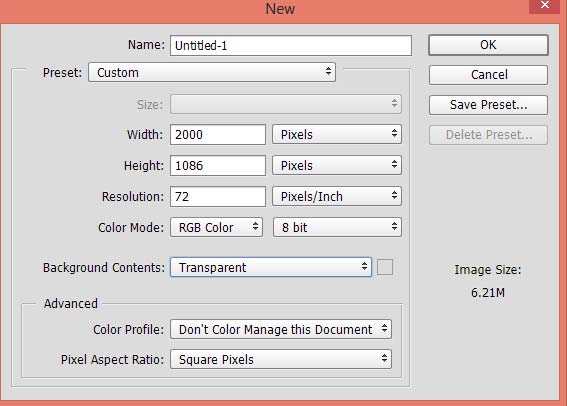
Go to File > New and create a new document in Photoshop. Give the settings below or you can also directly work on the landscape image if you want.
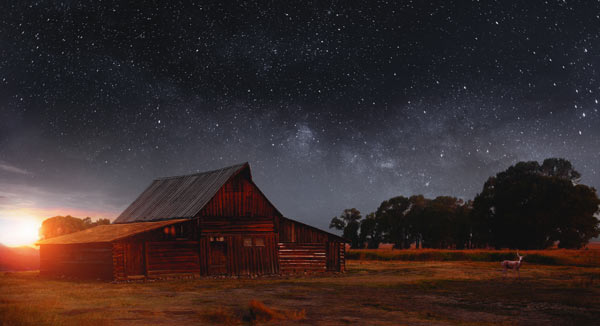
Step 2 – Add the Landscape
Download the landscape image and then place it to newly created document by selecting File > Place Embedded.
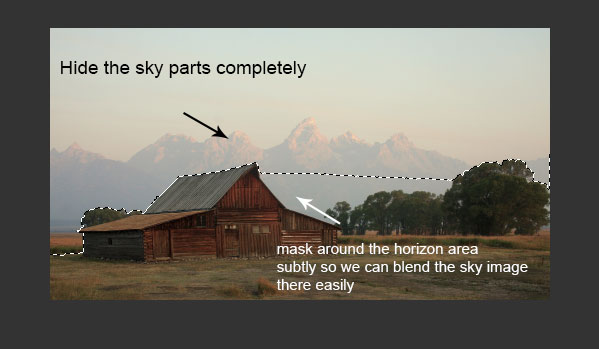
Once you did we are going to use a mask here to mask the sky of the landscape. First, add a mask to landscape layer, go to Layer > Layer Mask > Reveal All, then mask its sky parts (see black arrow) using a soft black brush. Then mask the horizon area subtly, don’t mask it completely, this will help us to better blend the sky 1 image (which we’ll add it later) there seamlessly.
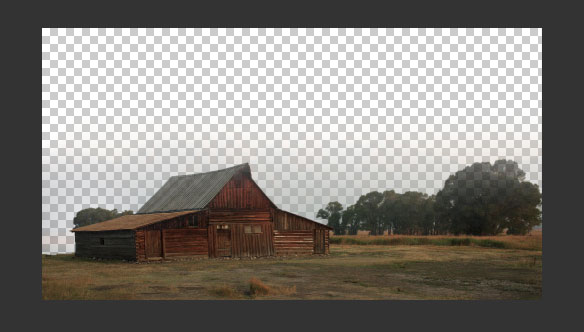
Here you can see the results after the masking:
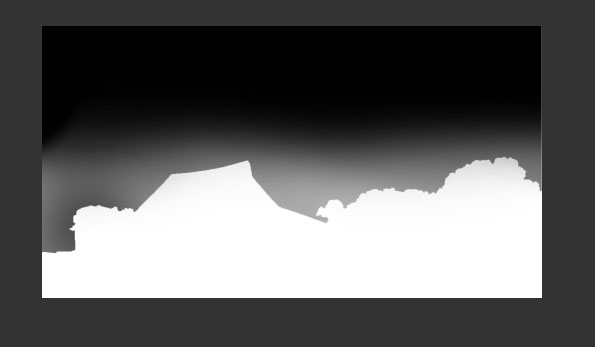
This layer mask results of the landscape layer shows where I hide the parts completely and where I did the masking subtly:
Step 3 – Add the Sky 1
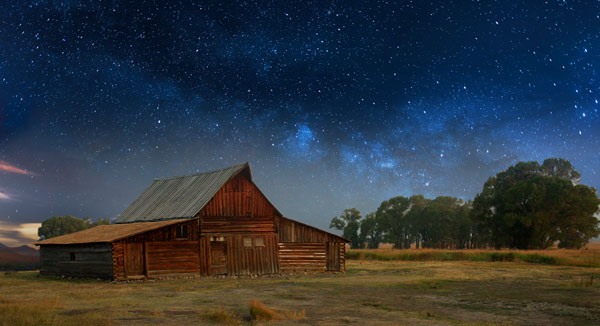
Add the sky image to scene and drag it below the landscape layer using Move Tool (V).
Step 4 – Add the Sky 2
This image is not available I tried to search it on Google but couldn’t find it. I downloaded the image from Pexels but the link of the image is redirecting to another image. So use any other sky image.
In the final outcome of the tutorial, you’ve already seen the light coming from the left side of the sky. The sky we just added don’t have the sky patterns, I mean it didn’t has the cloud and it got only the stars.
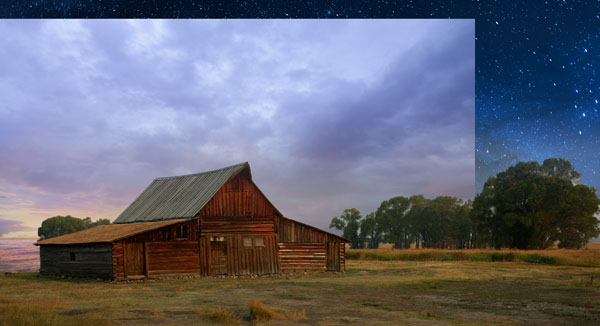
We’ll add the different sky there so add the sky 2 image.
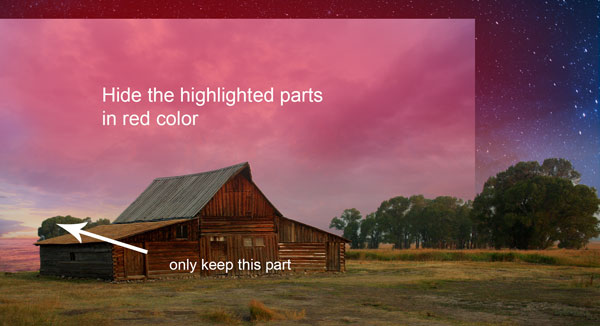
Add a mask to sky 2 layer and then remove the unwanted highlighted parts.
Once you did it you’ll have the little portion of the sky 2 image as shown below.

Step 5
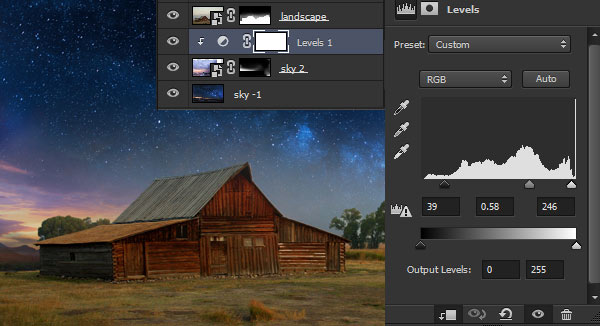
Go to Layer > New Adjustment Layer > Levels and balance the contrast of the sky 2. Remember to use the Levels layer as Clipping Mask.
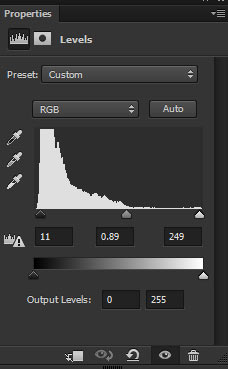
Step 6
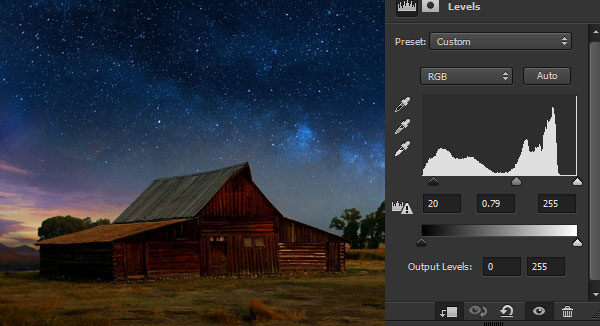
Get back to landscape layer and use a Levels adjustment for it as well. Darken it a bit using the following settings:
Step 7
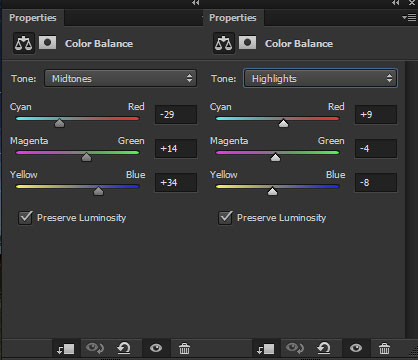
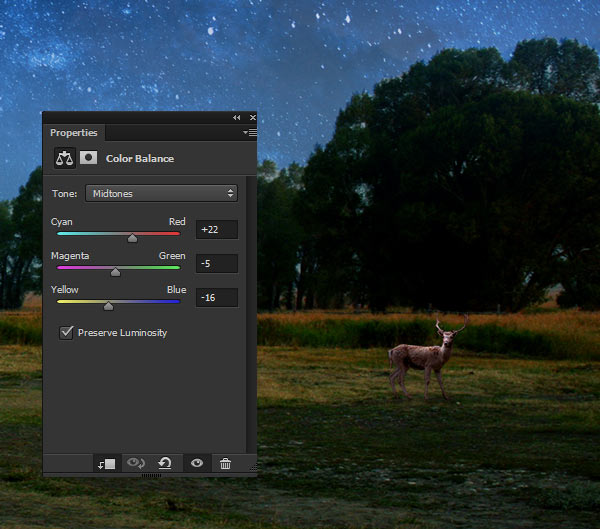
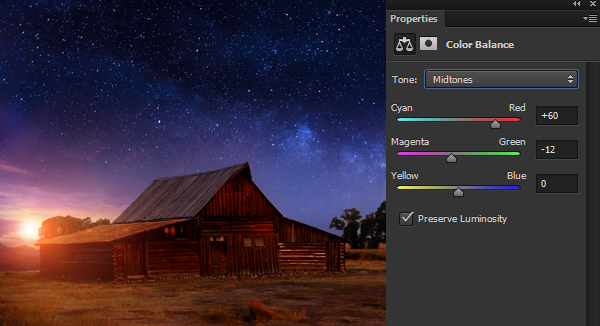
Make a Color Balance adjustment for landscape and add the combination of cyan and green tones.
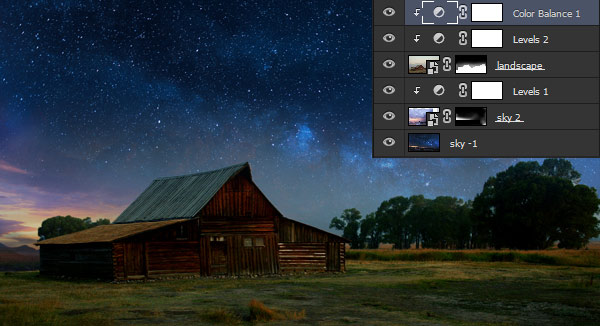
Results:
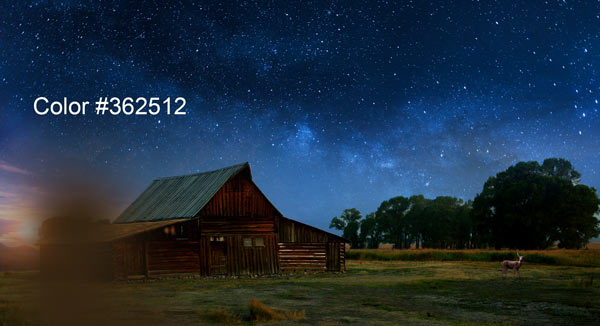
Step 8
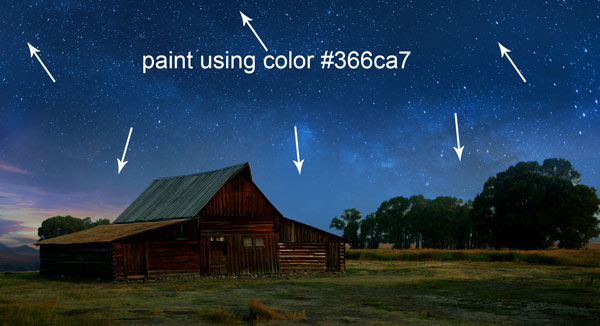
I noticed that the horizon area color isn’t matching with the sky. Also, I want to add the blue color to the sky. To do this, pick a blue color, I choose #366ca7, then paint on the sky and mostly on the horizon area on a new layer. Name this layer ‘blue color’.
You can take the help of the arrows as well showing you where I painted with the blue color.
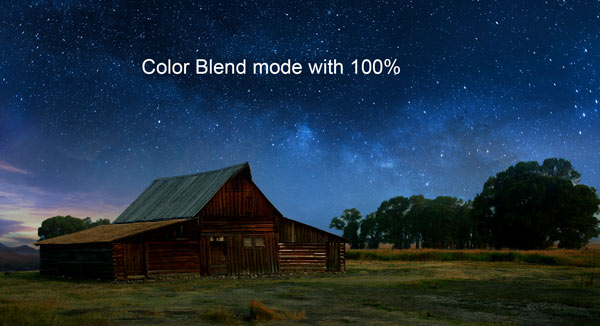
Now change the blending mode to Color so the blue color blend with the sky.
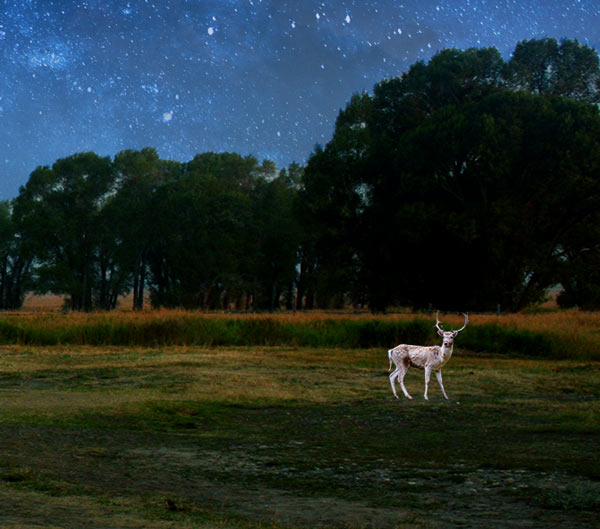
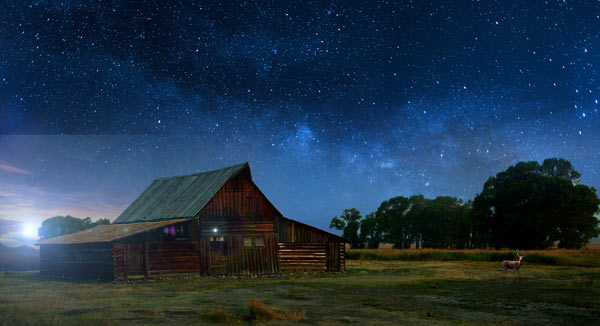
Step 9 – Add the Deer
Add our main character, the deer to the composition. Needless to say, you need to extract him from the background and then place him in the main document.
So place him on the right side.
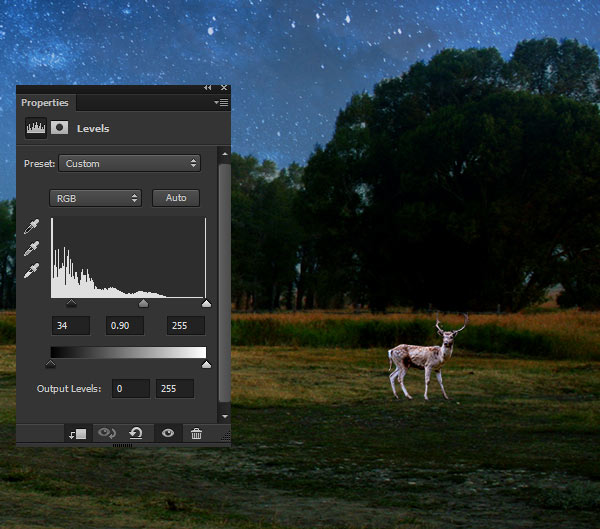
Step 10
Now we’ll apply a bunch of adjustment layers to deer to blend him with the scene and we’ll use them as Clipping Mask. So make a Levels layer to increase the contrast.
Step 11
Make a Curves adjustment layer and then darken him. After reducing the brightness, remove the dark effect of the Curves from the top body parts of the deer, mostly from his back, head and from horns so the light can reflect there.

Step 12
Use a Color Balance adjustment to alter the colors of the deer.
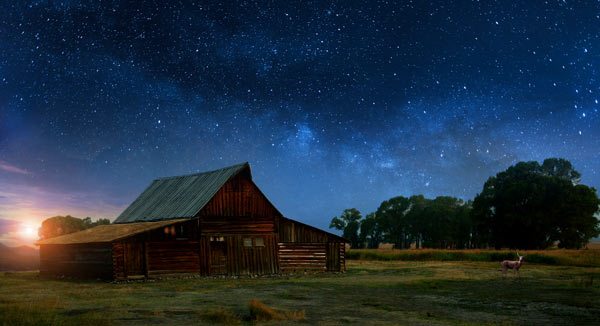
Step 13 – Adding Lens Flare
Download the lens flare pack and choose the optical_flare_26 and place to the left side and then change its blending mode to Screen.
Step 14
I used two adjustment layers for lens flare. Using Levels I got rid of the unwanted edges (you can use a mask to hide the parts). With the use of Hue/Saturation I changed the color of the lens flare.
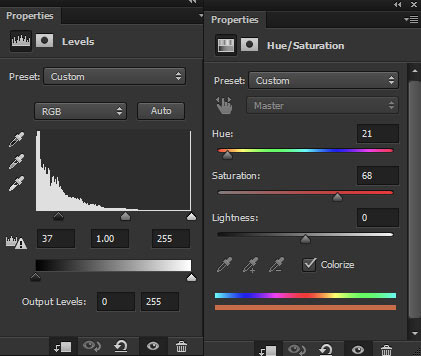
How these adjustment affected lens flare? You can see the below image.
Step 15
On a new layer, I painted more light with dark orange color. You can see below to see where I painted the lights.
I changed the blending mode to Linear Dodge of that layer in which the painted the light.
Step 16 – Final Adjustments
As I said we’ll do some color experiment in this tutorial we’ll do it now. So I always do the experiment at the final stage not only with the colors but with light, blending or anything that will make the image better or best.
First, I thought that adding magenta tones to the image would be great. So I added a Color Balance adjustment layer and did it with the settings below.
Step 17
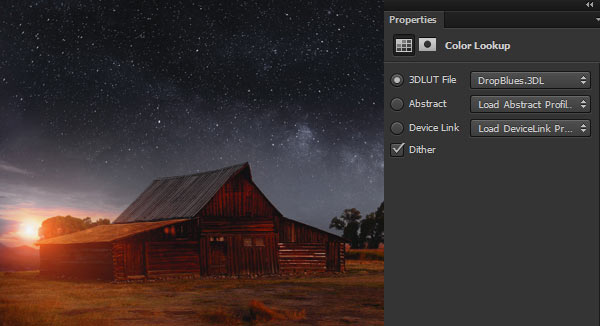
Next, I tried the Colok Lookup adjustment and found the drop blue filter interesting so I added it. This filter will drop the blue color from the entire image as you can see it.
I like these color earlier so you can also quit here if you are happy with the final color of the image. If not, then let’s go ahead.
Step 18
I painted some light using Color Dodge with a dark orange on the left side.
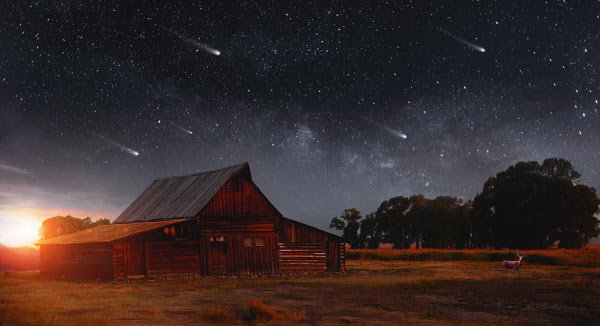
Load the meteor brushes in Photoshop and the paint some meteors using white color.
Step 19
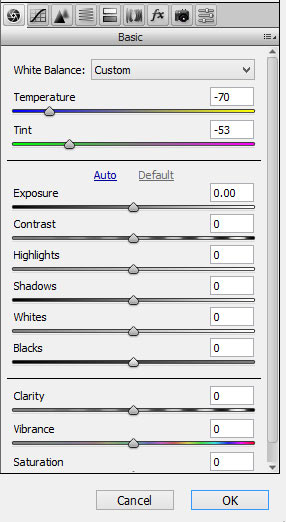
Finally, I decided to add the colors so first I merged all layers into a single one by pressing CTRL + SHIFT + ALT + E. Then go to Filter > Camera Raw and input the following values:
I reduced the opacity of the merged layer to 50%.
Step 20
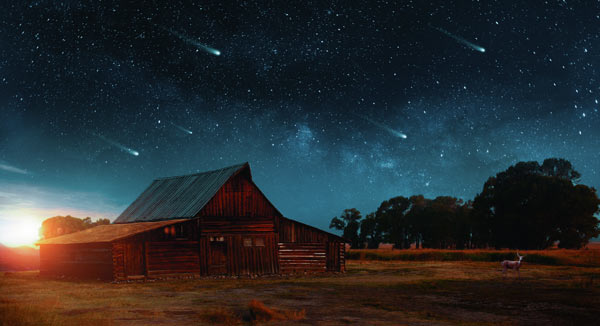
At the end, I adjusted the contrast of the whole scene using a Levels adjustment.
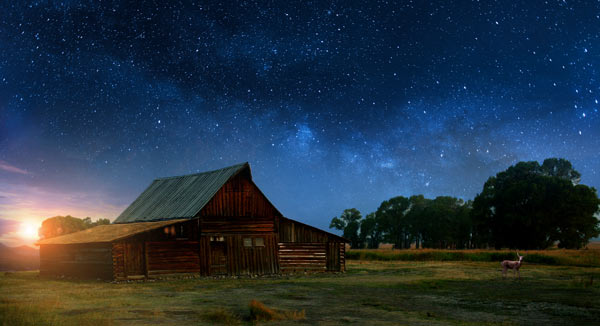
Here is the final outcome:

Need Help With Photoshop or Looking for Professional Support?
Whether you're just getting started with Photoshop or need expert-level assistance, we're here to help! Contact us for personalized Photoshop tutorials, project support, or creative services.
Get in touch today to take your skills or projects to the next level.
CONTACT US NOW📘 Want to Master Photoshop Faster?
🎁 Get Your FREE PDF E-Book "Top 10 Photoshop Tricks Every Designer Must Know" Now – Packed with expert tips, shortcuts, and techniques to boost your creativity & workflow.
👉 Download Your FREE PDF E-Book NOW!

