


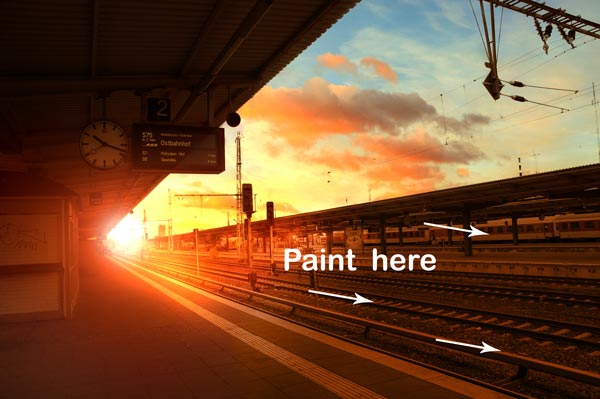
Learn how to create a romantic photo manipulation with Adobe Photoshop featuring a couple meeting at a station. We’ll first use the station image and do some retouching like removing people from the station and then we’ll create the sky. After that, we’ll create the light effects and then we’ll add the couple. Finally, finish it up using adjustment layers and by correcting the contrast.
Tutorial Resources
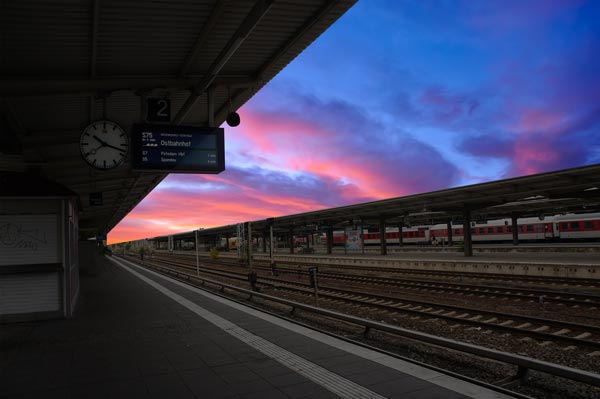
Step 1
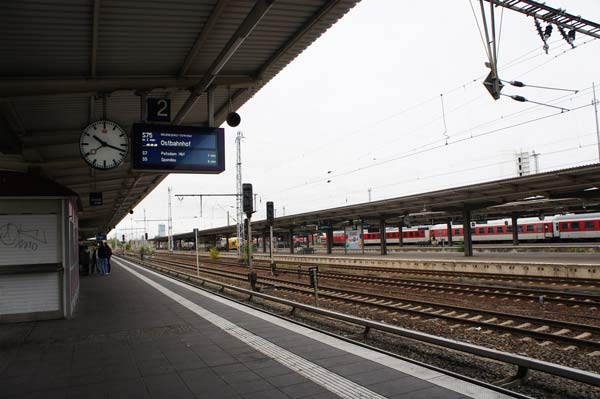
Open up the station image in Photoshop. Go to File > Open and open it up.
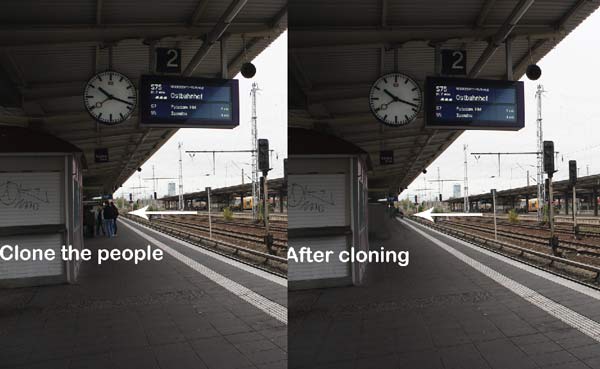
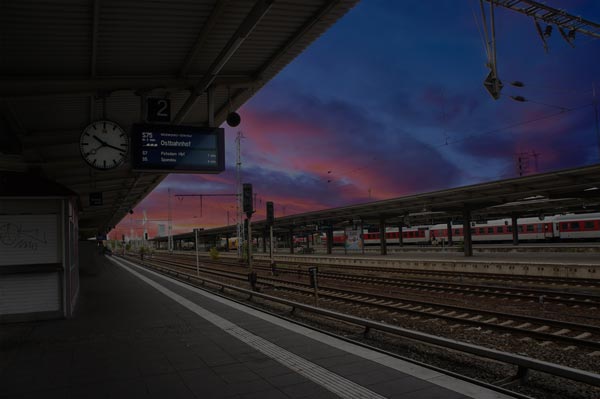
Step 2
Go to Layer > New Layer to create a new layer and then use the Clone Stamp Tool (S) to remove the people from the station as they will interrupt the romance between our couple.
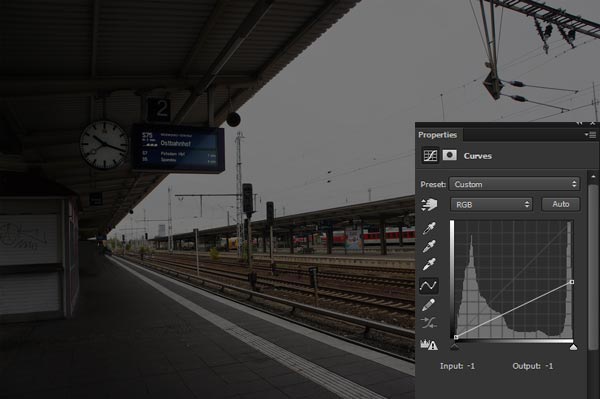
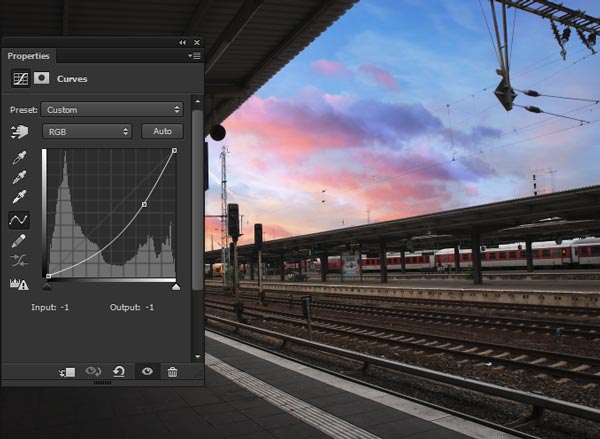
Step 3
Go to Layer > New Adjustment Layer > Curves and darken the station. Since I know that I’ll be creating a dark hour sunset mood then obviously we are talking about losing light.
Create the Sky
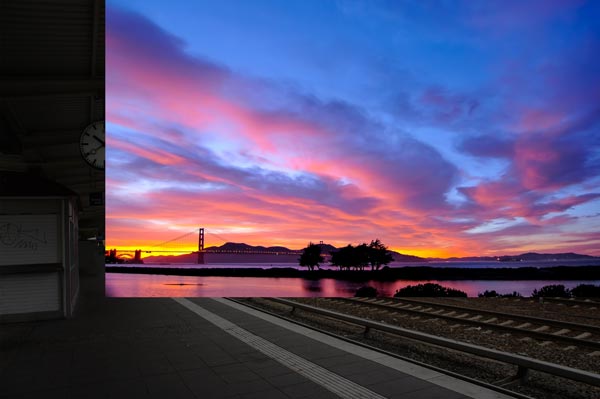
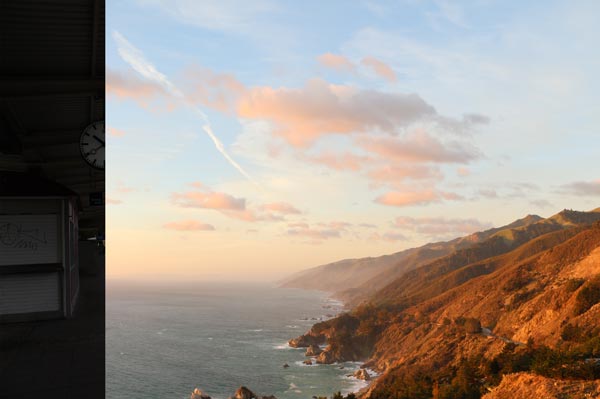
Step 4
The sky above the station is looking flat. It doesn’t have any clouds and colors. We’ll be using 2 sky images to create a new one.
First, place the sky 1 image to the main document.
For the proper blending of the sky 1 with the station, we need to make the selection of the station sky. To do this, you can use the Pen Tool (P), just make the selection of the station edges and activate the selection and then add a layer mask to the sky by clicking on the second icon at the bottom of the layer panel. This will extract the sky in the shape of the station sky.
You can better understand it in the below image.
Now simply change the blending mode of the sky 1 to Multipy.
Step 5
Similarly, I placed the sky 2 image to the main document.
After placing it I cut it in the shape of the station sky and then I simply changed the blend mode to Hard Light to blend it with the sky 1.
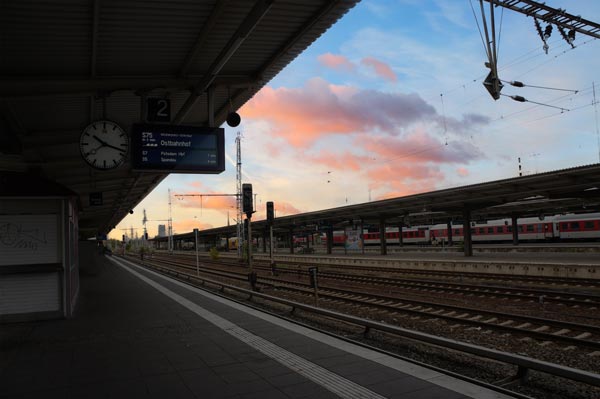
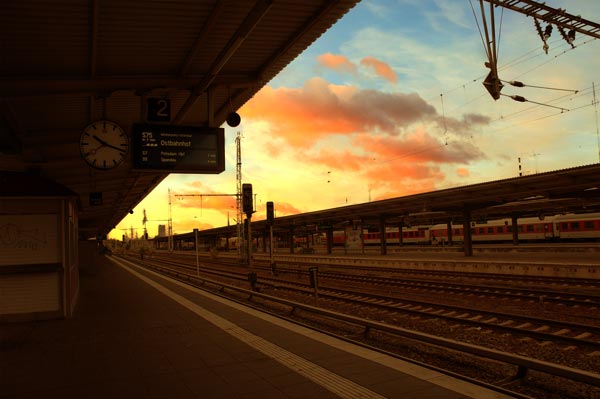
Step 6
We are done with the sky and it’s time to do some adjustments. First, I increased the contrast using the Curves adjustment layer. I create this layer on top of all the layers.
Step 7
Secondly, I used the Color Balance adjustment layer to add the colors to the scene which I wanted. Adding colors in the initial stage lay the foundation of the final colors. Sometimes I add the color just for an experiment like how the color will look and as always if I don’t like the colors then at the final stage I can tweak them according to the way I want them.

Coloring also depends on the mood which you are going to achieve, in my case I am looking to achieve sunset mood that is why I added yellow tones to the composition.
Now take a look at the layer panel:

Creating Sunlight Effects
Step 8
For adding sunlight effect to the composition we’ll use the lens flare. Open the lens flare pack and choose optical flare 26. Place it to the left side of the station as shown below.
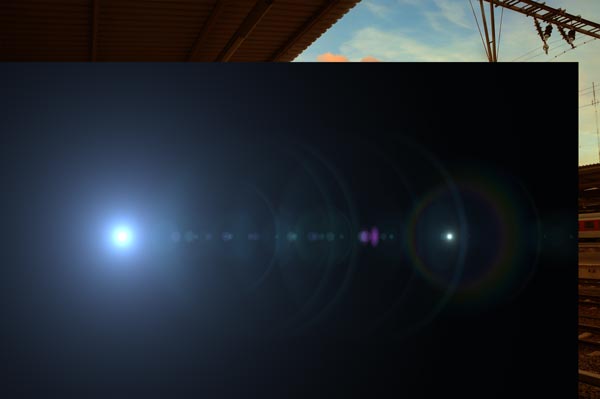
Change the blending mode to Linear Dodge to get a sunlight effect. Remember Linear Dodge blend mode won’t get you rid of all the edges and parts of the flare you need to manually remove them using a mask. I used the mask to remove the unwanted parts which I don’t want.
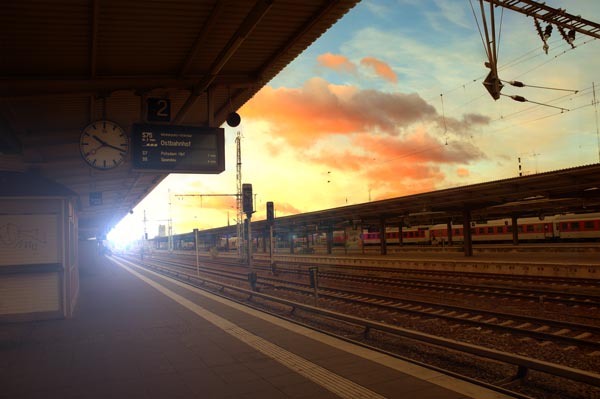
Step 9
Make a Hue/Saturation adjustment layer and use it as Clipping Mask to colorize the flare from blue to red.
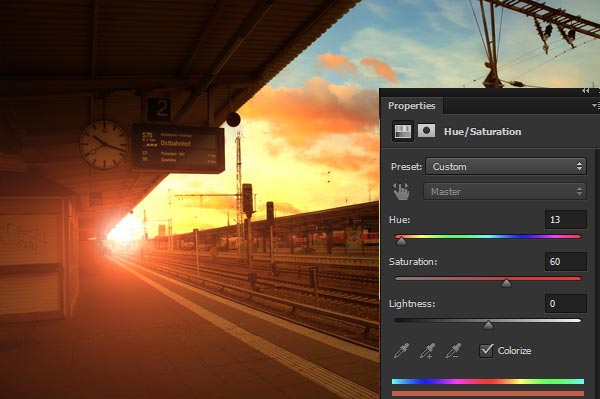
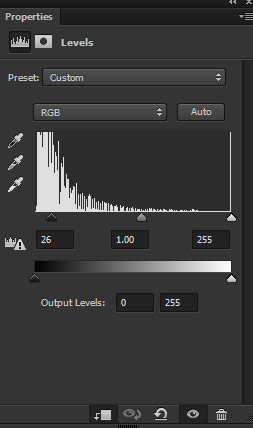
Step 10
I used the Levels for lens flare.
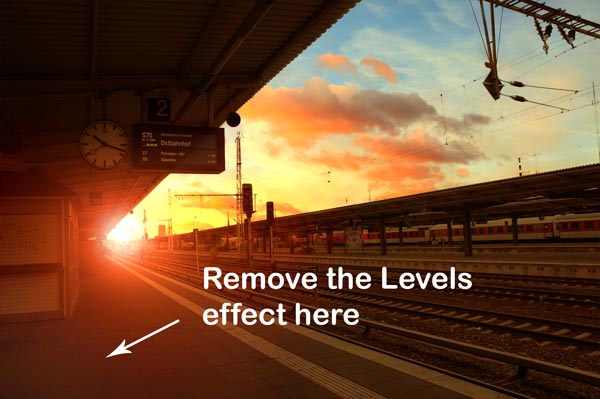
I removed the Levels effect on the left bottom corner to keep the contrast on the lens flare there.
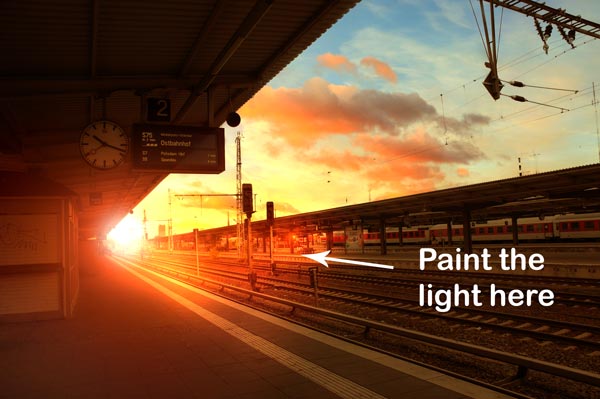
Step 11
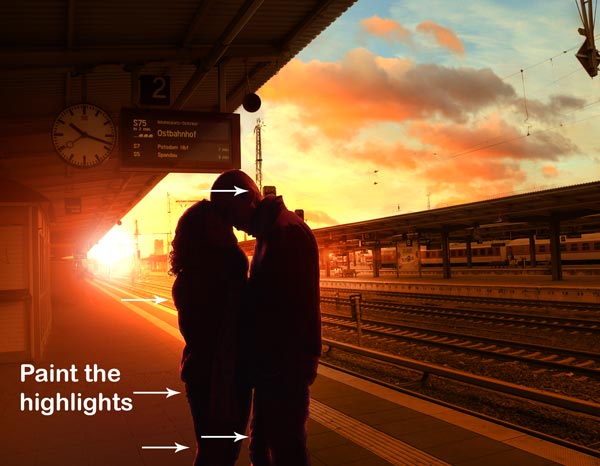
Create a new layer and fill this layer with black color (Press (D) on the keyboard then press ALT + BACKSPACE to fill the layer with black color). Now change its blending mode to Color Dodge. Using a soft round white brush paint the light as shown in the image below.
Create another layer and set its blend mode to Color. Set the foreground color to #b84c12 and then use the soft round brush to paint wherever you think that this area is lacking yellow color. Mostly I painted on the right side and on the platform as well.
Add the Couple
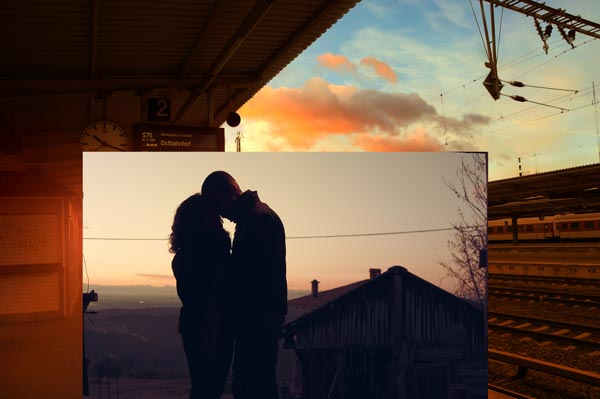
Step 12
Add the couple to the main document and flip them horizontally by selecting Edit > Transform > Flip Horizontal. You can see how I added them and you need to extract their background as well.
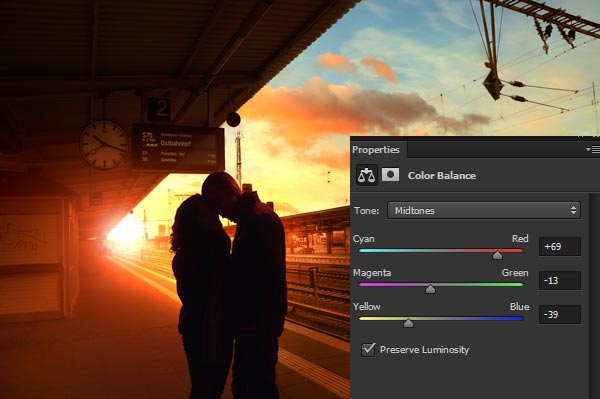
Step 13
Once I removed the background I started working on the color.They don’t have the colors like we see in our composition. To fix this, I used a Color Balance adjustment layer.
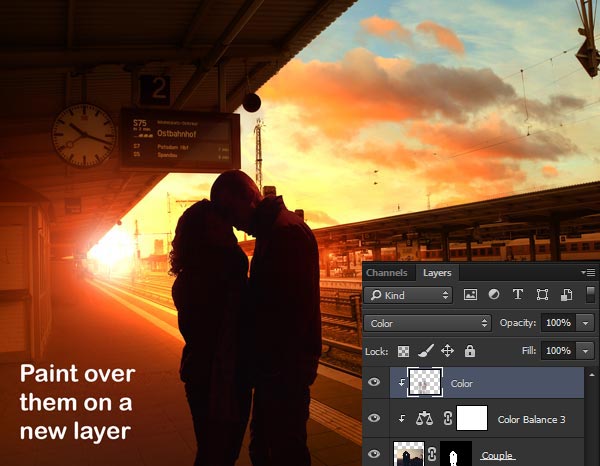
Step 14
Create a new layer and clip it to the model layer. Change the blending mode to Color and pick a saturated orange color (I chose #3e0d0c) and then paint over the couple.
Step 15
On a new layer, filled with black color, blend mode changed to Color Dodge and clipped to models, I painted the highlights on them like we did in step 11.
Step 16
On a new layer, I painted some lights using color #5a311a but this time I didn’t clip this light layer to couple.
I changed the blending mode to Color Dodge.
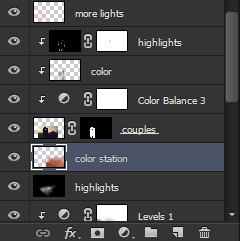
Layer panel arranged:
Final Adjustment
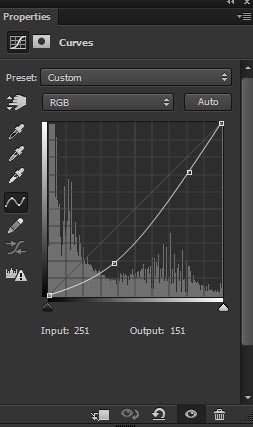
Step 17
Make a Curves adjustment layer on top of all layers and reduce the brightness of the composition.
Results:
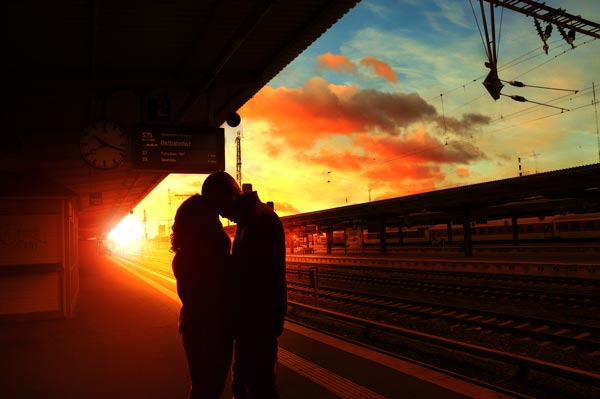
Step 18
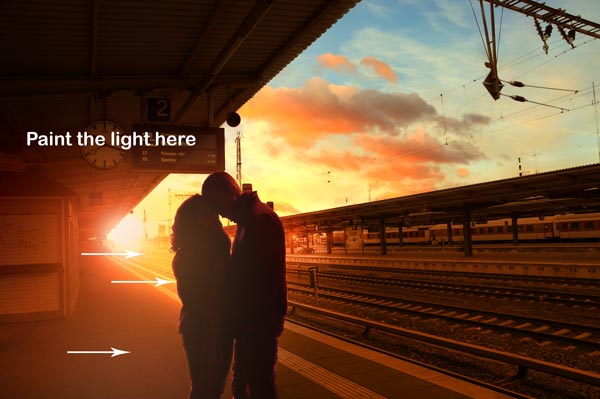
I painted some highlights on the station right side (see the platform two yellow lines on the right of the couple) as I think that this area is lacking. I used the same technique explained in step 11.
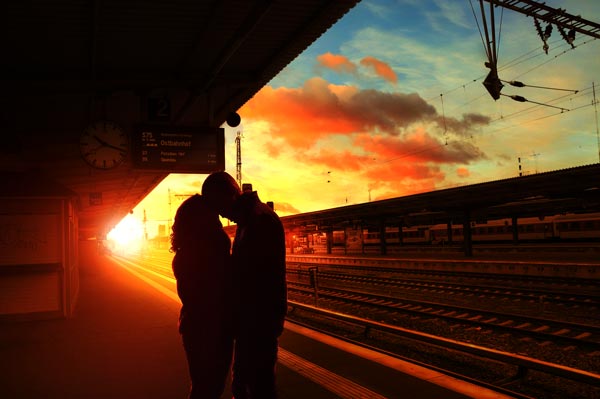
I used the bird’s brushes to paint some birds on the sky.

Step 19
For the final colors, I used the Color Lookup adjustment layer. It will add the combination of green and blue tones to the composition.
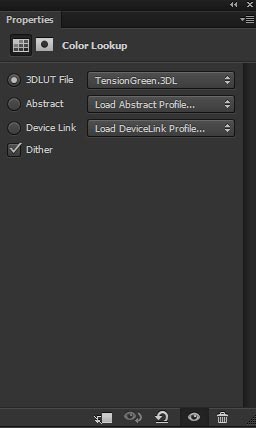
The effect of Color Lookup:
Step 20
I found that something is off with contrast of the composition. The contrast is not balanced in the entire composition. You can check that whether contrast is balanced in your artwork or not by simply viewing your art in black/white. It helps a lot and after viewing the image in black/white, I painted over the areas where I notice the contrast is high with color #4d1d04 on a new layer. Name this layer ‘contrast correct’.
You can see that I painted almost over the entire image.
I reduced the opacity to 34% of the contrast correct layer.

Step 21
I notice that the wires over the station are fading this is due to the both sky layers. We need to paint the wires using Brush Tool (B). Set the size of the brush to 1px and then using the black color paint the wires. Just zoom in the composition then make a small brush stroke from where you want to add the wire then hold the shift key and then again apply the brush stroke where you want to finish the wire.
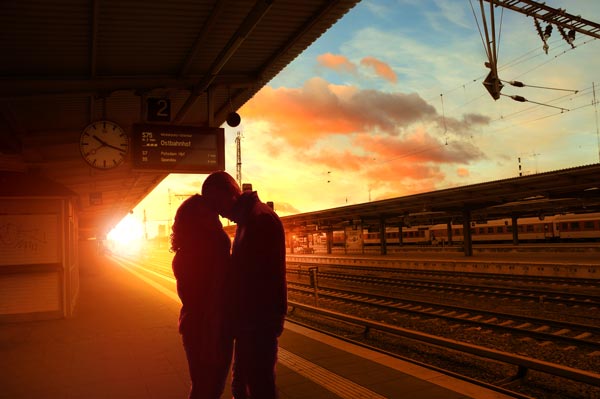
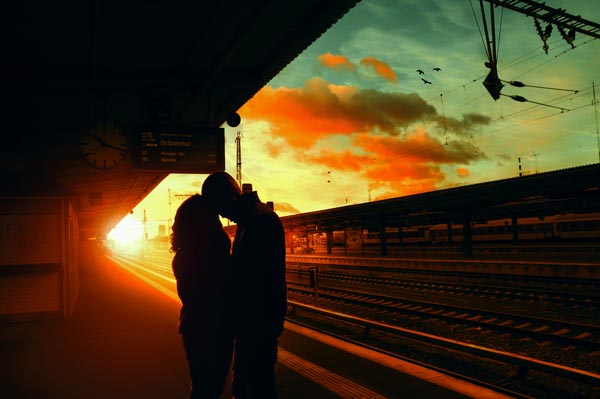
Here is the final outcome:
Need Help With Photoshop or Looking for Professional Support?
Whether you're just getting started with Photoshop or need expert-level assistance, we're here to help! Contact us for personalized Photoshop tutorials, project support, or creative services.
Get in touch today to take your skills or projects to the next level.
CONTACT US NOW📘 Want to Master Photoshop Faster?
🎁 Get Your FREE PDF E-Book "Top 10 Photoshop Tricks Every Designer Must Know" Now – Packed with expert tips, shortcuts, and techniques to boost your creativity & workflow.
👉 Download Your FREE PDF E-Book NOW!
