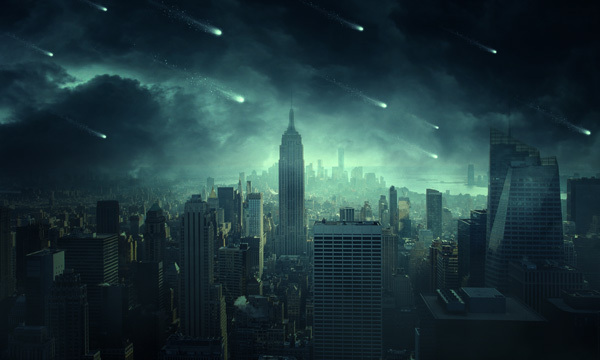
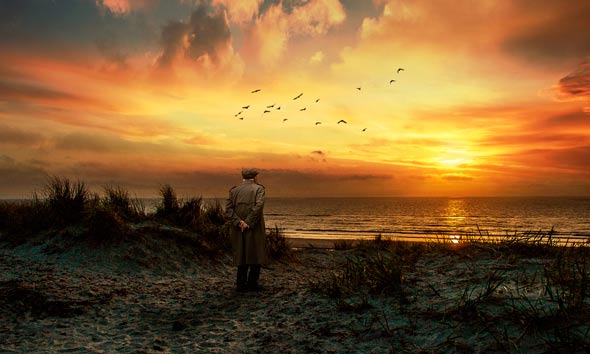
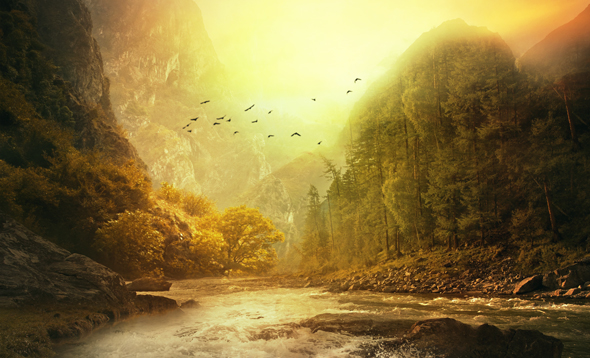
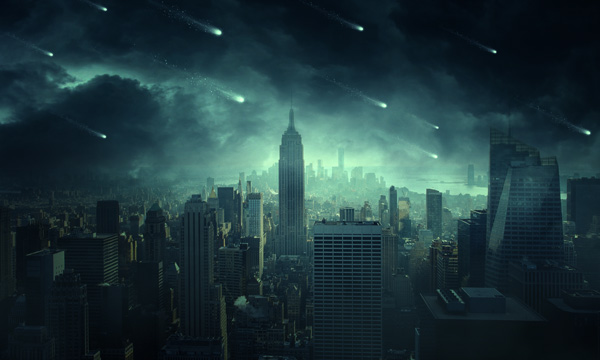
Learn how to create a Pre-Apocalyptic scene featuring about to meteor impact environment in Photoshop. You’ll learn how to create a dark, horrible atmosphere over the city using cloud image and then use the meteor brushes to create the falling meteors from the sky. Finally, we will adjust all the elements and will give a misty and hazy touch to the overall composition.
Tutorial Resources
Add the City
Step 1
Open a new document with 3000 Width X 1800 Height.
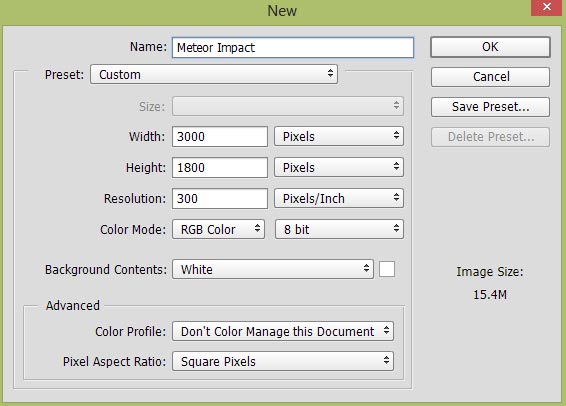
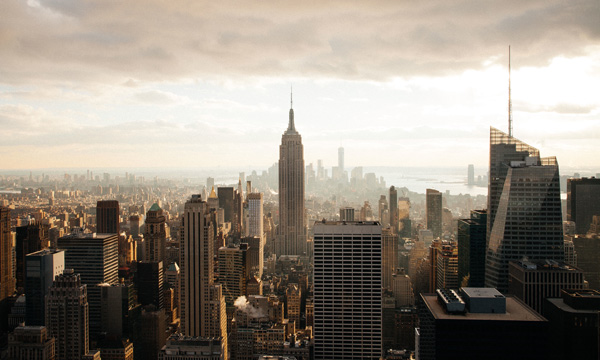
Place the city image into the main document. Try to make it fit with the existing canvas using Free Transform Tool. You can activate this tool by pressing CTRL + T.
Here is the image placed into the document:
Step 2
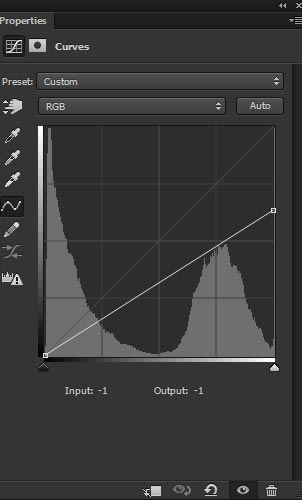
Go to Layer > New Adjustment Layer > Curves and then darken the city using the settings below. The aim is here to darken bottom and top parts of the city.
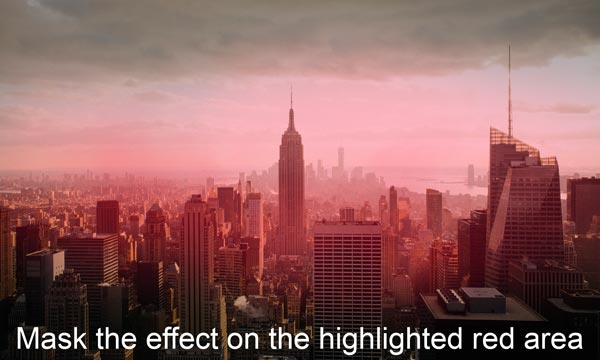
Since the aim is to keep the middle part lighter then we need to mask the effect there. On the layer mask, mask the dark effect of the Curves on the highlighted area to leave it as it was before (brighter). Don’t forget to use the soft round brush with black color for masking the effect.
Step 3
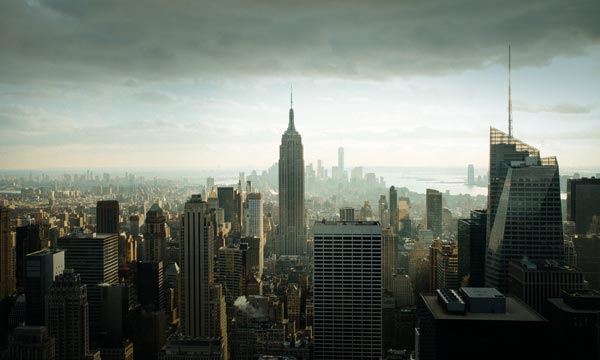
I used another Curves adjustment for adding the cyan colors tones to the city. This will lay the foundation of the final color like you have already seen in the featured image.
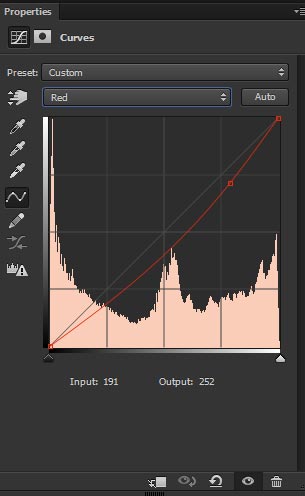
You can see how both Curves affected the city.
Add the Clouds
Step 4
Add the cloud image to the main canvas and then enlarge it like shown in the image below.
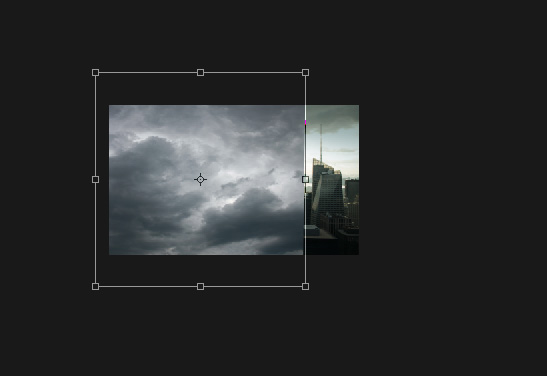
Once you fit the sky now you need to mask some parts in order to fit the clouds with the city sky. To do this, add a mask to cloud layer (go to Layer > Layer Mask > Reveal All and add a mask to cloud layer) and using a soft black brush mask the highlighted parts in order to blend the remaining parts of the cloud.
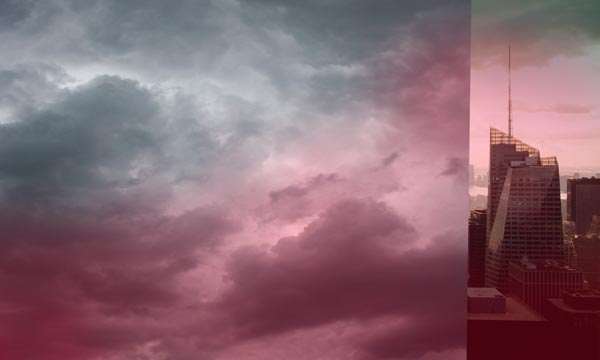
Here you can see how I masked the cloud layer part to make them part of the existing sky.
Step 5
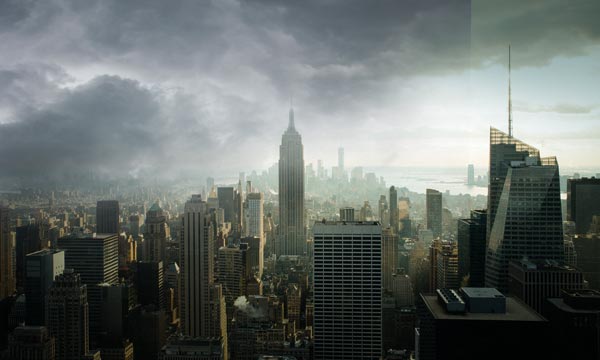
We will add the cloud to the right side using the same cloud image. Place the cloud layer one more time and enlarge it. Name this layer ‘cloud 2’.
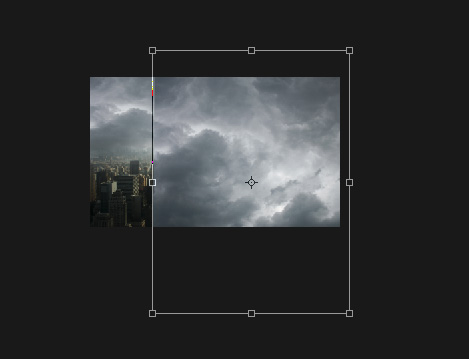
Add a mask to this cloud 2 layer as well and mask the red parts to blend it with the rest of the sky. See the below image for reference.
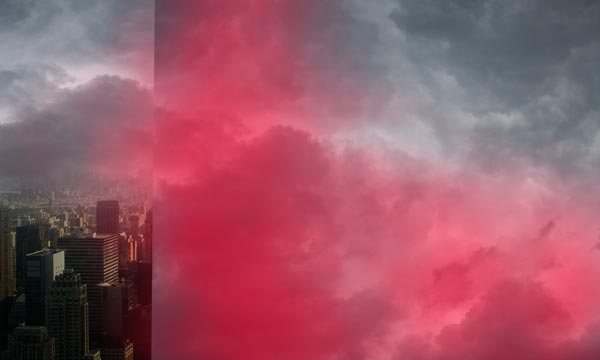
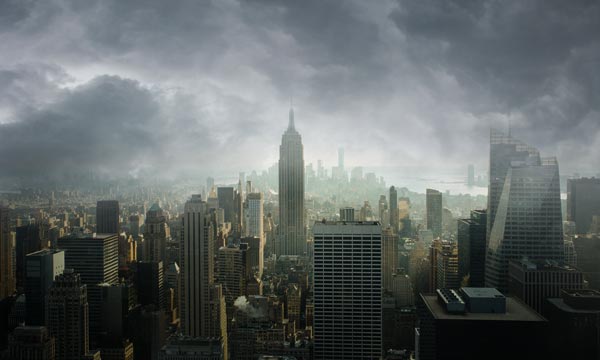
While masking both of these cloud images remember to leave the mist effect over the buildings. This will make the city look like that city is covered by the clouds. I am not saying that completely cover the city in the clouds but just leave some soft mist effect over the building. You can notice it in below image how I did during masking process.
Step 6
Select both of the cloud layers and then press CTRL + G to put them inside the group. Change their group blend mode to Normal from Pass Through.
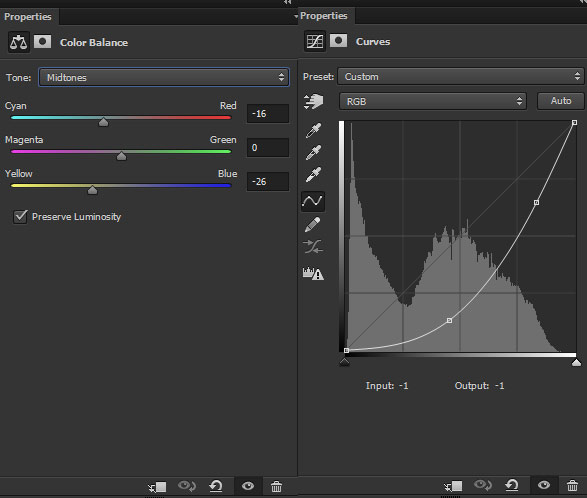
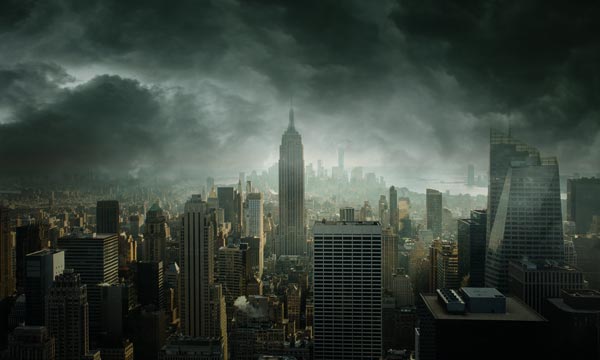
Now we’ll make some basic adjustments to the clouds like changing color and darkening them. First, I created a Color Balance adjustment layer and used the Midtones settings to add cyan tones to the clouds.
After that, I created Curves adjustment to boost the contrast of the clouds. You can see the settings for both adjustment layers in the below image.
Results:
Create the Meteors
Step 7
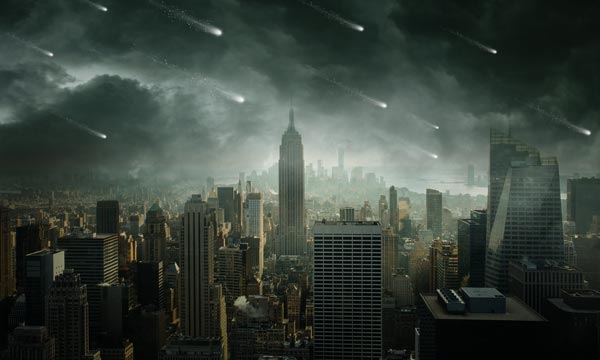
Download the meteor brush and then load them brush in Photoshop. Paint some falling meteors from the sky using Comet 1 brush with 597 597 pixels brush (you can also choose Comet 2 and Comet 3 brush) but remember to vary the brush size in order to generate the meteors randomly. Remember to use white color while using these brushes.
Final Adjustments
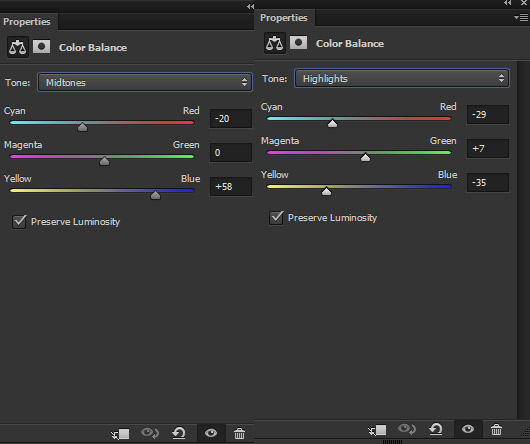
Make a Color Balance on the top of all layers. Use the Highlights and Midtones settings to change the overall color of the composition.
Please note: I am to add dark cyan and blue tones to overall image because I wanted these colors in my finished image. But you can go for different colors depends on what colors you want on the final image.
Here you can see the values for Color Balance:
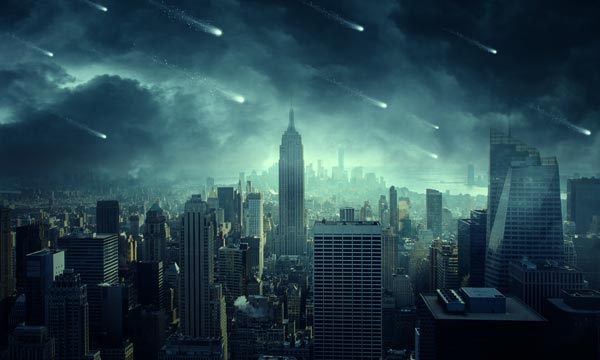
Here you can see how it changed the color of the entire image:
Step 9
Now we’ll retouch the image created so far with Dodge & Burn (O) tools. Press CTRL + SHFT + N to create a new layer and then changed its blend mode to Overlay 100%. Select the Dodge Tool and lighten up the middle of the background further (a little bit) and after that, use the Burn tool to darken the bottom parts (a little bit).
I used Dodge & Burn tool with Range: Midtones and Exposure: 9%-12%.
Don’t forget to compare the before and after results in the below image.

Here you can also see the results in Normal Mode. You can clearly notice where I used Dodge & Burn tool.

Step 10
I used the Curves adjustment layer to decrease the lightness on the highlights. You can see that I used the Curves with only one point added at the highlight areas.
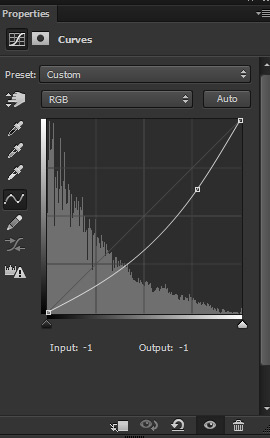
I don’t want the Curves effect in the middle where the light is coming from. So I just erased the effect of the Curves there on the layer mask using a soft round black brush.
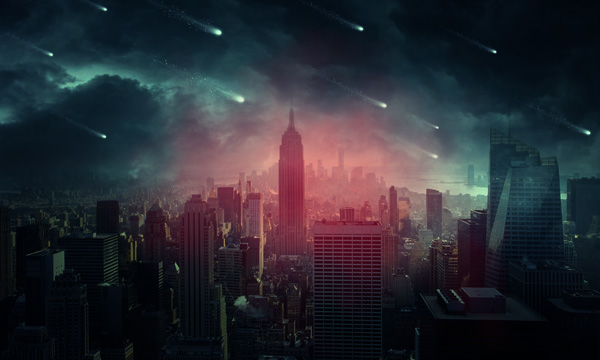
After masking effect:
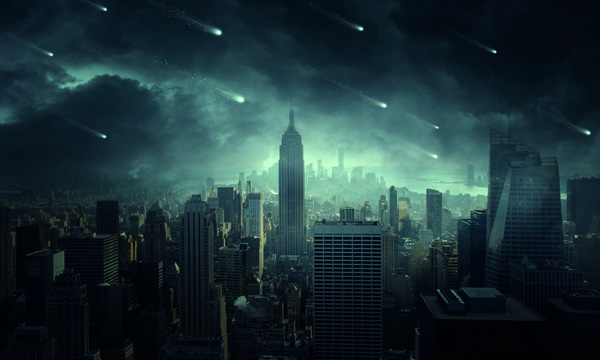
Step 11
Finally, I painted some mist over the city where it lacks (mostly on the bottom parts). I used the color #2b4f57 to paint the mist with soft round brush. You can see the arrows indicating that I mostly painted the mist on the bottom parts. This will also show the effect of dark clouds that the entire city is under the mist and there is going to be a big impact there soon.
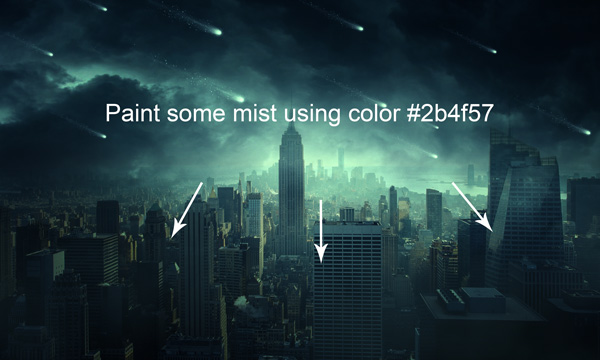
Here is the final outcome:
Conclusion
These are tips in order to turn a city into an apocalyptic one. You can replicate this over any city image now. If you got some question do let me know. If you like the tutorial, then do share it into the world.
Need Help With Photoshop or Looking for Professional Support?
Whether you're just getting started with Photoshop or need expert-level assistance, we're here to help! Contact us for personalized Photoshop tutorials, project support, or creative services.
Get in touch today to take your skills or projects to the next level.
CONTACT US NOW📘 Want to Master Photoshop Faster?
🎁 Get Your FREE PDF E-Book "Top 10 Photoshop Tricks Every Designer Must Know" Now – Packed with expert tips, shortcuts, and techniques to boost your creativity & workflow.
👉 Download Your FREE PDF E-Book NOW!
