


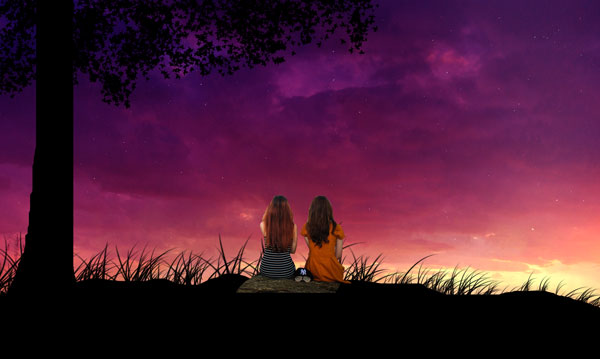
In this tutorial, you’ll learn how to create a beautiful moment scene using Adobe Photoshop. We’ll first paint the cliff, tree, leafs, and bushes using Lasso tool and default Photoshop brushes. After that, we’ll start blending the stock images to create the calm sunset mood for the background. Finally, we’ll finish it up by giving a painted effect to composition and we’ll also learn how to add glowing highlights using filters.
Even though I didn’t use the tablet in this tutorial but I recommend the tablet for better results.
Tutorial Resources
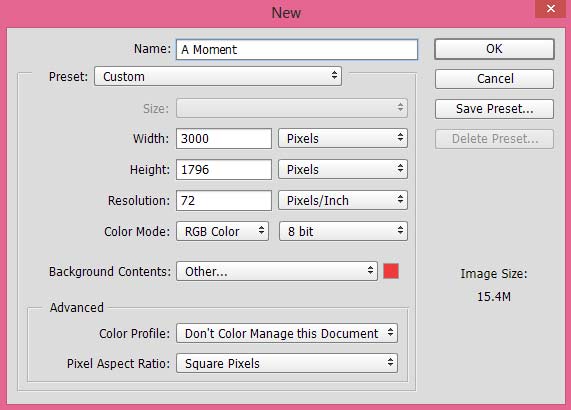
Step 1
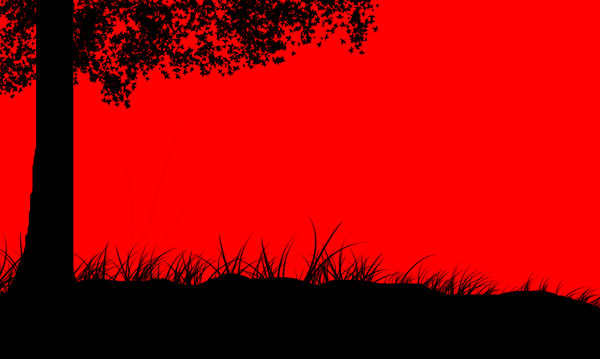
Create a new document in Photoshop using File > New command. I am creating a red document but you can also use the white document instead.
Lasso Painting
Step 2
In this step, we’ll be doing lasso painting. First, let me tell you what is lasso painting? Painting using Lasso Tool (L) is known as Lasso painting and it is often used by the every concept artist to quickly block in the shapes initially. It’s like painting with Pencil and a very free hand painting. We are applying this technique in this tutorial for creating silhouettes.
So pick the Lasso Tool (L) and using the mouse or tablet’s pen paint the shape of the cliff like shown below.

Once you created the shape then make the selection and fill it with the black (ALT + BACKSPACE if you the foreground is set to black) color to create cliff silhouette. You can notice that the shape is different than the previous screenshot, in the last screenshot I already showed you how I painted the cliff in real time (when I was writing this tutorial, today). So there is no big difference and if you still facing problem then you can also use any cliff image.

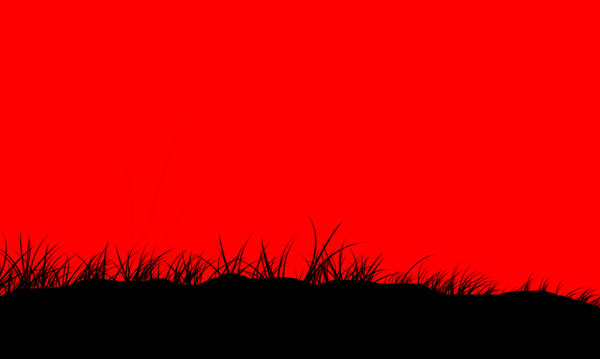
Step 3
Now we’ll paint the bushes using default Photoshop brush and don’t worry it will be easy. In the below image you can see I highlighted two brushes for painting bushes and I used both of them. But before you start painting with these brushes make sure to set the foreground/background color to black. Because these brushes use both foreground and background color with every stroke so better set them to black otherwise you’ll have two colors in the bushes.
Here you can see the brushes which I’ve used:
Now start painting the bushes and you can see how I painted them.
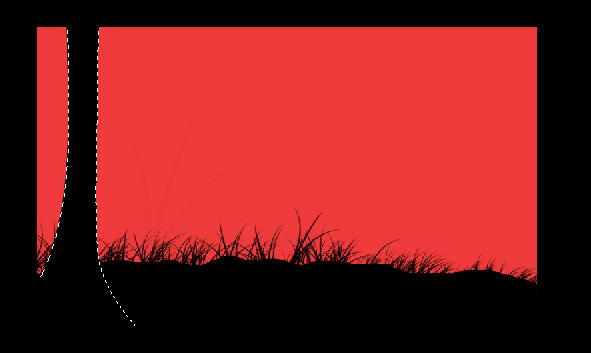
Step 4
I used lasso tool again in order to paint the tree silhouette (real time). You can see how I made the selection and for this purpose you can also use the Pen Tool (P) for creating a tree shape.
Now we’ll paint the leafs around the tree using the default Photoshop leaf brush. Select the brush highlighted in below image and do set the foreground/background color to black again.
Now paint the leafs around the tree as shown below.
Creating the Background
Step 5
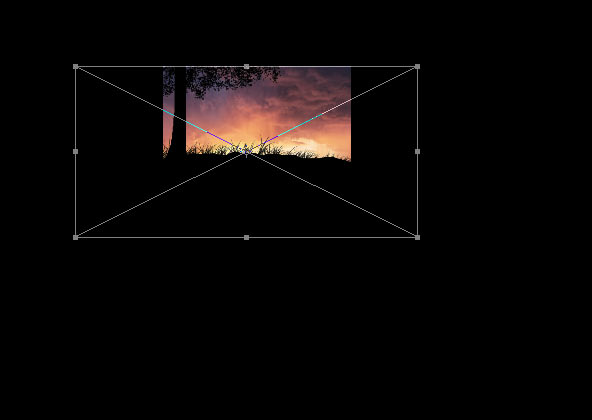
Everything is set up for foreground and now we’ll work on the background of the composition. First, we’ll add the sky with sunset mood and atmosphere using three sky images. Place the sky 1 image to the main document and use the Free Transform Tool (CTRL + T) to enlarge it. Don’t forget to drag this layer under all the silhouettes we created so far. Remember we are working on the background.
Place the sky 2 image and go to Edit > Transform > Flip Horizontal to flip the image and then adjust it as shown below. The aim here is to get the light source which is the already in the sky 2 image and then add it to the right side of the composition. Put this layer above the sky 1 layer.
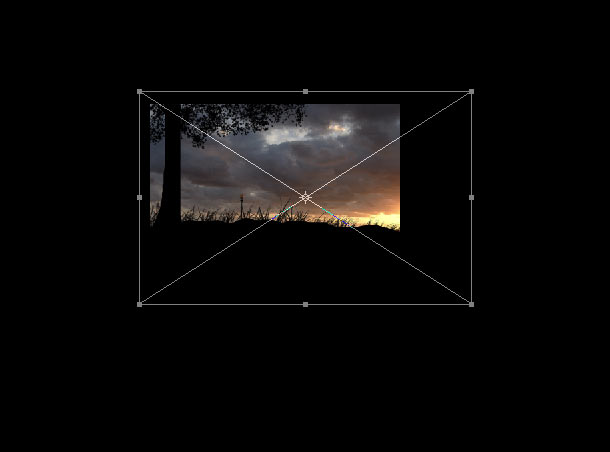
To blend the sky 2 image with the layer below it, just change its blend mode to Multiply and blend it.
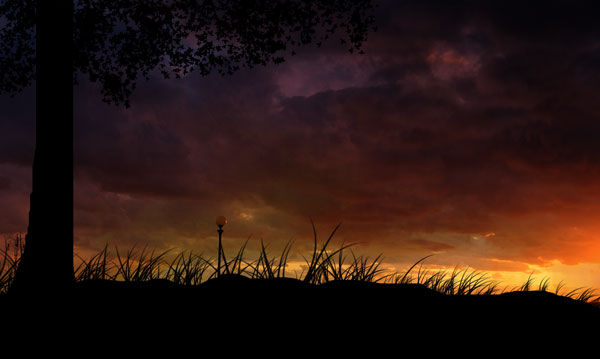
Step 6
Create a Levels adjustment layer above both sky layers and increase the brightness.
Results:
Step 7
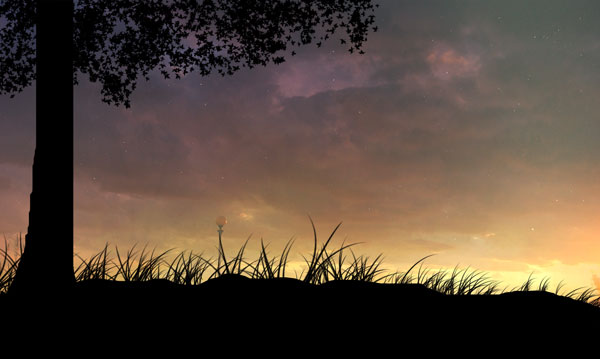
Now place the sky 3 image to the main document. This will introduce more new colors and some stars as well to the scene.
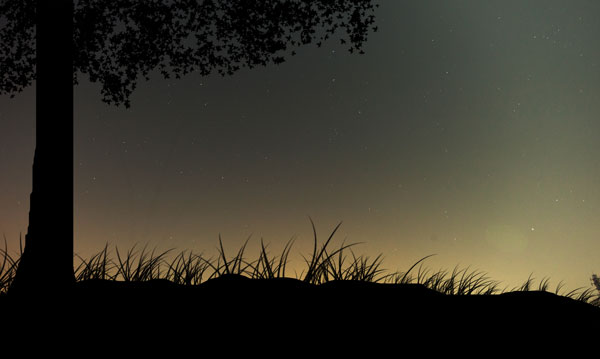
Set the blending mode to Screen.
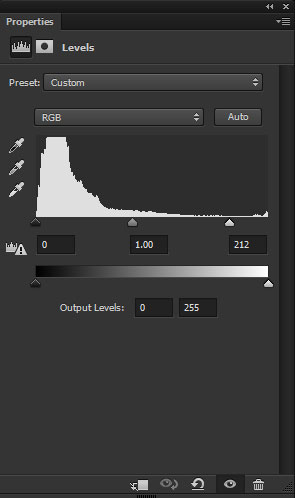
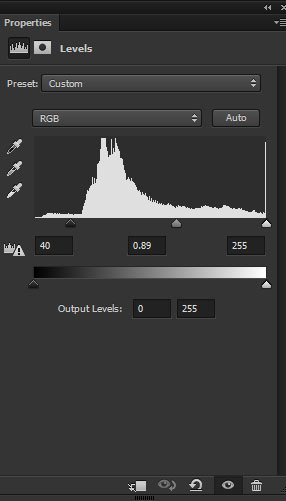
Step 8
Create a Levels adjustment layer to washed out the contrast added by the sky 3 image.
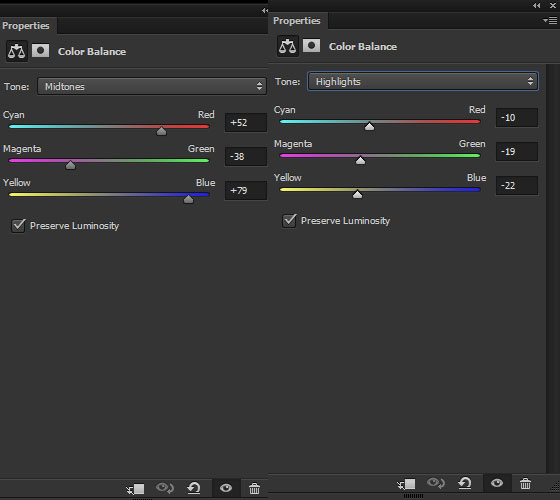
Use the Color Balance adjustment layer to alter the color of the entire background created so far. If you want you can also add the colors according to your taste by experimenting with Color Balance settings so it’s up to you as well.
Here are the values I used for Color Balance:
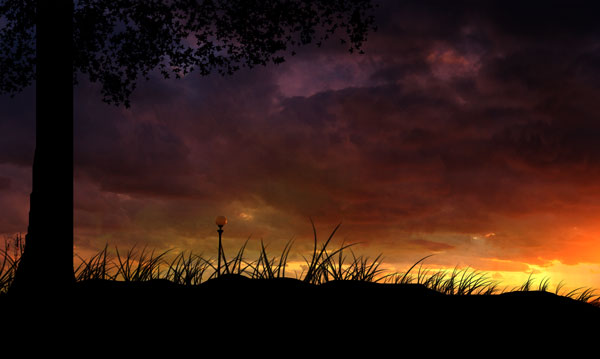
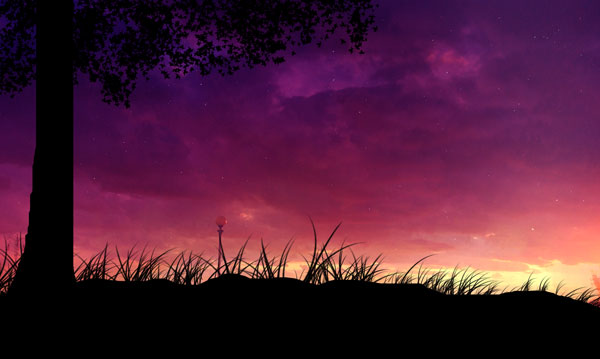
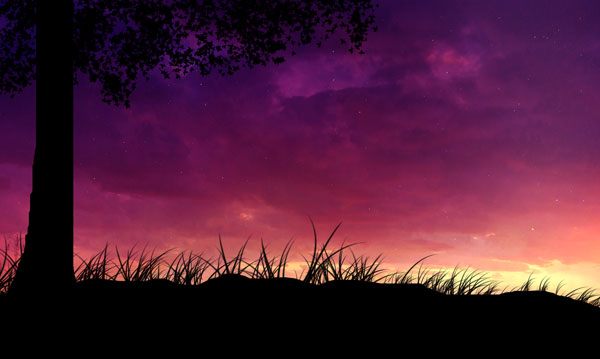
Results so far:
Step 9
In the below image the red circle indicates the unwanted part of the sky 2 image. Which obviously we don’t want and in order to fix it, we need to clone that area. So activate the Clone Stamp Tool (S).
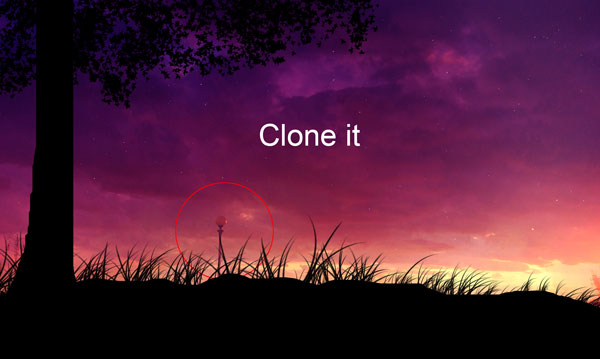
Now start cloning the pole by sampling the parts of the sky by pressing ALT key. Don’t forget to create a new layer (CTRL + SHIFT + N) for cloning process.
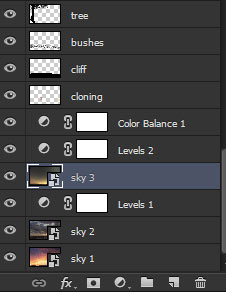
Here you can see what’s going on on the layer panel:
Step 10
In the second step, I said to you that if you don’t want to paint then you can use the image to create the silhouettes. Now I’ll show you how to do it by adding girls image. Place the girls image in Photoshop and you can see how I placed the image. After adding the image, make the selection using Pen Tool (P).
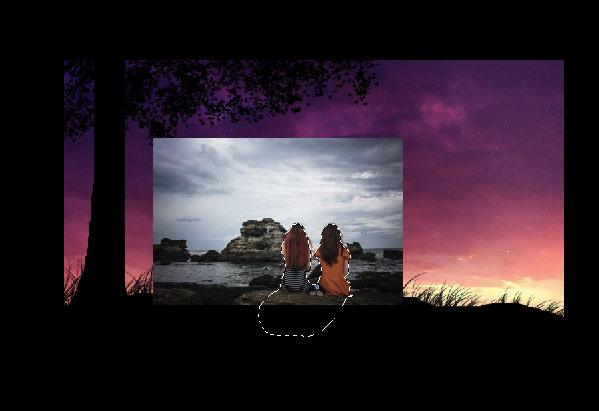
Click on the add layer mask icon at the bottom of the layer panel and add a mask to girls layer.
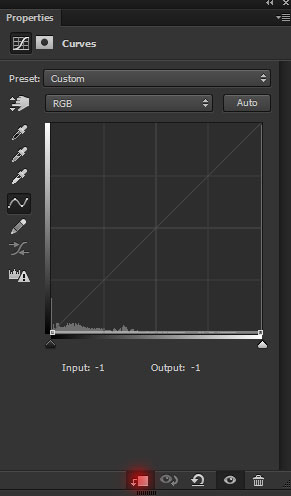
Step 11
Make a Curves adjustment layer for girls layer and use this layer as Clipping Mask (press the red icon). Now reduce the brightness to all the way to zero and darken them. Instead of using Curves, you can also fill them with black color. Both methods do the same thing so choose whatever you the prefer most.
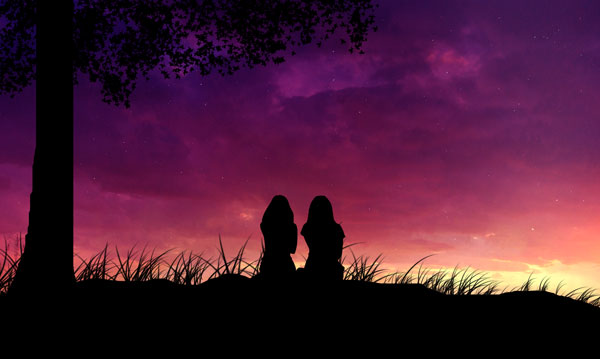
Here how I created the girls silhouette using an image:
Final Adjustments
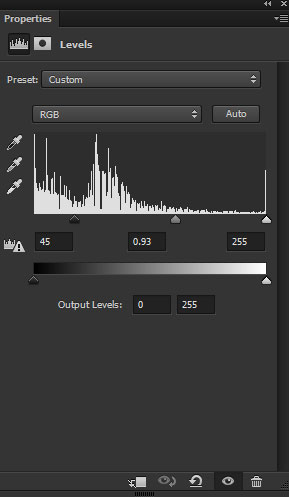
Step 12
Create a Levels adjustment layer on top of all layers and decrease the lightness.
Results:
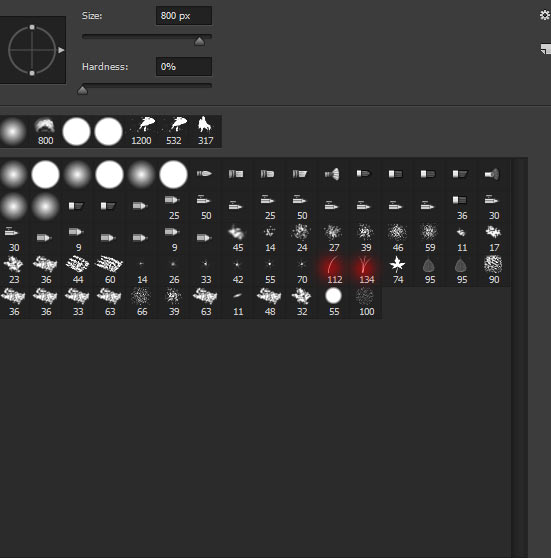
Step 13
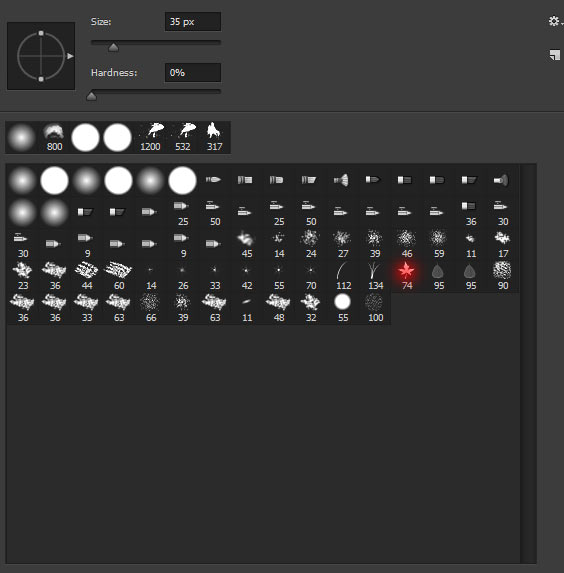
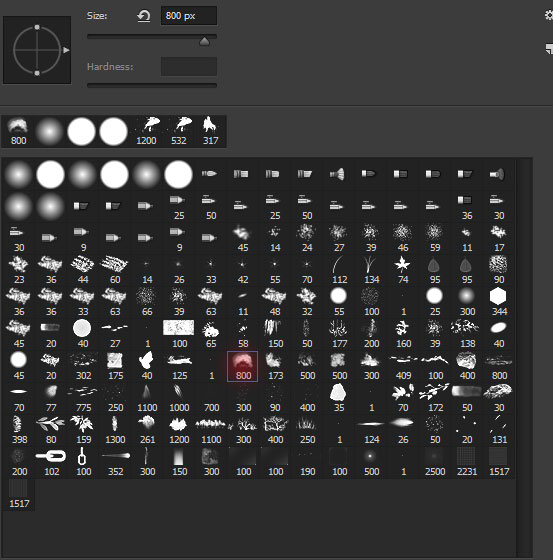
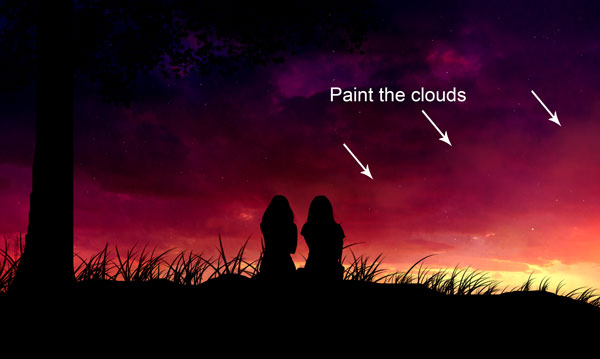
Now we’ll paint the clouds using a cloud brush which comes handy in a lot of ways for painting only clouds and mist. Download the brushes of the Jonas De Ro (a concept artist in the entertainment industry) and load them in Photoshop. Use the highlighted 800 size clouds brush and set the foreground color to #a6213d.
Now paint the clouds using this brush on a new layer.
Step 14
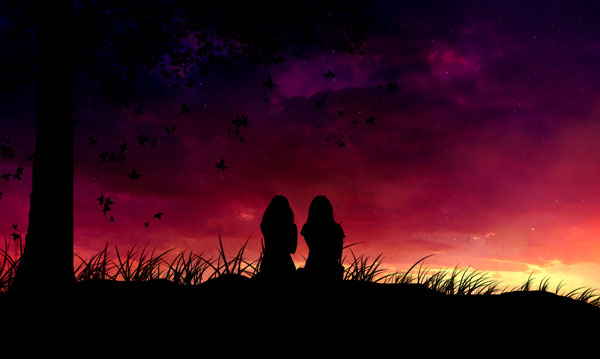
Create a new layer and use the same leaf brush which we used in Step 4 to paint some falling leafs from the tree. Do vary the brush size in order to paint leafs of different sizes.
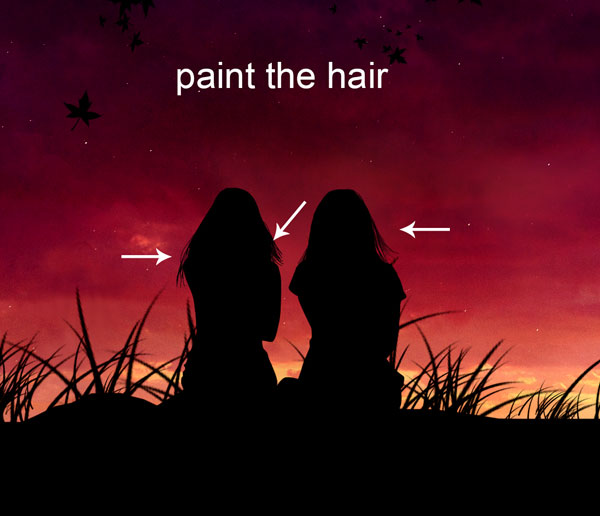
On a new layer, I painted the hair for the both girls using a hard round black brush.
Step 15
Now we’ll give the composition a painted effect using filters.
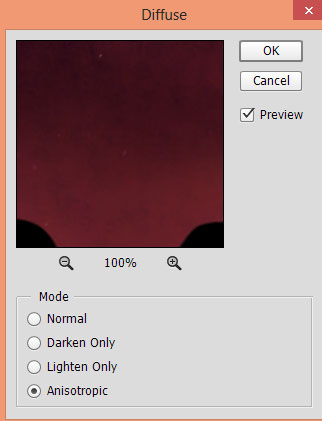
Create a new layer of all layers by pressing (CTRL + ALT + SHIFT +E) and then convert this layer into Smart Objects. Go to Filter > Stylize > Diffuse and set the Mode to Anisotropic.
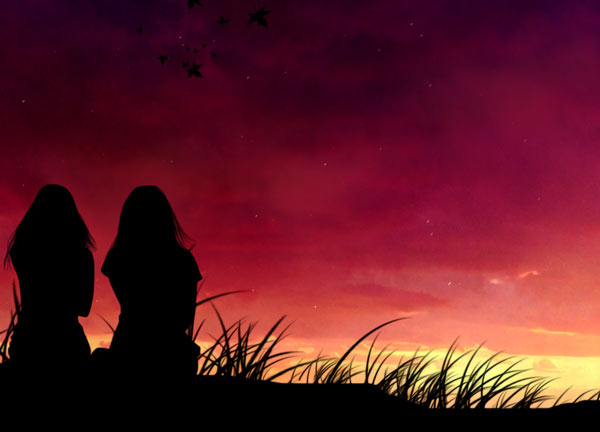
If you still following this tutorial and creating this photo manipulation in Photoshop, then if you zoom you’ll notice that we got the painted effect in the image. You can also see the results here as well.
Step 16
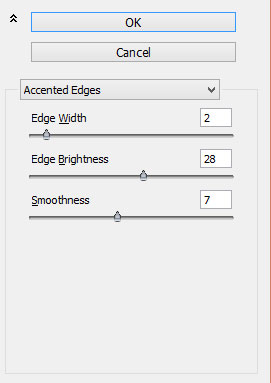
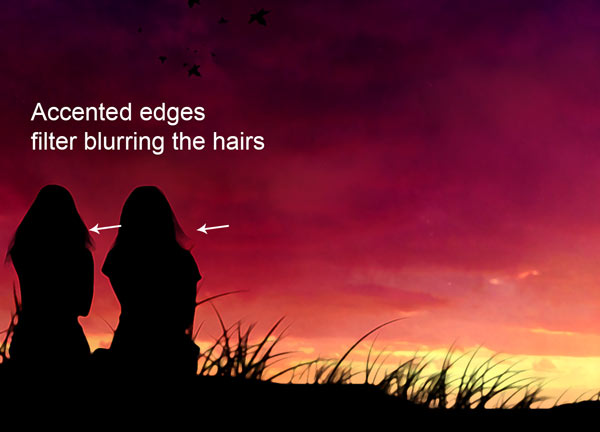
Now we’ll add the glowing highlights around the girls, tree, leafs and cliff using the Accented Edges filter. Again create a merged layer of all layers and then go to Filter > Filter Gallery and under the Brush Strokes section choose Accented Edges. Now using the following settings or you can also play around with the settings to see what best works for you.
So the filter has added the glowing effect but it faded the girls hairs and I also don’t want it too much on the falling leafs.
Here you can see what I am talking about:
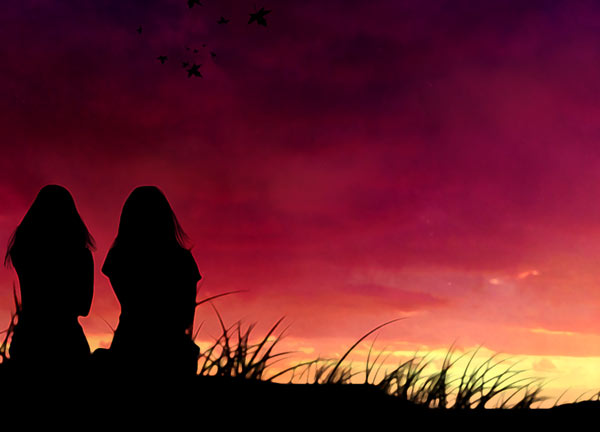
I erased the effect on those things by painting on the layer mask of the Smart Filters using a soft black brush. You can also retrieve the selections of girls and falling leafs for better masking.

Here you can see the results after removing the effect only on the hair and you can also notice glowing highlights around them. Not only there you can even notice those highlights on the tree and leafs if you zoom out.
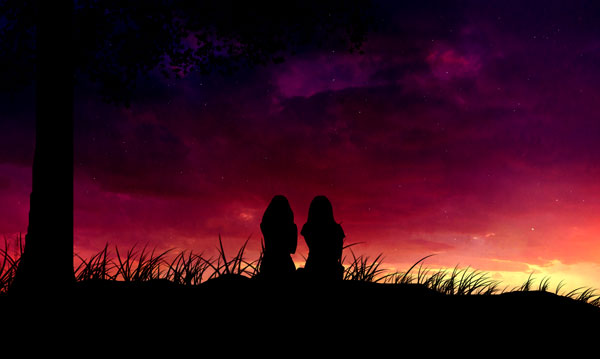
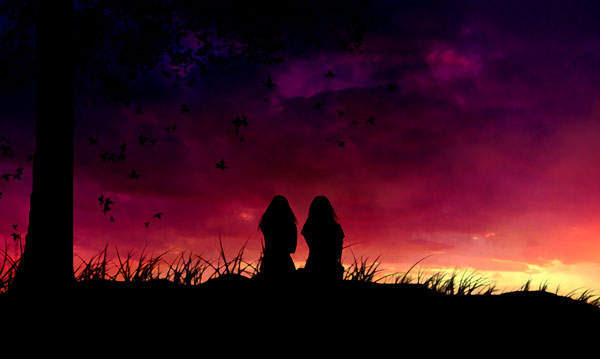
Here is the final outcome of the tutorial:
Coclusion
You know guys we often see those scene in real life while searching for peace or whenever we want to be alone or we want with someone or with your relatives on a place where we can find peace even for a moment. Hope you like this tutorial and keep Photoshopping!!
Need Help With Photoshop or Looking for Professional Support?
Whether you're just getting started with Photoshop or need expert-level assistance, we're here to help! Contact us for personalized Photoshop tutorials, project support, or creative services.
Get in touch today to take your skills or projects to the next level.
CONTACT US NOW📘 Want to Master Photoshop Faster?
🎁 Get Your FREE PDF E-Book "Top 10 Photoshop Tricks Every Designer Must Know" Now – Packed with expert tips, shortcuts, and techniques to boost your creativity & workflow.
👉 Download Your FREE PDF E-Book NOW!
