

In this tutorial I’ll show you how to create a desolated place in Photoshop. You’ll learn how to create abandoned place with sunset atmosphere using less stock images. We’ll also learn how to match the color of whole scene, create light effect and much more. Follow along the tutorial and learn more about photo manipulations.
Tutorial Resources
Step 1
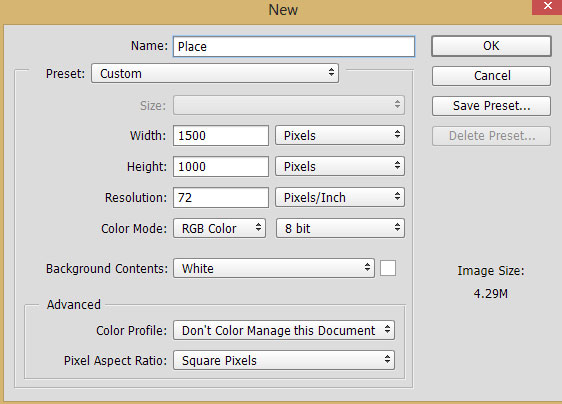
Create a new layer in Photoshop by selecting File
> New and give the following values or feel free to go with higher settings :
Step 2
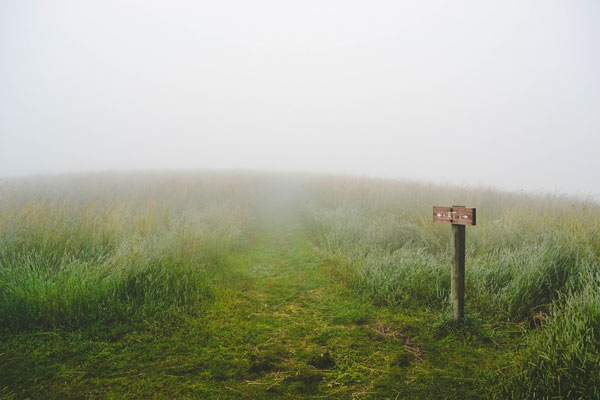
Place the mist path image to main document and you can use the Place Embedded command for that by selecting File > Place Embedded. Here is the image placed to main document :
Step 3
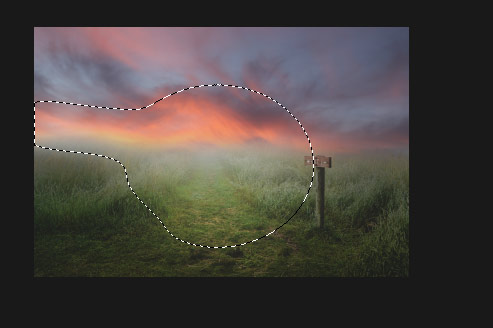
Add a mask to misty path image by clicking on second icon at the bottom of layer panel. Mask its uppers parts as we will add sky later there. Use soft round black brush for masking and also, try to leave some mist on the horizon area so we can blend the sky easily. Here you can see the results after masking :

Place the sky 1 image to main document and drag it below the misty path.
The results looks decent and blended if you didn’t get the results which you want then you can mask the mist to blend the sky properly. Mostly try to reveal and mask the mist on the horizon area.
Step 4
Select the path layer and add a Curves adjustment layer by clicking on the third button at the bottom of layer panel. Now using the following settings lower the brightness of path image. Don’t forget to use it as Clipping Mask (click on the red icon).
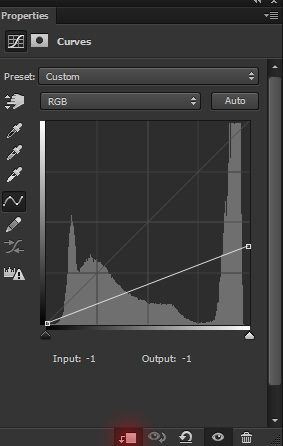
On the layer mask of Curves, mask the effect on the selected area to keep it brighten. Use a soft round black brush for masking.
Step 5
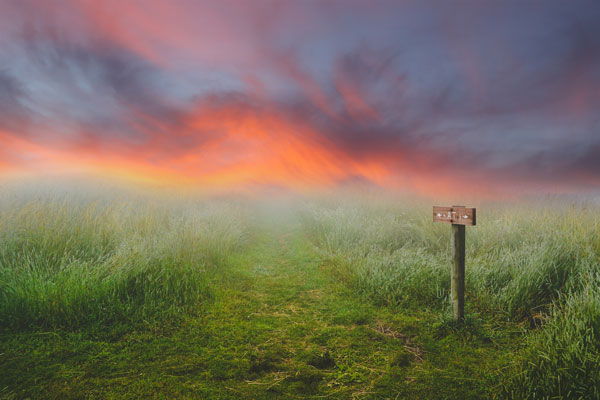
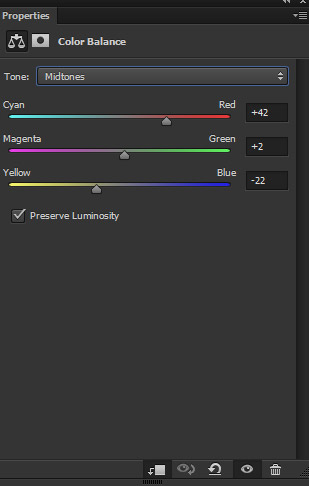
Match the color of path with the sky using Color Balance adjustment layer. Here you can see the settings :
Results :
Step 6
The image I used in this step, I don’t know from where I downloaded this image. I tried to search it many times on the internet but I didn’t find it. So I apologize for that and but you can find the same image on Google by searching with this query ‘favorites from camera 075’.
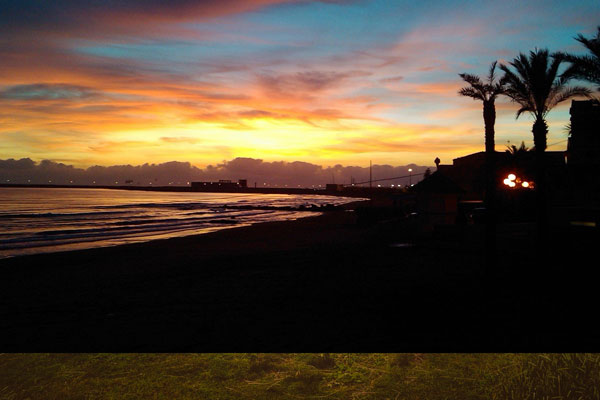
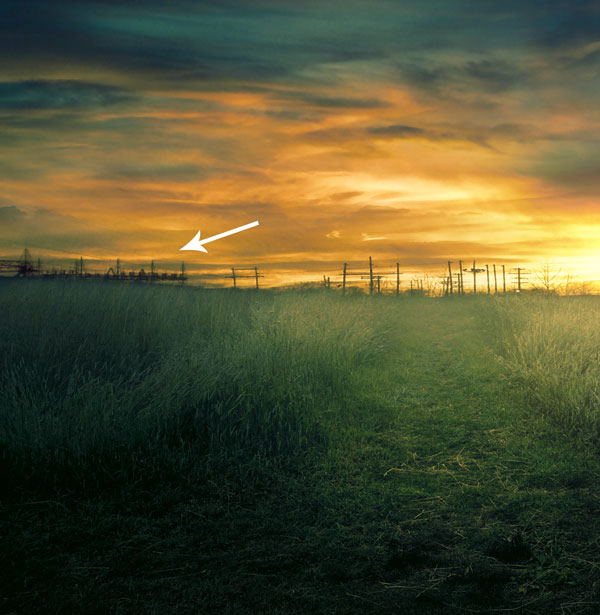
Now we’ll create a afar view using another sky image. Place the sky 2 image to main document and I transformed the image using Transform Tool (CTRL + T). You can notice lot of buildings, strings and many other elements (indicated by arrows).
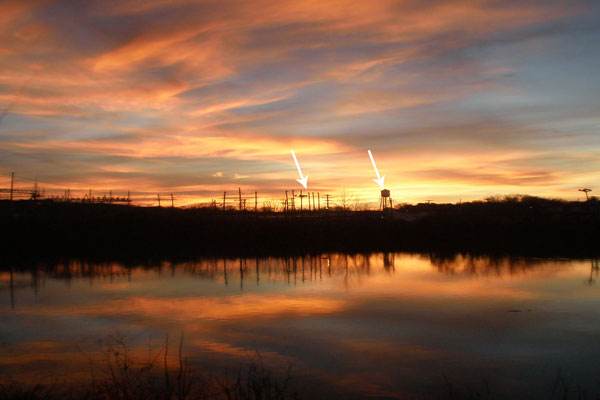
Set the blend mode of sky 2 to Overlay.
Step 7
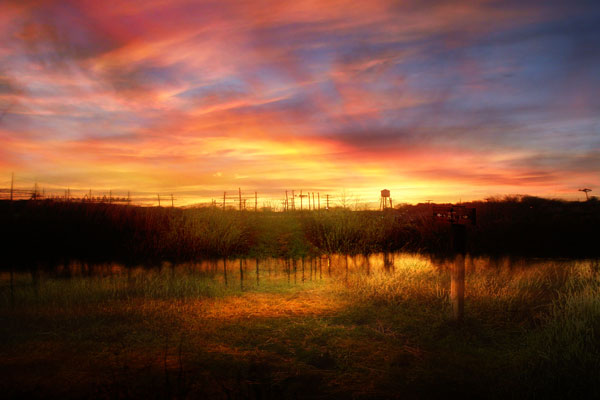
Add a mask to sky 2 and mask the most of the lower parts indicated in red color. Don’t forget to use the soft round black brush.
Results after masking :

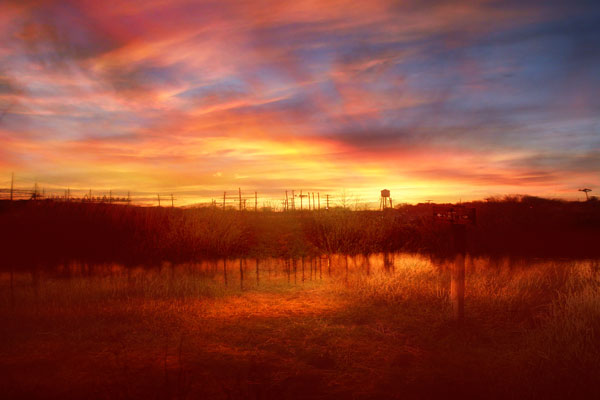
Step 8
On the middle of the background, I found that mist color is not matching with the sky and it has still some white color. I don’t want that. Create a new layer and set the foreground color to #b09356 paint over the indicated area using soft round brush.
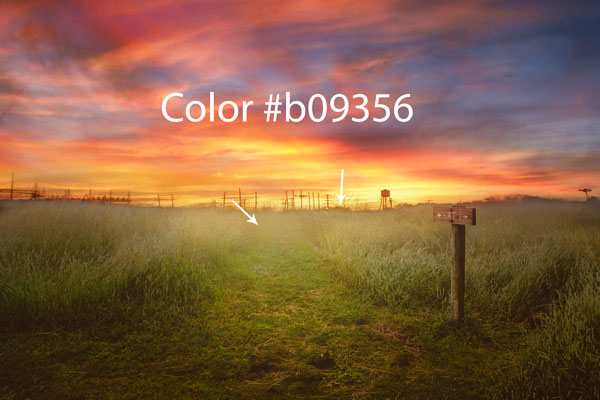
Lower the opacity to 50%.
Step 9
Add the sky 3 image to main document. You can see how I placed it :
Add a mask to sky and mask all the parts of sky 3 except top left parts. If you want to add some more parts on the sky then feel free keep other parts as well of sky 3. You can see the results after masking :

Step 10
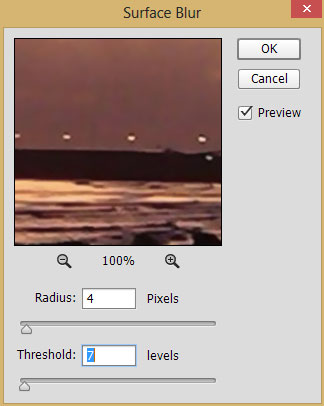
You can notice the noise on the sky 3 and I don’t like that. To fix this I applied the Surface Blur to sky. So convert the sky 3 layer to Smart Objects then go to Filter > Blur > Surface Blur and input the following values :
Results :
Final Adjustments
Step 11
Make a Color Lookup adjustment layer on top of all layers. Use the following settings to match color of whole scene :
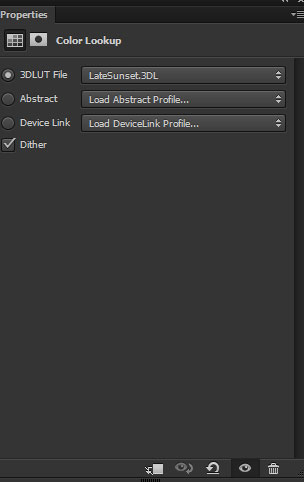
Results :
Step 12
Lot of magentas color tones in the scene which doesn’t look good. I used the Selective Color adjustment layer to change the colors only using Neutrals and Black settings :
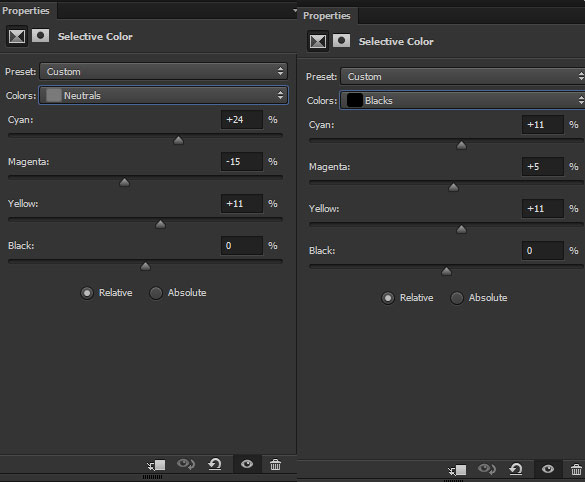
Results :

Step 13
I changed the color again but this time I used Color Balance adjustment layer to add more green color tones.
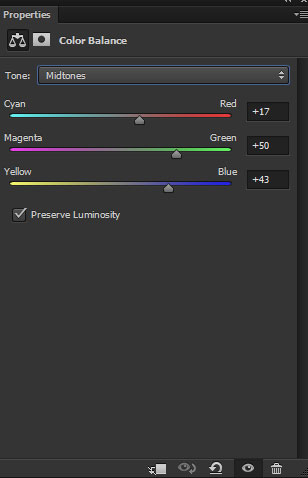
Results :
Step 14
Create a new layer and name it ‘light’. Set the foreground color to #663e19. Now paint the light like I did below using a soft round brush.
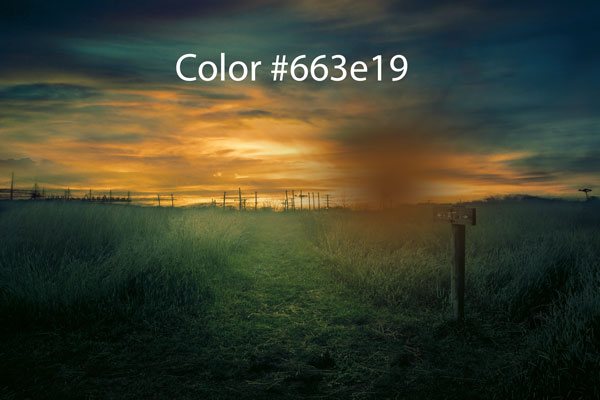
Change the blending mode of light’s layer to Linear Dodge.
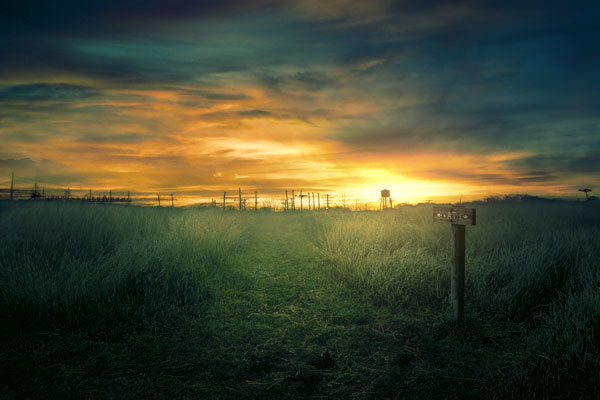
Step 15
In the below image you can see that some parts are not properly blended like the indicated area looks like floating in the air.
To fix this, I created a new layer and I painted over that area using soft round black brush.
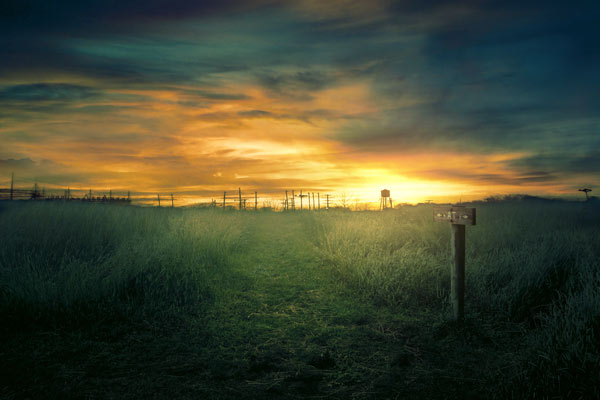
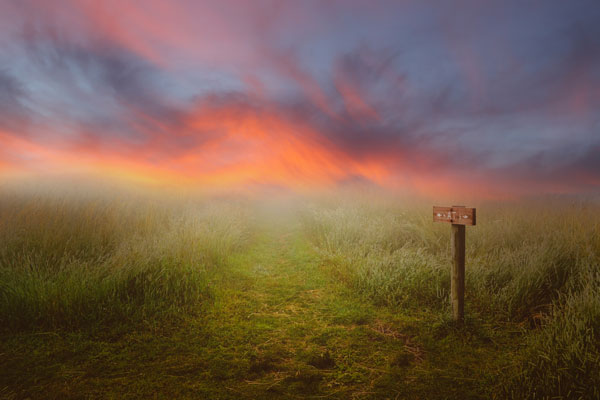
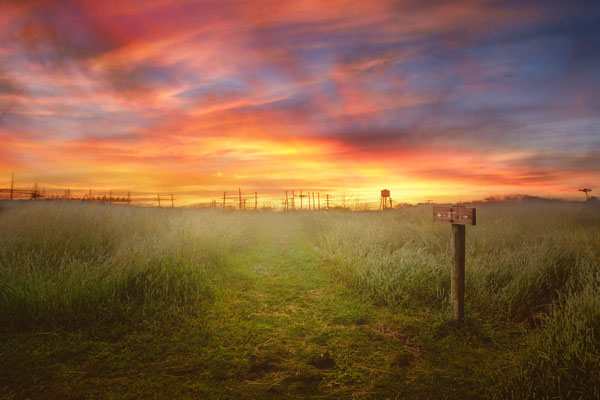
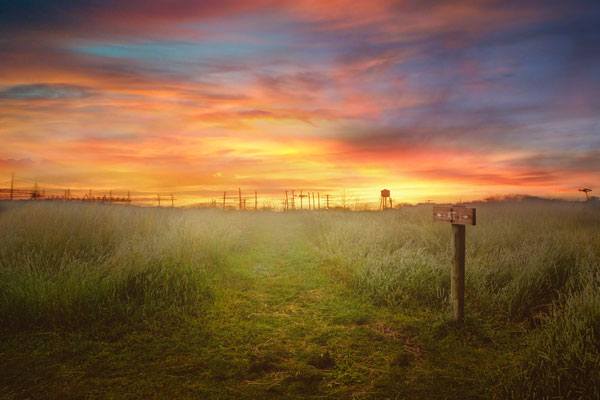
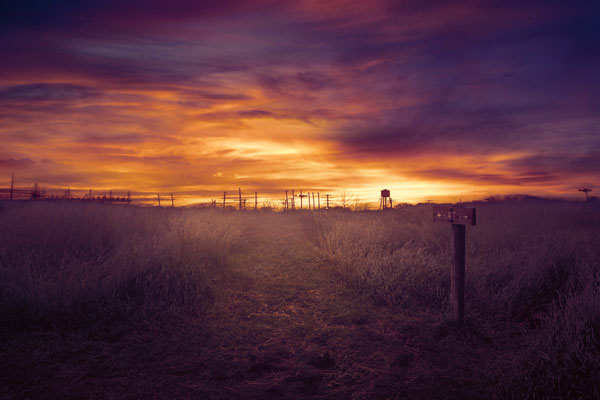
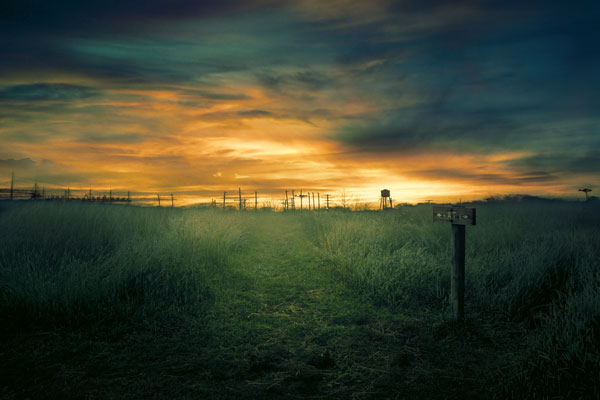
Here are the final results :

Conclusion
Thanks for following the tutorial. I hope you enjoyed the lesson and do let me know if you need any help through comments. Don’t forget to share the tutorial with the world using social media. Have a great Photoshopping day!!
Need Help With Photoshop or Looking for Professional Support?
Whether you're just getting started with Photoshop or need expert-level assistance, we're here to help! Contact us for personalized Photoshop tutorials, project support, or creative services.
Get in touch today to take your skills or projects to the next level.
CONTACT US NOW📘 Want to Master Photoshop Faster?
🎁 Get Your FREE PDF E-Book "Top 10 Photoshop Tricks Every Designer Must Know" Now – Packed with expert tips, shortcuts, and techniques to boost your creativity & workflow.
👉 Download Your FREE PDF E-Book NOW!

