In today’s Photoshop tutorial, I’ll show you how to create an amazing spiderman photo manipulation in Photoshop. We’ll use a black/white city image to create a background for our hero and then we’ll add Spidey. After we’ll adjust the whole compositions using adjustment layer and finish it up with by adjusting light effects using Lighting Effects filter.
Tutorial Resources
Add the City
Step 1
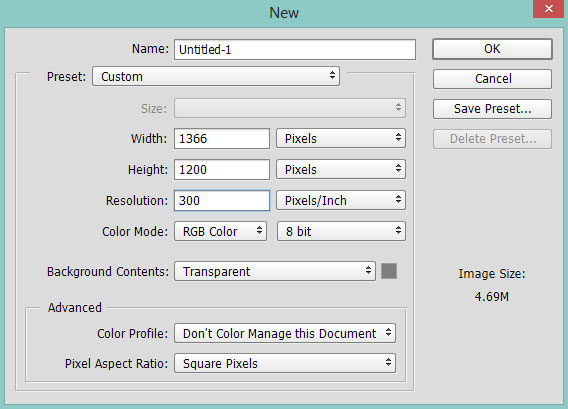
Create a new document in Photoshop with Height 1200 pixel and Width 1366 pixel.
Step 2
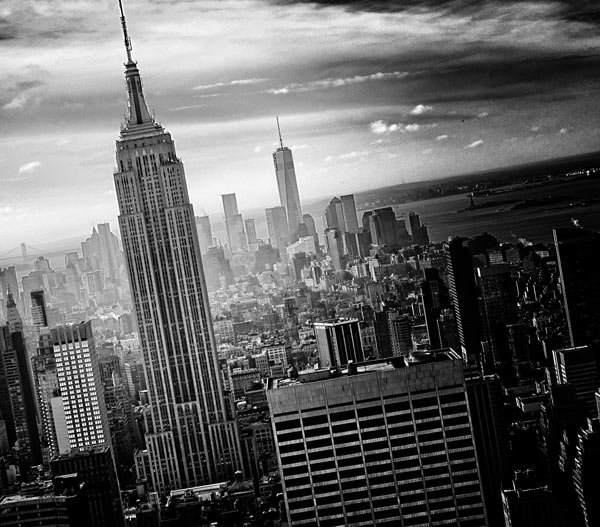
Place the city image to main document by selecting File > Place Embedded. You can also use the Transform Tool (CTRL + T) to rotate it or fit it with the main document. But try to get the biggest building scene like I did it below:
Step 3
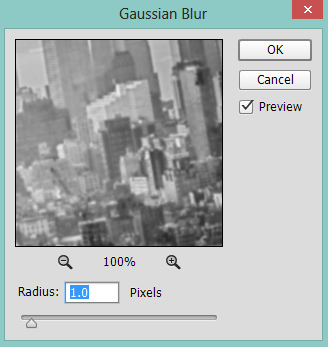
Convert the city image into Smart Objects. Go to Filter > Blur > Gaussian Blur and set the Radius to 1 pixel. This will add more visibility to our subject and if you want more blur on city then just simply increase the Radius value.
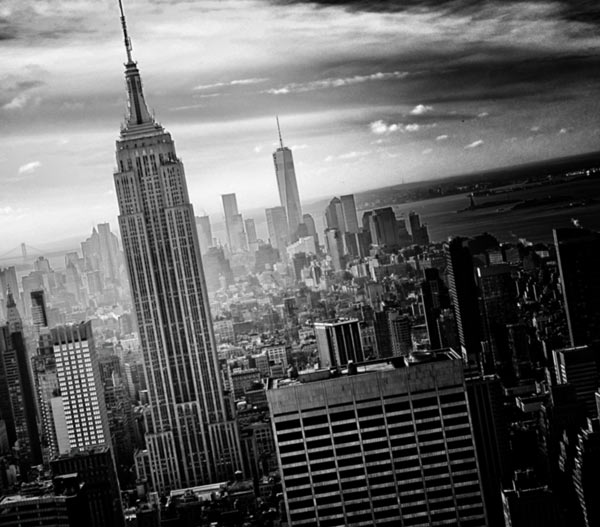
Here you can see the results:
Step 4
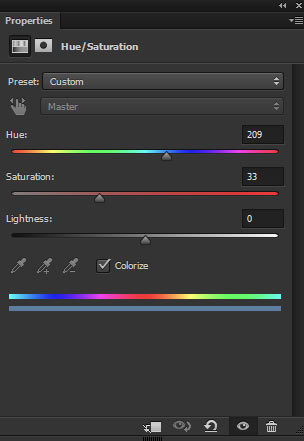
Now we are going to colorize the city using adjustment layers. Create a Hue/Saturation adjustment layer by clicking on the third icon at the bottom of layer panel.
Check the Colorize option to coloirze the city image with the following settings:
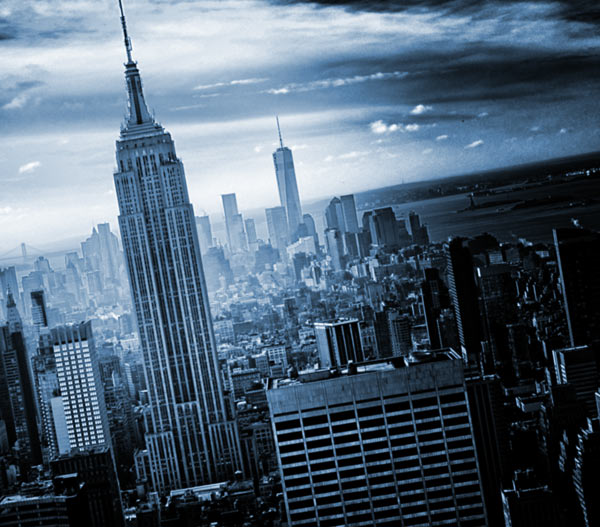
Here are the results:
Step 5
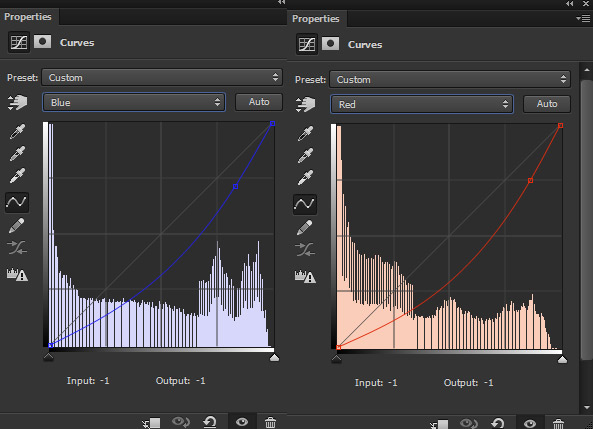
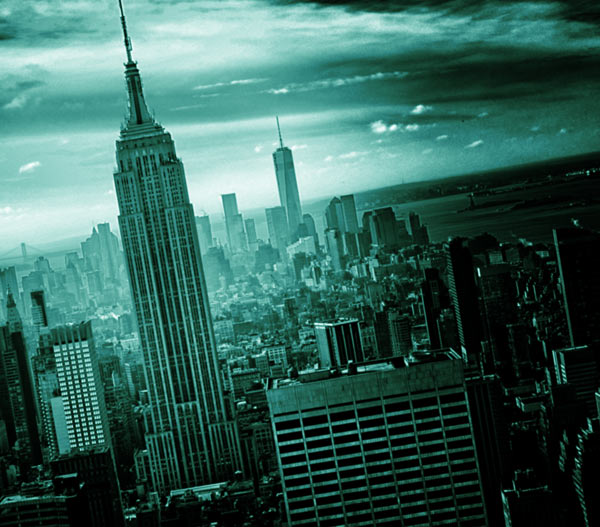
Continue coloring the city image with Curves adjustment layer. So make a Curves adjustment layer and use the Red and Blue channel to add Cyan and Yellow tones combination. Here you can see the values :
Results:
Step 6
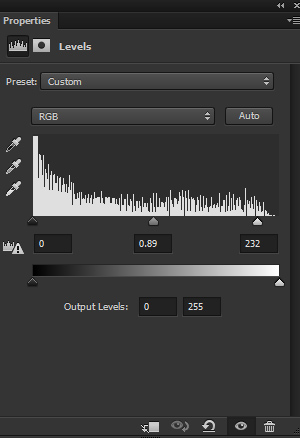
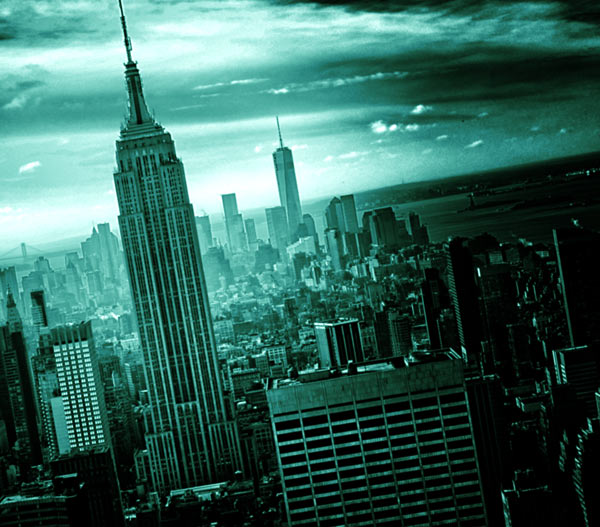
Make a Levels adjustment layer and increase the contrast of whole image. You can see the settings below.
Results:
Add our Hero
Step 7
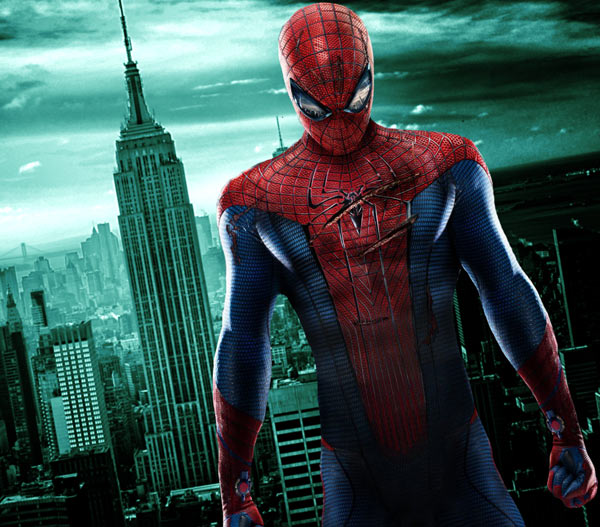
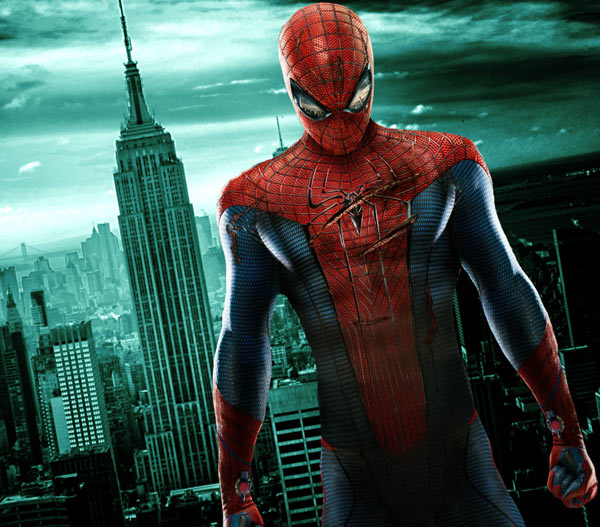
Download the Spiderman PSD file and open it up in Photoshop. Move the Spiderman to our main document using Move Tool (V). Now adjust the spidey position as shown below:
Step 8
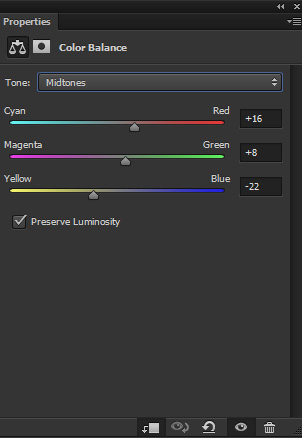
Make a Color Balance adjustment layer for Spiderman and only change the Midtones values to add Yellow color tones to spidey. You can see the below image for reference. Don’t forget to use this layer as Clipping Mask.
Results:
Step 9
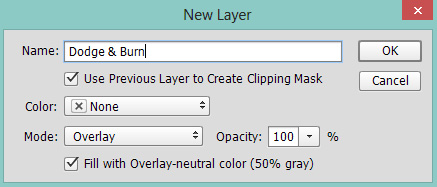
Create new layer and name it Dodge & Burn. Fill this layer with 50% gray color and blend mode changed to Overlay 100%. Don’t forget to use it as Clipping Mask.
Activate the Burn Tool (O). Set the Range to Midtones and Exposure about 9-10%. Now start refining the shade on Spiderman using Burn Tool (O). Just paint only on those there in wherever you think that this area will be less illuminated by the light source (I aim to create light from top left) but remember don’t overdo it. You can see how I did it in both modes.
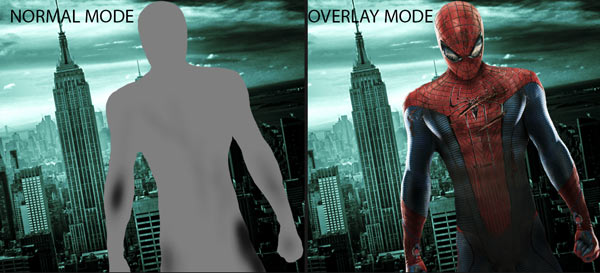
If you want you can also use the Dodge Tool (O) for refining the light but the Spidey already has enough light, therefore, I only used the Burn Tool (O).
Final Adjustment
Step 10
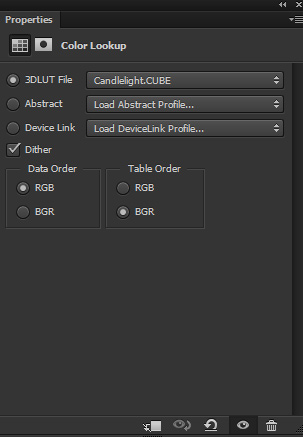
It’s time for final adjustments. Make a Color Lookup adjustment layer on top of all layers. Use the Candlelight filter to change the color of whole scene.
Results:
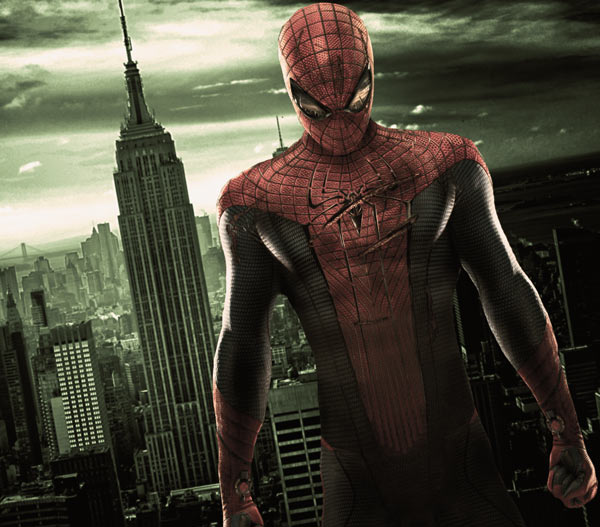
Step 11
Create a new layer and name it ‘light’. Set the foreground color to #644C19. Activate the Brush Tool (B). Now paint the light source as shown below. Just apply a bigger brush stroke.
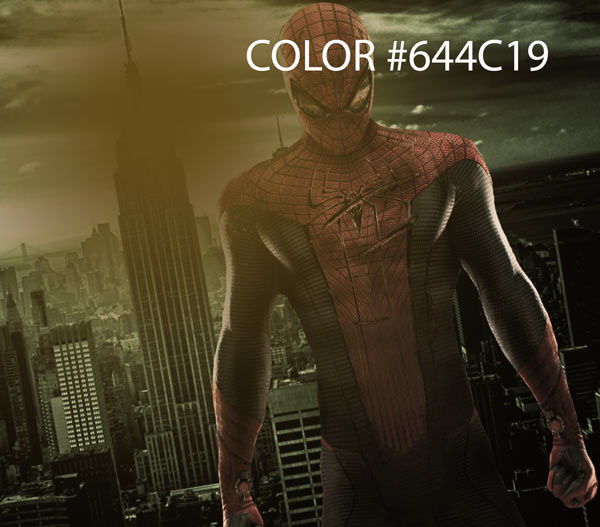
Set the blending mode to Linear Dodge.

Step 12
Make a Selective Color adjustment layer. Change the Yellow and Neutral color settings.
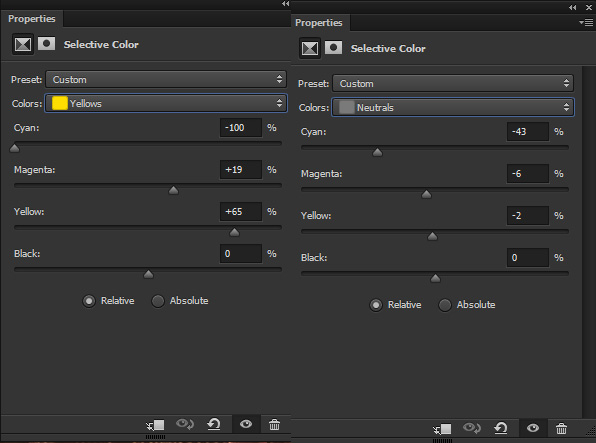
Here are the results:

Step 13
Press CTRL + SHIFT + ALT + E to merge all layers into single layer. Go to Filter > Render > Lighting Effect > and adjust the spotlight as shown below:
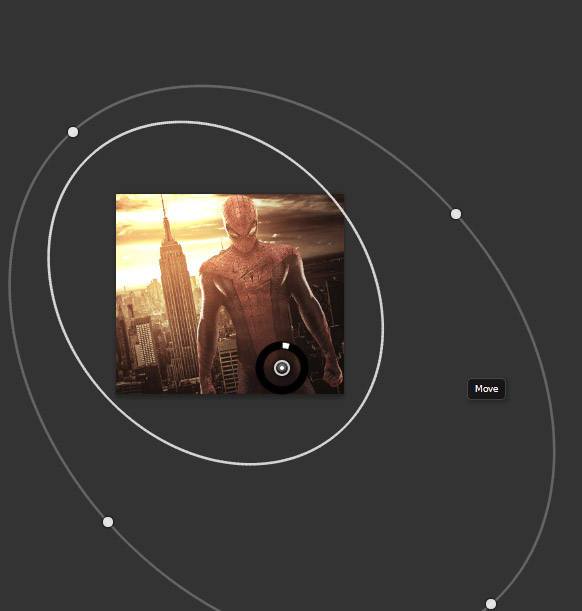
Settings of Lighting Effects:
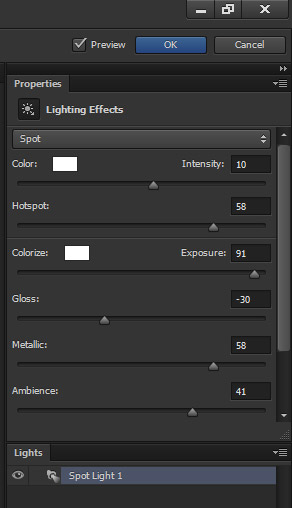
On the layer mask of Lighting Effects filter, I masked the effect on the highlighted area because I don’t want too much light there. Use a soft, basic black brush for masking the effect:

Results:

Step 14
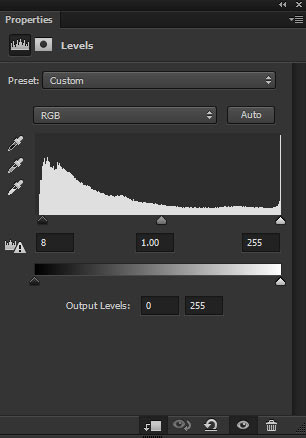
Finally, I increased the contrast little bit using Levels adjustment layer.
Final Results:

Conclusion
Thanks for following the tutorial and I hope you enjoyed the tutorial. Also, thanks for your ongoing love and support. If you need any help then do let me know!
Need Help With Photoshop or Looking for Professional Support?
Whether you're just getting started with Photoshop or need expert-level assistance, we're here to help! Contact us for personalized Photoshop tutorials, project support, or creative services.
Get in touch today to take your skills or projects to the next level.
CONTACT US NOW📘 Want to Master Photoshop Faster?
🎁 Get Your FREE PDF E-Book "Top 10 Photoshop Tricks Every Designer Must Know" Now – Packed with expert tips, shortcuts, and techniques to boost your creativity & workflow.
👉 Download Your FREE PDF E-Book NOW!


