
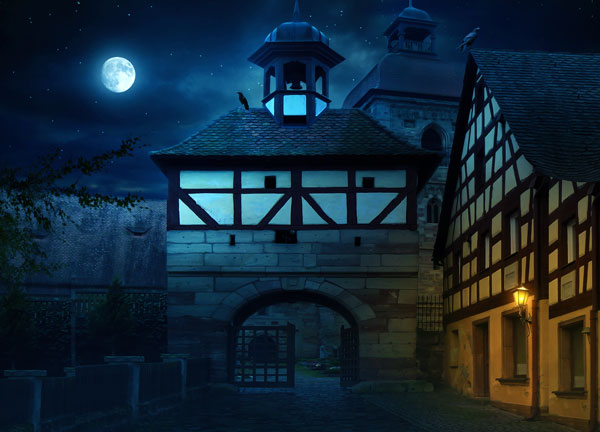

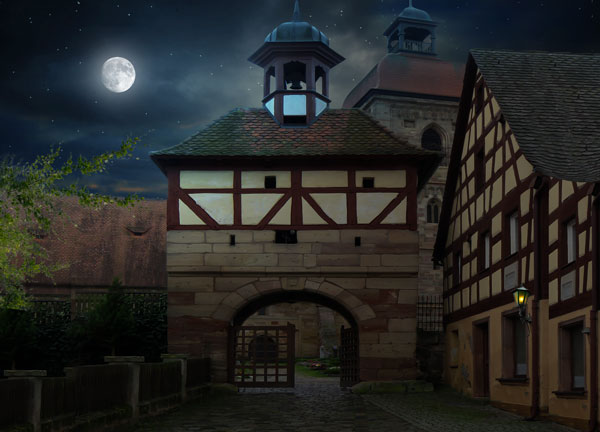
In this Photoshop tutorial, I’ll show you how to create a mysterious street night scene in Photoshop. You’ll learn how to create a night scene with realistic light effect in Photoshop. You’ll learn how to blend multiple stocks into a cohesive scene and advanced masking techniques as well.
Please Note: guys this is not a step by step complete tutorial and it’s an advanced tutorial. I’ll not share basic knowledge and you should have a basic understanding of Photoshop to follow this tutorial.
Tutorial Resources
Step 1
First I created a new document with Width 2500 pixels and Height 1800 pixels. I placed the street image on the middle of the document. You can notice the street is too narrow and to make it fit with our document we need to add some parts of street on the empty area. Here you can see how I placed the image:
Step 2
To fill the empty area, I duplicated the street two times and placed all the duplicated under the original layer. Then move two duplicated layer to the left and right. You can see the position in below image and in this way I filled all the empty area.
Step 3
Now it is all about masking. I add a layer mask to each street layer and then try to achieve smooth blending between each layer to make the street complete. Not only masking, I also used Clone Stamp (S) for cloning several area of the street on many separate layers and then I pressed CTRL + ALT + SHIFT + E to get a complete street image. Here you can see the results:
Add the Sky
Step 4
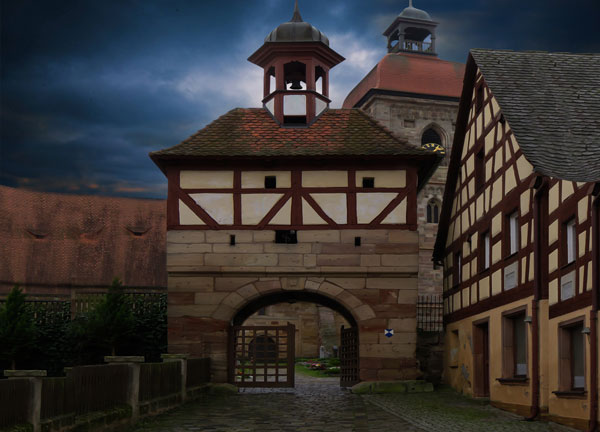
I extracted the street sky using Pen Tool (P) and I added the sky image there. If needed use the Transform Tool (CTRL + T) to make the sky fit with the street.
Here you can see the results with sky image:
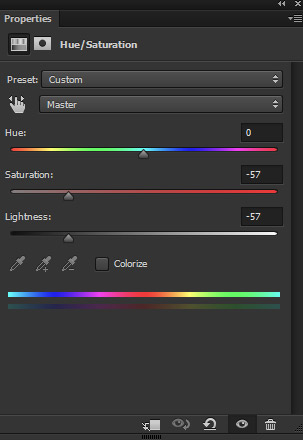
Step 5
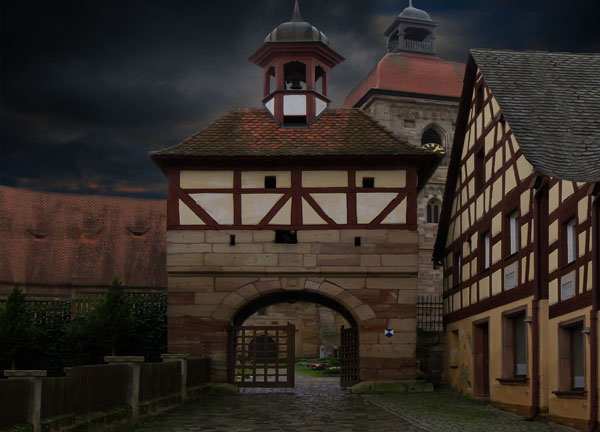
Using Hue/Saturation adjustment layer I reduced the color and lightness of the sky. You can see the below image for reference:
Here are the results with darkness on the sky:
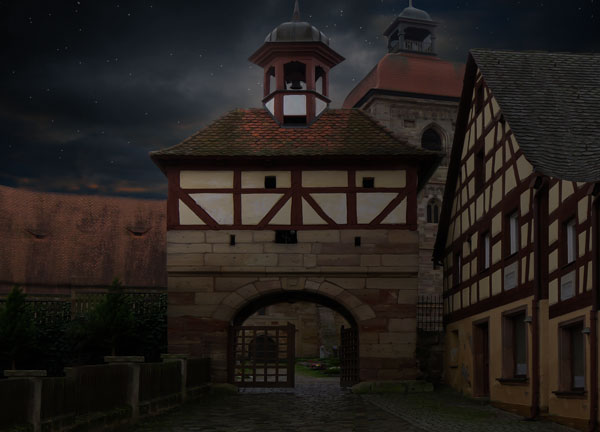
Step 6
I added some stars on the sky using my using Filters and I already shared this techniques in my Fantasy Moonlight Tutorial. You can read this tutorial for more detail explanation. Here you can see the results with added stars:

Step 7
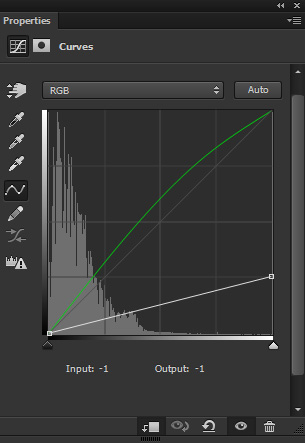
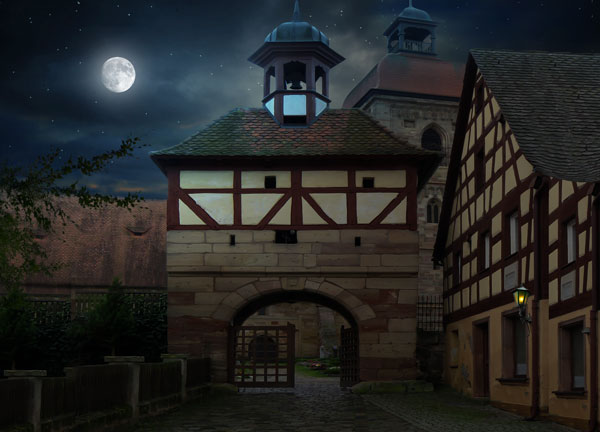
Using Curves adjustment layer I darken the street. I used Curves adjustment layer as Clipping Mask (press the red icon). Here you can see the values :

On the layer mask of this, I masked the effect on the top left side to keep that area brighten because we’ll add the moon there which will be our light source. For masking the effect use soft, basic black brush with lower opacity.
Step 8
I used another Curves adjustment layer but this time I used Red and Blue channel to add the combination of blue and cyan tones to the street.
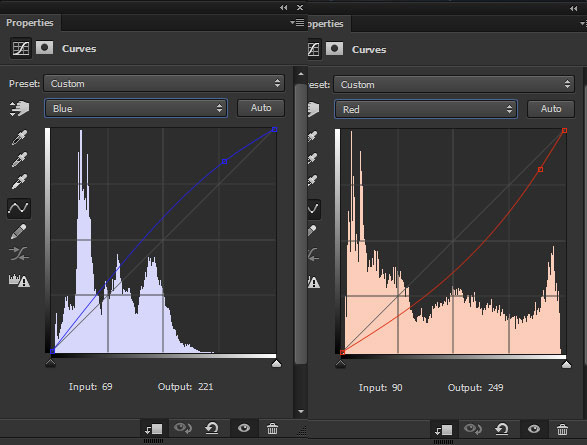
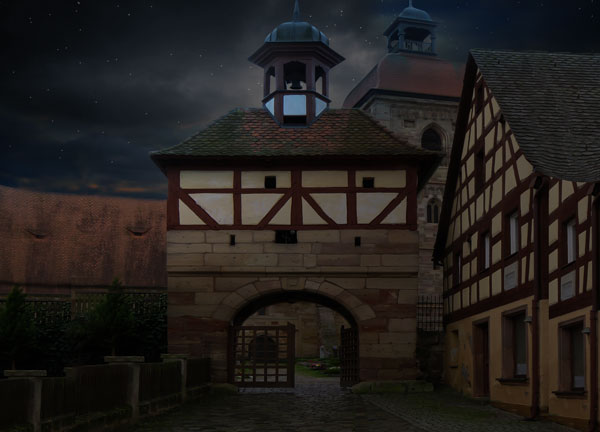
I keep the effect at the top left parts of the street and erased the effect of Curves on the rest of the streets like I did in the previous step. Don’t forget to use soft, basic black brush for masking the effect. Here you can see the results:
Step 9
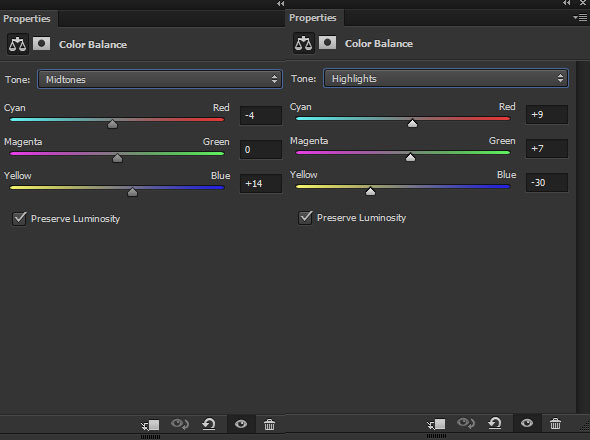
I used the Color Balance on top of all layers (without clipping mask) for adding basic colouring to the scene. Only alter the Midtones and Highlights value.
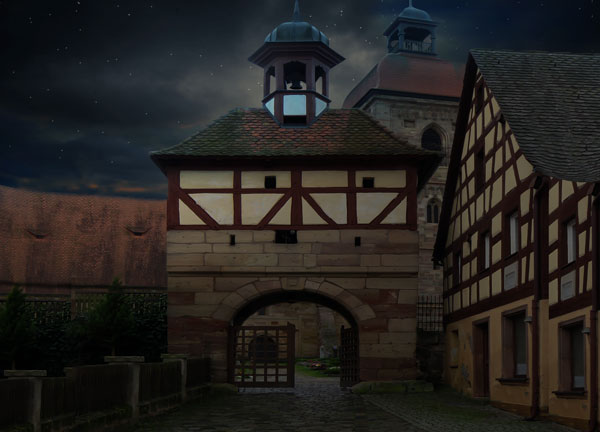
Results:
Step 10
On a new layer, I painted big brush strokes with color #134f62. The aim here is to make a light source there. You can see how I did it in below image.
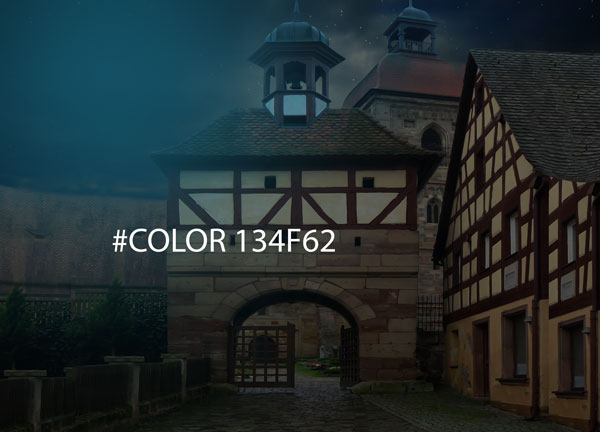
I changed the blend mode to Color Dodge 100% and you can see the results with glowing light effect.
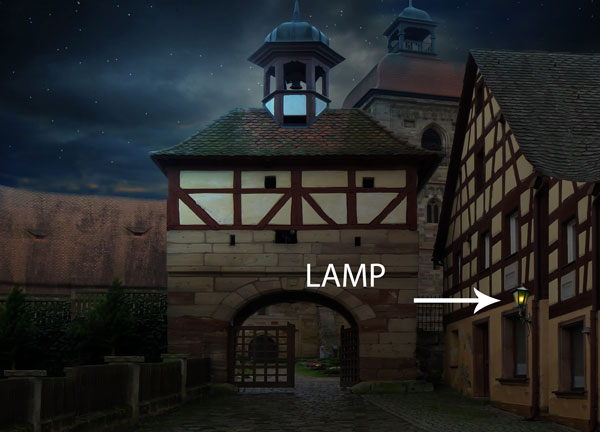
Add the Lamp
Step 11
Place the lamp image to the main scene as shown in below image. Don’t forget to use a layer mask to make a connection between the lamp and wall. You can see the arrow indication for reference.
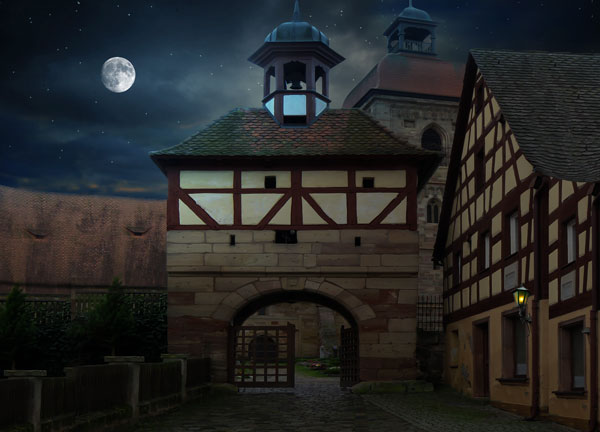
Add the Moon
Step 12
Add the moon image to our main document. I changed the blending mode of the moon to Screen to get rid of the black background.
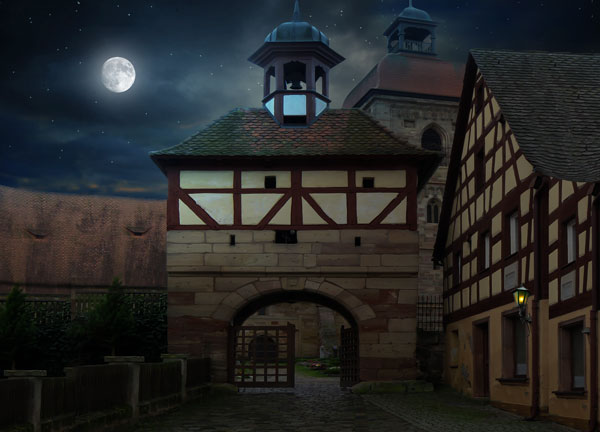
Step 13
On a new layer, I painted the glow around the moon using a soft white brush. Just paint a dot of light on the moon to make it glow.
Add the Bushes
Step 14
I added the bushes on the left side of the street. See the below image for reference.
Step 15
Using Curves adjustment layer I darken the leaves and changed the color little bit using Green channel. You can see the settings below :
Results:
Step 16
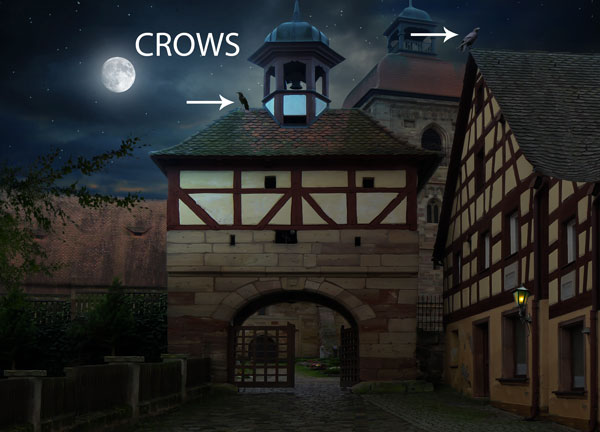
I placed the crows on the main document. I added crow 1 image to right side and added an another to left side chosen from PSD Crow files. Feel free to add them wherever you want to.
Make the Lamp Glow
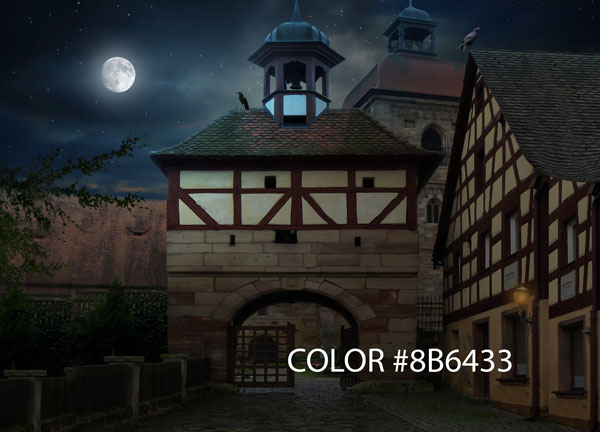
Step 17
On a new layer, I painted light on the lamp for adding glow. I chose a dark yellow color (#8B6433) for making glow on the lamp.
Here you can how I painted the light on the lamp:
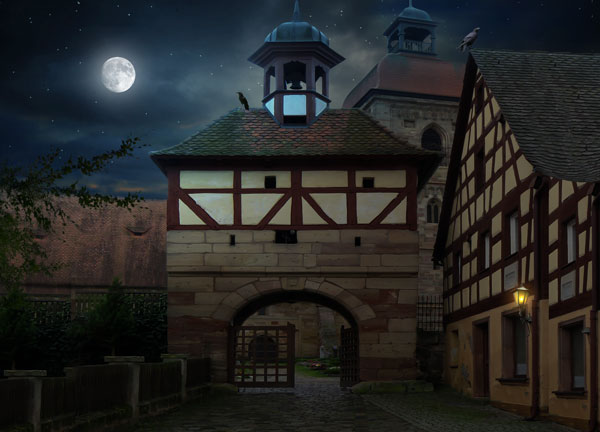
I changed the blending mode to Linear Dodge 100% and here are results with glowing light effects:
Step 18
Using the same color I painted the lamp’s light reflection on the street but this time I changed the blend mode to Color Dodge. Don’t forget to paint the light on a new layer. Here you can the see the results:
Step 19
Similarly I painted the light reflection on the street top parts using the same color which we used in Step 10. Here you can see where I painted the lights:
I changed the blend mode to Color Dodge 100%. Remember you can also vary the opacity of layer for determining how much light you want to add.
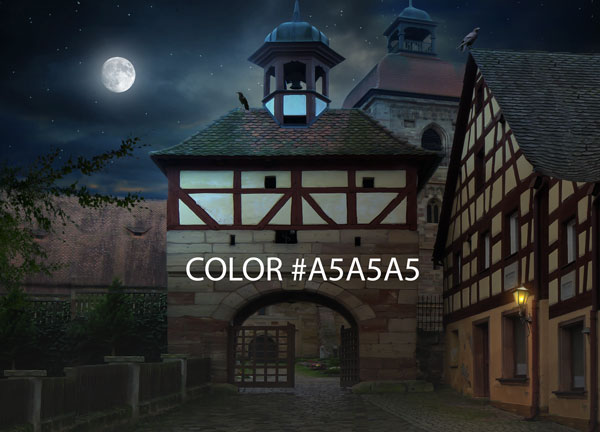
Step 20
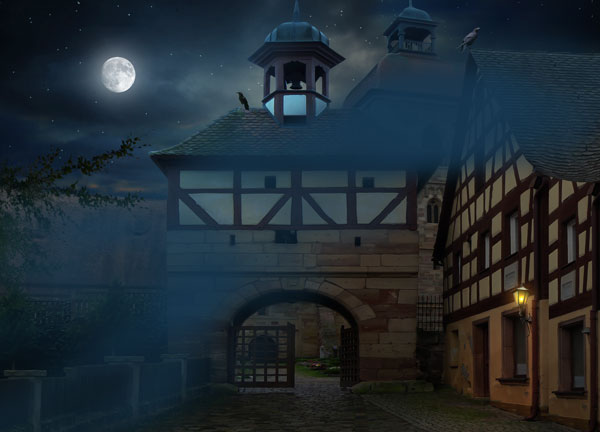
Using the #a5a5a5 I painted the mist on the street. This will make the scene misty and mysterious.
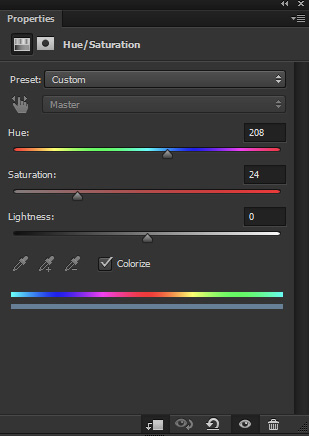
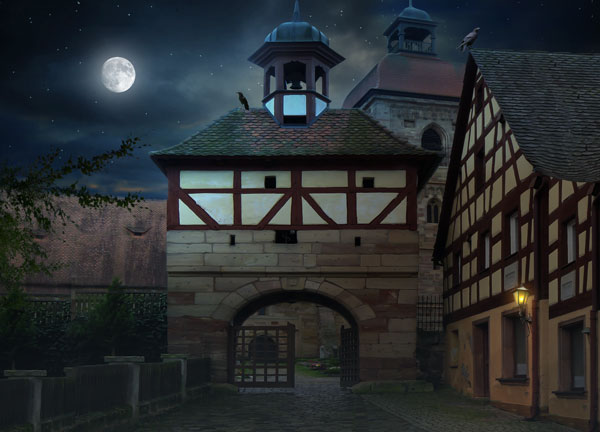
Step 21
Using Hue/Saturation adjustment I changed the color of mist. See the settings in below image.
Results:
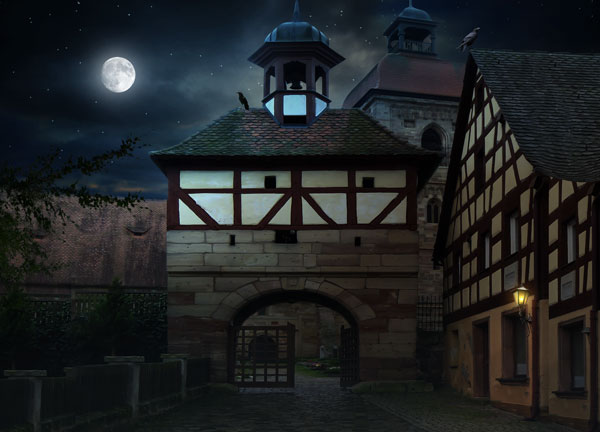
Final Adjustments
Step 22
Make a Gradient Map adjustment layer on top of all layers and use the default Black/White Gradient.
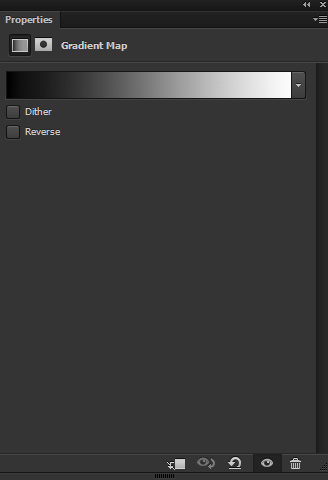
Change the blending mode of Gradient Map to Soft Light and reduce the opacity to 51%. This will add more contrast to the scene.
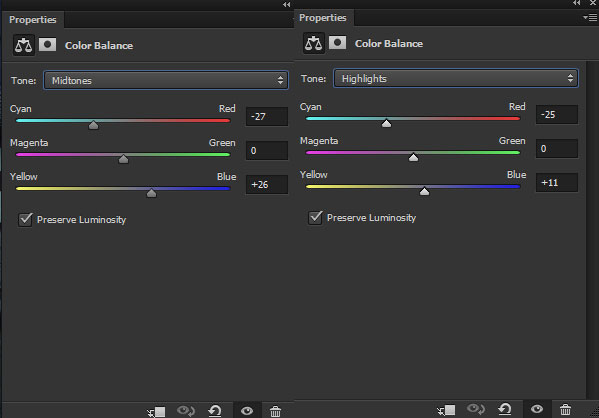
Step 23
I used a Color Balance adjustment layer to add more blue tones to street.
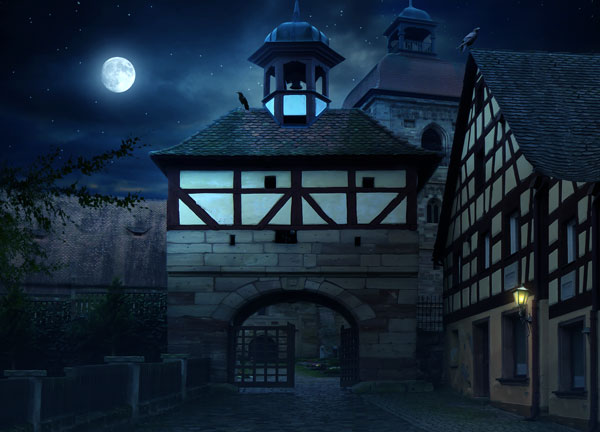
Results:
Step 24
You can notice that Color Balance adjustment layer added blue tones to lamp area as well and I don’t want. It is also fading the glow of the lamp. To get rid of this, I masked the effect of Color Balance on the highlighted red area.
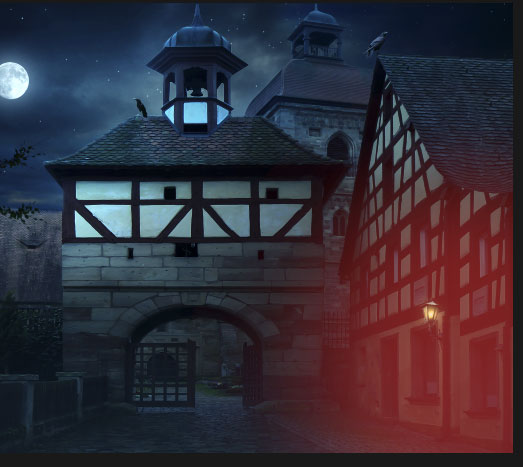
Result:
Step 25
I used another Color Balance adjustment layer and this time I used it for lamp lights area. You can see values below.
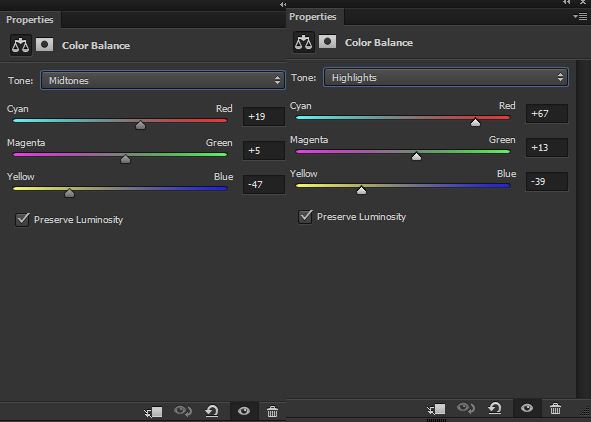
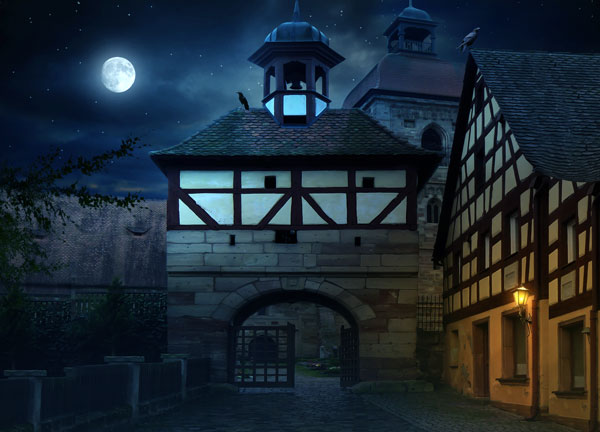
Last Color Balance adjustment layer used for adding blue tones to the scene but this one is used for lamps lights.
So keep the effect on the lamp light area and hide the rest of the effect. Here you can see the results:
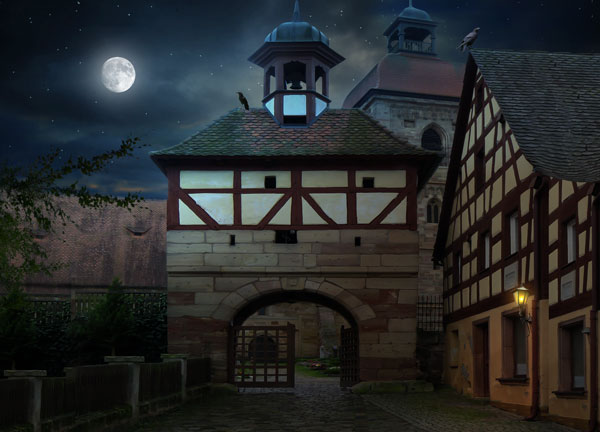
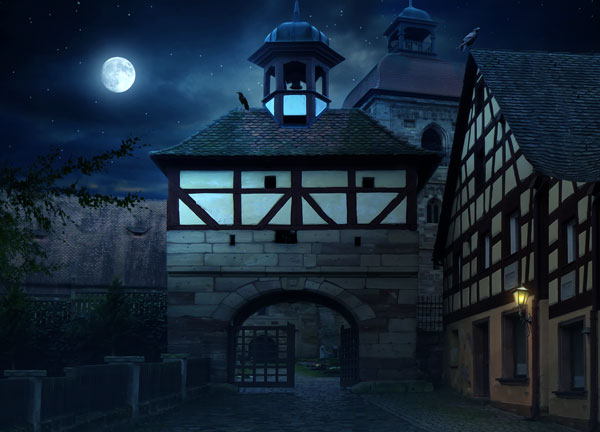
Step 26
At the final step I refined the light and shade of the scene using Dodge & Burn techniques. If you want more color adjustments then you can also use Selective Color adjustment layer. Here are the final results:

Conclusion
Thanks for following the tutorial and I hope you enjoyed it. If you have any question then do let me through the comments. Please do share the tutorial with the world if you really like it.
Need Help With Photoshop or Looking for Professional Support?
Whether you're just getting started with Photoshop or need expert-level assistance, we're here to help! Contact us for personalized Photoshop tutorials, project support, or creative services.
Get in touch today to take your skills or projects to the next level.
CONTACT US NOW📘 Want to Master Photoshop Faster?
🎁 Get Your FREE PDF E-Book "Top 10 Photoshop Tricks Every Designer Must Know" Now – Packed with expert tips, shortcuts, and techniques to boost your creativity & workflow.
👉 Download Your FREE PDF E-Book NOW!

