


In this Photoshop tutorial, I’ll show you how to create a dark, dream-like photo manipulation in Photoshop. We’ll learn how to achieve nostalgic, dream-like scene using a variety of photo manipulation techniques. You’ll also learn how to change the perspective of an image using filters and then blending them into a cohesive scene. Read on and escape from the reality!
Tutorial Resources
Preparing Dark Background
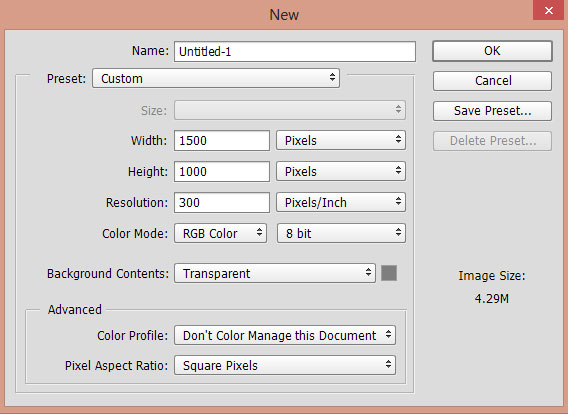
Step 1
Create a new document in Photoshop with height 1500px and width of 1100px.
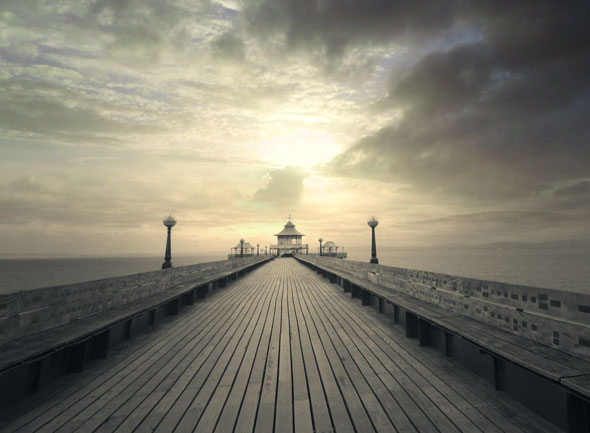
Placing Pier
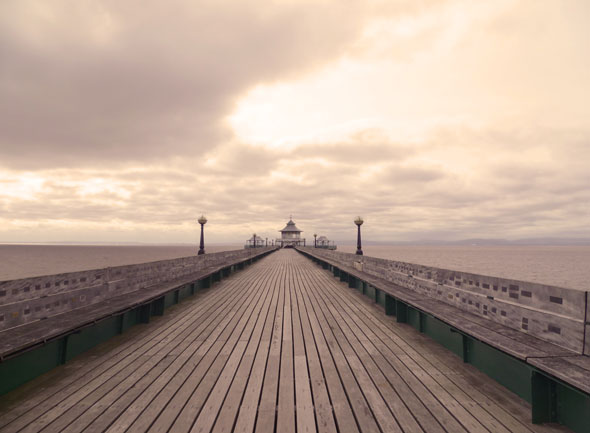
Step 2
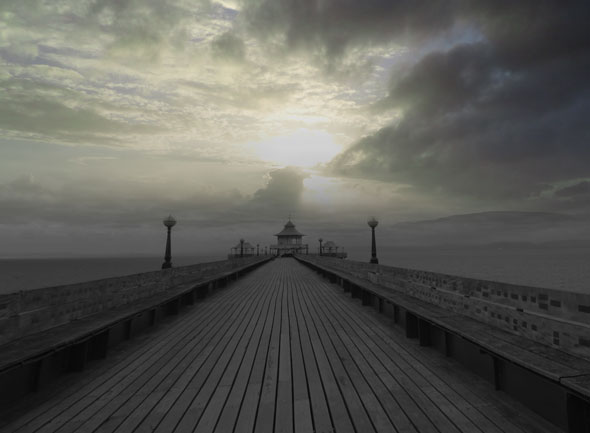
Open up the pier image in Photoshop and then drag it into our main document using Move Tool (V).
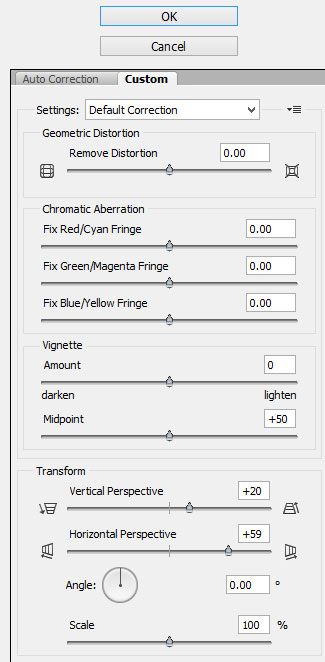
Step 3
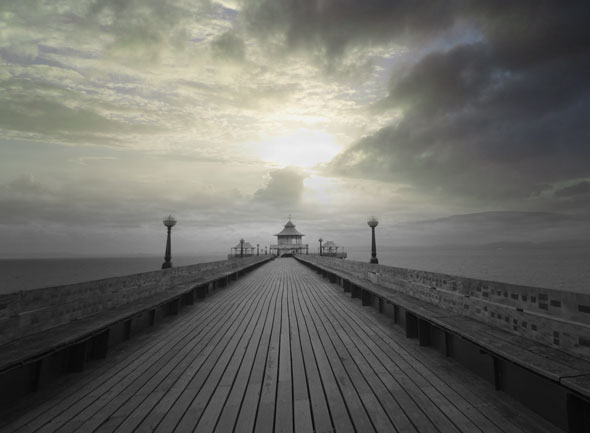
Now I am going to change the perspective of pier image using Lens Correction Filter. First, convert the pier layer to Smart Objects. Now go to Filter > Lens Correction and change the horizontal and vertical perspective with the following settings:
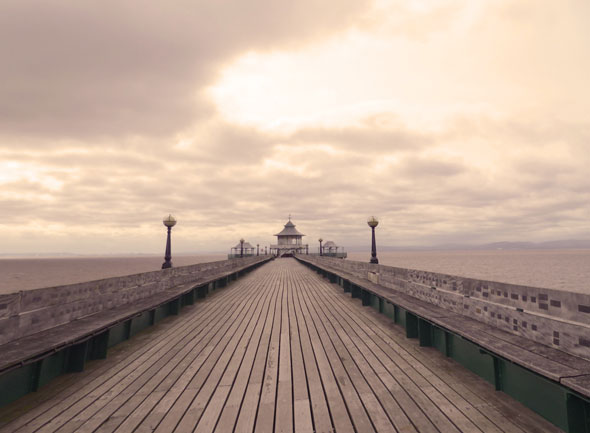
Results:
Adding Sky
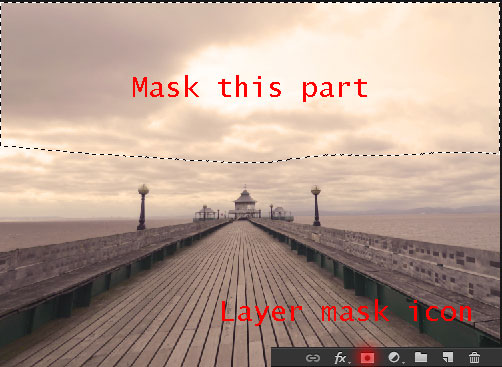
Step 4
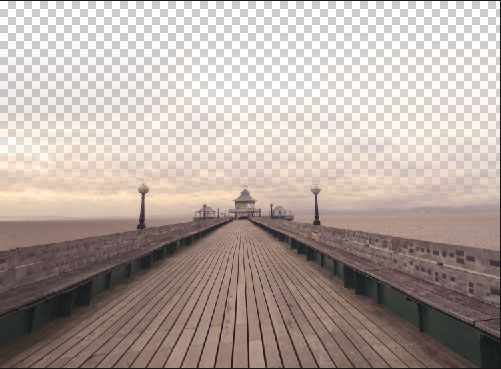
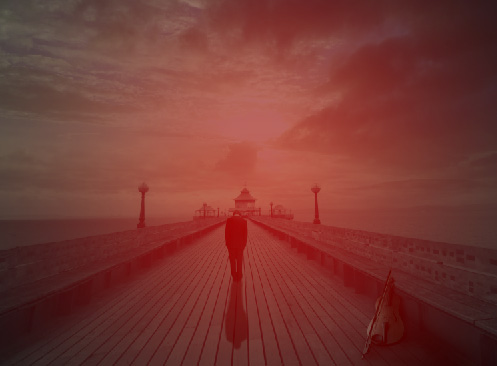
Add a Layer Mask to pier by clicking the second icon at bottom of layer panel. Use a soft round black brush with opacity about 30% to mask the upper parts of pier.
Results after masking:
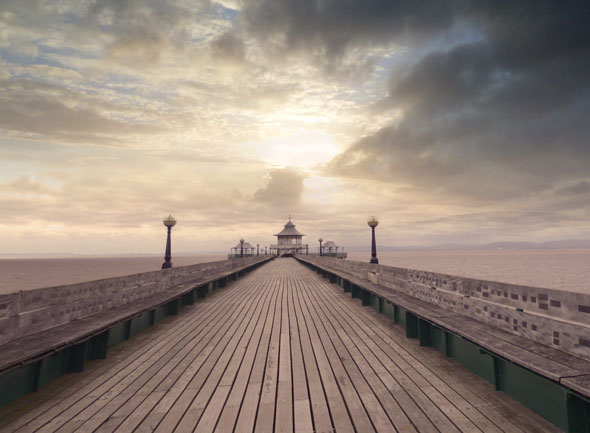
Step 5
Place the sky image under the pier. Here are the results with added clouds to the scene.
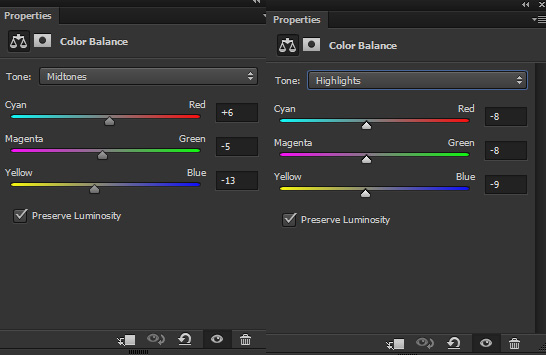
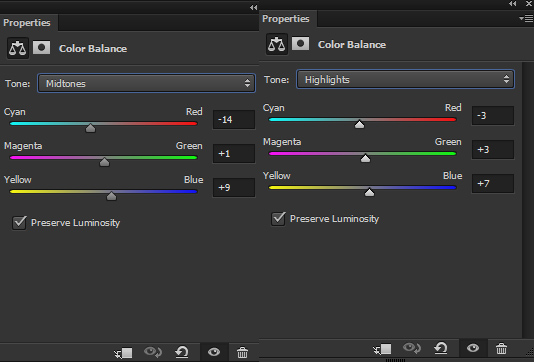
Step 6
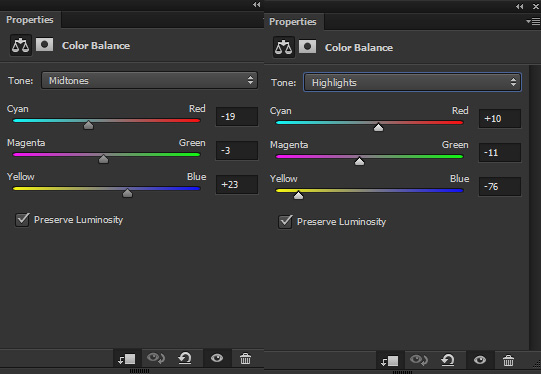
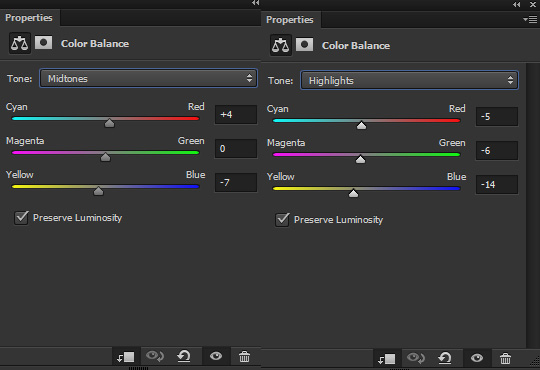
Make a Color Balance adjustment layer and change the color of sky little bit. Use it with following setting and you can add adjustment layer by clicking on third button of layer panel.
Results:

Step 7
Continue coloring it using Selective Color adjustment layer and use the yellow color and change its settings.
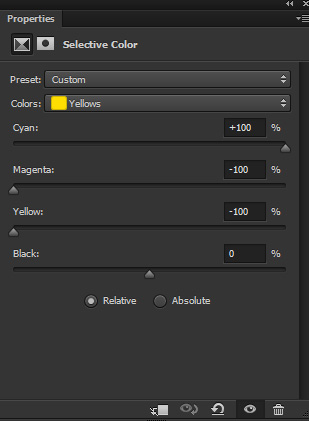
Results:
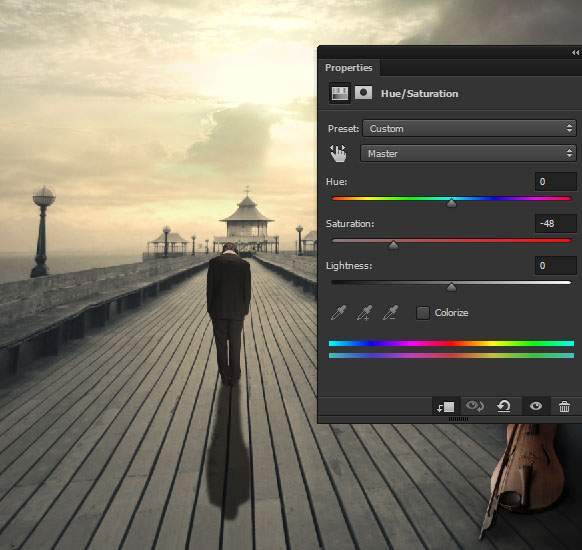
Step 8
Now head back to pier layer. Use a Hue/Saturation adjustment layer to reduce its saturation. Don’t forget to use it as clipping mask (press the red icon for clipping mask).

Results:
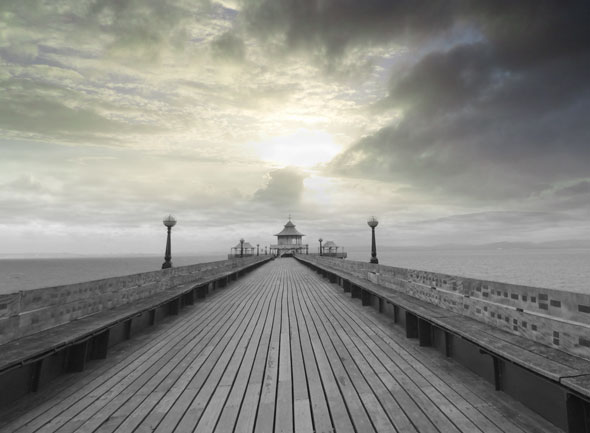
Step 9
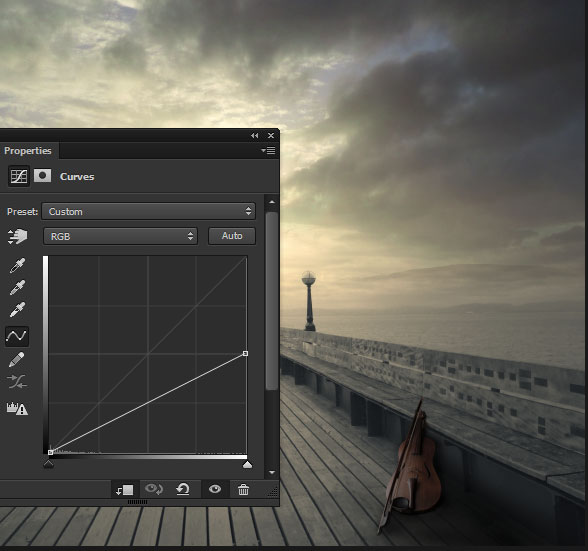
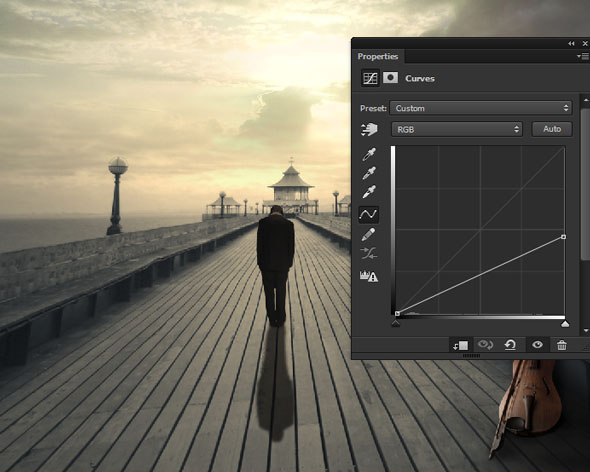
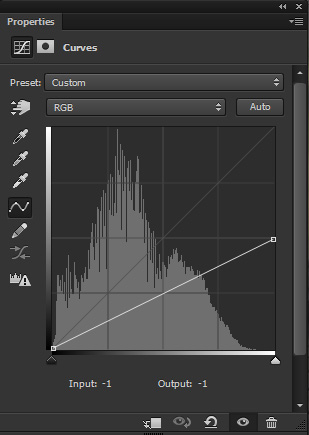
Now use a Curves adjustment layer to reduce its brightness as we are creating dark photo manipulation.
Results:
Step 10
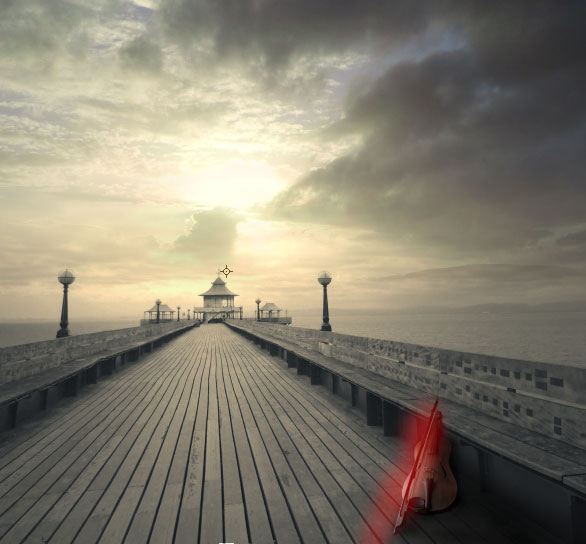
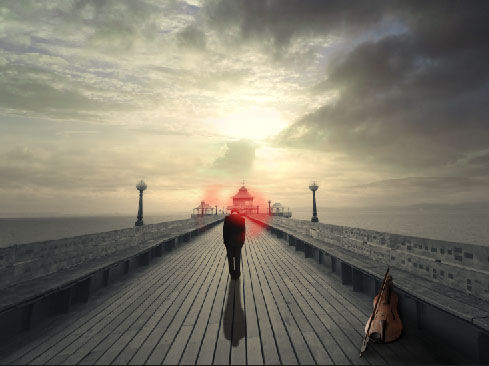
On the layer mask of Curves, hide the effect on the middle using a soft round black brush. Because the light appears to come on the middle then we should maintain some lights there.
Results:
Step 11
Make a Color Balance adjustment layer and add some colors to pier. Try to match its color with the sky.
Results:
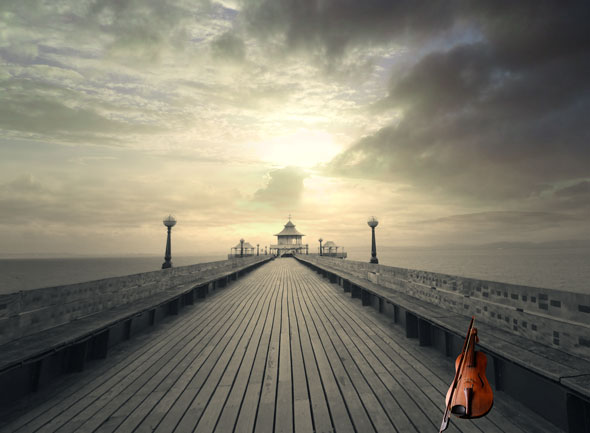
Adding Violin
Step 12
Extract the violin from its background using Selection Tool. Place it as shown below.
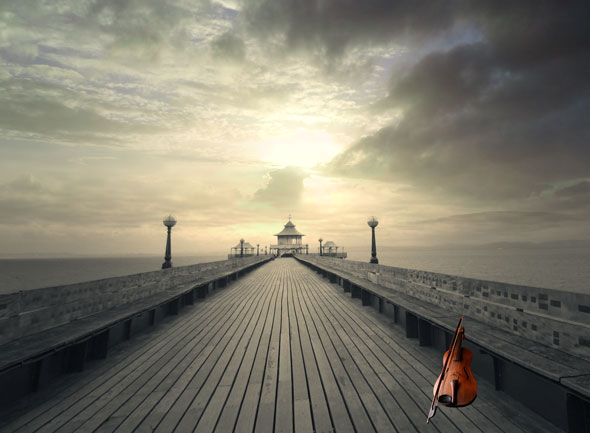
Step 13
Now use the Lens Correction filter and change the perspective of violin with the following settings.
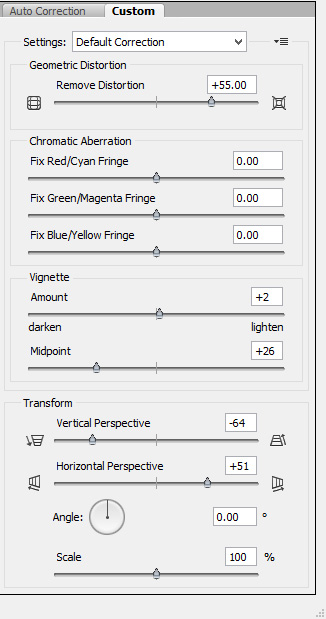
Results:
Step 14
Looks like the violin is floating in the air. Create a new layer under the violin and paint some contact shadows under the violin. Use a soft round black brush to create shadows. See the following image for reference.
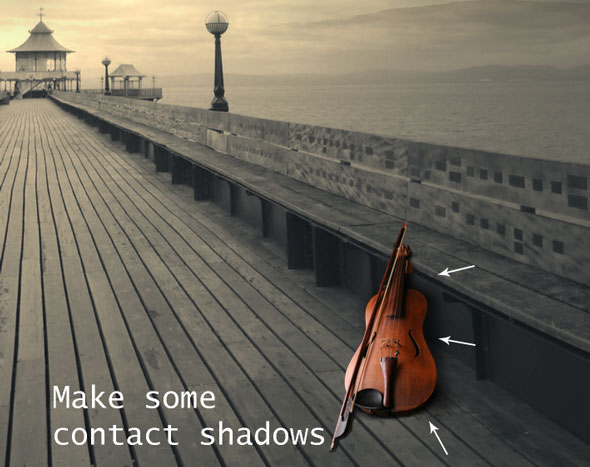
Create again new layer under the violin and this time make some cast shadows.
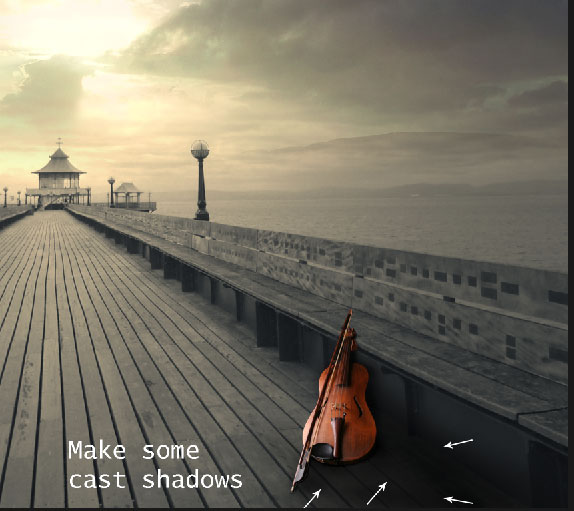
Results so far:
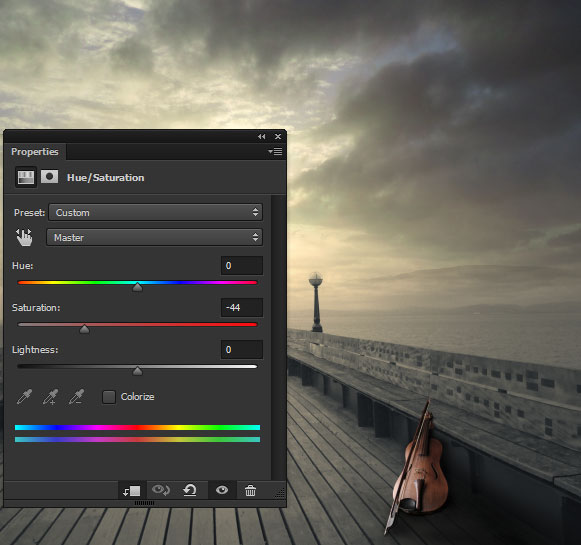
Step 15
Time to adjust the violin with the scene. Use a Hue/Saturation to desaturate the violin little bit. Set the Saturation slider to -44.
Step 16
Use the Curves adjustment layer to reduce its brightness.
Step 17
On the layer mask of Curves, hide the effect on the highlighted front part of violin as these parts will be reflected by light source.
Results:

Step 18
Make a Color Balance adjustment layer to match its colors with the background.
Results:

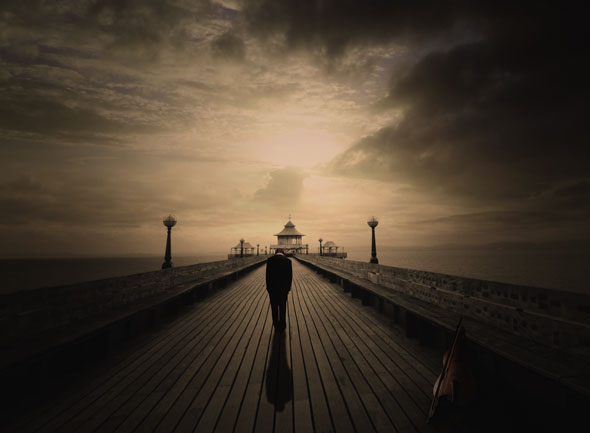
Adding Man
Step 19
Extract the man from its background and then place it as shown below.
Step 20
Make some contact shadows for man as we did it for violin.
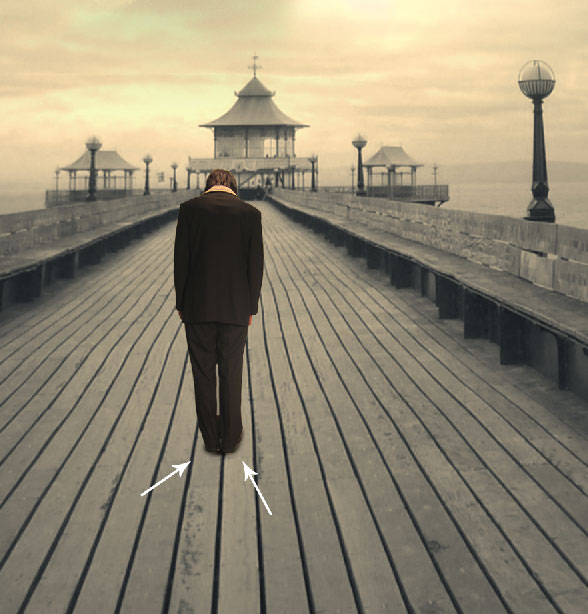
Step 21
It’s time to create the cast shadows for man. Duplicate the man layer by pressing CTRL + J and drag it under the original man layer. Flip it vertically using Transform Tool. To flip it, activate the Transform Tool (CTRL + J) and right click on anywhere and choose Flip Vertical.

Step 22
Make a Hue/Saturation adjustment layer and reduce the lightness of duplicated man layer.
Step 23
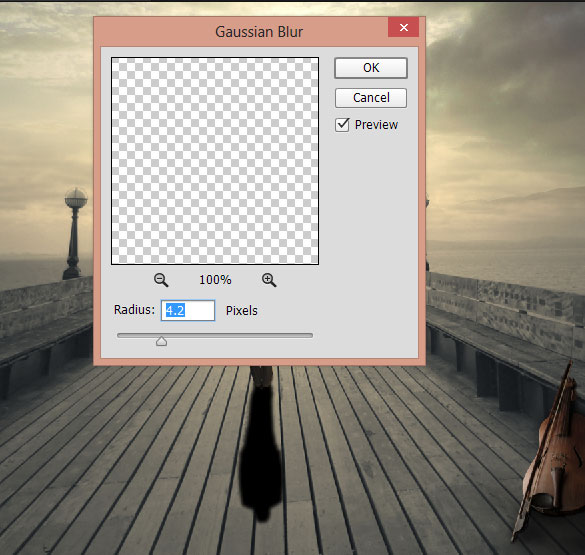
Now use Gaussian Blur (Filter > Blur > Gaussian Blur) filter to soften the shadows. Set the radius value to 4.2px.
Results:
Step 24
Reduce the opacity of this layer to 71% and fade the shadows into the pier.

Step 25
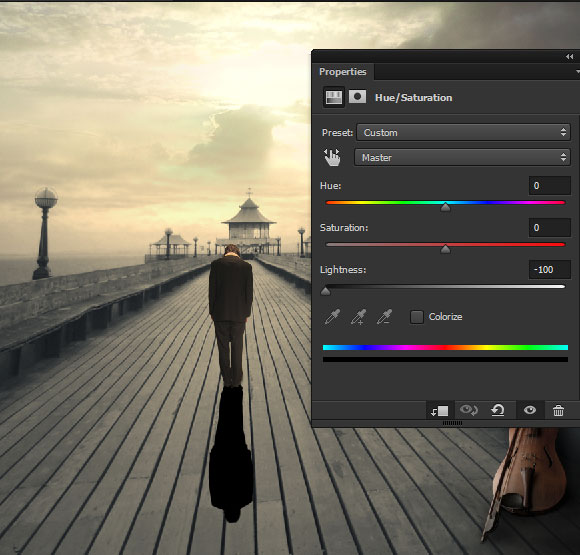
Now head back to original man layer and start adjusting it with the scene. First, use a Hue/Saturation adjustment layer to desaturate the man.
Step 26
Use Curves adjustment layer to darken the man.
Step 27
Maintain some light on man head by masking the effect of Curves. Hide the effect on the highlighted parts of man as shown below.
Results:
Final Adjusments
Step 28
Make a Curves adjustment layer, above all layers, darken the whole scene.
Select the mask of this layer and hide the effect of Curves on the middle of the scene to keep the light coming from the center.
Results:
Step 29
Make a Gradient Map adjustment layer and use the black/white gradient. The aim is to increase the contrast and brightness of whole scene.
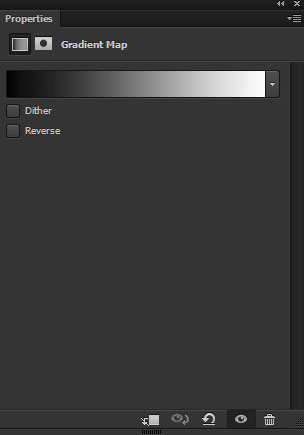
Set its blend mode to Soft Light and reduce its opacity to 80%.
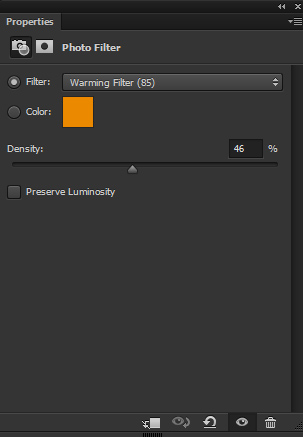
Step 30
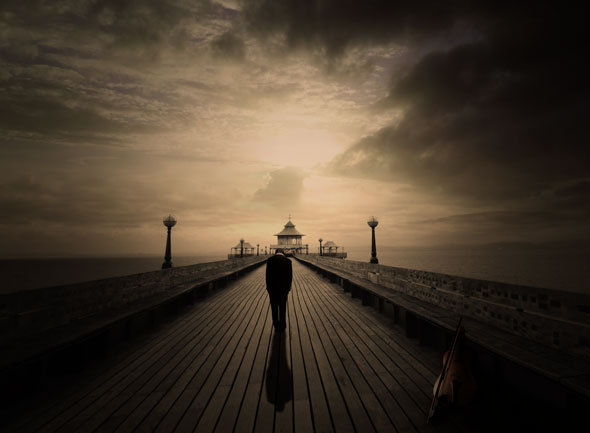
Add a Photo Filter adjustment layer and add the warm yellow colors to whole scene.
Results:
Step 31
Make a Color Lookup adjustment layer to darken it more.
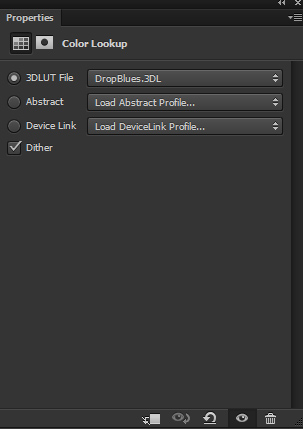
Reduce its opacity to 50%.
Step 32
Finally, make a Color Balance adjustment layer to add some more different colors to scene.
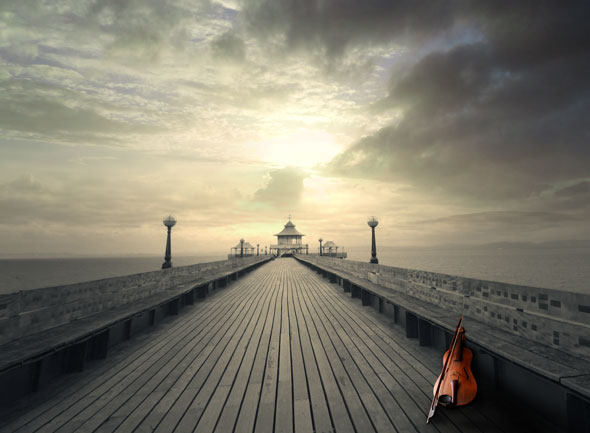
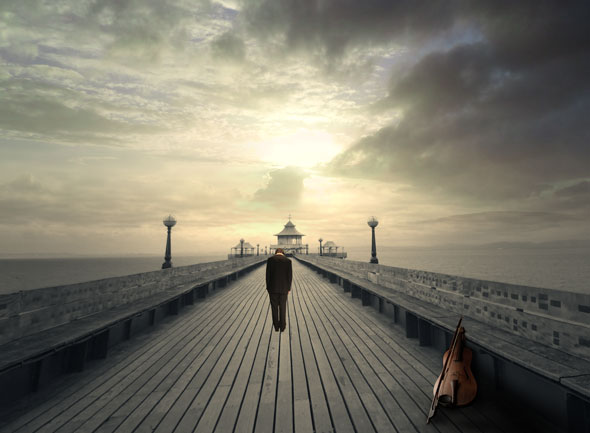
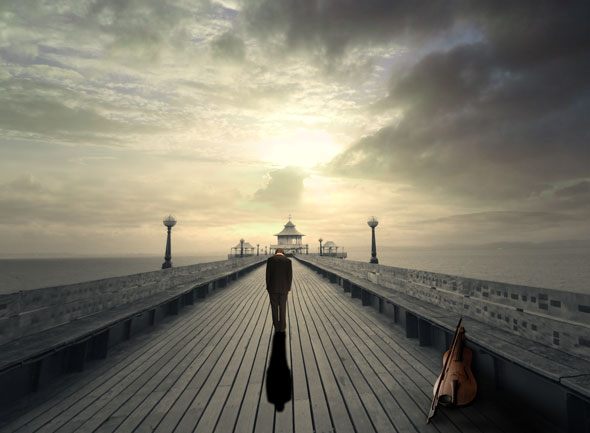
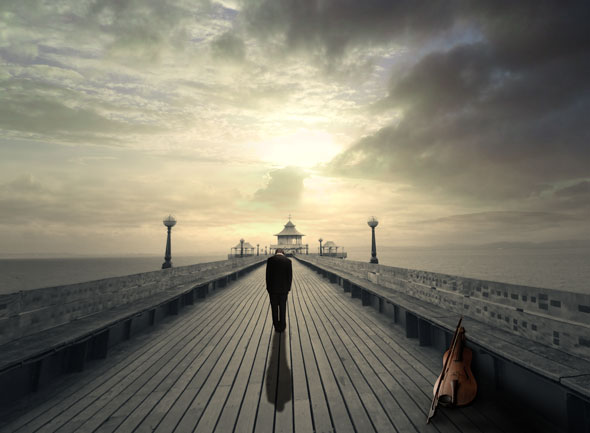
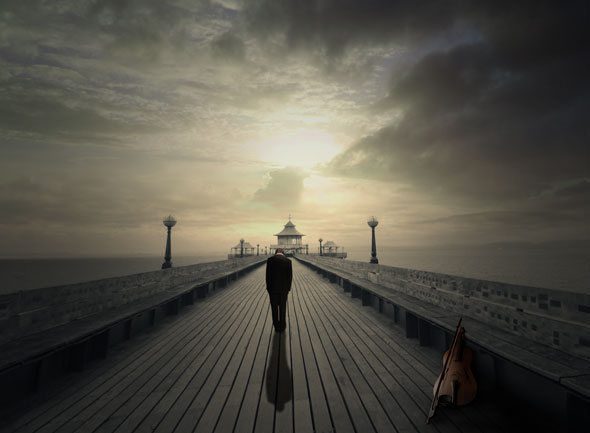
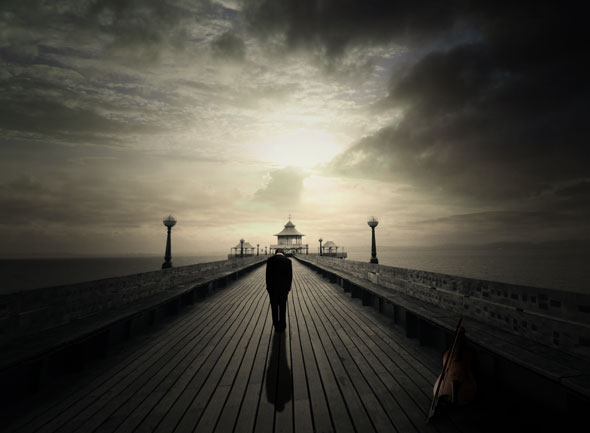
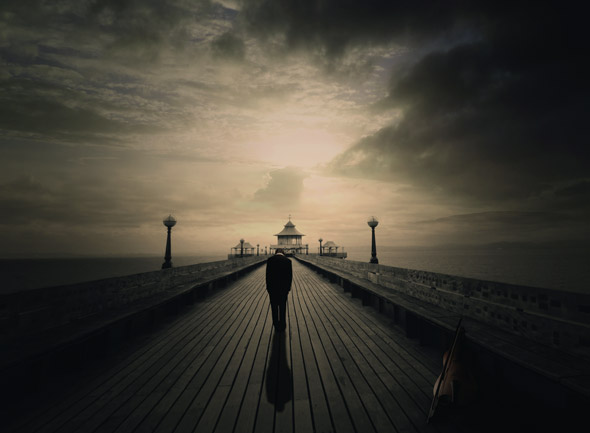
Final Results:
Conclusion
Thanks for following the tutorial. I hope you enjoyed it and learned some new techniques of photo manipulation. Do let me know if need any help. I’ll be happy to help you. Have a great day!
Need Help With Photoshop or Looking for Professional Support?
Whether you're just getting started with Photoshop or need expert-level assistance, we're here to help! Contact us for personalized Photoshop tutorials, project support, or creative services.
Get in touch today to take your skills or projects to the next level.
CONTACT US NOW📘 Want to Master Photoshop Faster?
🎁 Get Your FREE PDF E-Book "Top 10 Photoshop Tricks Every Designer Must Know" Now – Packed with expert tips, shortcuts, and techniques to boost your creativity & workflow.
👉 Download Your FREE PDF E-Book NOW!

