


In this tutorial, you’ll learn how to composite a landscape using the lake and some cloud stock images in Photoshop. I’ll show you how to make the reflection in the water, color matching using adjustment layers, removing low contrast and will also give you some color correction tips at the end of the tutorial.
Tutorial Resources
Step 1
Open the lake image in Photoshop. I am directly working on the photo but you can create a new document and then place the lake there and start working on it.

Step 2
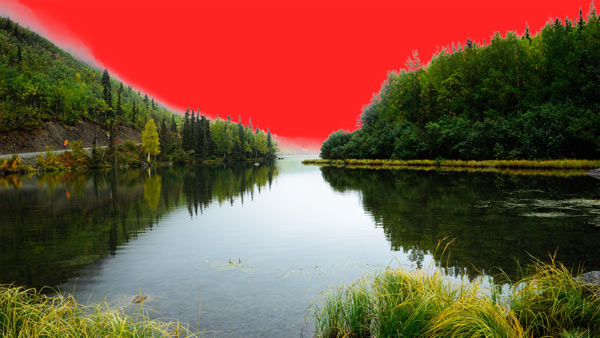
First, we need to get rid of the white background of the lake. You can either use Quick Selection Tool (W) to make the selection or better option to use the Channel and Calculation techniques. I already have a tutorial on making a complex selection using channel techniques and you can read the tutorial here.
Using channels technique I removed the background of the lake.
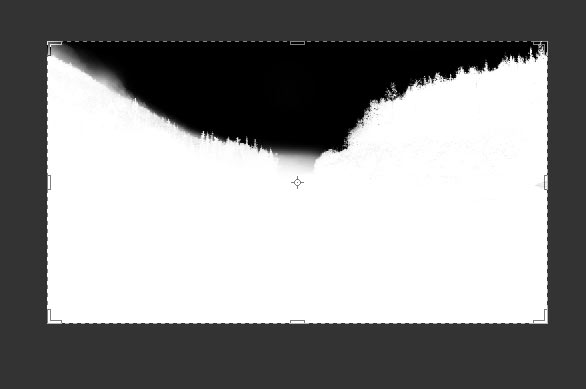
Now take a look at the layer mask results of the lake:
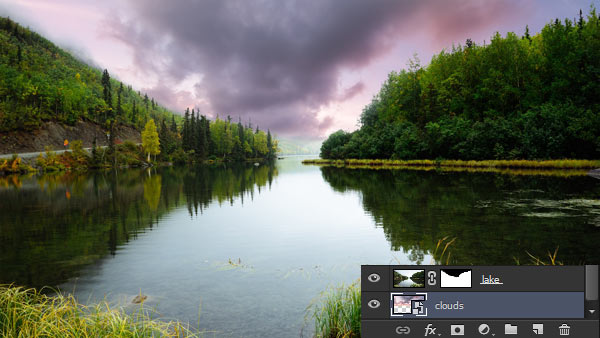
Place the cloud image and move it under the lake layer. Feel free to adjust the cloud image as you want using Transform Tool but for the sake of tutorial place it as I did it.
Step 3
In this step, we’ll add the sunset image. Place it under the lake layer but above the cloud layer. Also, make sure you get the dark, warm clouds from the sunset image so adjust it according to that.
Below you can see how I did it:
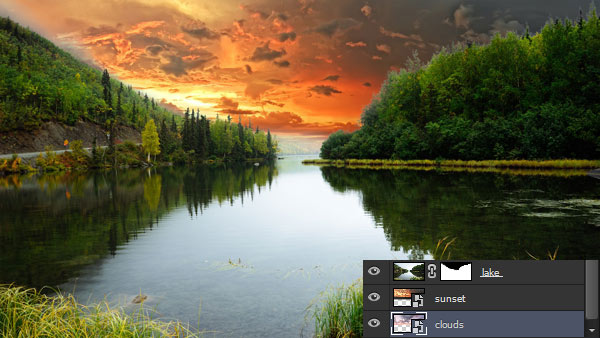
Change the blending mode of the sunset layer to Linear Light and blend it with the layer below it. You can also notice that after changing the blend mode we got very harsh light on the left side in the sky but don’t worry we’ll take care of that later in this tutorial.
Step 4
Select the lake layer and then make a Curves adjustment layer (go to Layer > New Adjustment Layer > Curves). Now lower the brightness of the lake as it has too much brightness.
I removed the dark effect of the Curves on the highlighted red parts like on the lake reflection parts and trees as they are close to the sky so it makes sense to have a light there. So select the layer mask of Curves, mask the effect using a soft round black brush.
After maintaining light:
Step 5
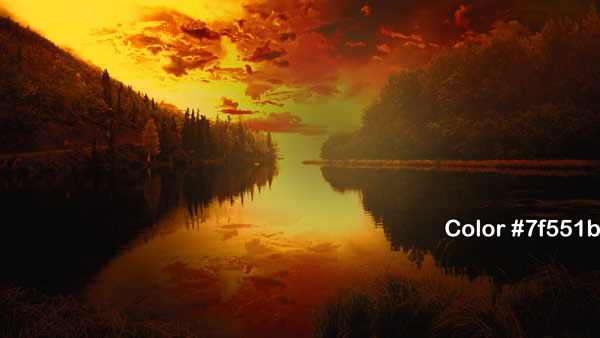
The color of the lake doesn’t have the value like we see in the sky. We need to add warm tones to the lake or you can say we need to match the color. Make a Color Balance adjustment layer and use the setting below to add similar color to lake like in the sky.
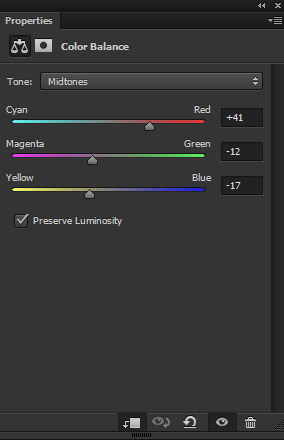
Here you can see we have warm tones added to the lake:
Step 6
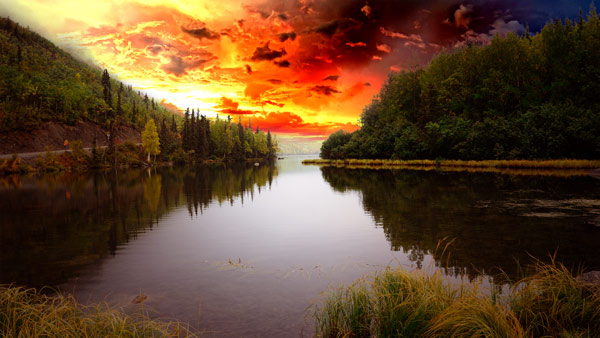
We’ll paint the light now, mostly on the sky. Hit CTRL + SHIFT + N to create a new layer and then choose the less saturated orange color (I chose #694a14). Using the soft brush paint the light like shown below.
Alter the blending mode of the layer in which you’ve painted light to Linear Dodge 100%.
Step 7
Due to Linear Dodge blend mode we have low contrast on the composition. To fix this, make Level adjustment layer and increase the contrast.
Results:
Creating Reflection
Step 8
Create a new layer on above all layer and then press ALT + SHIFT + CTRL + E to create a single layers of layers. Once you have the merged layer go to Edit > Transform > Flip Vertical and flip the layer vertically.
Change the blending mode of the merged to Soft Light. Instead of the changing the blend mode, you can also use the Normal mode then darken the image using Curves but I used the blend mode as it’s a faster way to do it.
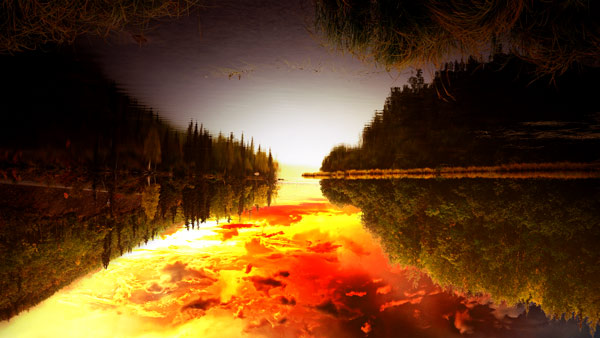
Step 9
Since we don’t need any other parts as they are making the composition darker so I added a mask to the reflection layer (go to Layer > Layer Mask > Reveal All). Then I only kept the cloud reflection and erased the rest of the parts (highlighted in red color) using a soft black brush. Zoom in during the marking process to make sure you are adding the proper reflection of the sky on the water.
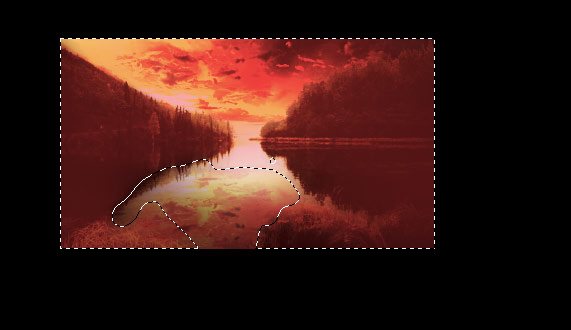
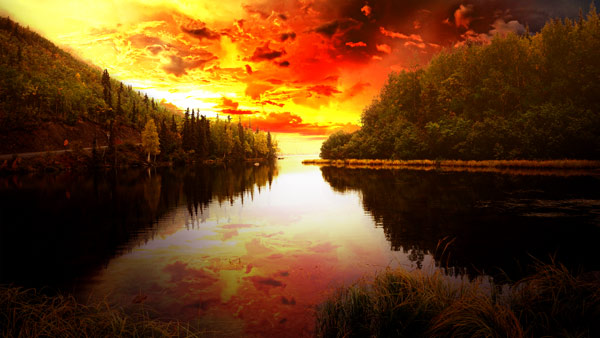
Here are results so far with decent reflection on the water:
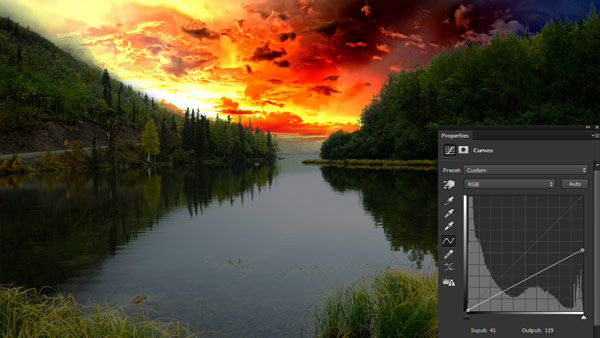
Step 10
Now we’ll match the color and brightness of the whole composition. The easier way to do it in my opinion is using the Color Lookup. Make a Color Lookup adjustment layer and choose the Edgy Amber.
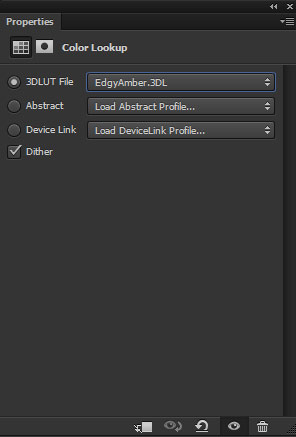
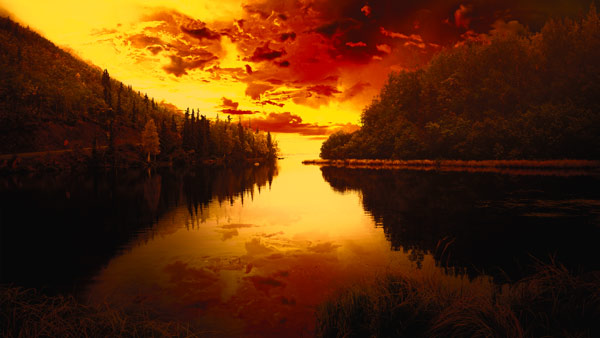
As you can see we’ve everything matched in terms of color and light. It has removed the harsh light by totally lowering the lightness. Since this adjustment layer has done most of the work but we also have a low contrast on the entire piece as well.
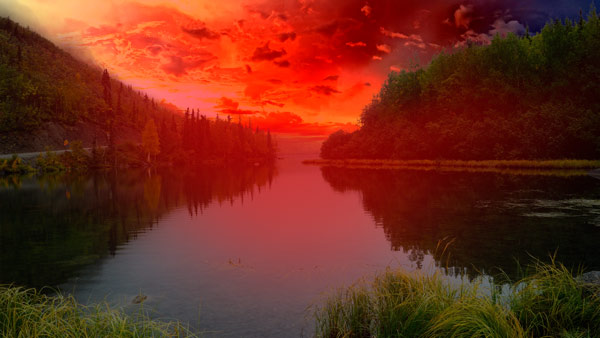
Step 11
Create a new layer and fill this layer with black color. Now change its blend mode to Color Dodge. Use a soft brush with white color and then paint the light as shown below. This will be our new light source but proper one not likes before using Color Lookup.
Results in Normal mode:
Step 12
On a new layer, I painted some light using dark orange color.
Changed the blend mode to Linear Dodge 72%.
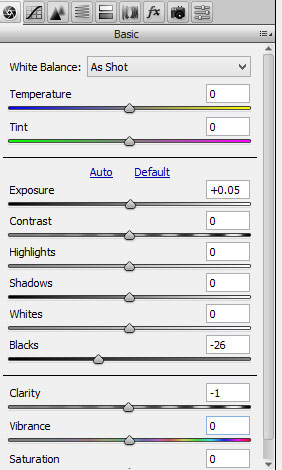
Step 13
We have created the light and now we’ll try to increase the contrast. Create a merged layer of all layers like we did in step 8. Go to Filter > Camera Raw and use the settings below. Mostly, I reduced the blacks to increase the contrast on the shadows.
Results:

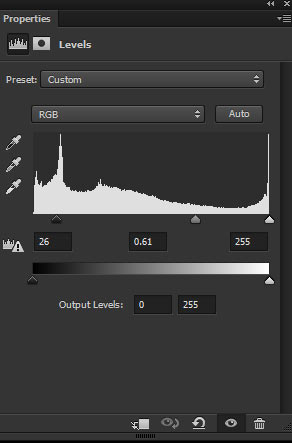
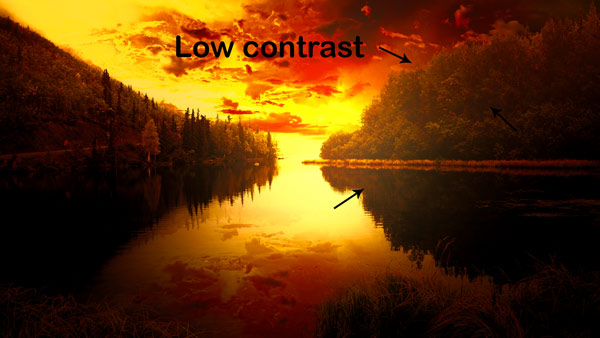
Step 14
We are still having low contrast on the right side.
Make a Levels adjustment layer and remove it.
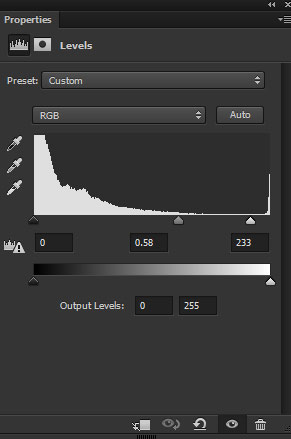
Only keep the effect on the right side and remove it from the rest of the parts (see the highlighted parts) using a soft black brush.

Step 15
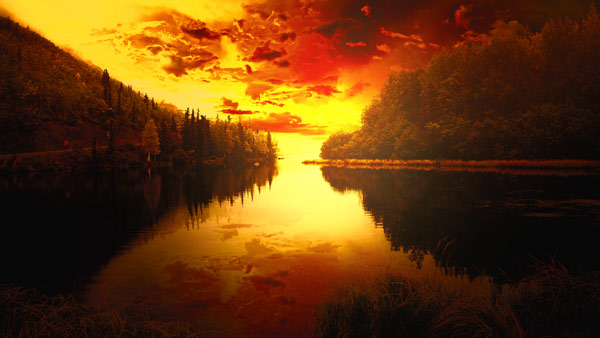
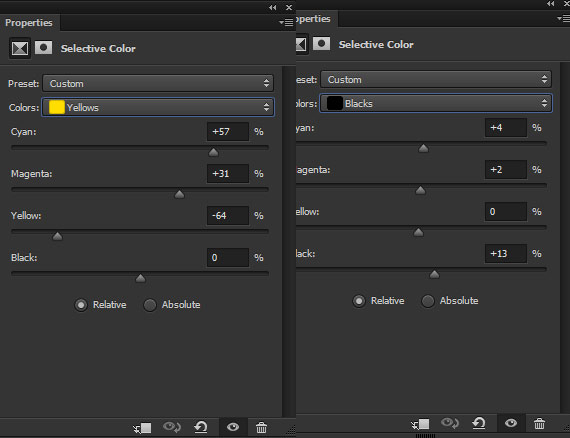
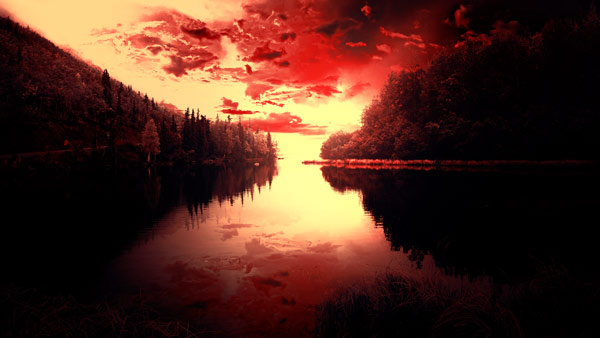
We are done with contrast and now it’s time to work with the colors. Curves, Selective Color and Color Balance comes handy in a lot of ways if you want to correct the colors of the image. Selective Color is more powerful when it comes to color correction as it provides more specific control for each color.
Now you can notice we have dark yellow color on the scene and the image also looks dull as it lacks brighten tones. Using Selective Color adjustment layer I totally changed the color of the whole composition. You can also experiment with different color but in our composition, we have the yellow tones most so I chose the yellow color.
Changed color and increased brightness:
Step 16
If you like the color then you can quit here but I’d like to add yellow color tones. So I used a Color Balance adjustment layer.
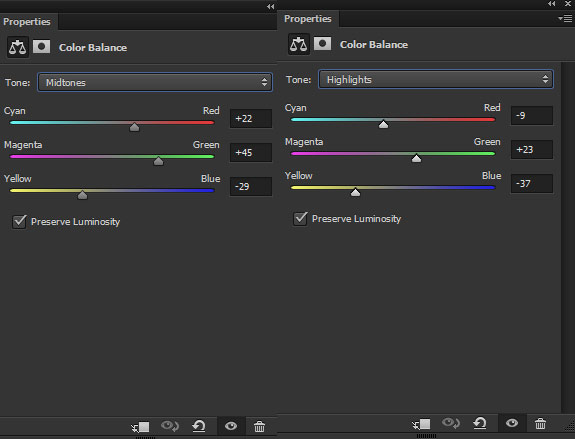
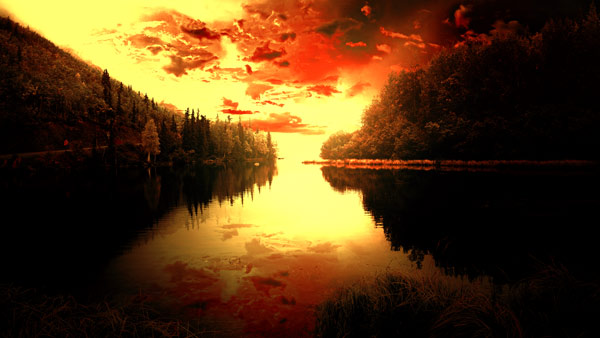
Results:
Step 17
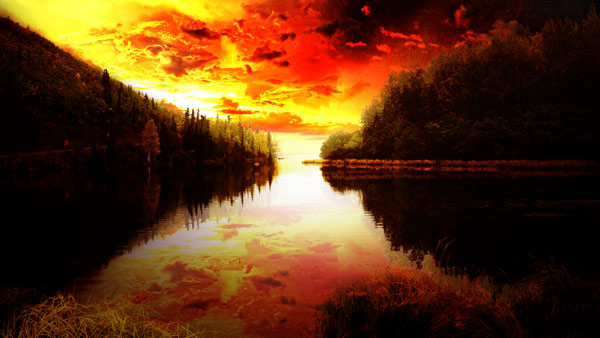
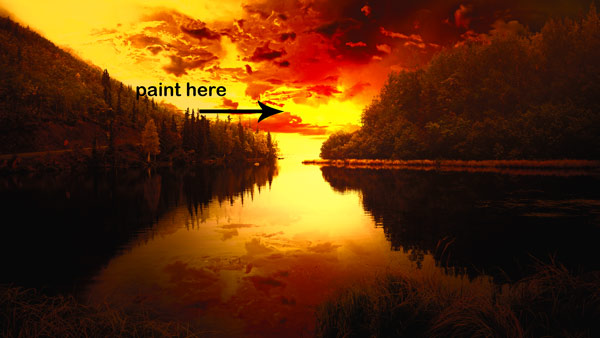
Now we’ll do some retouching on the final image just to correct the things. While creating water reflection I got some unwanted trees of the merged layer and you can notice them in below image. Also, I think we need the cloud reflection there (indicated by black arrow). On the right side, I did a cloning there to remove the tree reflection (I think that there is a low contrast but if you think it’s fine then don’t clone there).
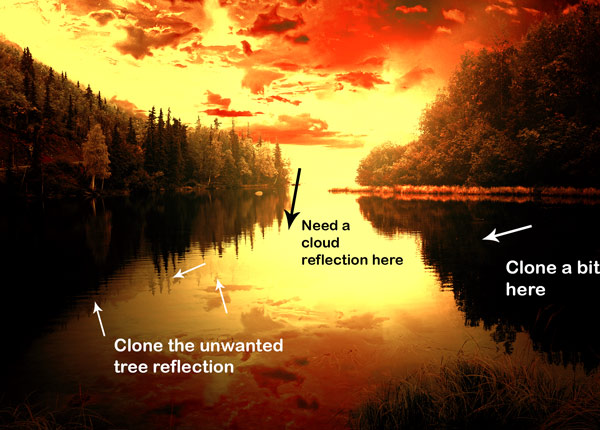
So without further ado, just activate the Clone Stamp Tool (S) and then start the cloning process. Here is the image looks like after the cloning process:

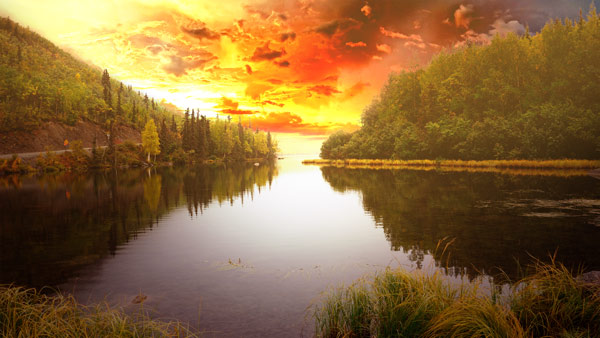
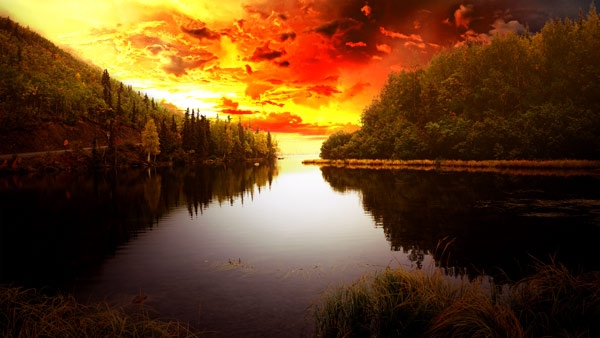
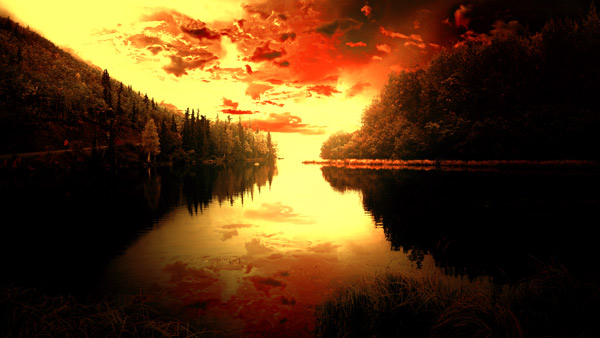
Final outcome:
Conclusion
The tutorial emphasizes the use of Color Lookup adjustment layer. How you can use it and then how you can overcome from its drawback. Apart from this, I also shared you some color correction tips. Thanks for following the tutorial and will soon post a new one till then keep photoshopping!!
Need Help With Photoshop or Looking for Professional Support?
Whether you're just getting started with Photoshop or need expert-level assistance, we're here to help! Contact us for personalized Photoshop tutorials, project support, or creative services.
Get in touch today to take your skills or projects to the next level.
CONTACT US NOW📘 Want to Master Photoshop Faster?
🎁 Get Your FREE PDF E-Book "Top 10 Photoshop Tricks Every Designer Must Know" Now – Packed with expert tips, shortcuts, and techniques to boost your creativity & workflow.
👉 Download Your FREE PDF E-Book NOW!

