

So you have captured some amazing landscape photos but you want to enhance the beauty of the landscape? With the help of Photoshop, you can create epic landscapes as you can do a lot of stuff here from fixing exposure & recovering details, to making colors pop & creating epic landscapes.
In this tutorial, you’ll learn how to make your landscape colors pop in no time. If you have muted or dull tones in your landscapes, you can follow this tutorial make them pop without touching other details.
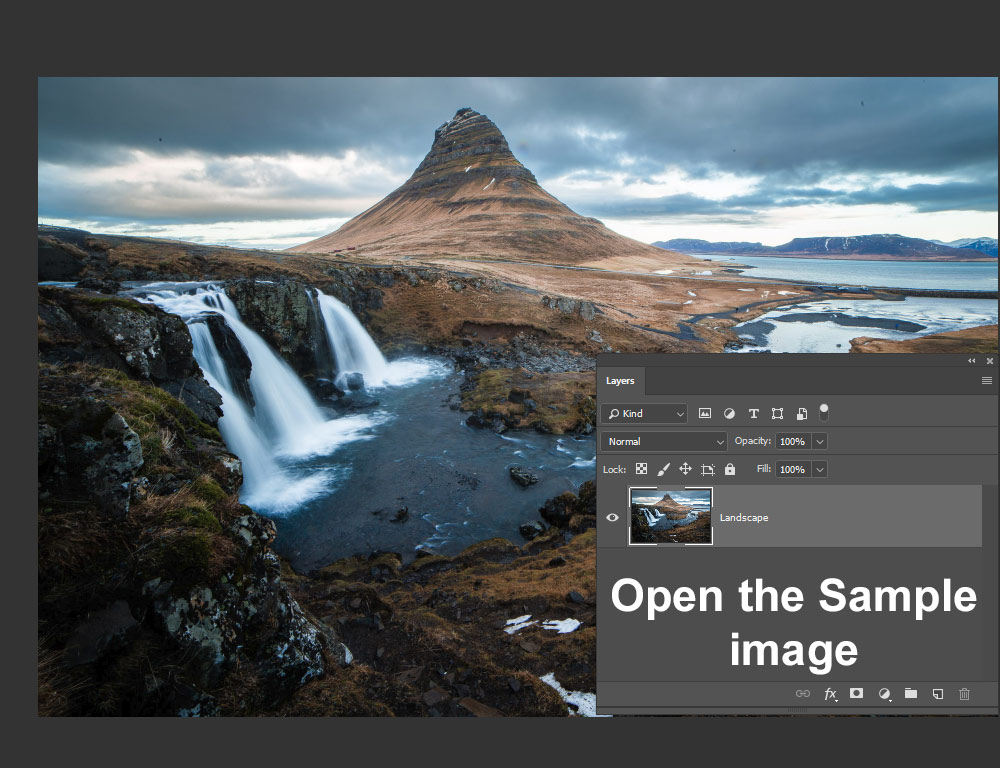
Step 1 – Open the Sample Image
I am using a landscape image from Unsplash but you can use any of your landscape images. We will make the colors of landscape vibrant so they can pop & catch viewers’ attention. The way our eyes captures the beauty of landscape cameras can’t and that’s why apps like Photoshop & Lightroom comes into play.
This landscape image that I am using, if you notice you can see it is captured in a dark mood. Obviously, if you want to leave it as it is you can maybe you want to create a dramatic mood but sometimes we need a touch of vibrant coloring to enhance the colors of landscapes.
Here is the image opened in Photoshop:
Step 2 – Increase Saturation Using Vibrance Adjustment
So first we we will create a Vibrance Adjustment & you can do this by selecting Layer > New Adjustment Layer > Vibrance. There is a tip, if your landscape has mostly orange tones, always use Vibrance to increase saturation because it will protect red & oranges leading to accurate saturation in those colors.

I increased the Vibrance Levels to +44 and the saturation level to affect other colors a bit. Don’t worry we gonna target every single color later in the tutorial.
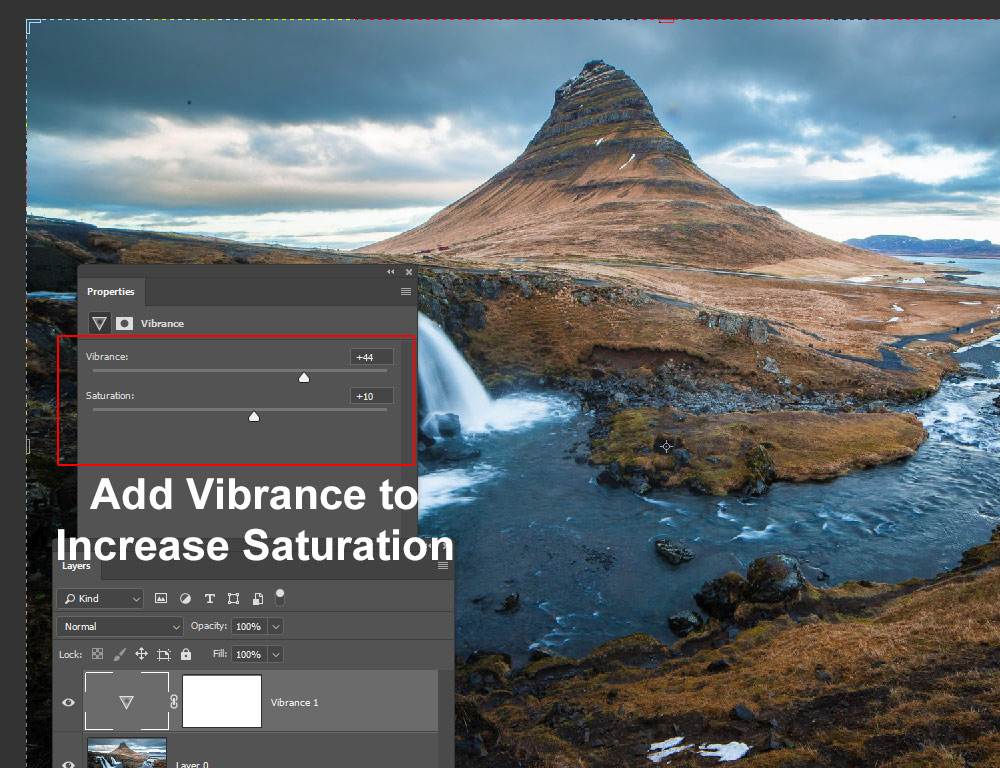
Notice the subtle difference that Vibrance adjustment has made to our image:
Step 3 – Dial Up The Brightness on Shadows
To increase the brightness on shadows, we can use Levels adjustment layer, go to Layer > New Adjustment Layer > Levels. You can see in the settings below I have increased the brightness on shadows by moving the highlighted black slider to right. This will make the details of shadows visible which might have lost when the photo was captured. If you notice, I increased the brightness on Highlights as well but in a delicate manner.
Here you can see my settings:
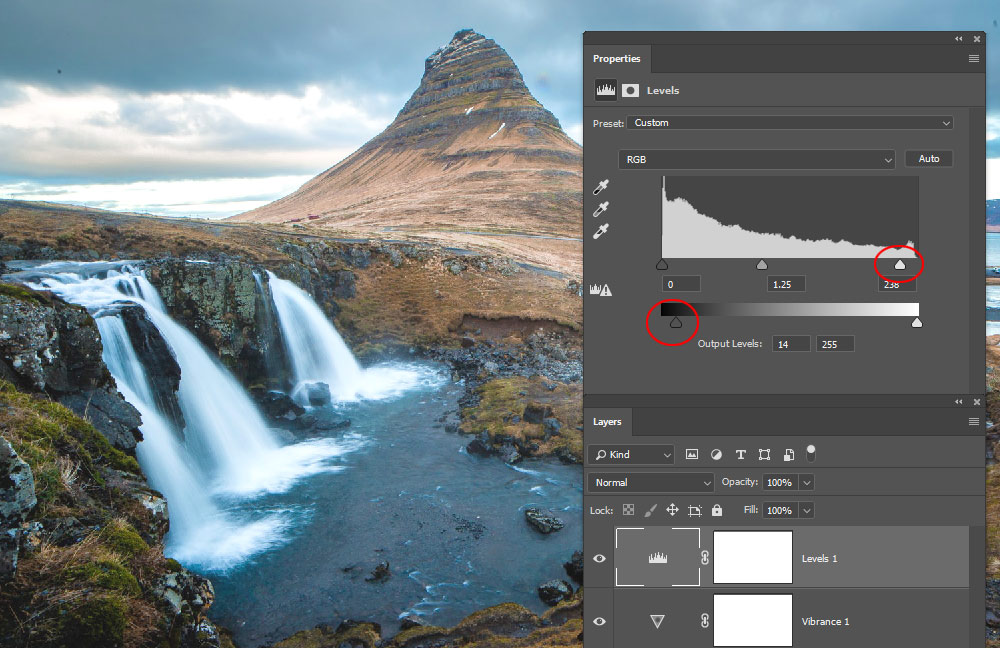
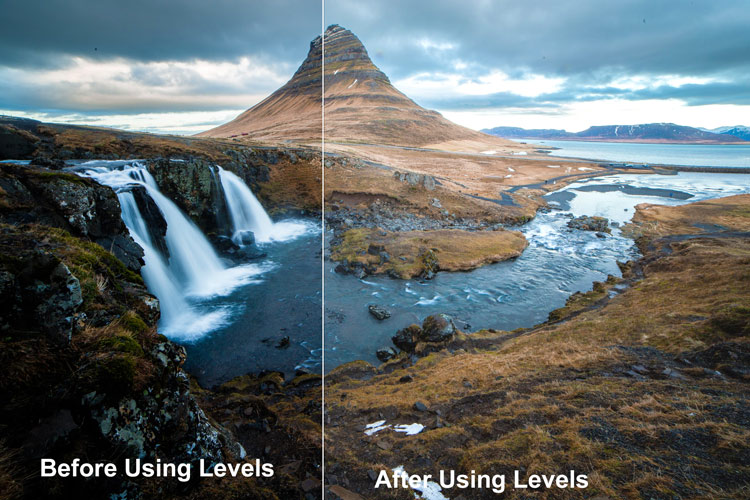
You can see the difference that Levels adjustment has made by lifting the level of the shadow.
Step 4 – Coloring with Adobe Camera Raw
Adobe Camera Raw is a versatile plugin that comes default with Photoshop. Basically, it is same as Lightroom, if you are using Camera Raw filter lately that also means you are mastering Lightroom as well. Both apps use the same algorithm to edit photos so great apps to edit photos using sliders only.
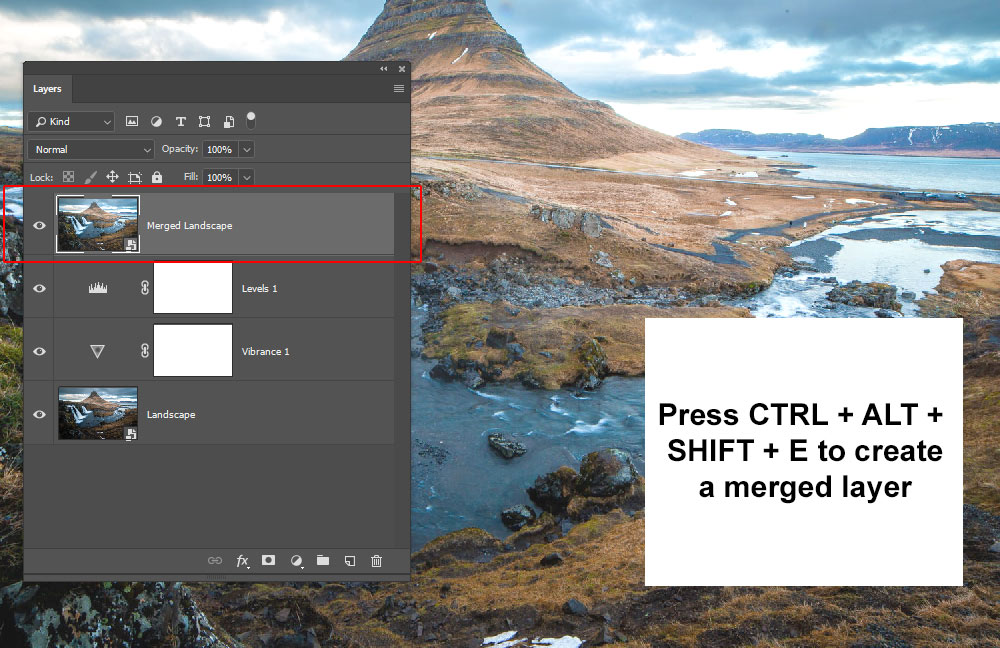
Before we use that, we need to create a snapshot of all layers so we can apply Camera Raw Filter to a single layer in just one go. Create a merged layer by pressing CTRL + ALT + SHIFT + E and this command will create a single layer on top of layer stack made from all the layers below.
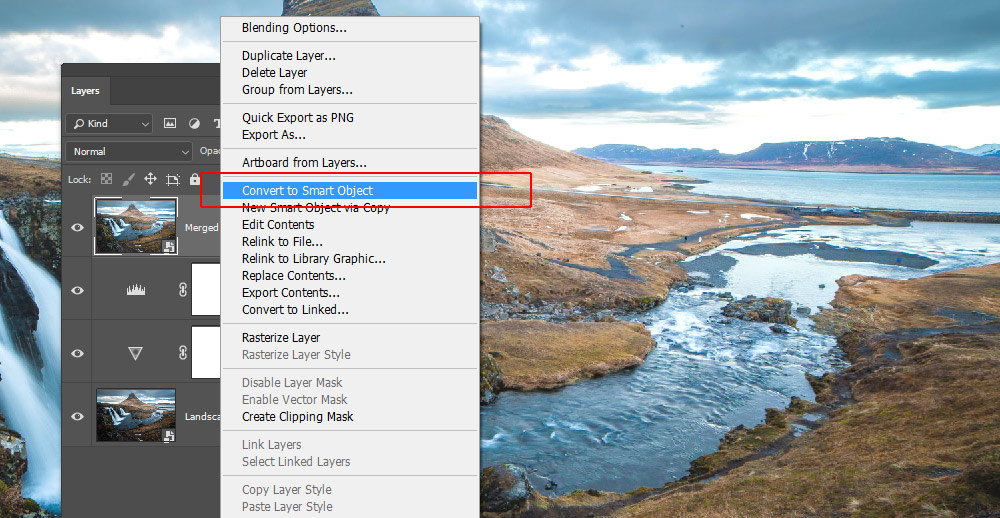
Now, right-click on the newly created merged layer & choose “Convert to Smart Objects”.
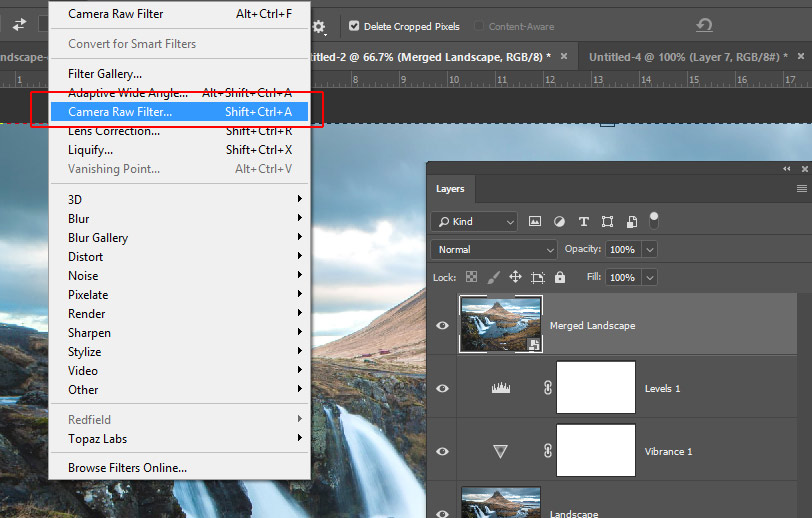
Go to Filter > Adobe Camera Filter & if you are not seeing this filter that means you might have to install it from Adobe Creative Cloud app.
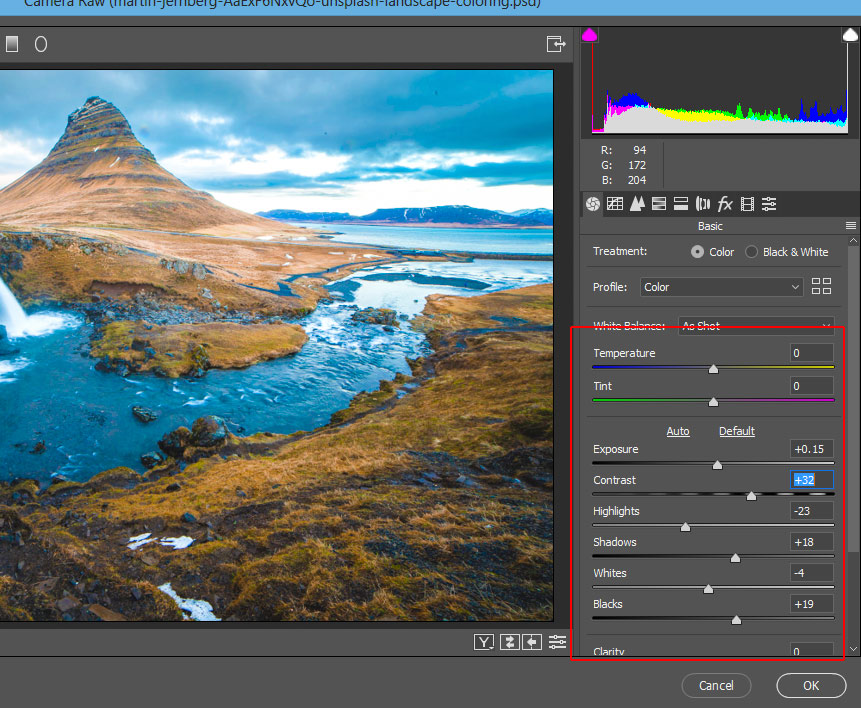
In the Basic Tab, you can see increased exposure, contrast, shadows & black levels. You can increase exposure as I did (be careful & don’t overdo it), increasing contrast will make the colors sharp & crisp but don’t overdo it, and Shadows & Black levels make sure we don’t lose info from darker areas when we increased exposure & contrast.
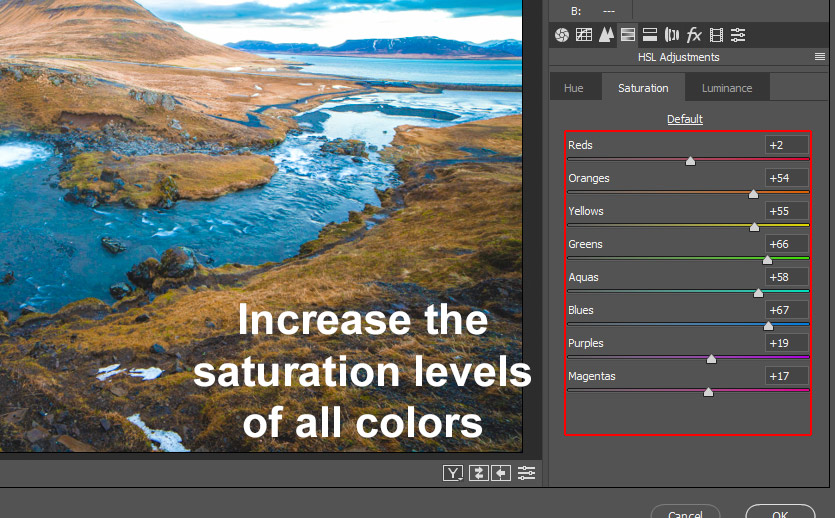
In the HSL TAB, we can control the saturation levels of all colors. What we gonna do is, select the Saturation TAB, increase it for every color you see in your landscape. This will make all the colors vibrant & pop.
Step 5 – Final Results
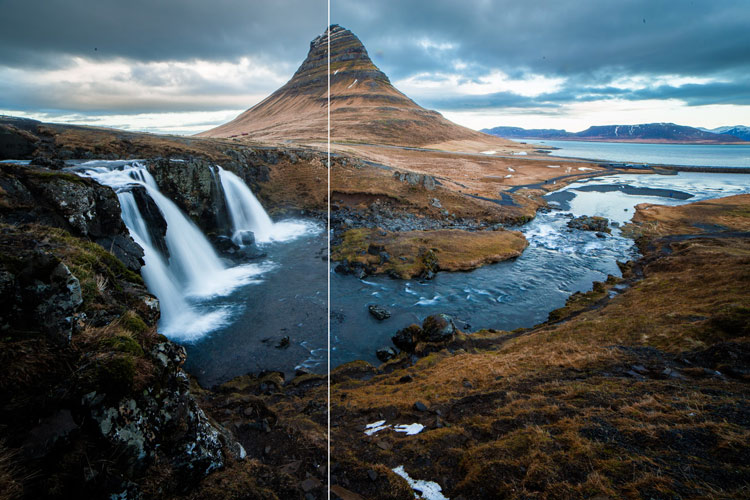
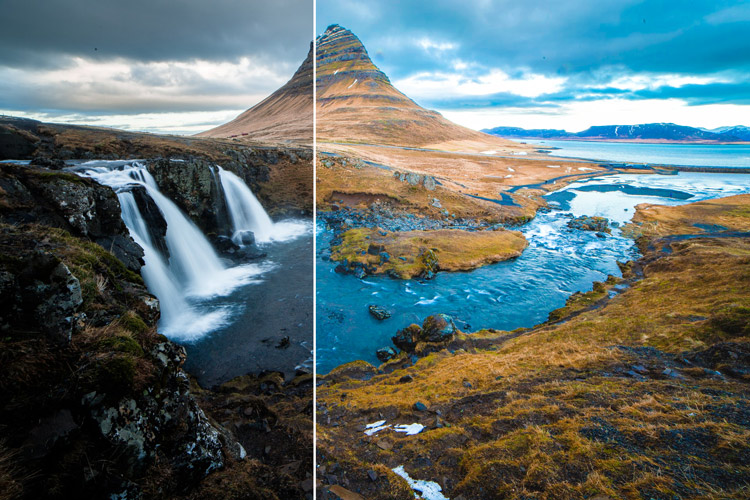
Here you can see my final results and we have targeted every single color of the landscape and made them pop just like you see in the image below. You can do a lot more with ACR, for instance, you can try to change Hues of the colors or set the Luminance to dial up & down the brightness of each color. Basically, Camera Raw helps a lot in post-processing, and the best part you can do this by just moving the sliders.
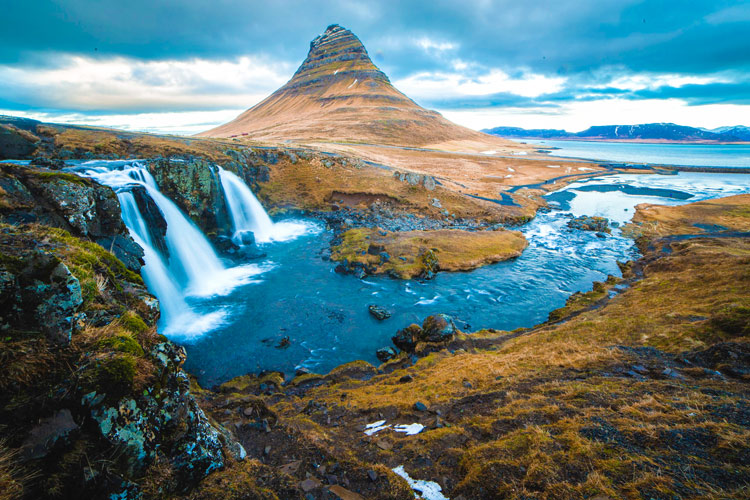
Here you can see before & after results:
I’d love to get your feedback on my tutorial. If you baffled at any step just let me know in the comment section and I’ll try my best to help you out.
Need Help With Photoshop or Looking for Professional Support?
Whether you're just getting started with Photoshop or need expert-level assistance, we're here to help! Contact us for personalized Photoshop tutorials, project support, or creative services.
Get in touch today to take your skills or projects to the next level.
CONTACT US NOW📘 Want to Master Photoshop Faster?
🎁 Get Your FREE PDF E-Book "Top 10 Photoshop Tricks Every Designer Must Know" Now – Packed with expert tips, shortcuts, and techniques to boost your creativity & workflow.
👉 Download Your FREE PDF E-Book NOW!

