

In this tutorial, you’ll learn how to edit travel & landscape shots in Photoshop. This tutorial will help you to get most out of your landscape images as it will teach you how to correct exposure, fix washed-out sky, recover details, and color grade images. This tutorial is only focused on post-processing so it doesn’t cover how to capture images with your camera.
Please Note: the image that I used in this tutorial was not captured by me. Going out and capturing images is not possible because of COVID-19 as we are in a lock-down situation.
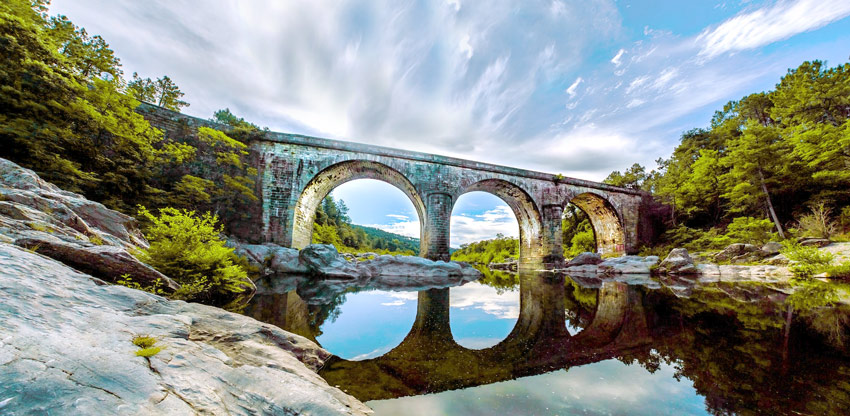
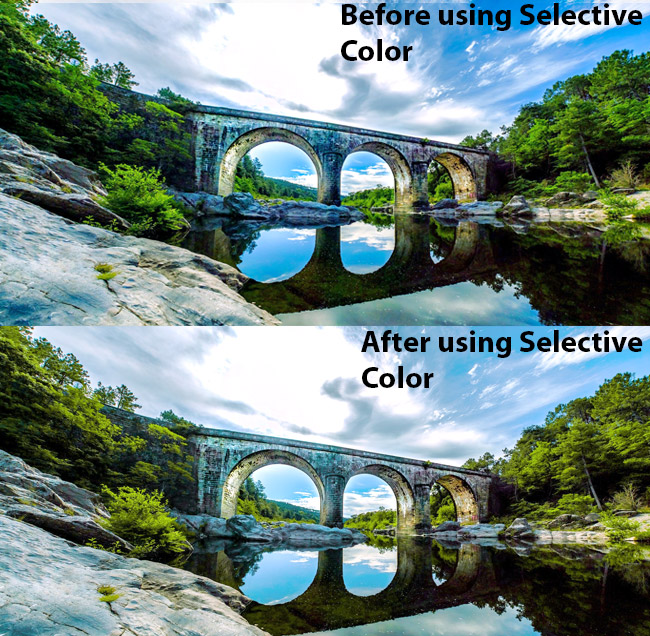
Before:

After:

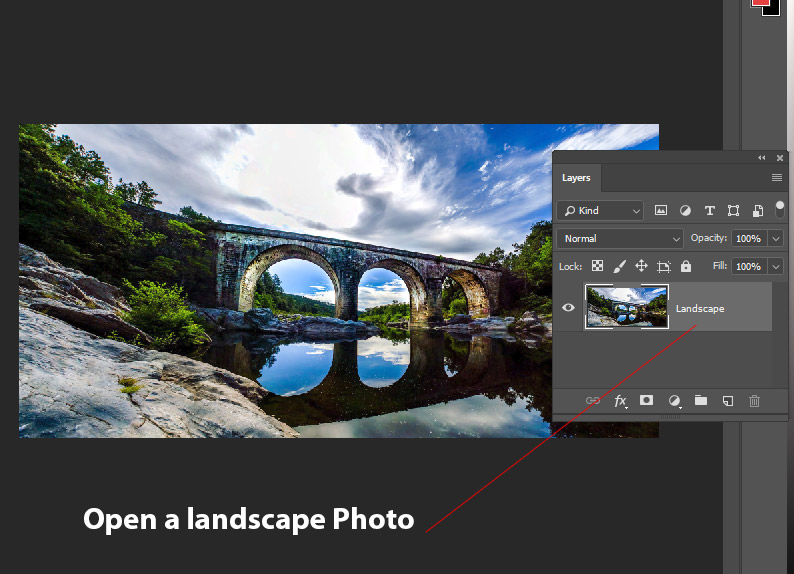
Open an image that you captured during your travel and I am using a landscape image from Pixabay which you can download here to follow along with the tutorial.
Step 1 – Make a Note Before Editing
The first thing you can do is make a note of how you want to edit your photos. Ask yourself a question what is the thing that is lacking in your images? What needs to be fixed?
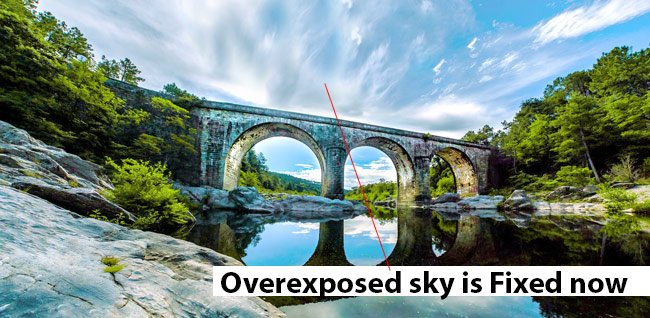
You can get all of the answers by taking a look at your images. For example, in the below image, you can see that I point out an overexposed sky, little info shadows, and very high contrast in the colors of the image. That is the thing that I want to fix in my image to make it look better.
My notes are:
1. Rescue details on Shadows
2. Fixing Overexposed Sky
3. Fixing High Contrast

Step 2 – Recover Shadow Details
So now we will add details to shadows and to do this first we’ll brighten the entire image and then we will limit the brightness only to the shadows of the image.
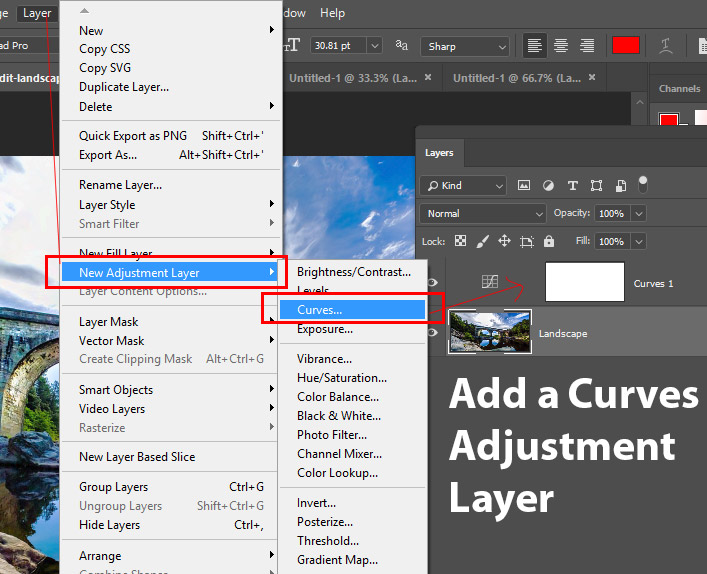
To do this, create a Curves adjustment layer by selecting Layer > New Adjustment Layer > Curves.
Now increase the brightness of the entire image using the following settings below:

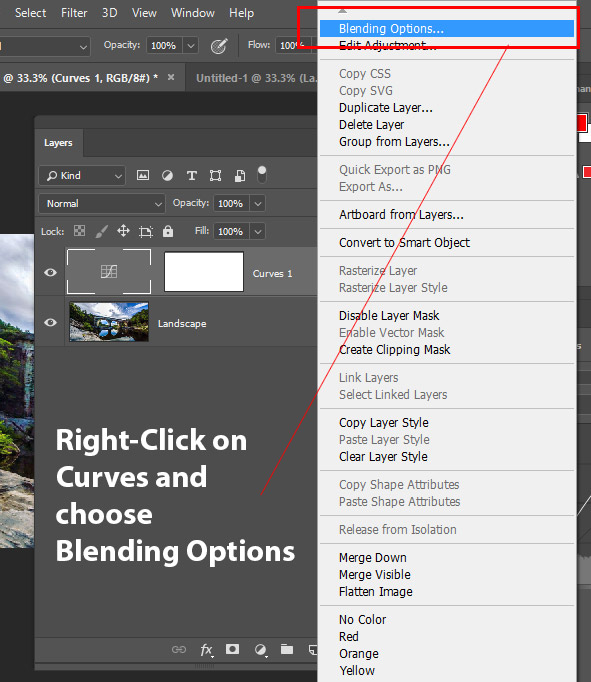
To affect only shadows of the image we’ll use Blend IF. Right-Click on the Curves adjustment layer and choose “Blending Options”.
In the blending options, under Underlying Layer Section split the white slider by holding down ALT Key & dragging the slider to left.
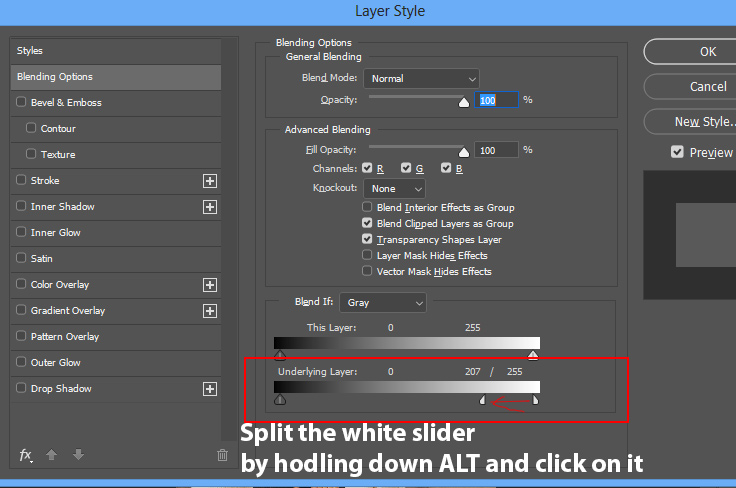
Once you split the white sliders drag both of the sliders to left and you’ll see Curves will only affect the shadows of the image. This will increase the exposure on the shadows leading to more info on shadows areas of the image.

Here you can see we have recovered a lot of info on shadows. If you are not happy with the results, you can increase brightness further using Curves and add more info to shadows but don’t overdo it.

Here you can compare before and after results of using Blend If. Before it was affecting the highlights but now it only affects darker areas of the image.

Step 3 – Basic Color Grading
What I mean by basic color grading is that you can adjust color before finalizing it and it can give you an idea of what your final colors will look like. You can notice that blue and green are the most visible colors in my image and targeting those colors using a Color Balance adjustment can really make those color pop out.
I used a Color Balance adjustment layer and targeted Midtones & Highlights to add coloring to my image. If you don’t want to color grade image, in the beginning, you can do it later and alternatively, you can also skip to step 6.
Here are the settings of Color Balance:
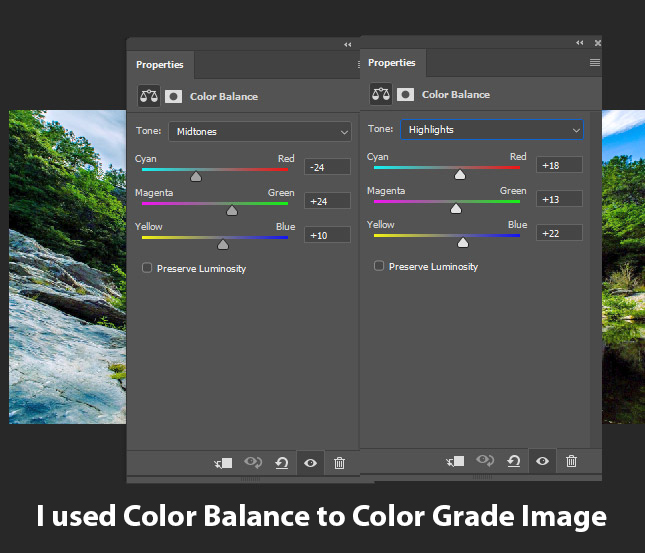
In the below image you can notice blue and green color has now really started to pop and they also have very low contrast and more details:

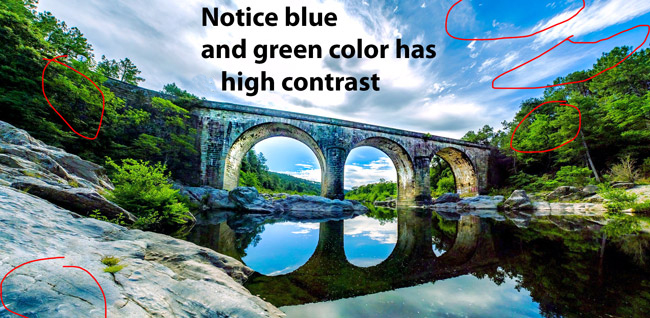
Step 4 – Reduce High Contrast
Even though Color Balance did a great job of reducing contrast from our image but still there is a lot we can do to reduce contrast further. You can notice in the below image the blue color on the sky, rocks, bridge & water, Green color on the trees and branches has high contrast.
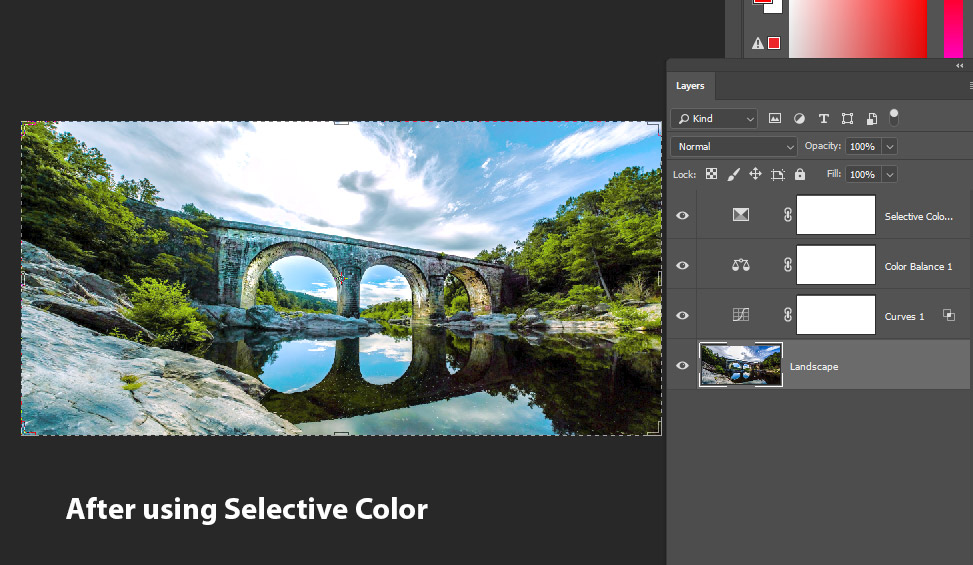
Go to Layer > New Adjustment Layer > Selective Color and target Green & Blue color to lower the contrast there.

A pro tip here is that you just need to drag the sliders to left or right and keep an eye on the image that how it is turning out. Also, make sure it is doing the thing that we want in our case reducing contrast.
You can see the results below:
Here you can compare the before & after results:
Step 5 – Fix Overexposed Sky
You have already noticed a washed-out sky in the image and we have to fix this. To do this, we’ll use the Clone Stamp Tool (S).
Create a new layer by pressing CTRL + SHIFT + N and name it “Sky Cloning”. Select the Clone Stamp Tool (S) and make sure Sample is selected to All Layers on the Options Bar.

Hold Down ALT Key and click on sky parts to take a sample to clone and then release the ALT Key and paint over the sky to clone it. Remember to clone the sky and it is really blown out and have no details at all.

Once you done with cloning process, activate the Transform Tool by pressing CTRL + T, right click anywhere on the image to bring up transform tool options and choose Warp.
Once you select Warp Tool, you’ll see a grid appear over the cloned parts. Now drag any line or any point on the grid to reshape the sky to make it natural.

You can see we have fixed an overexposed sky:
Step 6 – Final Coloring
Once everything is set you can head to color grading stage and start adding colors that you’d prefer in your image. Mine preferred way to color grade image is using a Color Balance adjustment layer and I used Midtones settings in the below image.
Once you used the Color Balance adjustment layer make sure you play around with the opacity slider to control the intensity of the color added by the adjustment layer. You can notice I set it to 49% but as always play around with it.
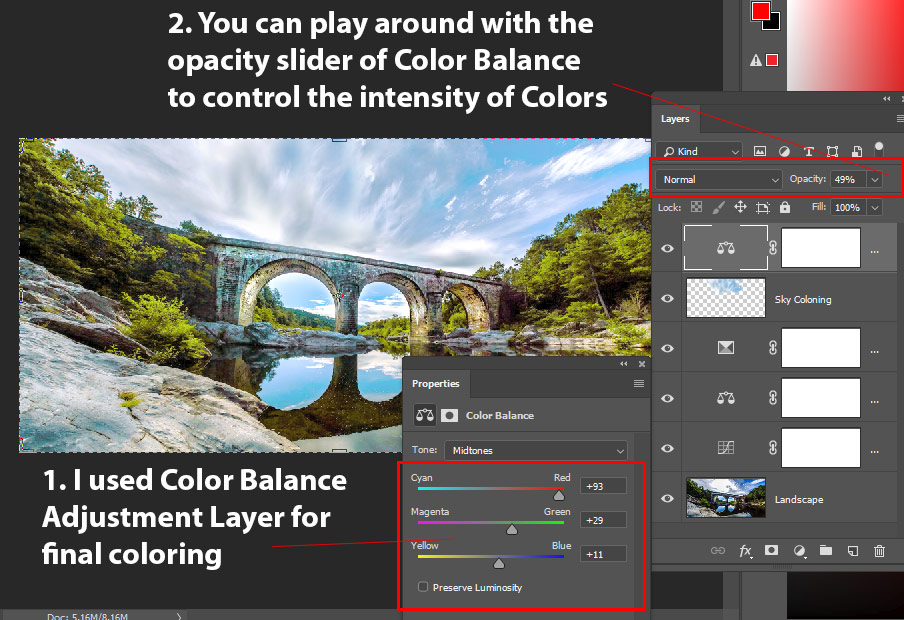
Here you can see my final results:

I hope you enjoyed the tutorial and do let me know if you have any feedback in the comment section below.
Need Help With Photoshop or Looking for Professional Support?
Whether you're just getting started with Photoshop or need expert-level assistance, we're here to help! Contact us for personalized Photoshop tutorials, project support, or creative services.
Get in touch today to take your skills or projects to the next level.
CONTACT US NOW📘 Want to Master Photoshop Faster?
🎁 Get Your FREE PDF E-Book "Top 10 Photoshop Tricks Every Designer Must Know" Now – Packed with expert tips, shortcuts, and techniques to boost your creativity & workflow.
👉 Download Your FREE PDF E-Book NOW!
