
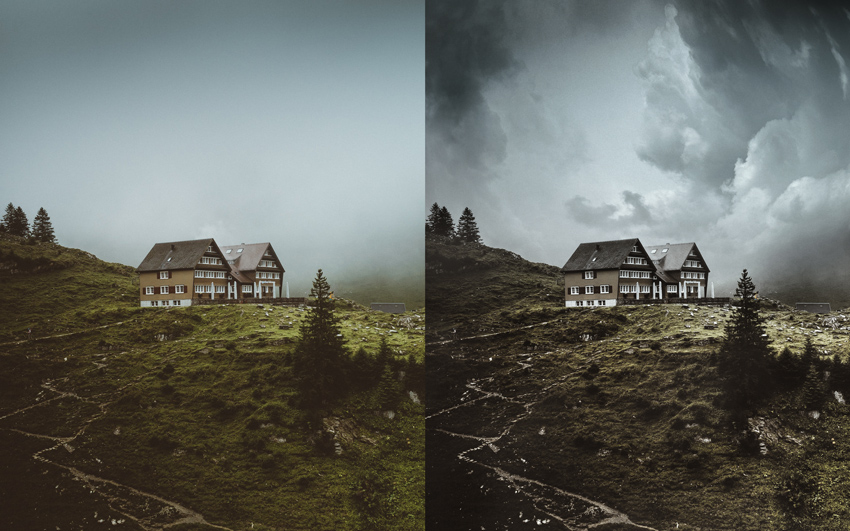

In this tutorial, you’ll learn how to create a dramatic moody effect in Photoshop. We’ll go through the basics of compositing techniques by replacing the sample sky image. I’ll also show you how to add bleak tone & HDR in no time using a magical filter in Photoshop. Let’s get into it!
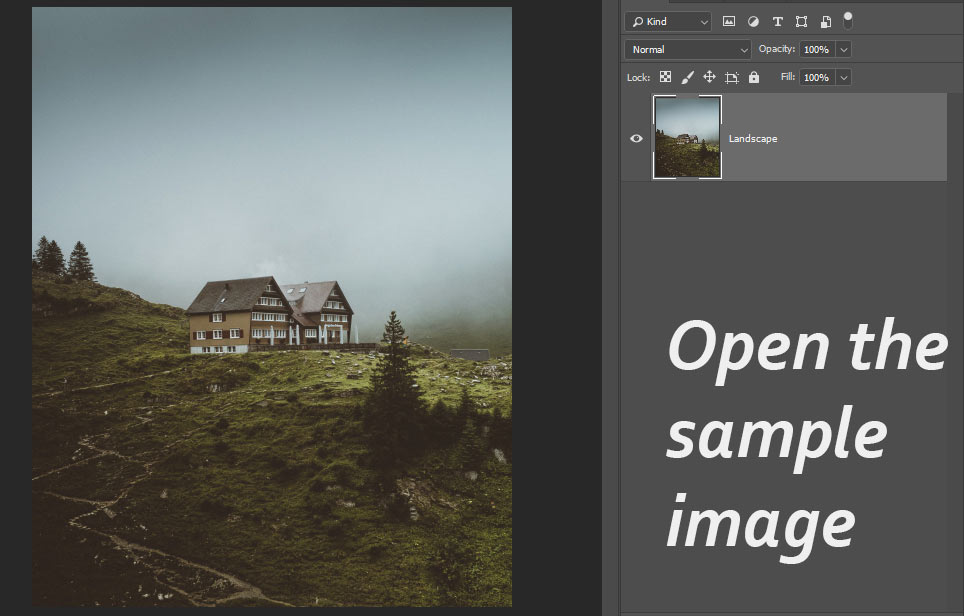
Step 1 – Open the Sample Image
I found this image on Unsplash looks gloomy, dark, & got a bleak tone. The image also looks moody & dramatic, we can enhance it further in Photoshop by adding a sky and giving it a dramatic look. If you want to follow along you can download the image.
Open the image in Photoshop by selecting File > Open and as you can see I have opened it in Photoshop.
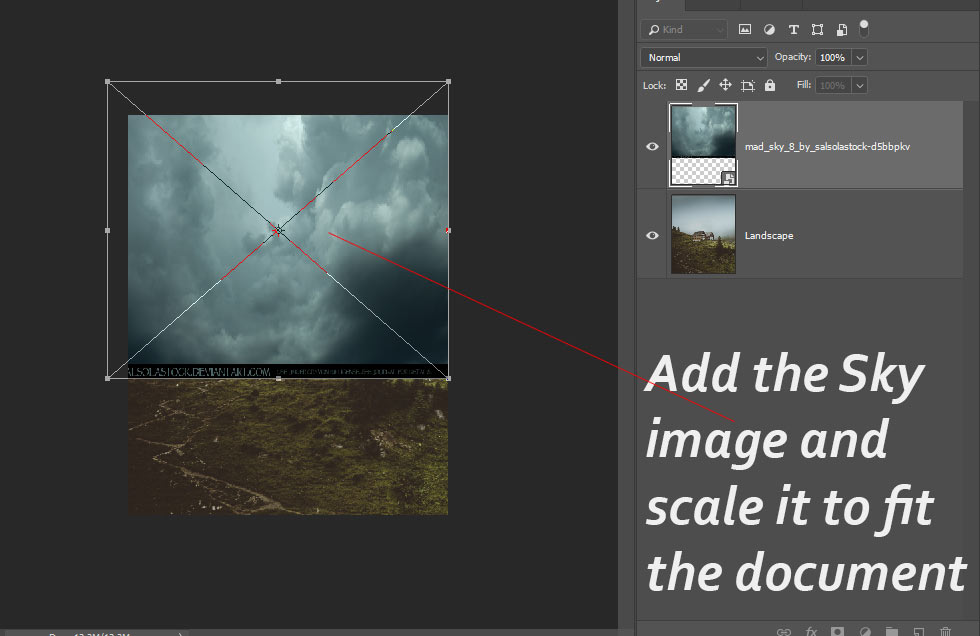
Step 2 – Add the Sky Image
If you notice that the existing sky is covered with mist there are no clouds in it. I want to add a sky there and reshape it later to add gloomy clouds over the house.
To do this, download the sky 2 image from Deviantart. Go to File > Place Embedded to place the image, use the Transform Tool (CTRL + T) scale the image horizontally so it can fit the main document. You can also resize the image according your way depends on which clouds parts you want in the image.
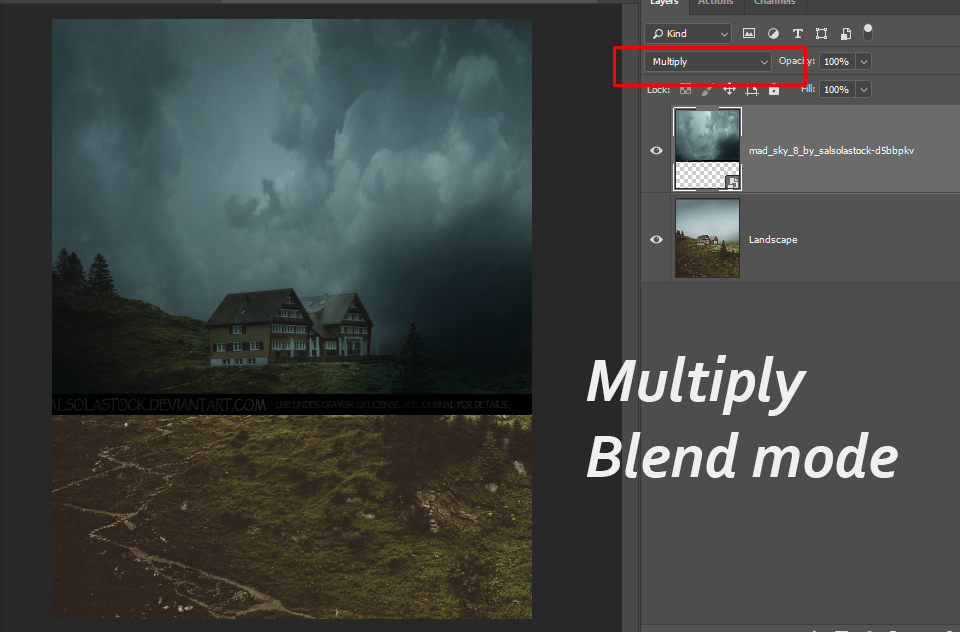
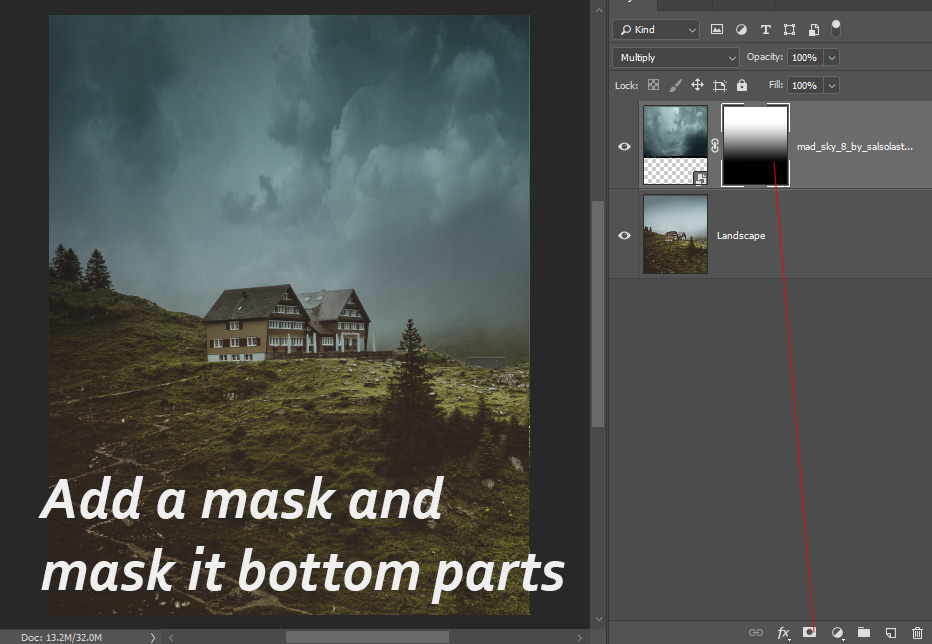
To blend the sky 2 image, I changed the blending mode to Multiply. Not only this blend mode blend the sky image with the background but it will also give a dark look to them which I want.
I added a mask to sky 2 layer by clicking on the Add a Layer Mask Icon at the bottom of the layer panel. Then I masked the unwanted bottom parts using a soft round brush with black color. Instead of using the brush, you can also apply a black/white gradient on the layer mask to mask the parts of the image.
Step 3 – Reshape the Sky
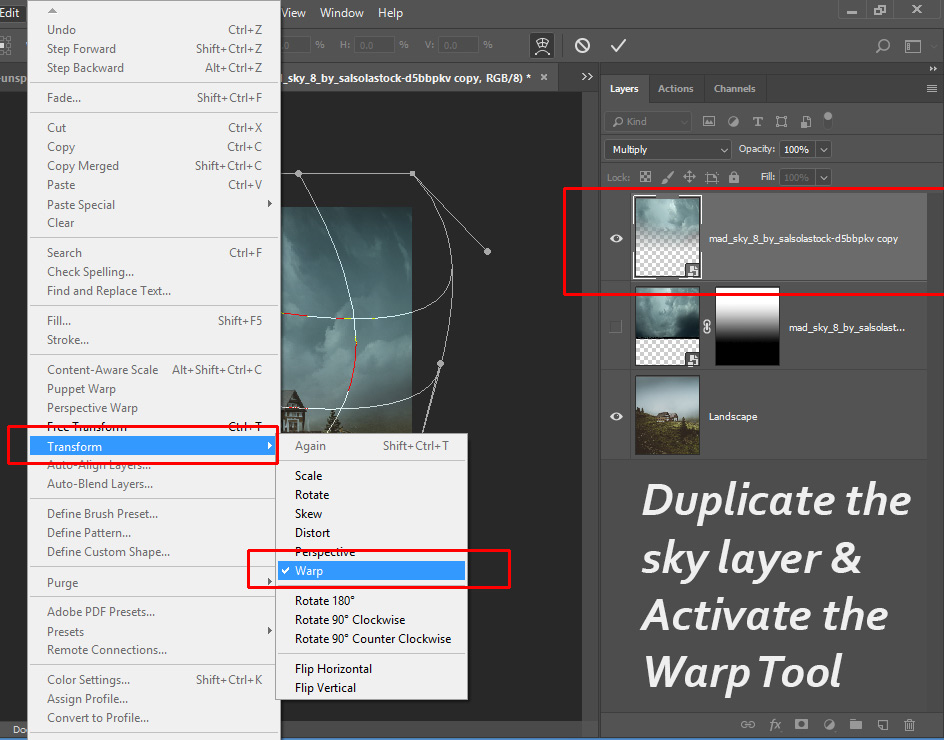
We’ll reshape the sky image using The Warp Tool but to do this we need the sky layer as a Smart Object & without a layer mask. First, I duplicated the sky layer by pressing CTRL + J then I converted it to Smart Object by right-clicking on it & choose “Convert To Smart Objects”. This will blend the layer mask of the sky with the layer itself leading to a single sky layer with masked parts.
I kept the original layer and hid its visibility so I can work on the duplicate & keeping the original one intact.
Once you have duplicated the sky layer go to Edit > Transform > Warp to activate The Warp Tool.
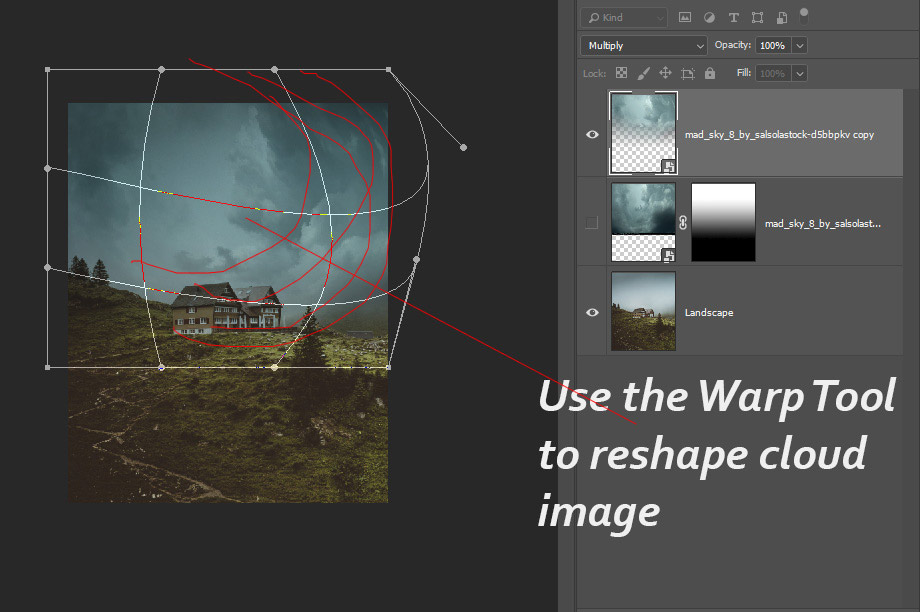
Now use The Warp Tool handler in a way that you can think of. I imagined the clouds being coming in a curve like shape turning from right bottom to top right (see the curved red lines).
Check the below image for reference.
Step 4 – Paint Mist
Download the brushes from Deviantart and then use the cloud brush (Cloud 1 Modified) to paint mist. I used a gray color to paint mist.
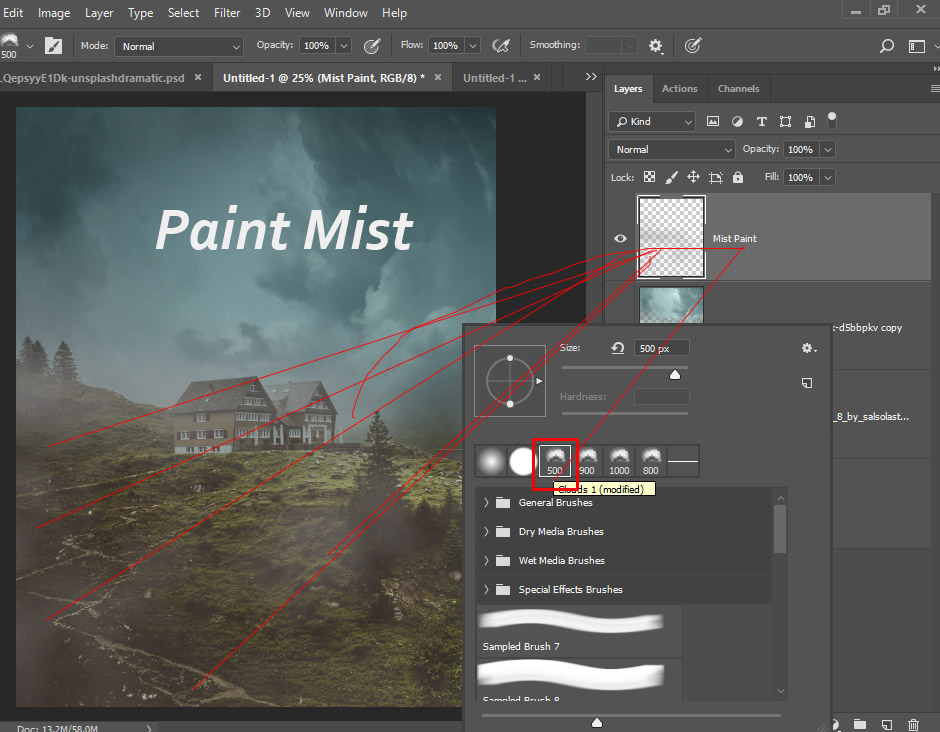
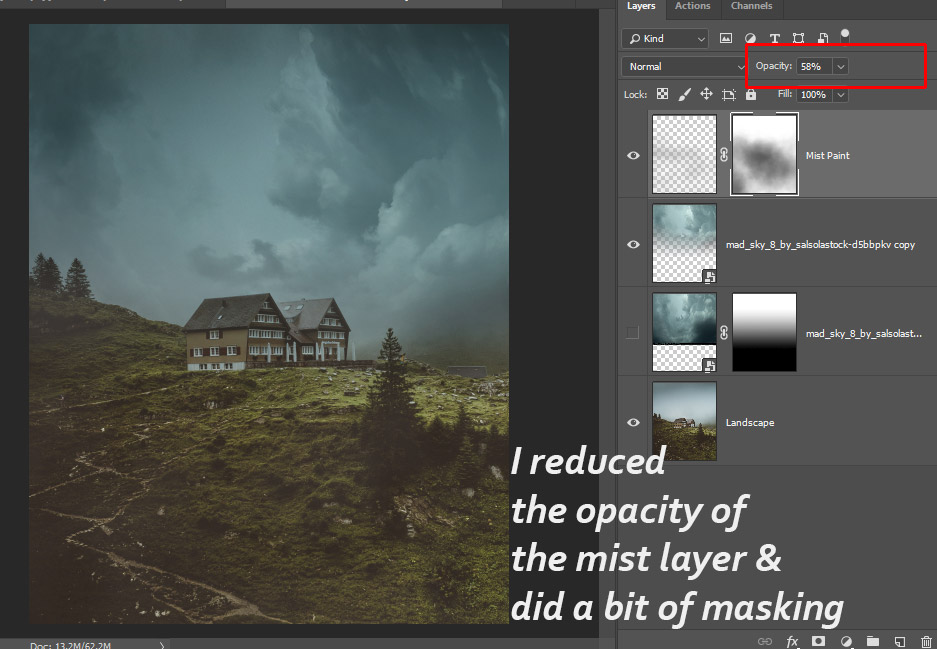
I reduced the opacity of the mist layer to 58%. I did a bit of masking using the same cloud brush to further minimize the intensity of the mist layer. It all depends on you how strong you want the mist layer to affect the image. Opacity and masking play an important layer to minimize the effect of any layer.
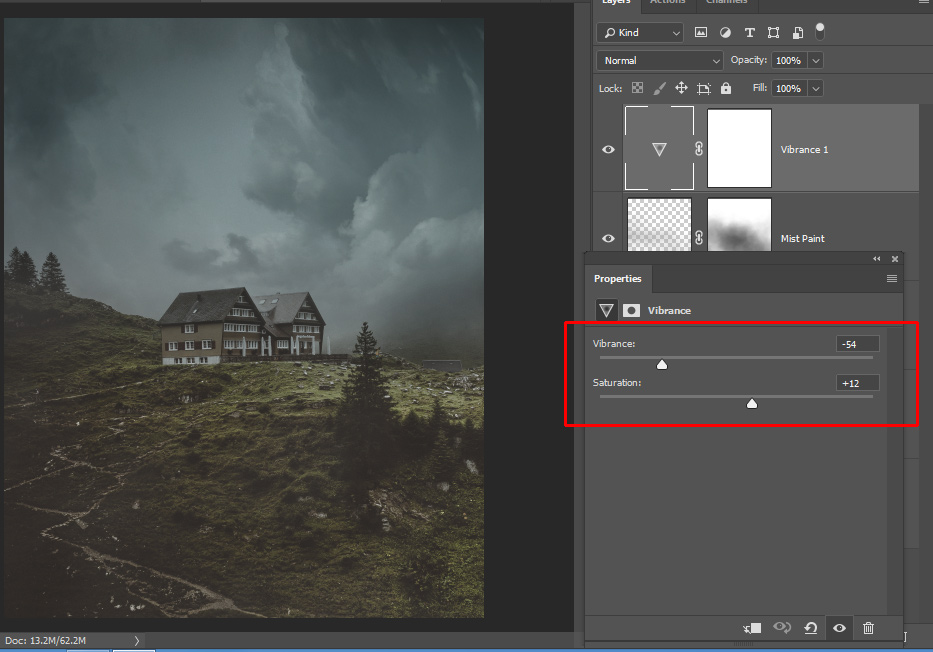
Step 5 – Adjusting Vibrance & Saturation
Go to Layer > New Adjustment Layer > Vibrance. I reduced the vibrance to -54 and increased the saturation to +12. This will add a bleak tone effect to the image.
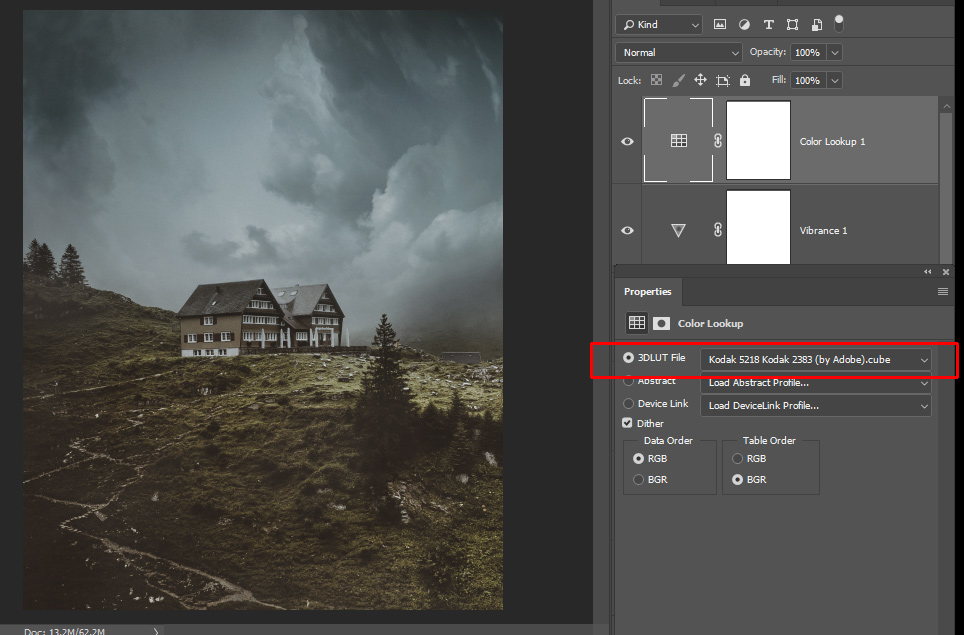
Step 6 – Highlights Boost using Color Lookup
Right now the image looks too dull and has a lot of mist in there. To give a boost to highlights of the image, I used Color Lookup Adjustments & used Kodak 5218 Kodak 2383 Lut File.
Step 7 – Prepping the Image for HDR Toning
To add an HDR toning effect we’ll use the HDR Toning filter but there is a downside with this filter that is it flattens all the layers that you are working on leading to loss of work that you have put in so far.
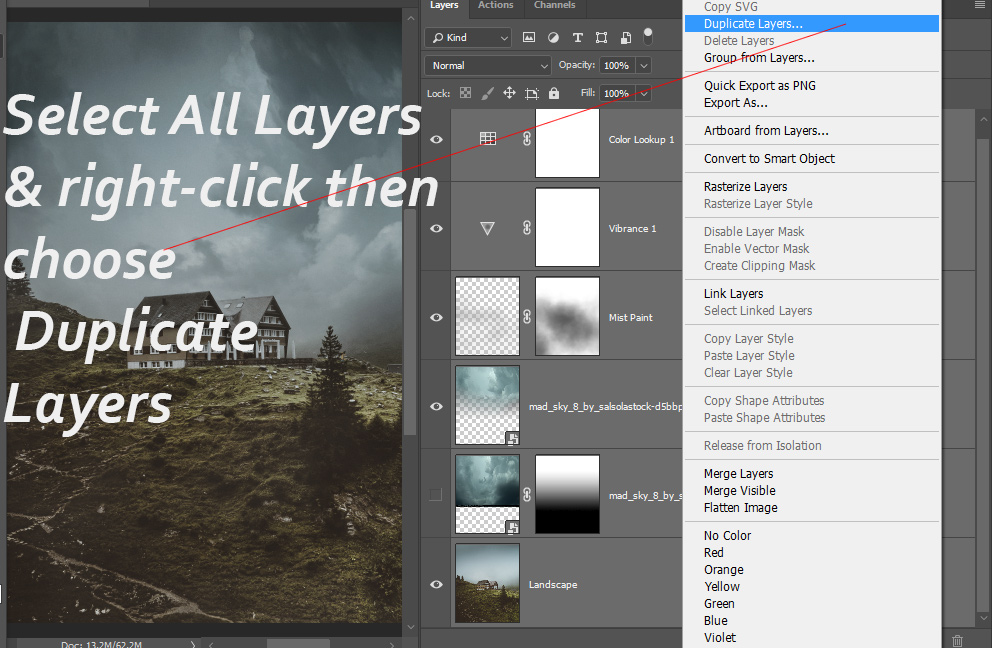
To avoid it, we’ll duplicate all the layers in a new document where we will apply this filter to avoid any loss of work. To do this, select all the layers by selecting the top layer & hold down the SHIFT key then select the bottom-most layer.
Now right-click on the layer panel & select Duplicate Layers.
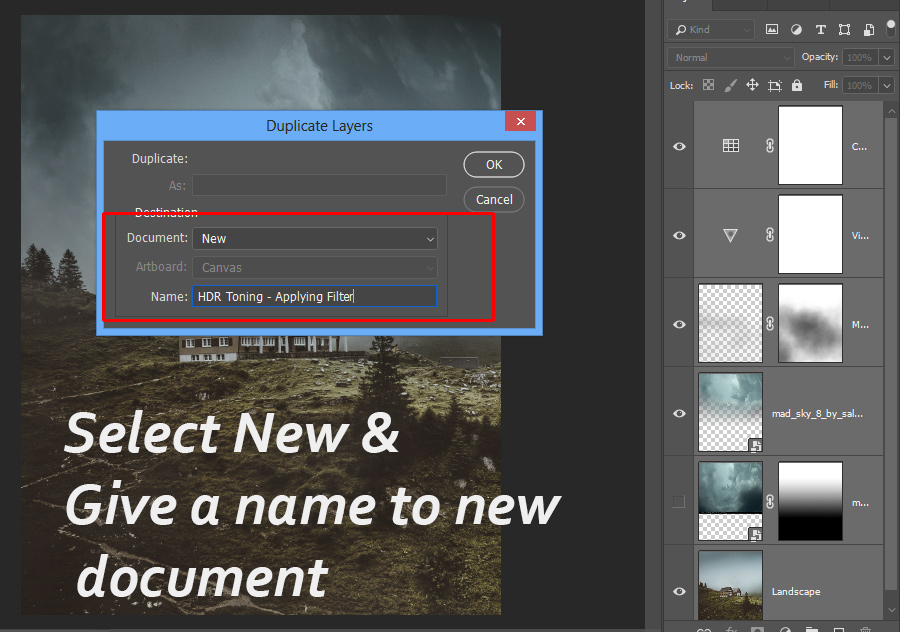
Select New in the Document that will tell Photoshop to duplicate all the layers in a new document. In the name field, give your document a new name such as HDR Toning – Applying Filter.
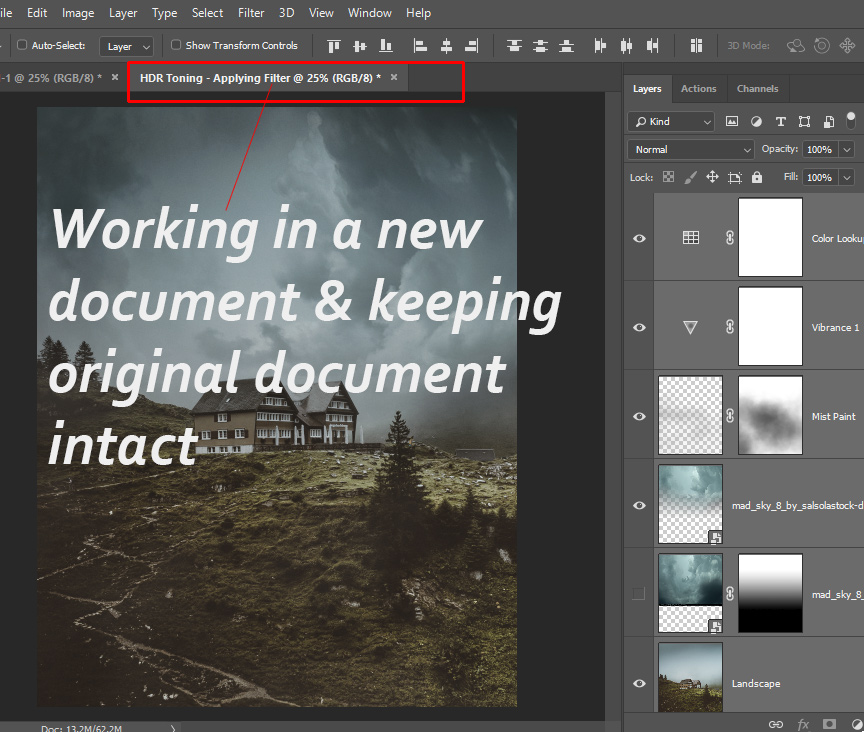
As you press OK Photoshop will create a new document containing all of the layers. You can confirm by taking a look at the document tab right on top.
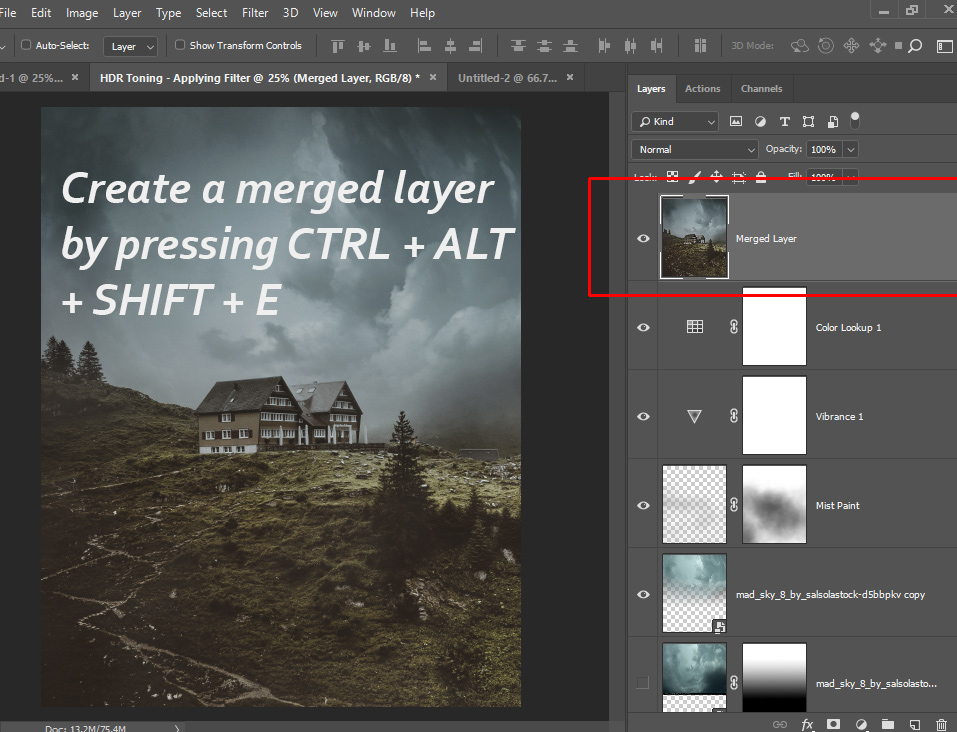
Now press CTRL + SHIFT + ALT + E to create a new merged layer & name it “merged layer” to finish preparing the image for HDR toning.
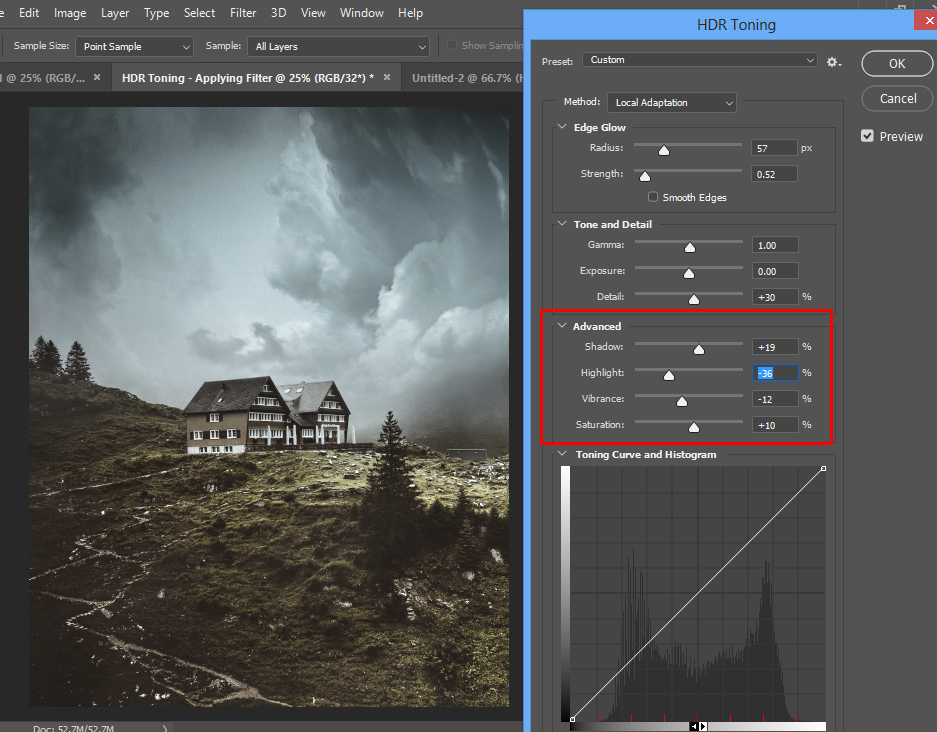
Step 8 – Apply HDR Toning Filter
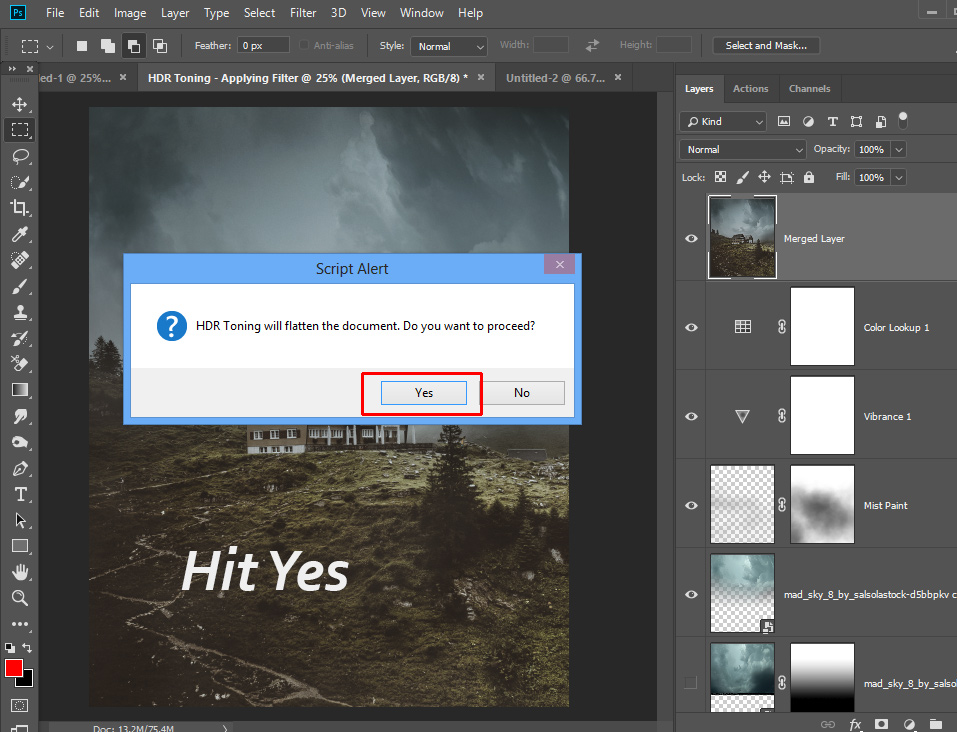
Go to Image > Adjustments > HDR Toning to apply HDR toning filter.

Hit Yes to continue and it won’t harm your original layer as we are working on the duplicated layers.
As you press Yes, Photoshop will automatically try to create the best possible HDR effect but you can customize it if you want to. In the Advanced Tab, I decreased highlights as the highlights were too bright. I increased shadows a bit to add more info there. You can play around with Tone & Details tab but I don’t need to use it unless there is a problem with exposure in the image.
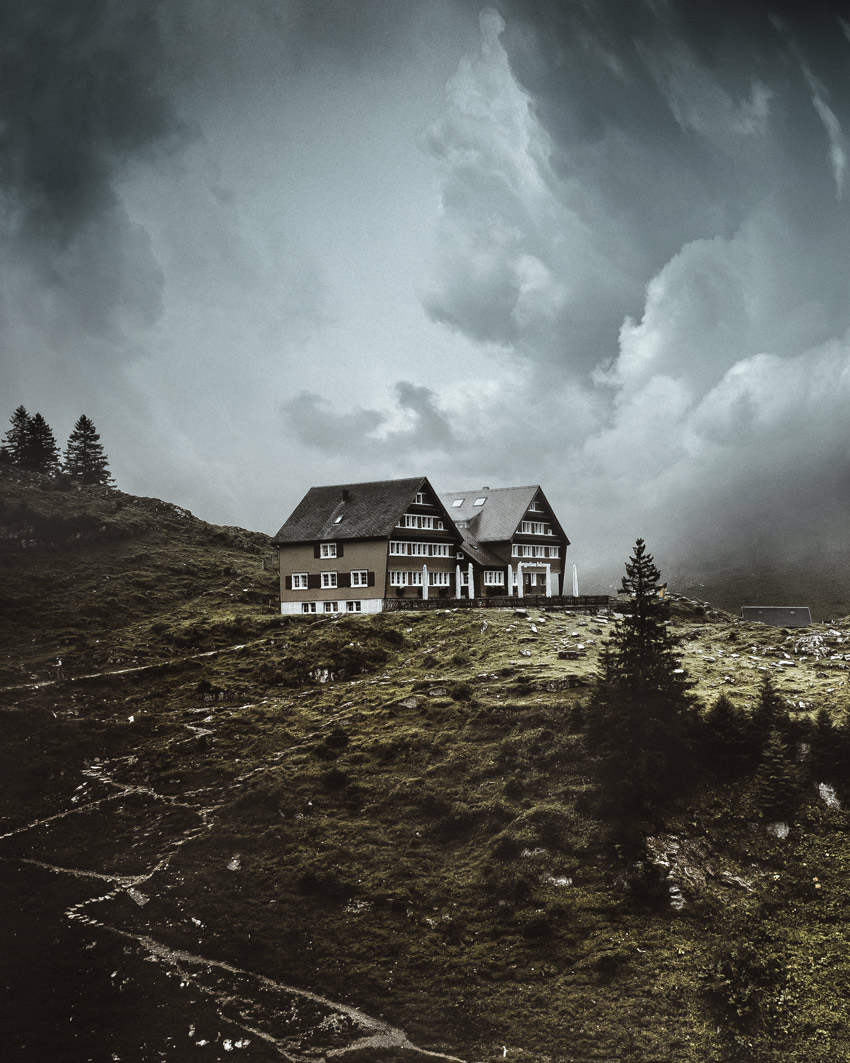
Check out the image in full resolution here:
I hope you enjoyed the tutorial, let me know in the comment section did this tutorial help you? Until then keep Photoshopping!
Need Help With Photoshop or Looking for Professional Support?
Whether you're just getting started with Photoshop or need expert-level assistance, we're here to help! Contact us for personalized Photoshop tutorials, project support, or creative services.
Get in touch today to take your skills or projects to the next level.
CONTACT US NOW📘 Want to Master Photoshop Faster?
🎁 Get Your FREE PDF E-Book "Top 10 Photoshop Tricks Every Designer Must Know" Now – Packed with expert tips, shortcuts, and techniques to boost your creativity & workflow.
👉 Download Your FREE PDF E-Book NOW!

