
In this tutorial, you’ll learn how to apply smoothing to skin in Lightroom Mobile App. We are not going to blur the skin, we’ll try to retain texture/details of the skin while applying the smoothing. Also, this tutorial will show you how to selectively edit the parts of the skin to make sure that you are not affecting the rest of the image. Let’s get into it.
Step 1 – Open The Image
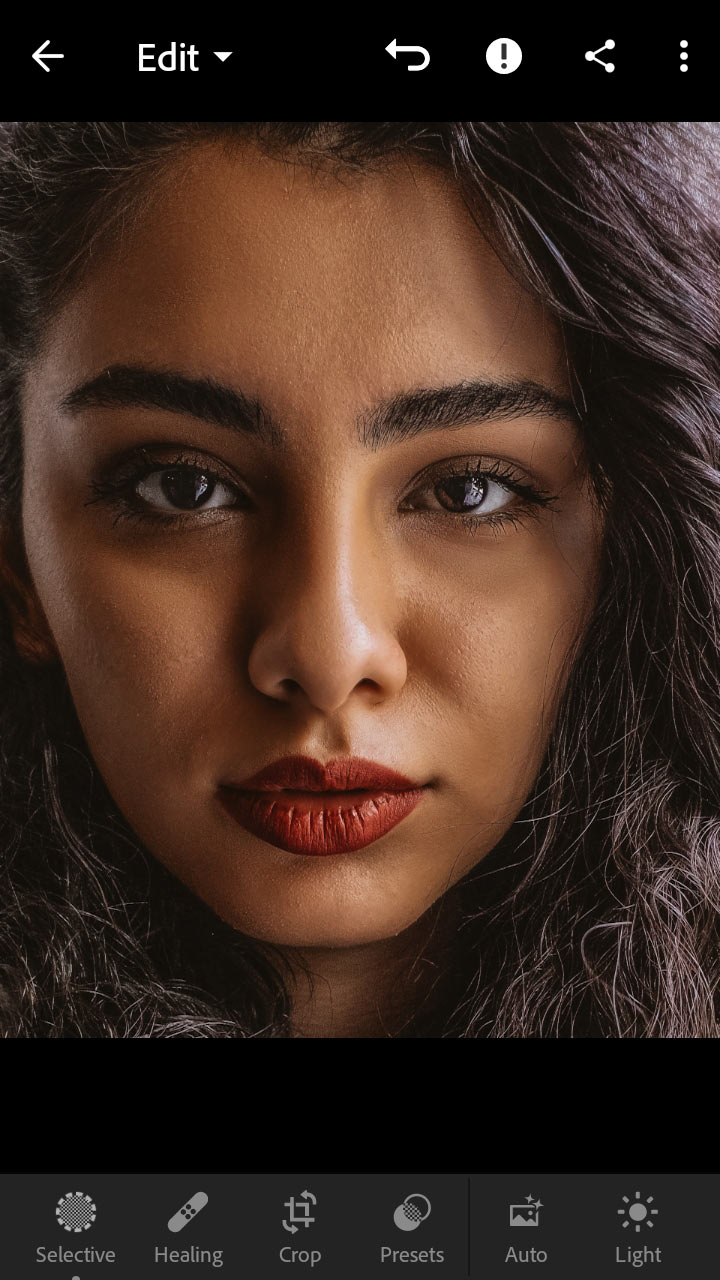
Open the image in Lightroom Mobile that you think needs skin smoothing. On the left-hand side, you can se that I have opened an image and you can clearly notice that the skin has a lot of details and require a bit of smoothing.
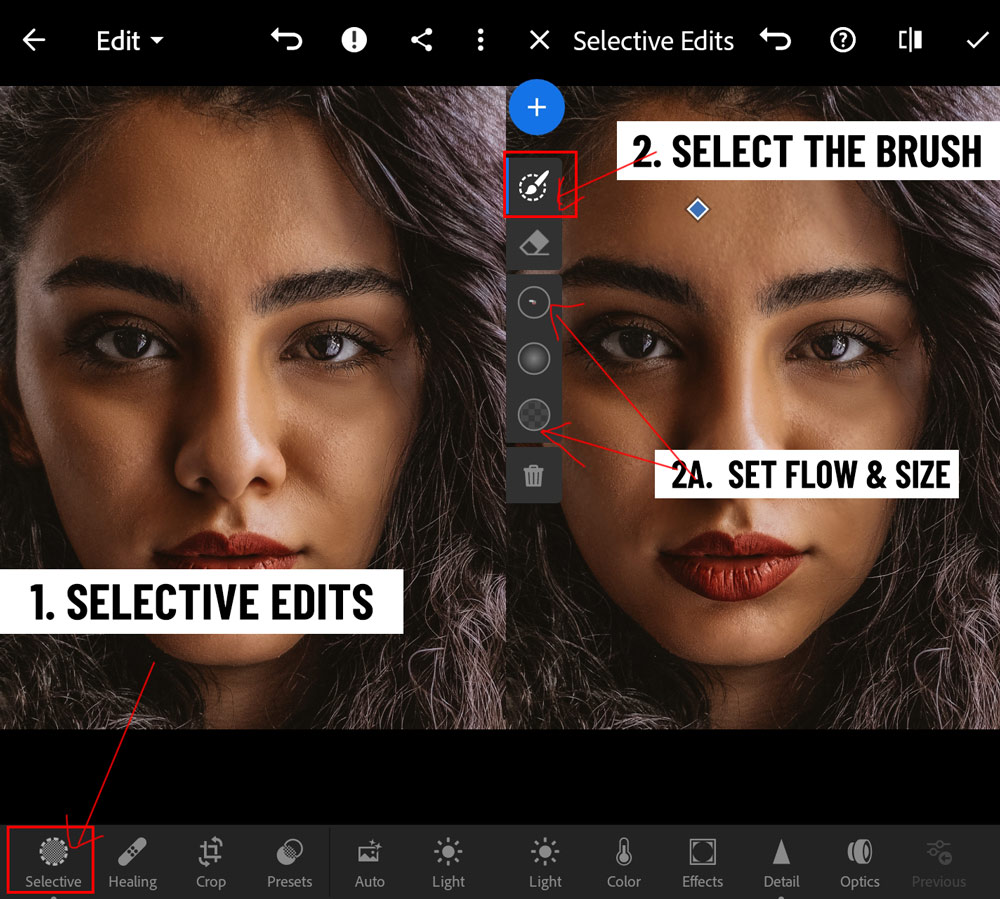
Step 2 – Selective Edit Brush
Once you open your photo, choose the Selecting Editing Brush at the left bottom of the screen. This selective brush allows us to selectively make changes/edits to the parts of the image. It only affects those areas where you brush and the rest of the parts remain intact from any edit that you do through this brush.
There will be several options to choose from, just click on the (+) and choose Brush.
Once you have the Brush Option selected, you can set the settings of the brush such as Flow, Size, & Feather.
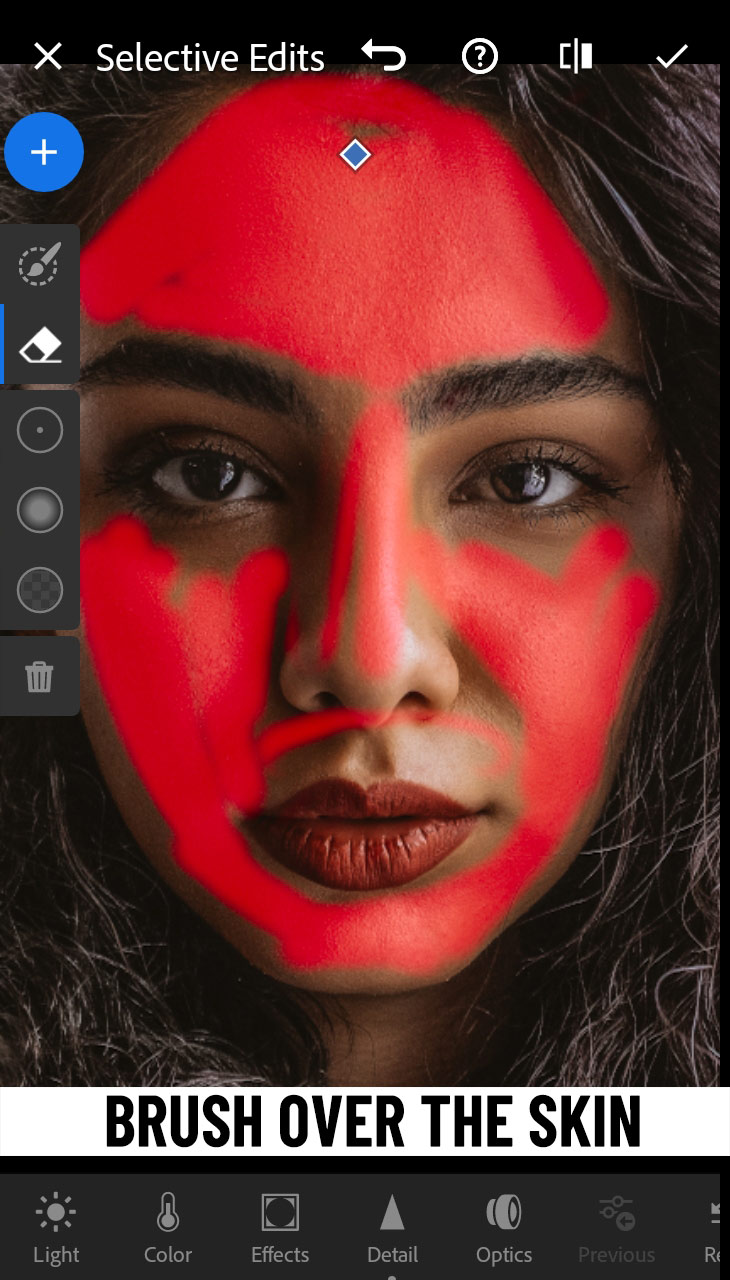
Step 3 – Brush Over The Skin
Let’s brush over the skin. For now, the default settings would be enough for most of us. Click on the middle icon that has soft edge circle, this will make the brush stroke soft and smooth.
Now brush over the skin where you want skin smoothing to be applied.
Keep in mind, you only need to paint those parts where it needs smoothing, don’t just brush over the entire skin.
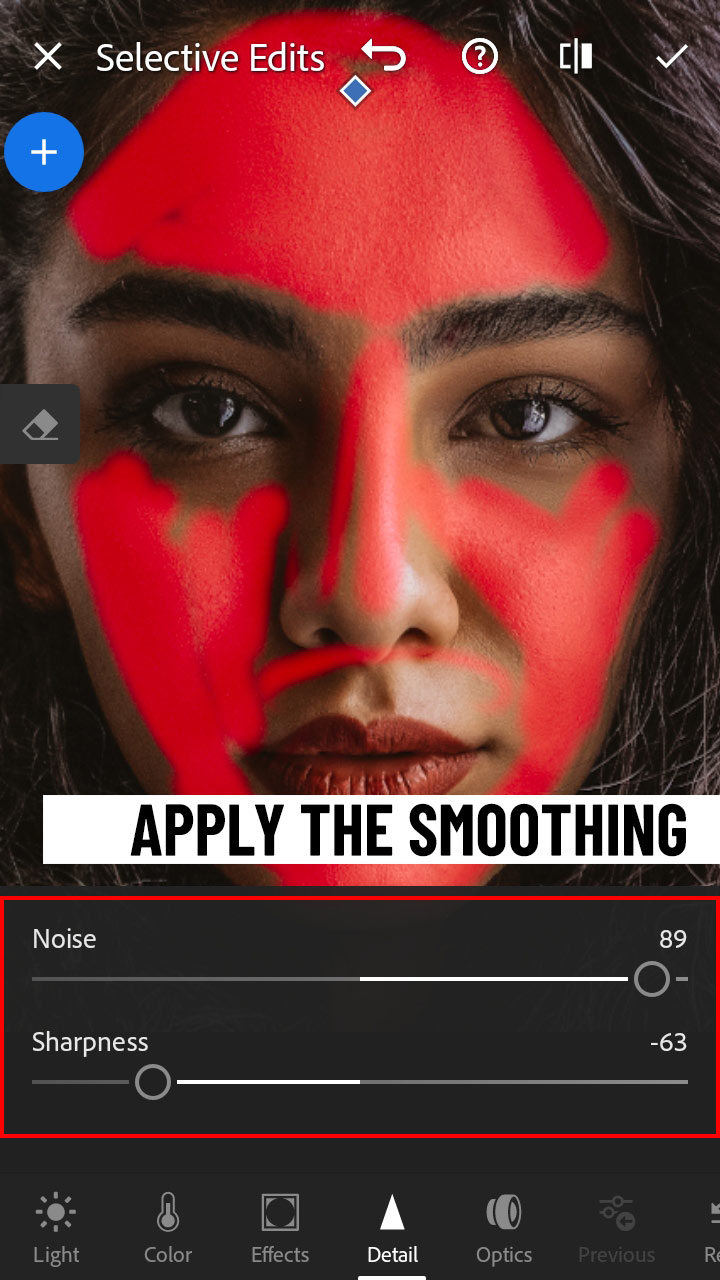
Step 4 – Apply The Smoothing
To apply smoothing, scroll to the right until you see Details Icon. Click on it, increase the noise Levels to 50+ and decrease the sharpness level to -50 or more.
These settings may not work with your images, you gotta tweak it a little. Just make sure you are not washing away/blurring the entire skin details, just keep it to the point where you see soft skin but still able to see those skin details.
Remember, blurring doesn’t mean skin smoothing.
Step 5 – Reducing Texture & Clarity
If you think there is still some work that needs to be done on the skin, then I would recommend reducing Texture & Clarity in the Effects Tab can help you. But make sure you don’t overdo it, as these sliders are very sensitive and can blur the skin in one go.

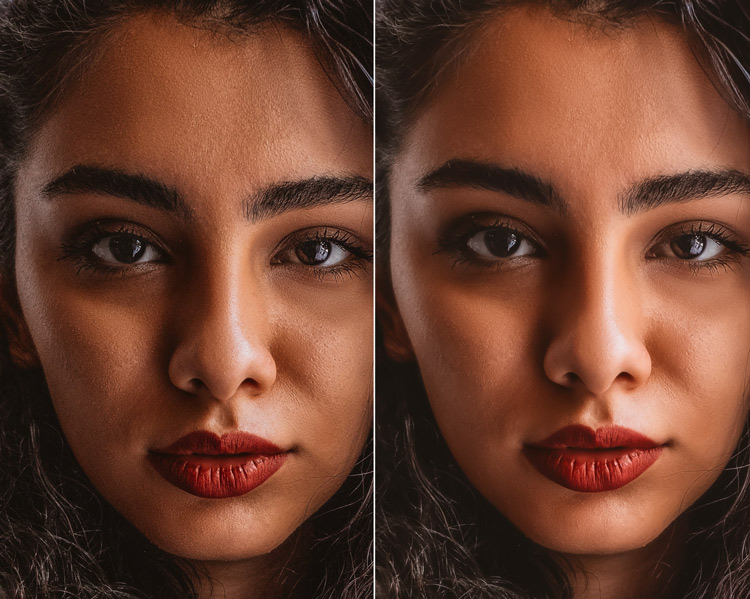
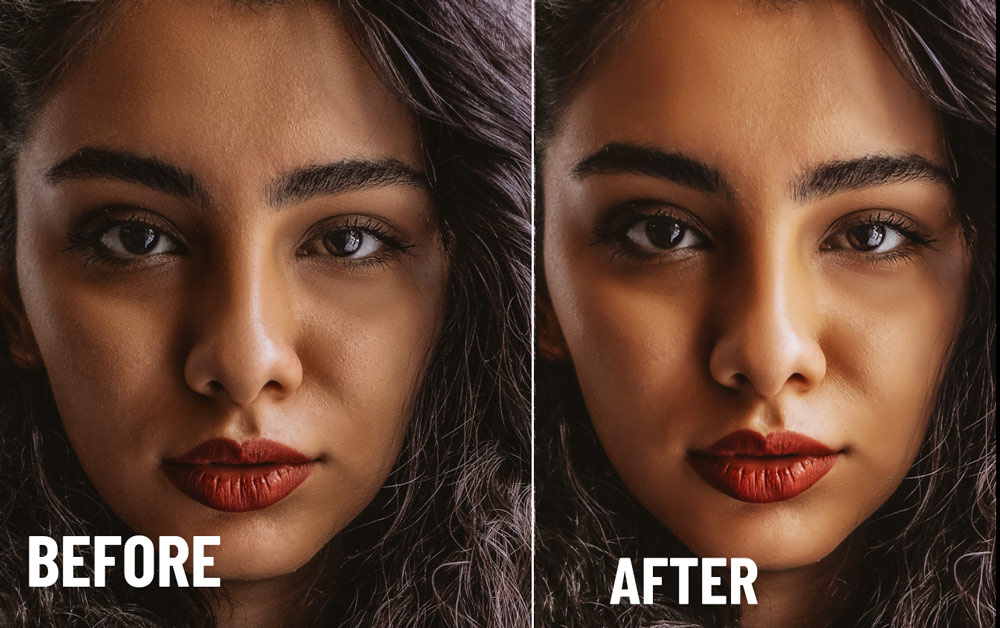
Here are my final results:
Also, if you don’t have access to Selective Brush, you can use the Effects Tab, from there you can increase noise and reduce sharpening. But keep in mind that it would affect the entire image as it doesn’t have the option to selectively edit parts.
I hope you have enjoyed the tutorial. Let me know if you have any questions in the comment below.
Need Help With Photoshop or Looking for Professional Support?
Whether you're just getting started with Photoshop or need expert-level assistance, we're here to help! Contact us for personalized Photoshop tutorials, project support, or creative services.
Get in touch today to take your skills or projects to the next level.
CONTACT US NOW📘 Want to Master Photoshop Faster?
🎁 Get Your FREE PDF E-Book "Top 10 Photoshop Tricks Every Designer Must Know" Now – Packed with expert tips, shortcuts, and techniques to boost your creativity & workflow.
👉 Download Your FREE PDF E-Book NOW!