Adobe recently released a new Preset Opacity Slider tool to set the intensity of the applied presets. The opacity slider works similarly such as the layer Opacity in Photoshop. This will help you control the effect or look of a preset that is being applied to your photos. In this tutorial, we will learn how to use this new tool in Lightroom, & Camera Raw. Let’s get started!
Preset Opacity Slider In Lightroom Classic
Using the preset opacity slider is easy and in order to bring that slider, you have to apply a preset first.
You can go to the Develop Module and on the left of your screen, under the Presets Panel, select a preset and after applying a preset you’ll see the Opacity Slider will become active.
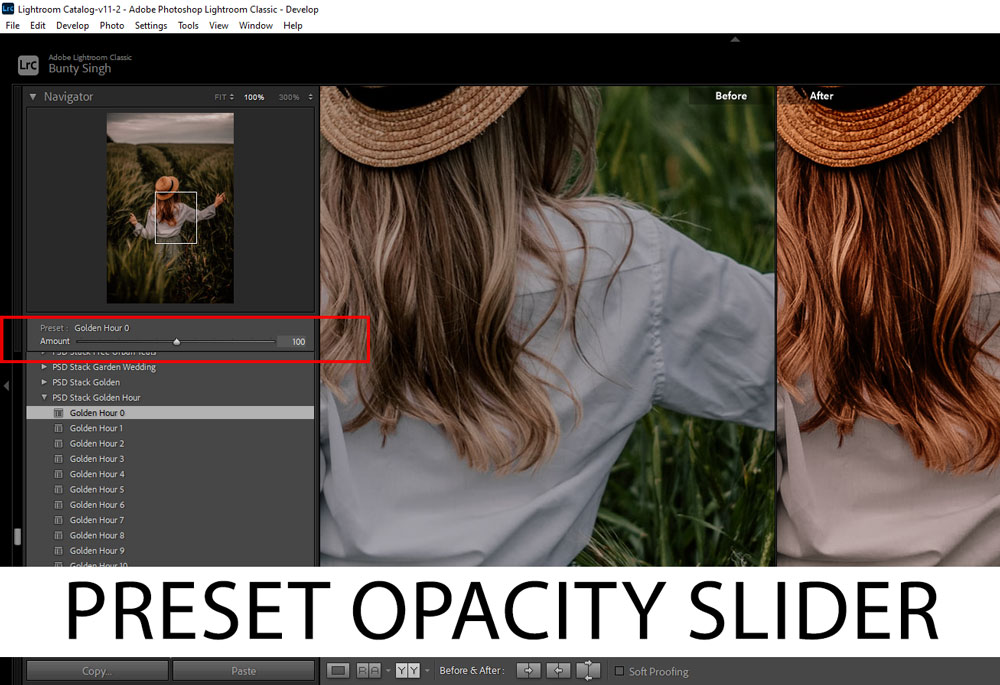
As you can see, it is set to 100%, you can either decrease it to reduce the intensity or the effect of the preset. You can even set it to 200% to stronger the effect of the applied preset. This all depends on you how strong you want a preset effect to be.

Preset Opacity Slider In Lightroom CC
In Lightroom CC, again you have to apply a preset first and then the preset opacity box will appear.
Open the Lightroom CC, and select a photo to edit.
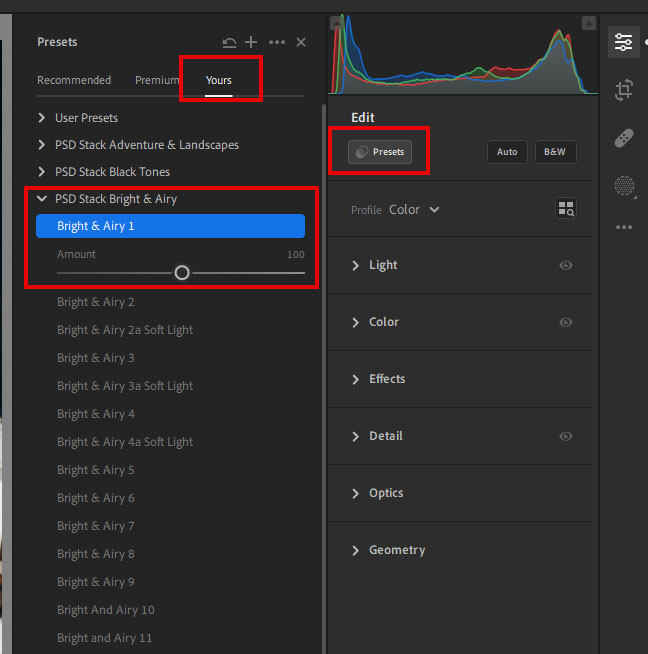
From the Edit Panel, click on the Preset panel and a new panel will open.
Select Yours section, this is where you will find your installed presets, from there click on any preset to apply it. Once you applied a preset, the opacity/amount slider will appear below the preset name. Simply move the slider left or right to modify the edit.
Preset Opacity Slider In Lightroom Mobile
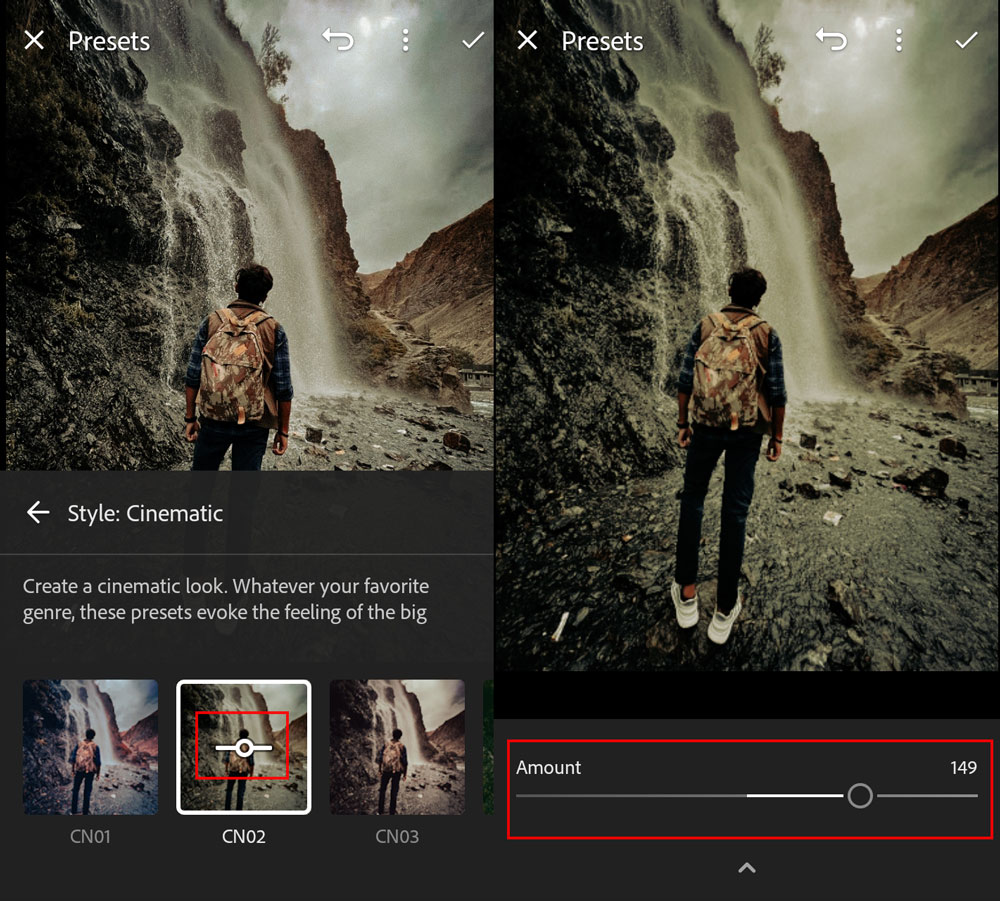
This slider is also available in Lightroom Mobile. To access this feature, select a photo to edit and then click on the Presets option at the bottom of the screen.
Select a preset, and once you applied the preset a slider icon will appear on the image thumbnail of the preset. Now you have to tap on the thumbnail again and the amount slider will appear.
You can then adjust the opacity of the applied preset.
Preset Opacity Slider In Photoshop Camera Raw
The Amount/Opacity slider is available in Photoshop Camera Raw as well. To use the feature, you can open an image in Photoshop.
Go to Filter > Camera Raw Filter and this will bring the Camera Raw filter.
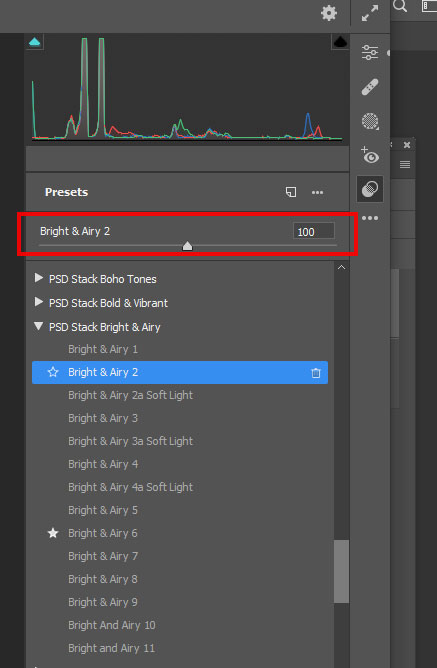
Click on the Preset icon (double overlapping circle), and a list of your presets will be available to you. From there, select a preset and you’ll notice the Preset Slider will become active at the top of the preset panel.
Feel free to play around with it to decrease or increase the effect!
Thanks much for following the tutorial. I hope you’ll like this tool. For over a decade, we want a feature to control the opacity of presets & now it’s here. I hope you’ll reap the benefit of this new feature in your post-production process. If you have questions, do comment below!
Need Help With Photoshop or Looking for Professional Support?
Whether you're just getting started with Photoshop or need expert-level assistance, we're here to help! Contact us for personalized Photoshop tutorials, project support, or creative services.
Get in touch today to take your skills or projects to the next level.
CONTACT US NOW📘 Want to Master Photoshop Faster?
🎁 Get Your FREE PDF E-Book "Top 10 Photoshop Tricks Every Designer Must Know" Now – Packed with expert tips, shortcuts, and techniques to boost your creativity & workflow.
👉 Download Your FREE PDF E-Book NOW!