
This year Adobe has released a bunch of new features to Photoshop 2022 and Lightroom. It’s no wonder that the goal of these updates is always helping photographers, artists, and people using Adobe software. To continue, making the experience of Lightroom users better, which are photographers, Adobe has revamped their masking tools and added new ones to Lightroom. This has changed everything as far as the selective edit and masking is concerned.
In this tutorial, you’ll learn how to use the new masking tools “Select Subject & Select Sky” in Lightroom Classic. I’ll show you where to find the new masking tools, how to work with masks, select subjects & sky, and a creative way to use the new tools. Let’s get started!
Where to Find The New Masking Tools?
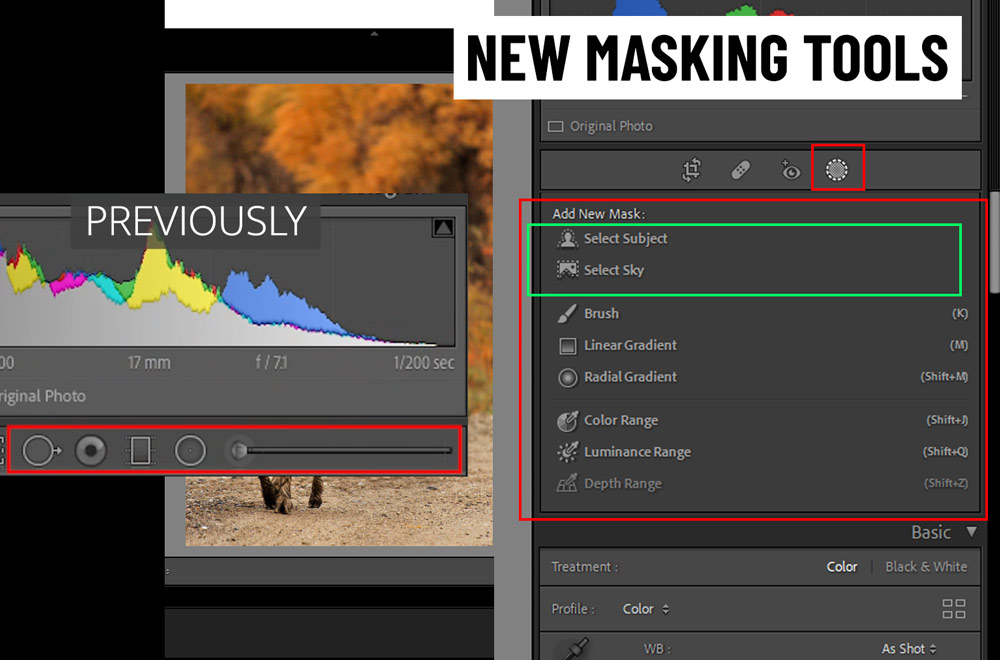
Go to the Develop Module, you’ll find a dotted circle icon that is the New Masking Tool icon, where Adobe has grouped all the masking tools such as Linear Gradient, Radial Gradient, and Brush. You can see they have added new tools Select Sky & Select Subject. Most of us are already familiar with Gradient and Brush, these two are new. We gonna take a look at them in detail by selecting the subject and sky.
Click on the Masking Icon to display the tools:
Select Subject in Lightroom
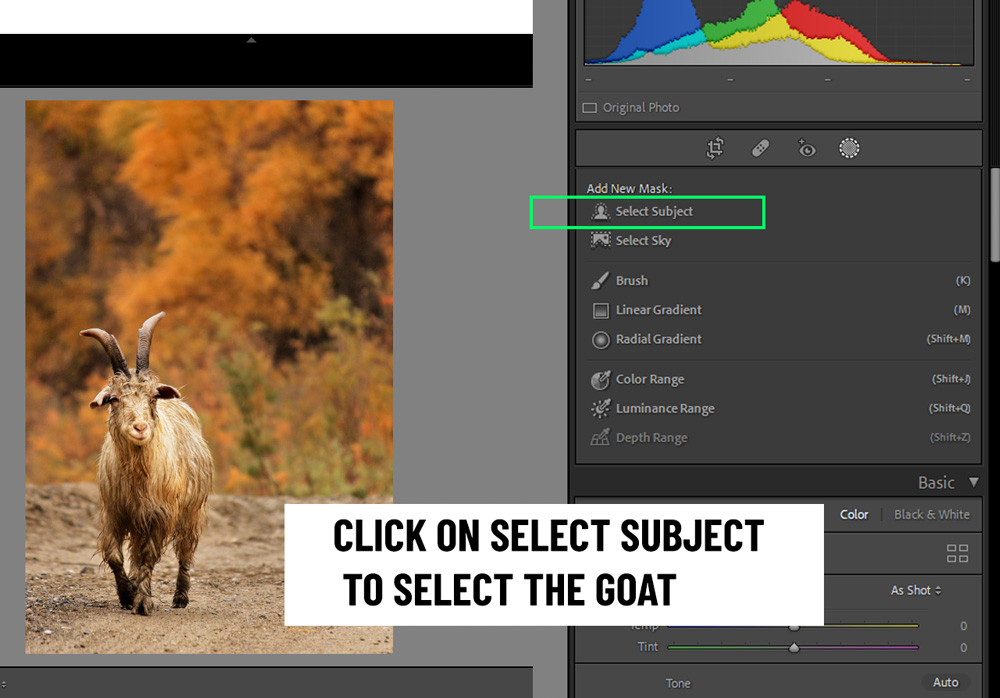
If you are one of those who has spent brushing their subjects to keep the background intact or brushing backgrounds to keep the subject intact, then you’ll love this feature. This feature allows you to quickly select subjects in one click using machine learning and artificial intelligence technology.
To select a subject, click on the Select Subject:
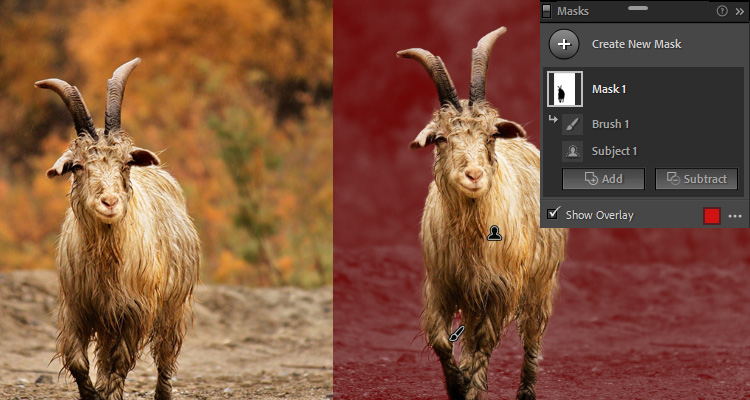
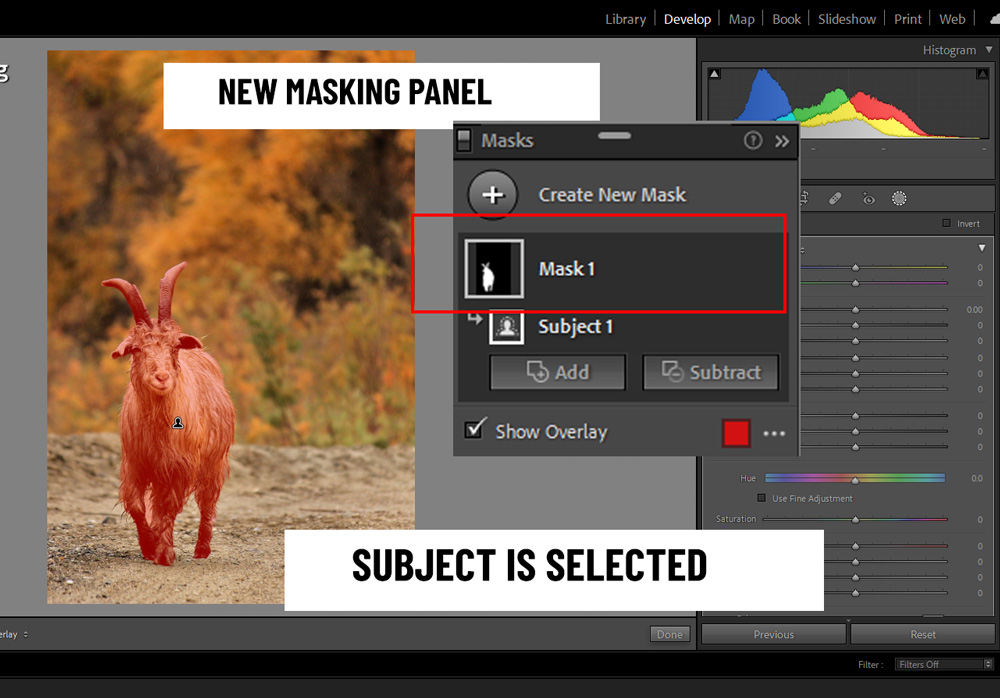
Notice how Lightroom has automatically selected the subject in the photo and created a mask. Yes, you can see a mask in the brand new masking panel. This allows us to create a new mask, make selective adjustments on just the subject or the background or the sky.
That new masking panel will help you refine selections as you can add parts to mask, or take away parts from the mask using the Add & Subtract button.
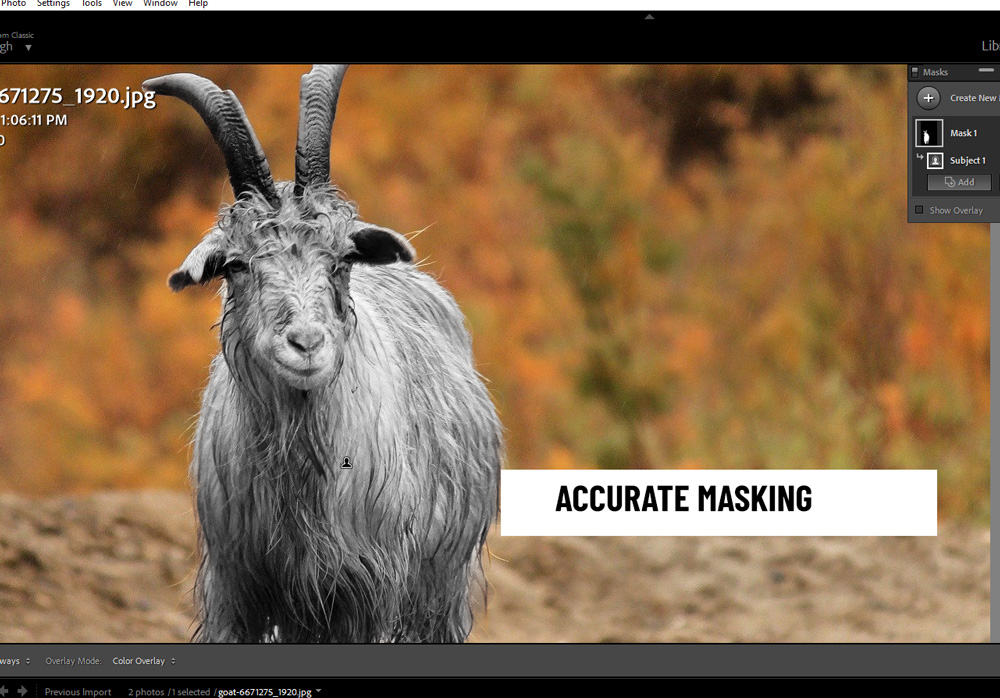
To show you how accurate this AI technology is, I have desaturated my subject so you can see how precise it is. Some of the furs of the goat did get away but it’s not that bad and you can even add those fluffy hairs back to selection.
Subtract/Add From Mask
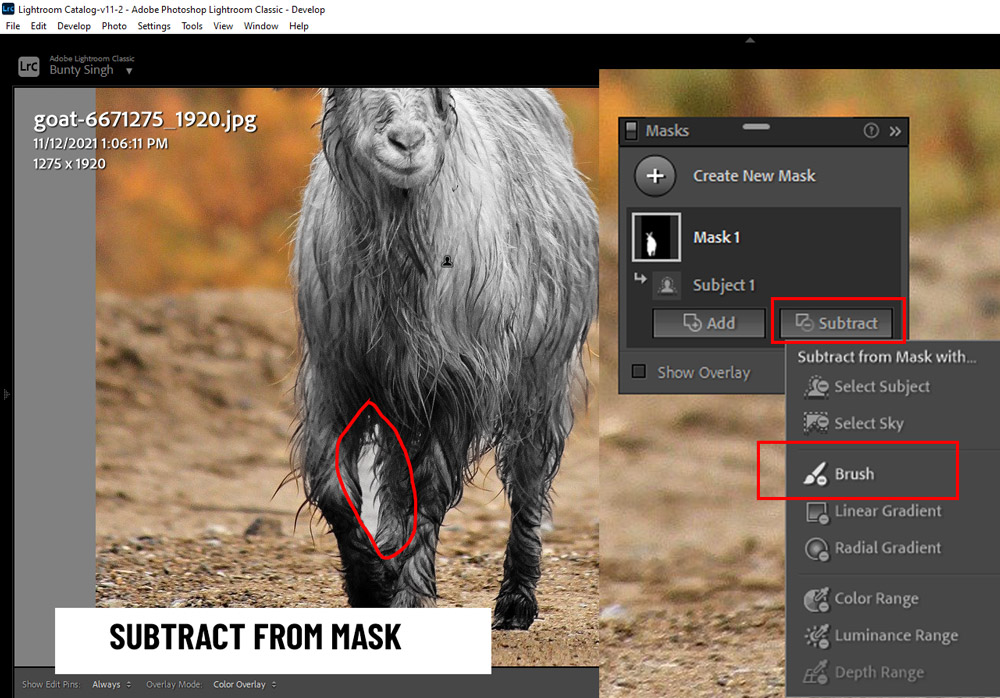
The new masking panel also allows us to add new parts to selection and subtract those parts that shouldn’t be inside the selection, both can be done using the Add & Subtract Button.
Let’s subtract from the selection:
Click on the Subtract Tool, then choose the Brush, then brush over the areas which you don’t want in the mask:
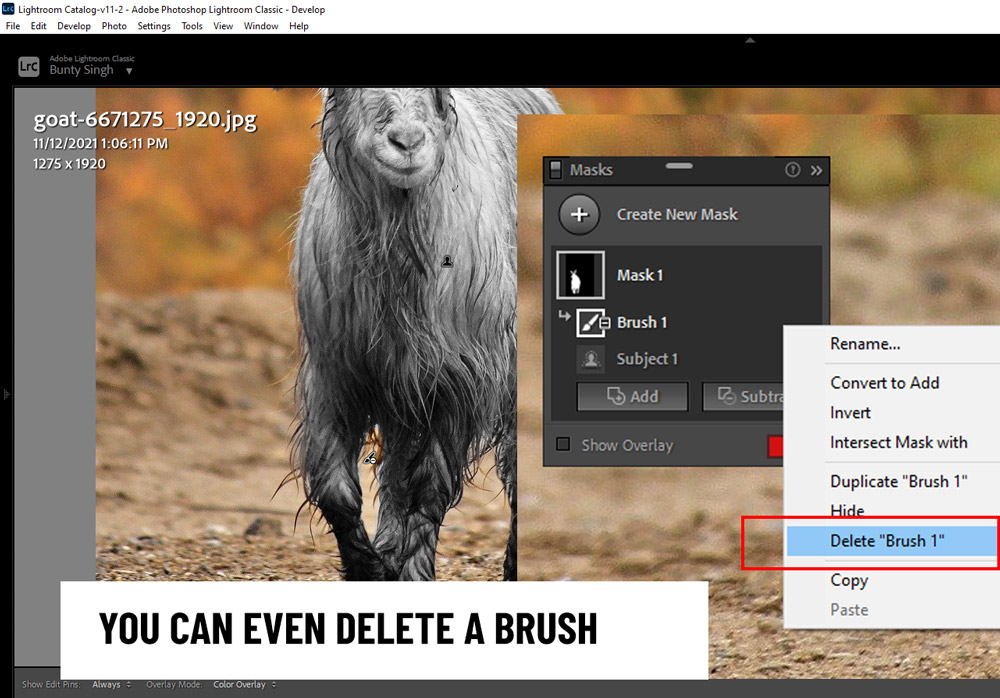
Here you can see the results and notice a new masking layer is added right underneath the Mask 1, this allows us to go back at any time and refine the masking again.
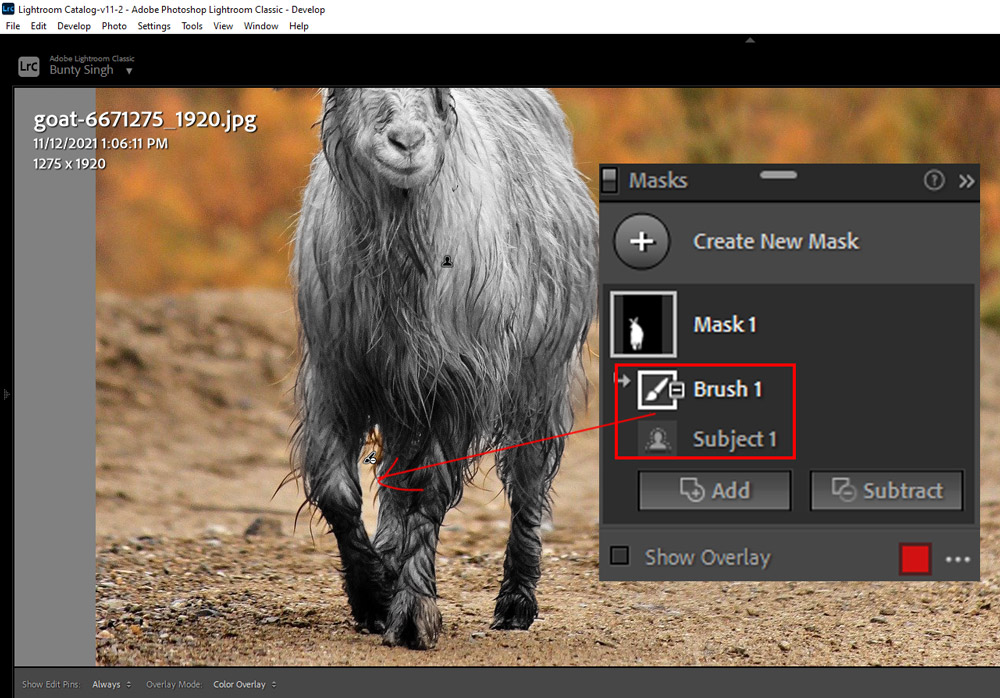
If you want do the masking again, you can delete this brush layer by right-clicking on it and choosing “Delete Brush 1”.
Invert Mask
Yep, you heard it right, you can invert Masks in Lightroom. To do this, first, make sure you have selected the subject layer of the mask, and make sure you have selected the right mask in case you are working with Multiple masks.
You’ll see an option called “Invert”:
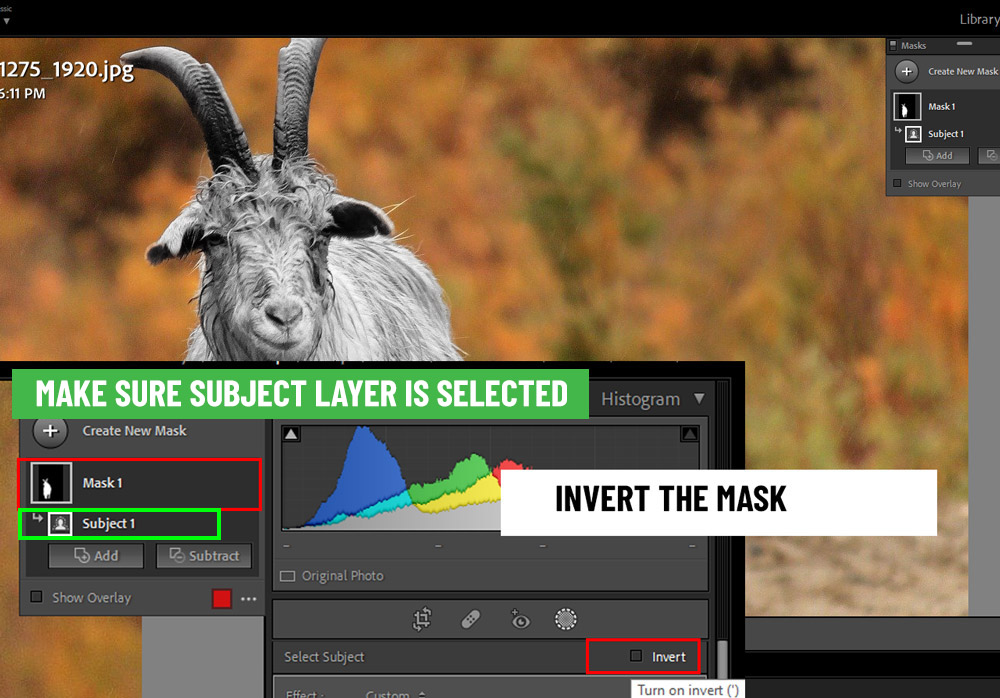
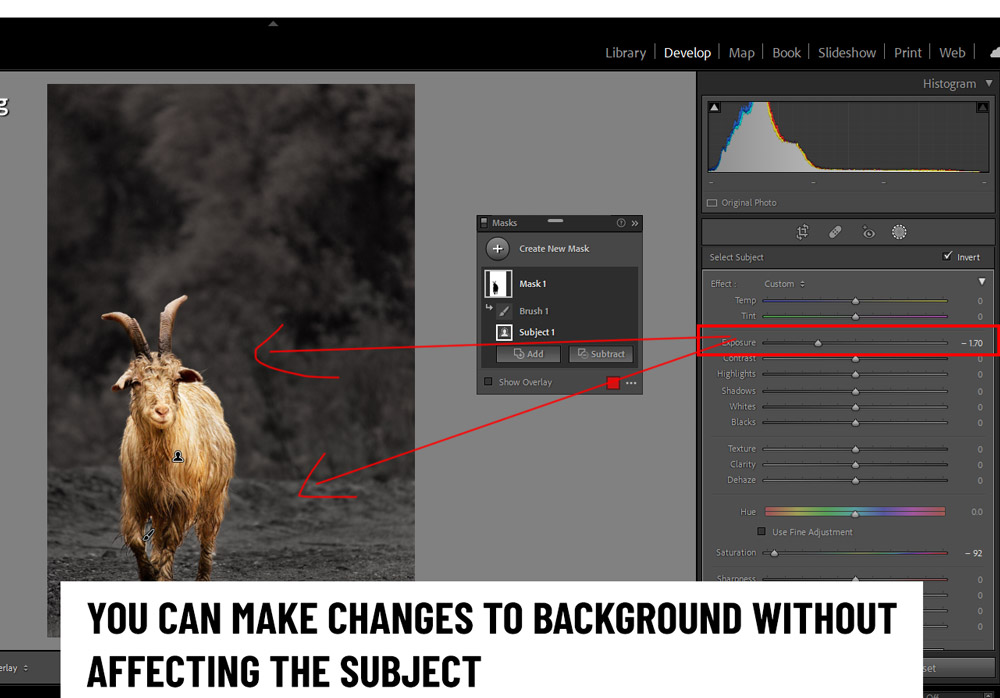
Click on it and you can see all the adjustments have been applied to the background and the subject is intact. Also, you can make further adjustments to the background without affecting your subject.
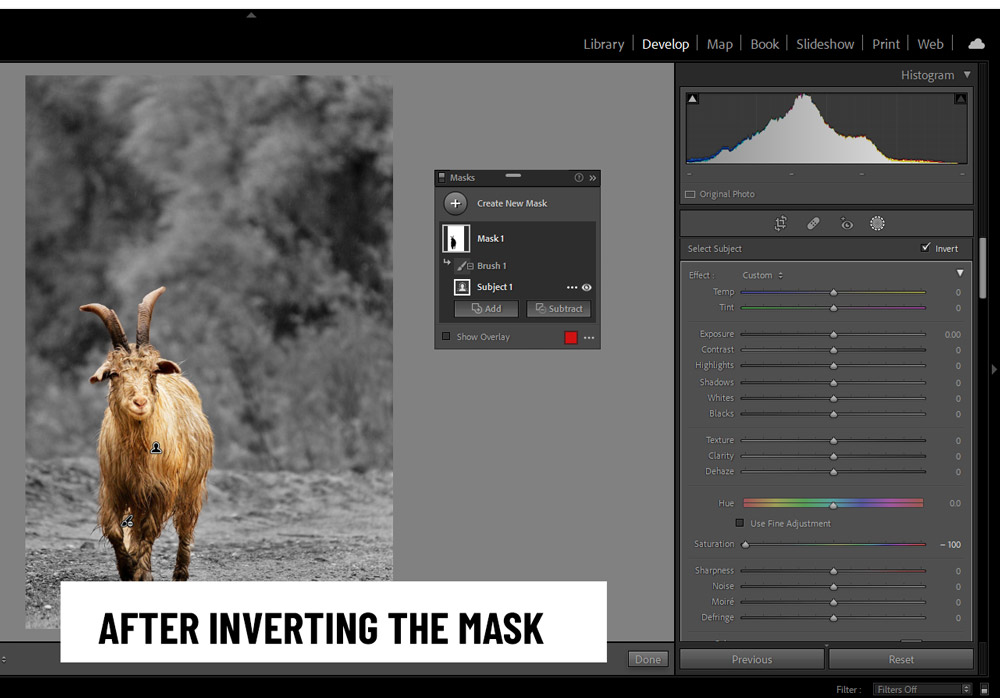
To show you, you can see I have reduced the exposure of the background but Lightroom is not affecting my subject.
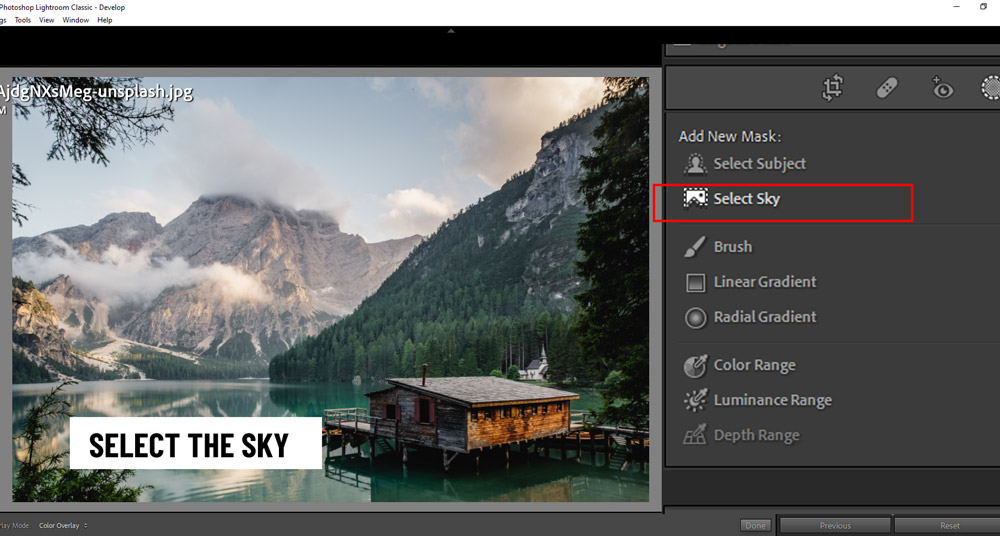
Select Sky in Lightroom
Just like the Select Subject, Select Sky works the same but it selects sky instead of a subject. To get started with it, click on the Select Sky button.
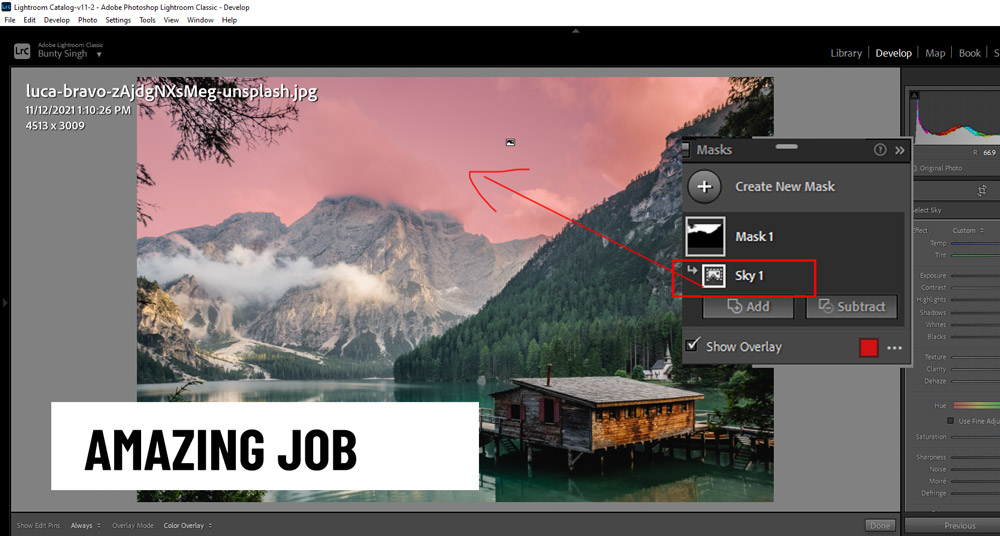
You can see the red overlay showing the sky has been selected:
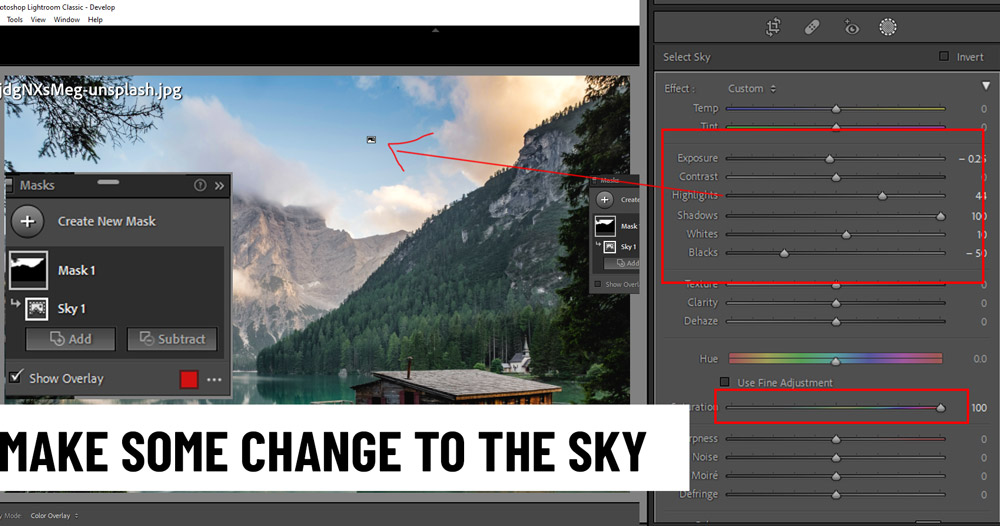
Let’s make adjustments to the sky! Here you can see that I made some adjustments to the sky and you can see the sky is now poping whereas there is no effect on the rest of the areas.
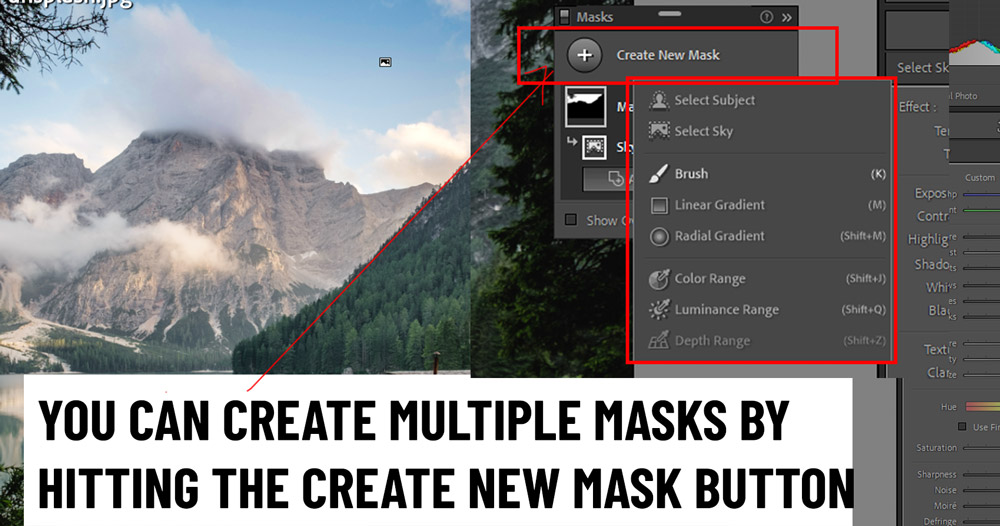
Multiple Masking
The fun doesn’t end here, Lightroom even allows you to create or work with Multiple Masks. You can click on the Create New Mask Button to create a new mask and work with them.
Imagine selecting multiple parts of a photo with different settings and affecting each of them without impacting the rest. This is just amazing!
How to Use The Select Subject & Select Sky
Now, I will show you a creative way where you can use these tools effectively.
First, create a Linear Gradient:
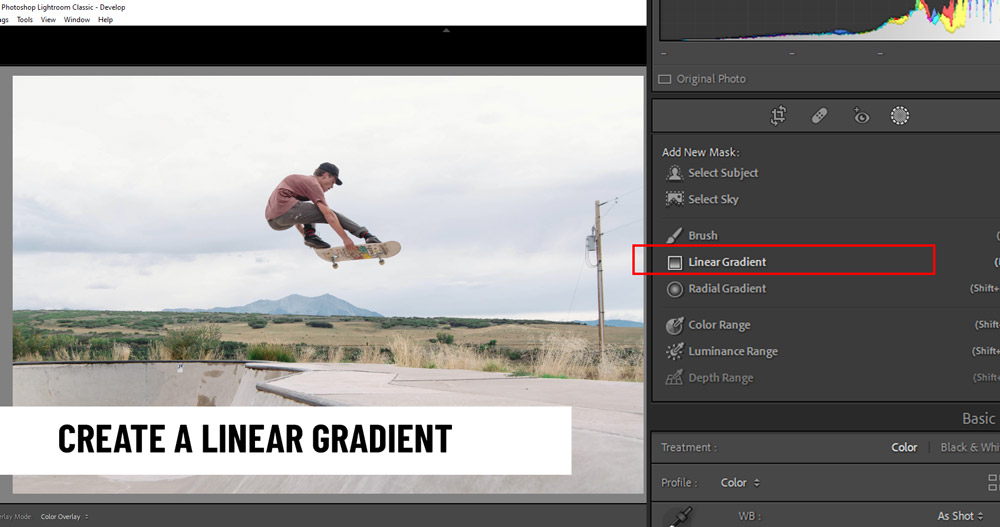
Apply the Linear Gradient as shown below. As you can see, I want to make adjustments to the sky but the subject is in the middle of the sky.
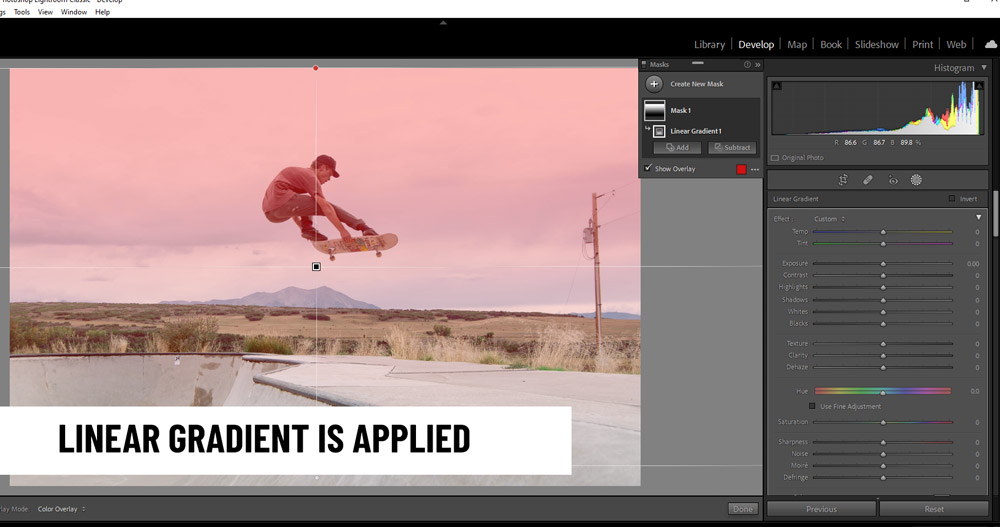
I decreased the temp to turn the sky blue but it is making the subject blue as well. I want to keep my subject out of the Linear Gradient effect:
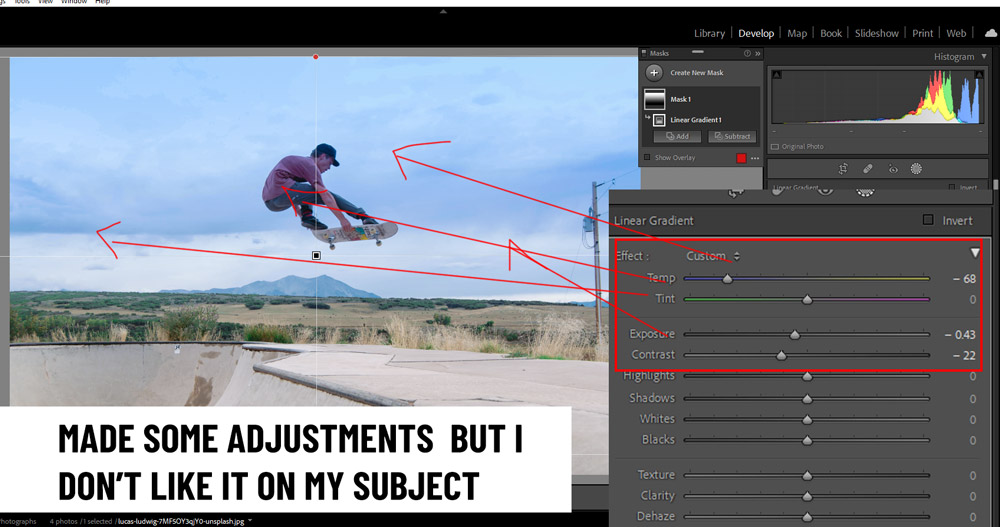
Earlier, it would have been time-consuming as I have to brush the entire subject to remove the effect of the Linear Gradient.
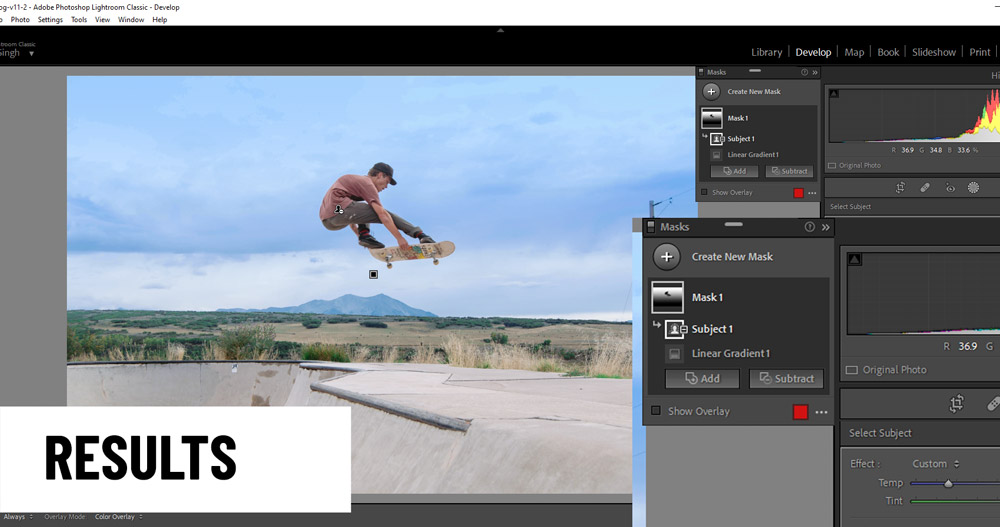
But now, I can click on the Subtract button, then choose Select Subject, and boom I am done:
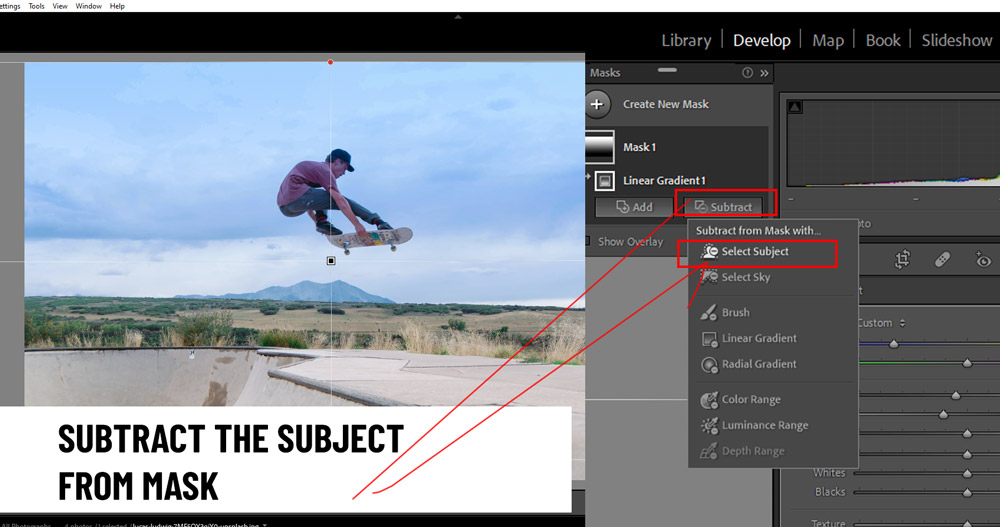
Here are the results:
Both of these tools are very useful and will surely help Photographers who want to make selective adjustments without spending hours. I think Adobe doesn’t want its users to move away from Lightroom to Luminar. Especially, photographers because more than 95% of photographers don’t need Photoshop and they can get the job done in Lightroom.
Of course, the Basic Photography plan (even the stand-alone Lightroom 1TB Plan) might not suitable if they don’t have access to these tools (Luminar already has these tools) as most will prefer to go for Luminar to avoid subscriptions. Anyway, these are great additions to Lightroom, and let me know what your thoughts are in the comment below.
Need Help With Photoshop or Looking for Professional Support?
Whether you're just getting started with Photoshop or need expert-level assistance, we're here to help! Contact us for personalized Photoshop tutorials, project support, or creative services.
Get in touch today to take your skills or projects to the next level.
CONTACT US NOW📘 Want to Master Photoshop Faster?
🎁 Get Your FREE PDF E-Book "Top 10 Photoshop Tricks Every Designer Must Know" Now – Packed with expert tips, shortcuts, and techniques to boost your creativity & workflow.
👉 Download Your FREE PDF E-Book NOW!