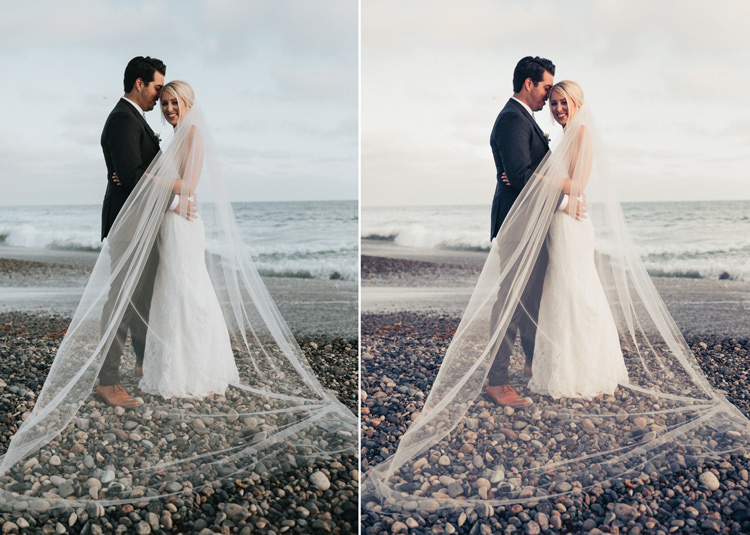

Ever felt like that the colors in your images are not in your control? Do you want to take creative control over colors? Then The HSL Panel might help!
In this tutorial, you’ll learn how to use this amazing tool to its fullest potential. I’ll show you how you can selectively target colors, change hue, saturation, and luminance of colors, and using the targeted adjustment feature of this powerful tool. Let’s get into the tutorial!
Step 1 – HSL/Color Mixer Tool
The HSL Panel is one of the most powerful tools in Lightroom. You can change the shade of colors, make a color vibrant or mute it & even change its brightness with this amazing tool.
If you master it, which is easy-peasy, it can give you more control over colors in your images and even gives you the flexibility to modify any preset.
You can find this tool in the Develop Module, go to the right-hand side to find the three tabs Hue, Saturation, and Luminance of HSL Adjustment panel.

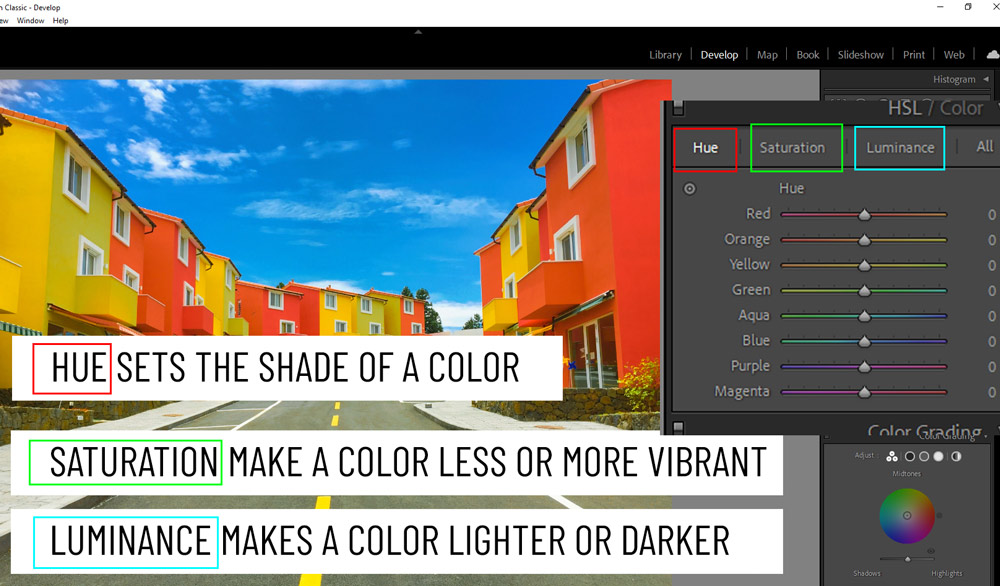
Step 2 – Hue, Saturation & Luminance Tabs
In the HSL adjustment panel, there are three tabs Hue, Saturation and Luminance
1. Hue sets the shade of a color. Think about, is the color orange in your image more of a yellow-orange or, more red-orange?
2. Saturation controls the intensity of a color. It makes a color less or more vibrant. The more the saturation value the more vibrant the color will be or vice-versa.
3. Luminance means brightness and it makes a color darker or brighter depends on how lower or higher values you go for the Luminance slider.
Step 3 – Hue Tab
Let’s see all three tabs in action one by one.
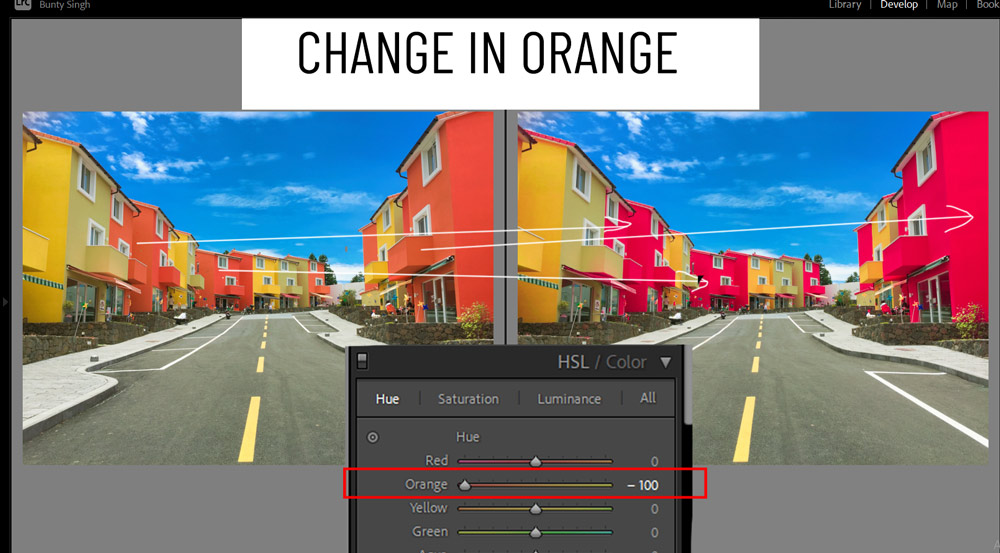
First, let’s test the Hue Tab. As we know, it changes the shade of a color shifting from primary color to the secondary color. For example, you can shift orange color towards more of a red-orange or yellow-orange.
In the image below, you can see I have changed the Orange Hue Slider to -100. Now in the image below, you can see the orange color shift closer to red-orange.
This is how the Hue tab works by shifting colors or changing the shade of a color.
You can play around with other sliders to make a shift in the colors of your image.
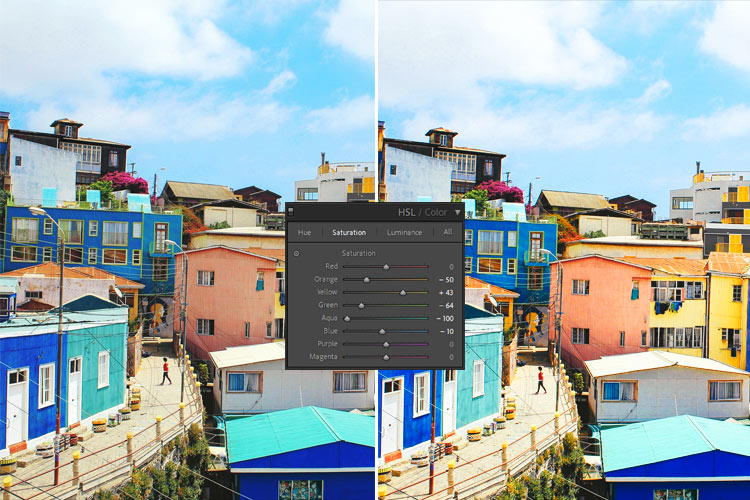
Step 4 – Saturation Tab
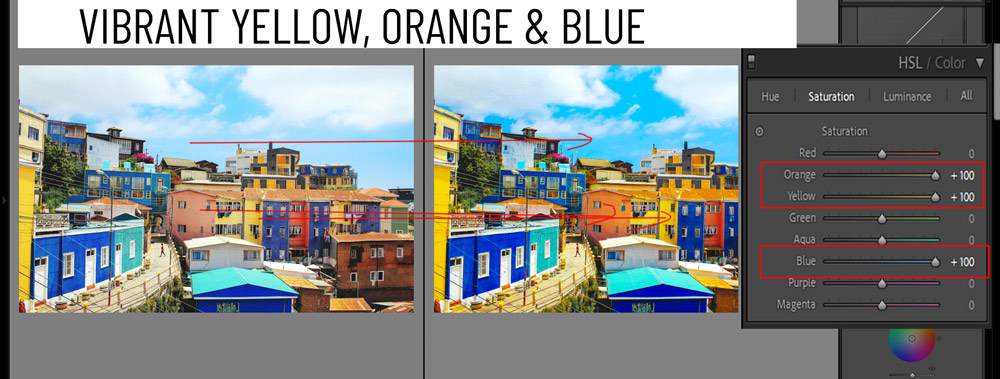
The saturation tab controls the intensity of a color. It makes the color more or less vibrant by either decreasing or increasing the saturation values of a color.
In the image below, I increased the Saturation of Orange, Yellow & Blue slider
As a result, you can see that Orange, Yellow & Blue is popping more than any color in the image. The Saturation slider has made them vibrant. Also, it can mute colors as well so if you want you can mute a color by reducing the values of the Saturation slider.
Step 5 – Luminance Tab
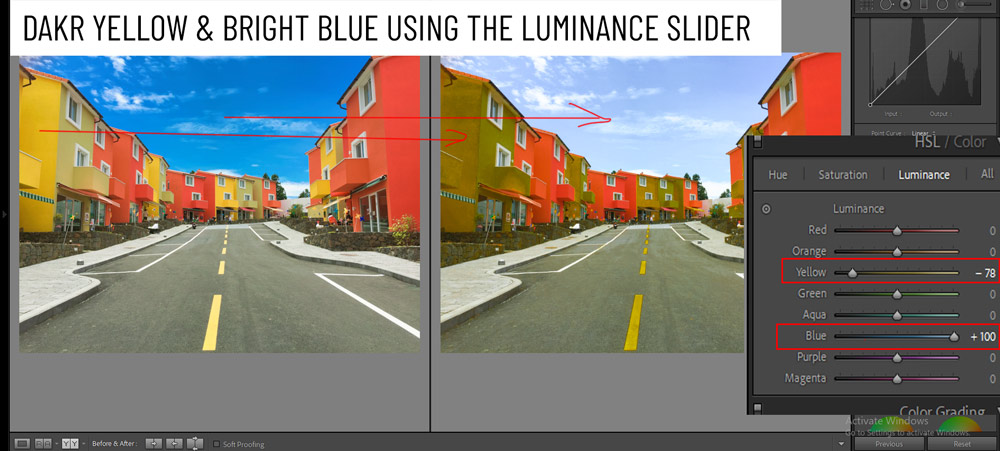
Luminance means brightness. It makes a color Lighter or Darker in your image.
In the below image, I have increased the Luminance Slider of Blue to +100 as a result the sky is now brighter.
Similarly, to make a color darker you can reduce the Luminance value. For example, I have reduced the Luminance Slider of Yellow to -78 to reduce the lightness of yellow tones.
Step 6 – Using All Three Sliders
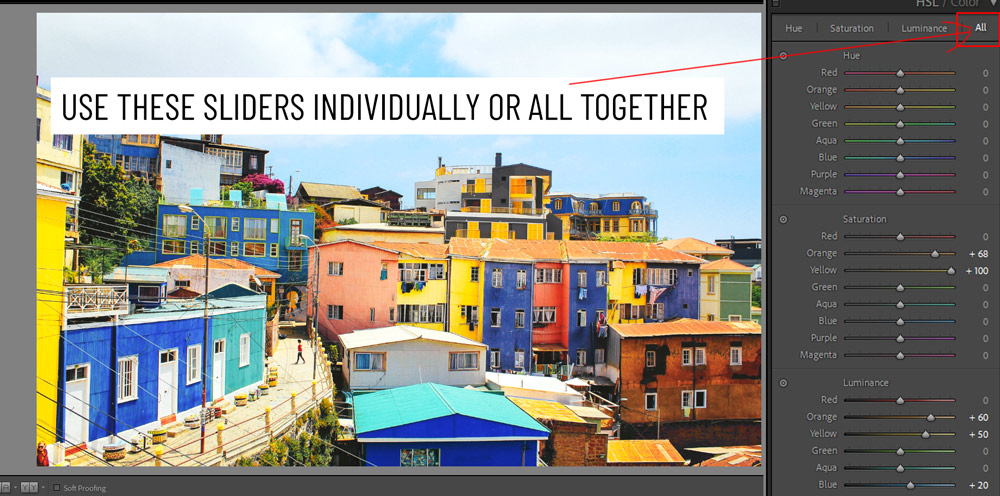
By far, you have seen we have used all the sliders by switching to their tabs, but if you want you can work with the Hue, Saturation, and Luminance slider of color at the same time.
You can click on the All in the panel, Lightroom will layer all three sliders so they can used be without switching tabs.
Step 7 – Precise Targeting with Targeted Adjustment Tool
There is another really cool feature of this tool, the Targeted Adjustment Tool. It can help you make changes to color when you couldn’t tell a color in your photos. You can click-and-drag on your image and Lightroom will automatically adjust the Hue, Saturation & Luminance of a color.
To activate the tool, select the slider that you want to change then click on the small circle icon right next to it.
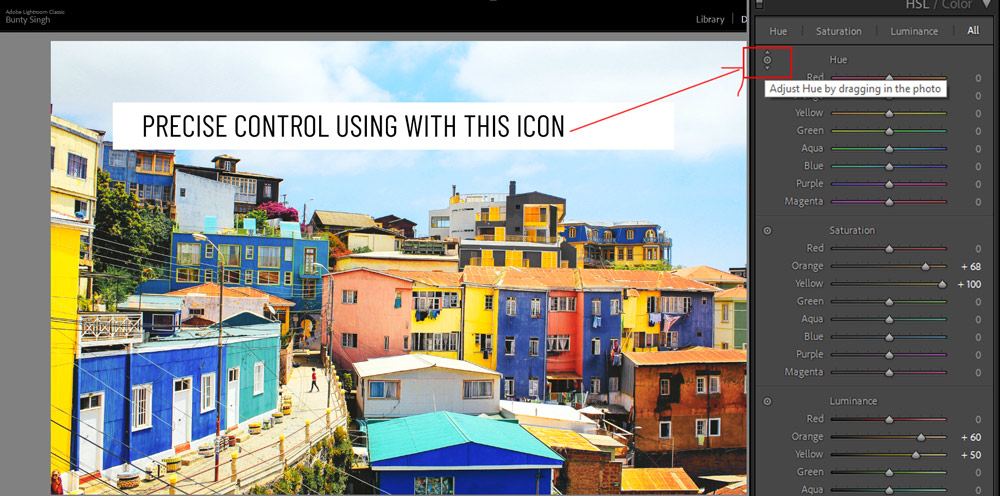
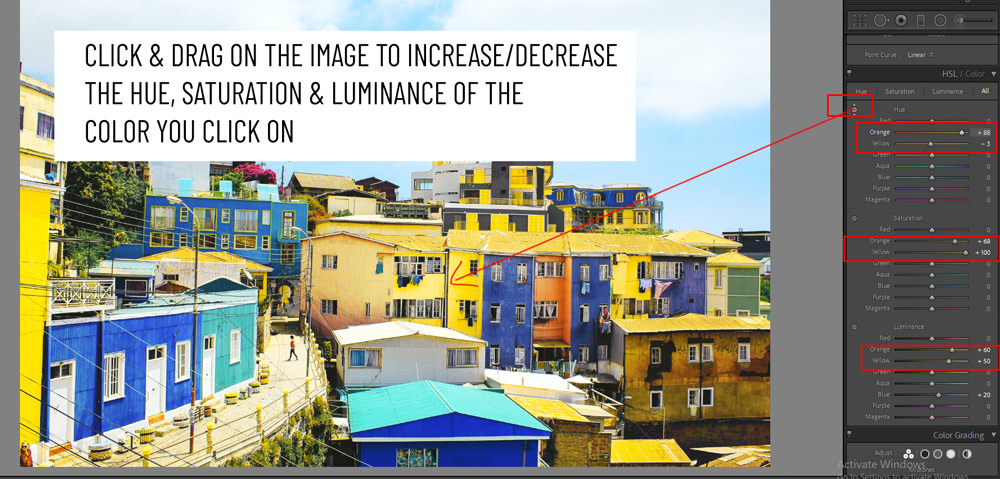
Your mouse icon will change into a small circle with up and down arrows, click-and-drag on the image to increase the Hue, Saturation & Luminance of a color.
As you can see, I have changed the hue of orange & yellow and Lightroom has automatically changed their values.
When you drag the mouse up increases the slider values and dragging it down decreases the slider values.
You can use this targeted adjustment tool when you couldn’t tell a color in your image. This will help you precisely control any color of a photo.
The flexibility to attack a single color and leaving others intact is amazing that this tool provides. It is very useful when you want to target a color without touching others.
For example: let’s say want to make orange pop in your photo but you don’t want to touch yellow or green or any other color then this tool can help you out by selectively targeting orange.
I hope this tutorial will help you in your photo editing. If you have questions, comment below.
Need Help With Photoshop or Looking for Professional Support?
Whether you're just getting started with Photoshop or need expert-level assistance, we're here to help! Contact us for personalized Photoshop tutorials, project support, or creative services.
Get in touch today to take your skills or projects to the next level.
CONTACT US NOW📘 Want to Master Photoshop Faster?
🎁 Get Your FREE PDF E-Book "Top 10 Photoshop Tricks Every Designer Must Know" Now – Packed with expert tips, shortcuts, and techniques to boost your creativity & workflow.
👉 Download Your FREE PDF E-Book NOW!