
Whether you are adding colors or alternating colors in your photographs it’s all part of Color Grading. Color grading is a technique that can help you add colors that you ever want to add to your images. You can inspire by reference images, movies, photographers, and nature. Color grading can be easily confused with color correction, correcting colors simply means removing a color or color cast, on the other hand, adding colors to images is color grading.
With the help of Lightroom, you can color grade your images like a pro, or even if you are just getting started the learning possibility is endless. In this beginner tutorial, I’ll show you how you can color grade images in Lightroom Classic. I’ll show you how to use The Tone Curve, HSL TAB, and the New Color Grading tab to add beautiful color toning to your images. Let’s get into it.
Step 1 – Open The Sample Image
First, download the sample image from Unsplash. Go to File > Import Photos and Videos, and import the downloaded sample image in Lightroom. You can see that I have opened the image in Lightroom below:

Step 2 – Basic Adjustments
Before you start color grading your images, it is always a good idea or step to make basic adjustments. With basic adjustments, you can always decide to put the amount the information you want in any of your images. In the sample image, the shadows are crunching but they have some info, and highlights are bright.
After analyzing the Highlights and Shadows, I can decide the amount of information I want to see in my image. For example, I dim down the highlights as I know they are bright. Similarly, I lifted shadows a bit to get more info from them. I lifted blacks and whites (I want her dress to pop a little).
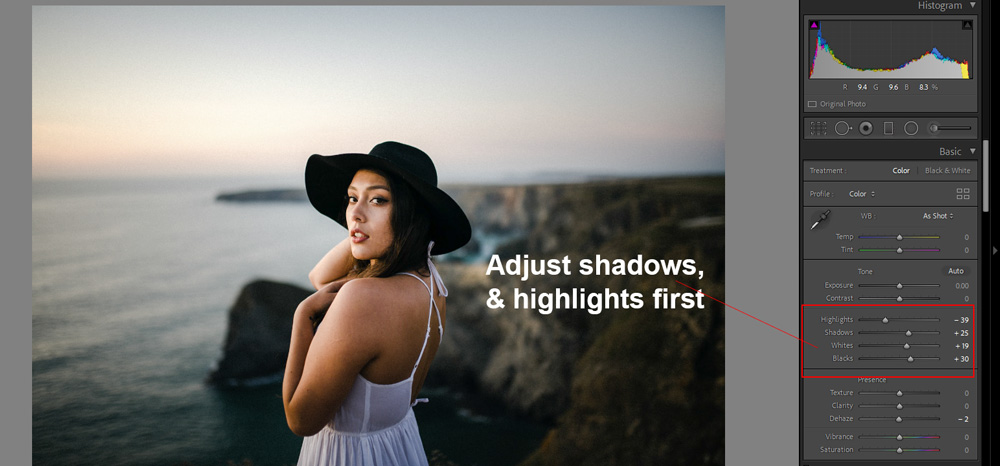
Here you can see the amount of information I have in shadows and highlights after making basic adjustments:

Step 3 – The Tone Curve
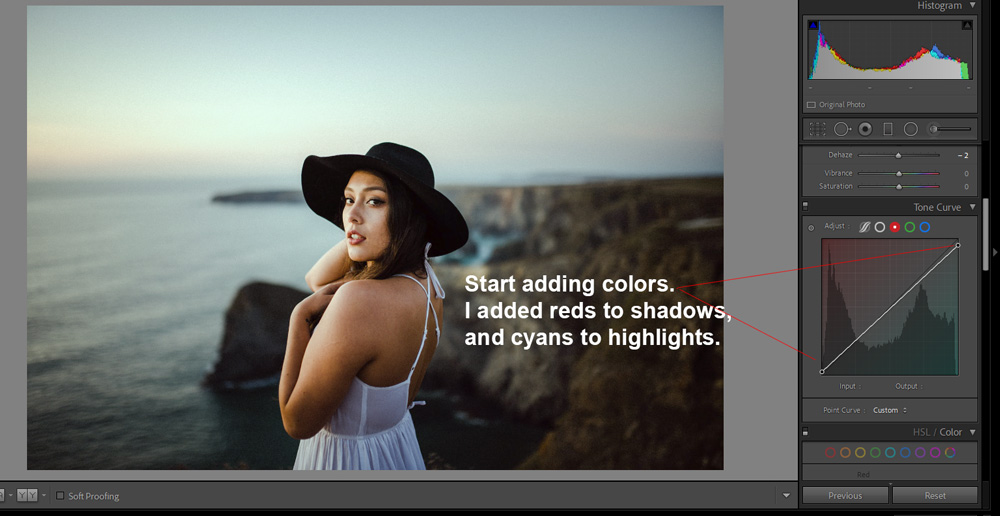
The tone curve is a powerful tool and it can do anything you can think of. Removing a color cast, color grading, uncover details, and fixing exposure you name it. I am using this tool to add colors to shadows and highlights.
To do this, go the Tone Curve Tab, and then switch to the Red Channel. Pull the shadows up to add red tones to shadows and drag the highlights down to add cyan tones to highlights.
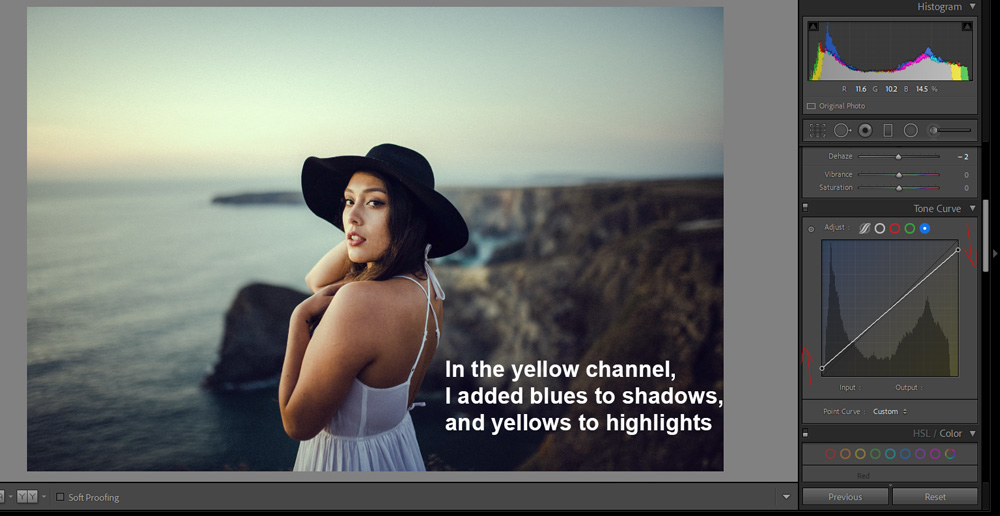
Next, I went to Blue Channel, I added blues to shadows and yellows to highlights.
Step 4 – Skin Tones
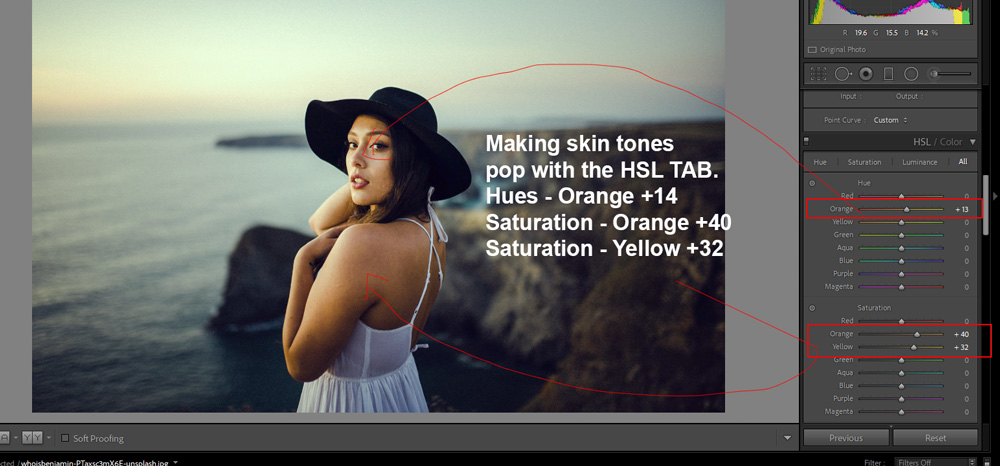
If you are working on a portrait as I am, then you must take care of skin tones. What else tool could be better than the HSL Tab for taking care of skin tones? As you can notice the color of the skin is not matching with the background (Compare it with the color of highlights in the background).
We need to change the hue and saturation a little. When it comes to skin tones, you can target them with Orange in HSL Tab. I went to the HSL tab, changed the Hues of Orange, and added more saturation as well. Also, I increased the saturation of yellow to make the color of the landscape pop a bit.
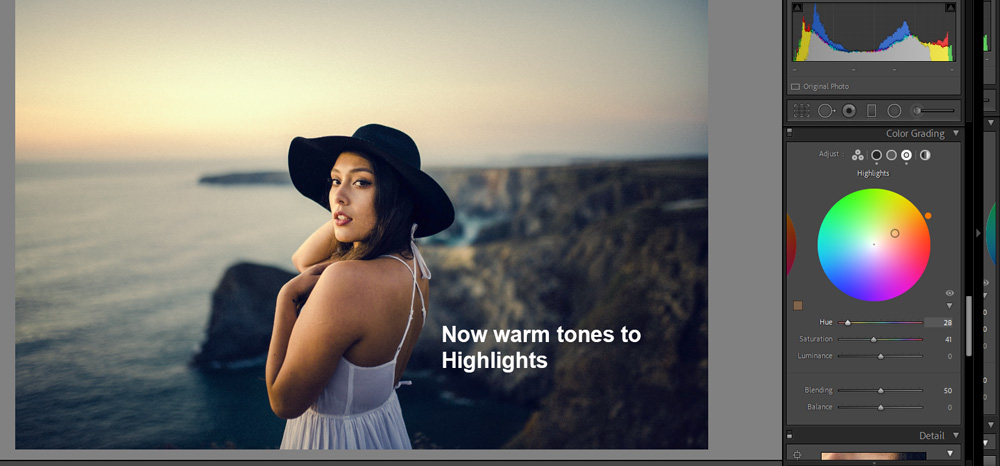
Step 5 – The Color Grading TAB
The brand new color grading tab is a powerful tool for adding colors to Shadows, Midtones, and Highlights. You can see I added cool tones to shadows.
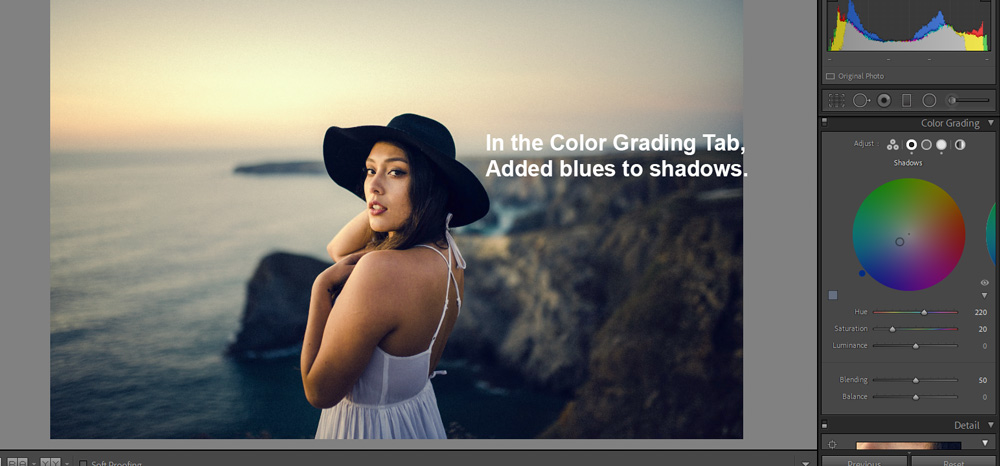
I added warm tones to highlights which I usually do.
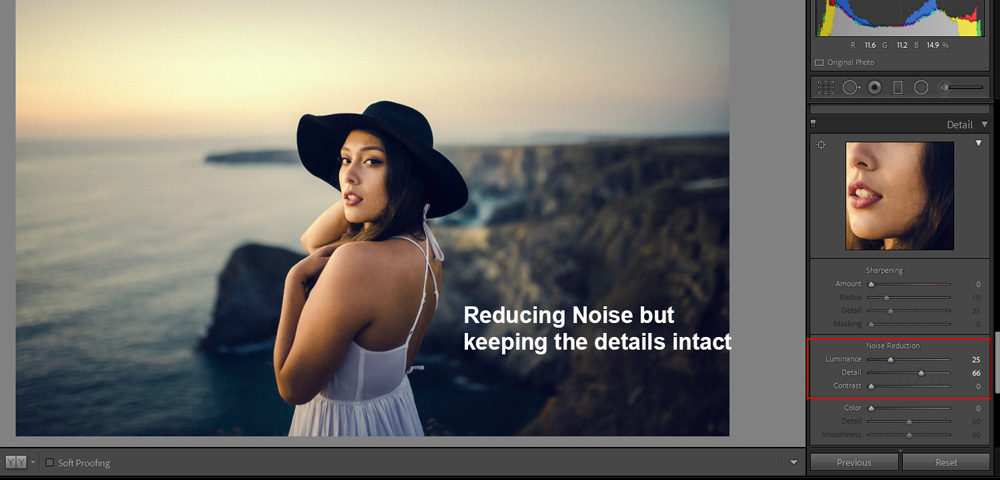
Step 6 – Details
After you have done color grading the image, now you can work on details such as sharpening, reducing noise, and popping details. I don’t need to sharpen the image here but I noticed some noise in the image. I have reduced the noise it in the Detail Tab.
I increased the Luminance value to reduce noise and I went for a higher value for Detail Slider to make sure that I don’t lose skin details as the Luminance slider blurs the image. Always go for a higher value when working with Detail than Luminance Slider.
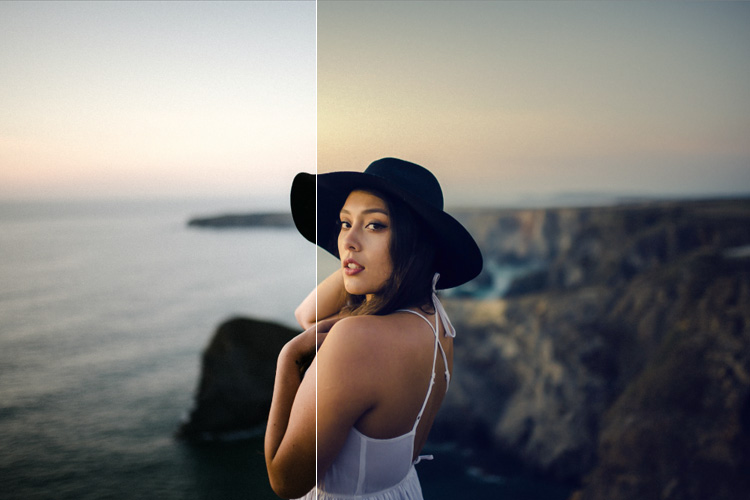
Here you can compare the before and after results:
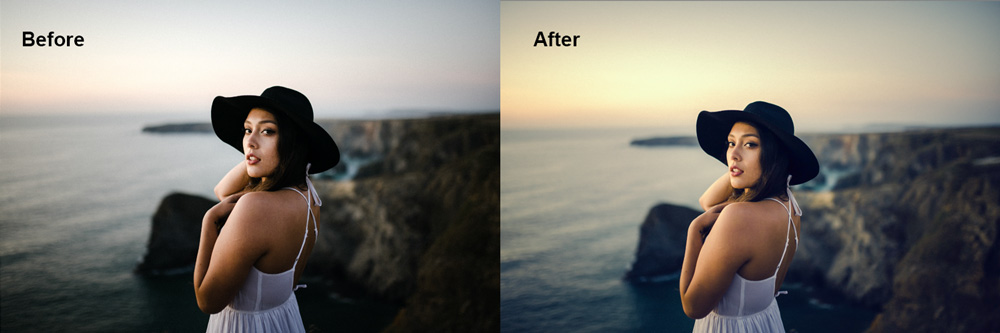
I think whites are way too much popping, you can always go back to Basic Settings and reduce the Whites slider. I hope you enjoyed the tutorial and learned something new today. If you have questions, let me know in the comments section.
Need Help With Photoshop or Looking for Professional Support?
Whether you're just getting started with Photoshop or need expert-level assistance, we're here to help! Contact us for personalized Photoshop tutorials, project support, or creative services.
Get in touch today to take your skills or projects to the next level.
CONTACT US NOW📘 Want to Master Photoshop Faster?
🎁 Get Your FREE PDF E-Book "Top 10 Photoshop Tricks Every Designer Must Know" Now – Packed with expert tips, shortcuts, and techniques to boost your creativity & workflow.
👉 Download Your FREE PDF E-Book NOW!