In this tutorial, you’ll learn how to correct color in Lightroom using auto and manual methods. I’ll show you how you can achieve a natural-looking white balance in any image. If your images are suffering from color casts, and colors are not balanced, this tutorial will help you. Let’s get started!
What is Color Correction?
Color correction is a technique to find a natural looking white balance in any photo. With color correction, we try to find the perfectly balanced values for Red, Green & Blue colors. If any of the values let’s say the value of Red is higher than the rest of the two colors in a photo, that photo requires color correction treatment.
Step 1 – Open The Sample Image
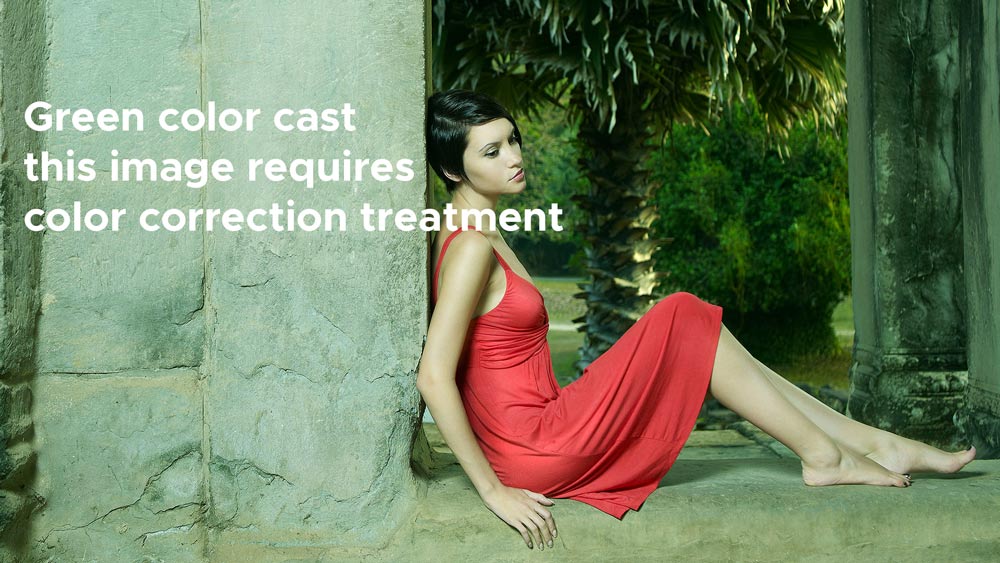
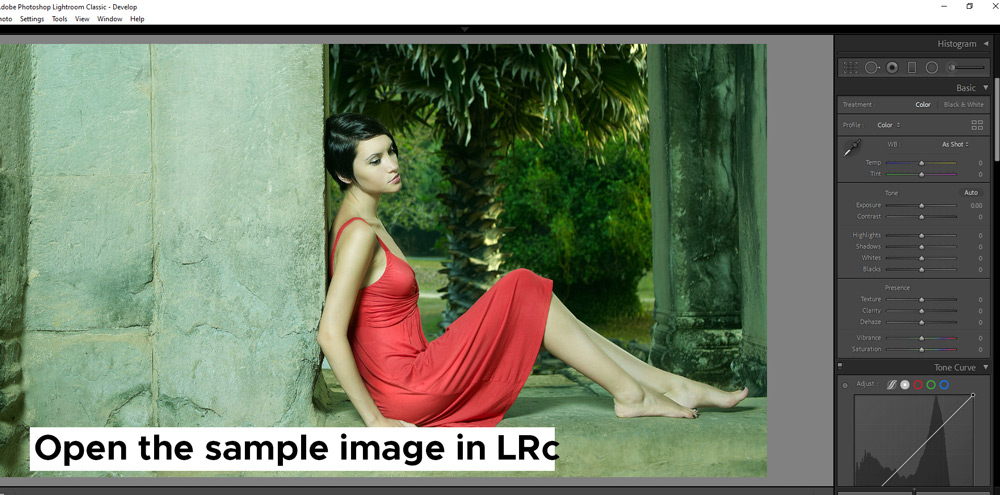
I opened the sample image in Lightroom to start correcting colors. You can go to File > Import Photos & Video and import your image for color correction.
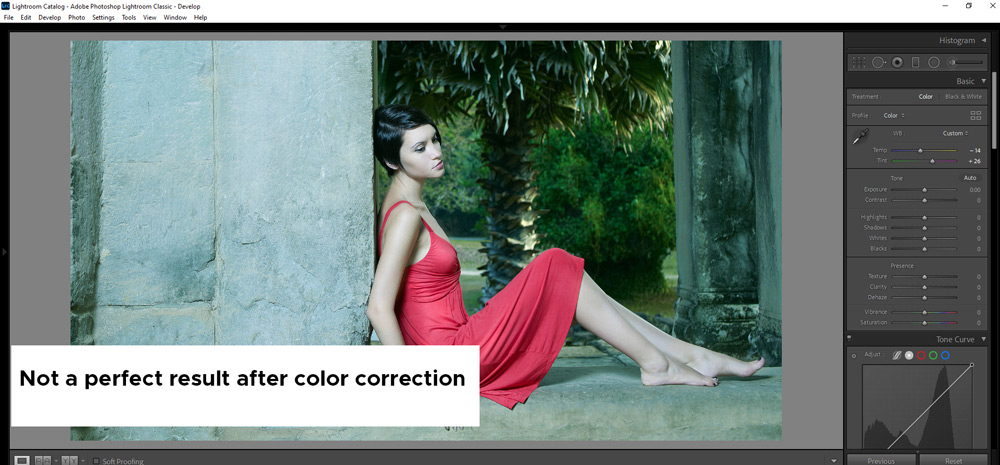
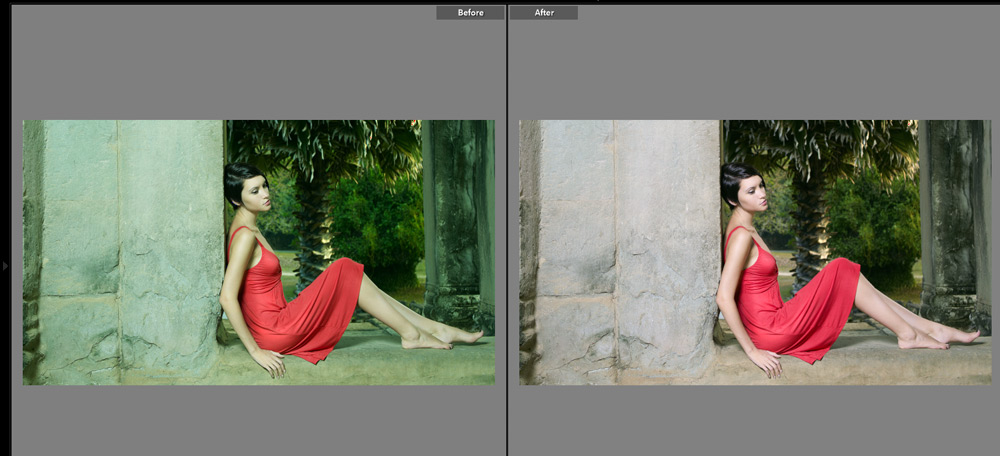
Right off the bat, you can see this image has a green color cast. It’s all over the image like a green film pasted on a photo.
We gonna remove the color cast using The Tone Curve and using the White Balance Selector W.
Step 2 – Auto Color Correction
This step is for those who want automatic color correction in Lightroom.
In any color correction, you have to select a gray point to balance all the colors in the image.
A Gray/Neutral point is where the Red, Green & Blue are same that means a point where we have no color differences.
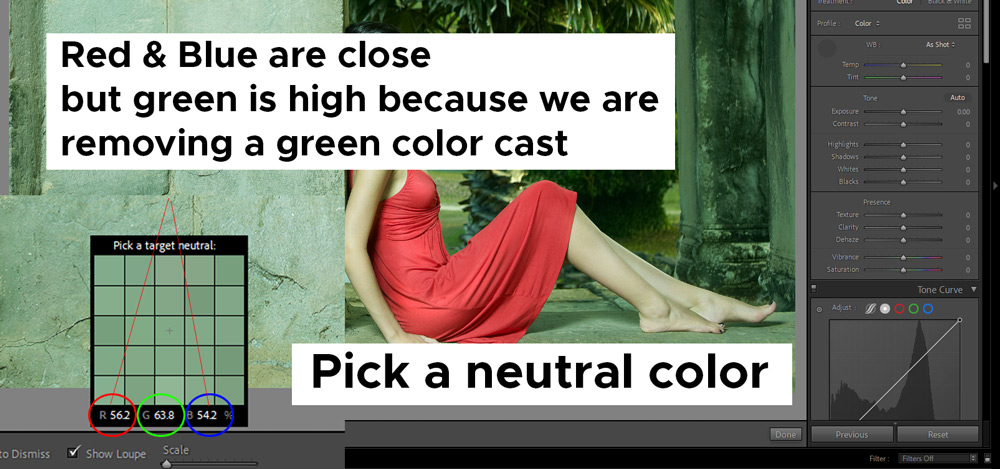
But in this image, the green color is going to be higher than any color because it’s green color cast so we gonna find a point where you see Red & Blue close to each other.
First, select the White Balance Tool in the Basic Panel:
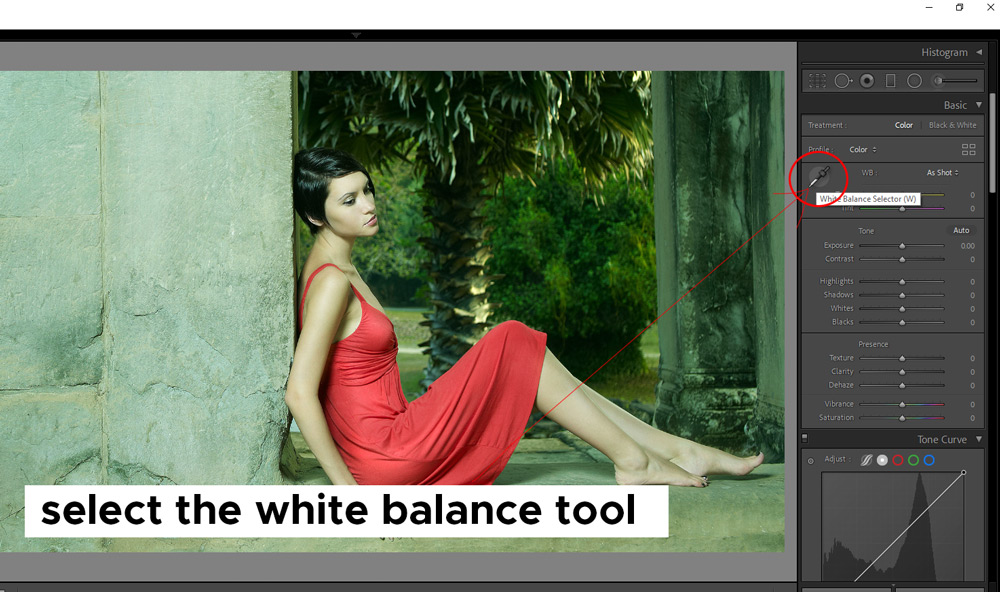
Once you have selected it, hover to a point where you see Red & Blue values are close to each other. Don’t worry about the green.
As you can see, I have found the gray point:
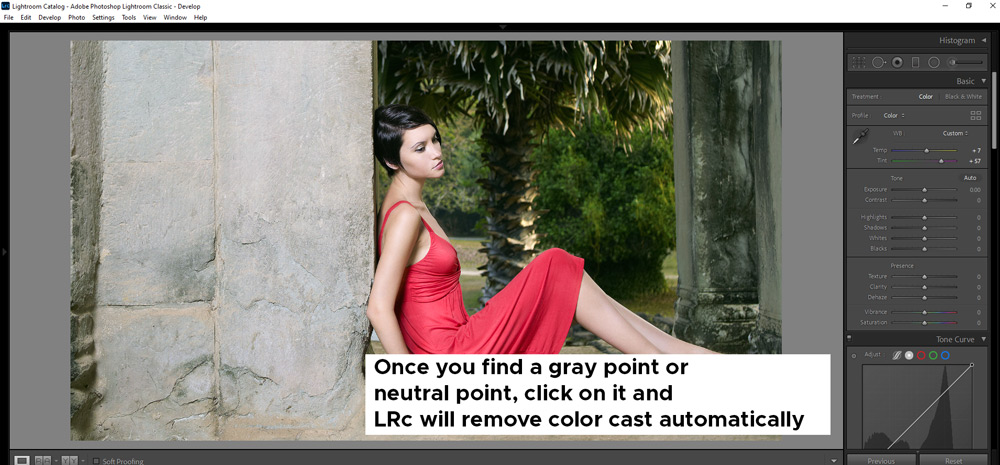
As I clicked on the gray point, you can see it has automatically removed the green color cast from my photo.
It did a pretty great job as you can see the results:
Step 3 – Incorrect Gray/Neutral Point
Let’s assume that if you have selected a gray point where Red and Blue values are not matching, then you might not get the perfect results.
In the image below, I have selected the neutral point from the skin of the model, as you can see that Red & Blue is not matching at all:
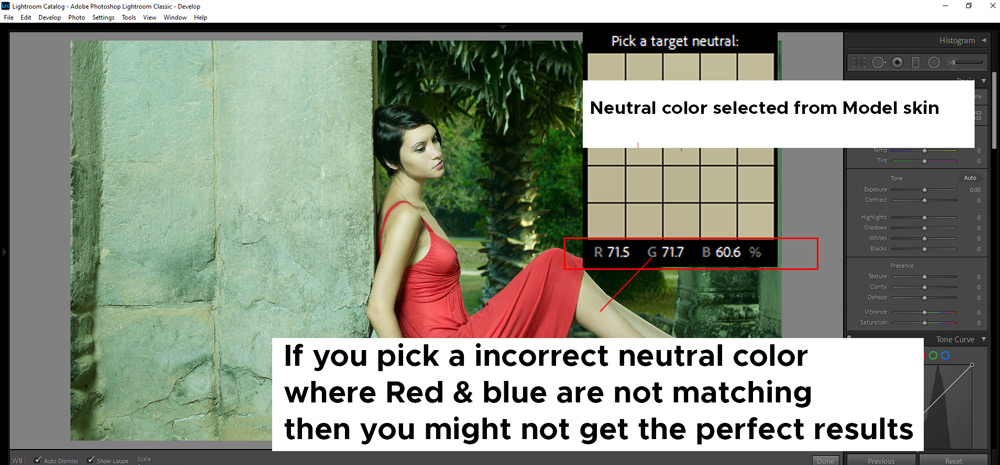
If I click here to select the gray point, you can see it is not the best result for the image.
It’s kinda added a lot more blues rather than fixing color balance in the image. Make sure you leave the color that you are trying to remove, in our case green, focus on the rest of the two colors.
This is only applicable if you can tell a color to remove from a photo. For example, looking at our image we can easily tell it’s the green color cast that we want to remove.
Step 4 – Manual Color Correction
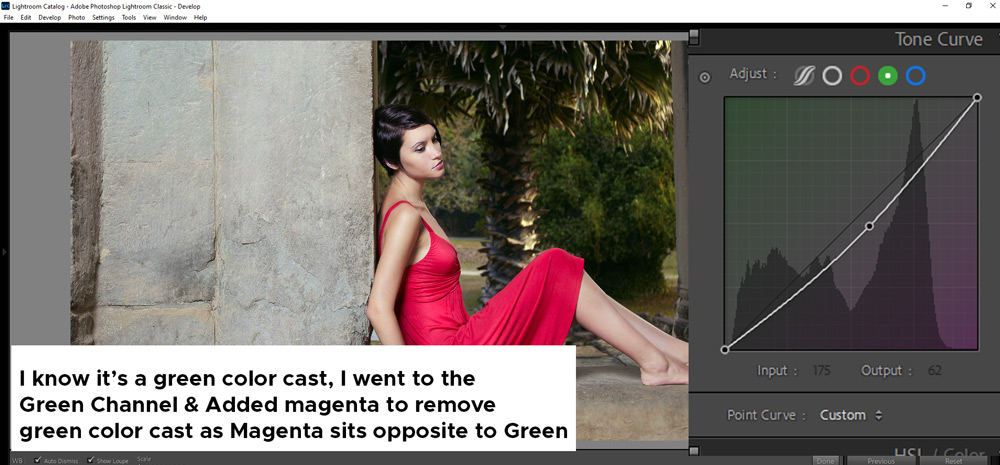
To manually remove any color cast or correct color, you need to know the color theory. The theory says in the digital world, Reds sits opposite Cyan, Blue is the opposite of Yellow and Green is the opposite of Magenta.
To remove the green color cast, we need to add magenta tones that will cancel out green tones.
To do this, go the The Tone Curve, select the Green Channel drag it down to the magenta areas to add magenta tones and cancel out the green tone in the photos.
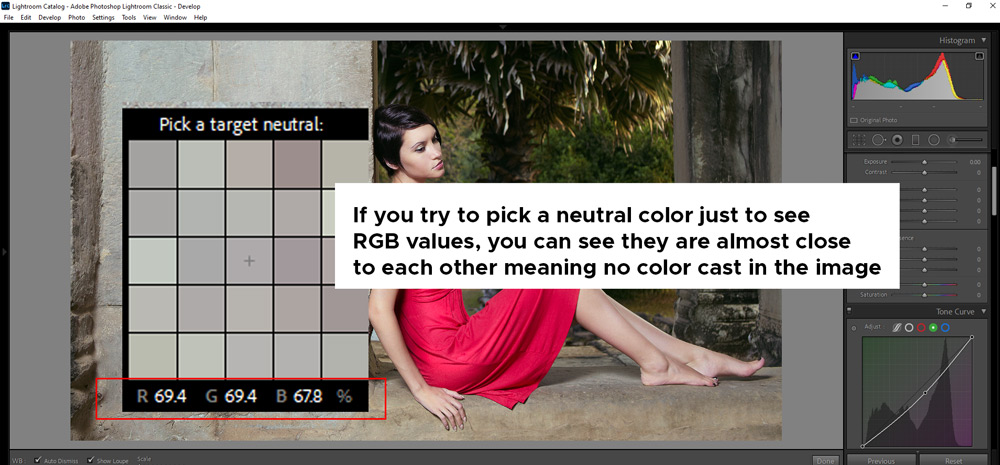
To confirm whether the RGB color values are the same throughout the image, activate the White Balance tool and hover on the image you’ll see almost the same values for all three colors in most of the parts. Of course, if you hover it over the red dress, the reds are going to be higher.
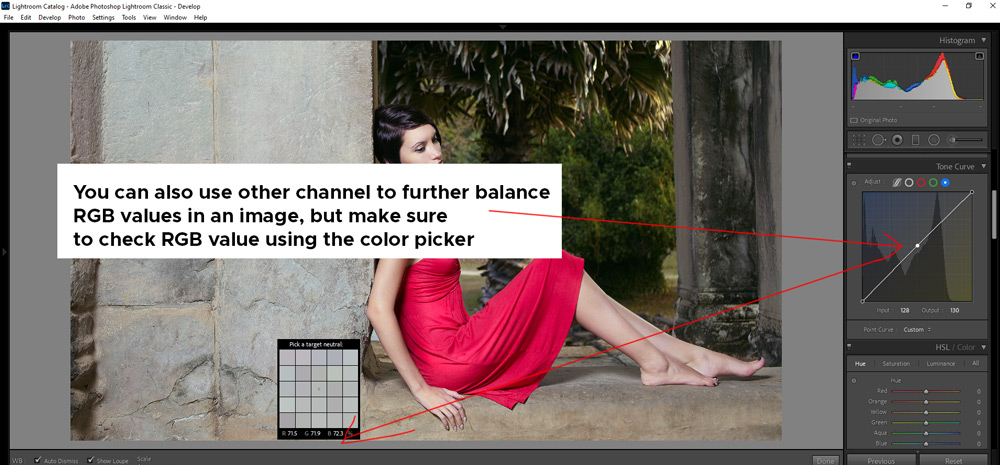
You can also choose other channels such as Blue to find a perfect-looking color balance. Just make sure to check the RGB values using the White Balance Tool.
Here you can see the before/after results:
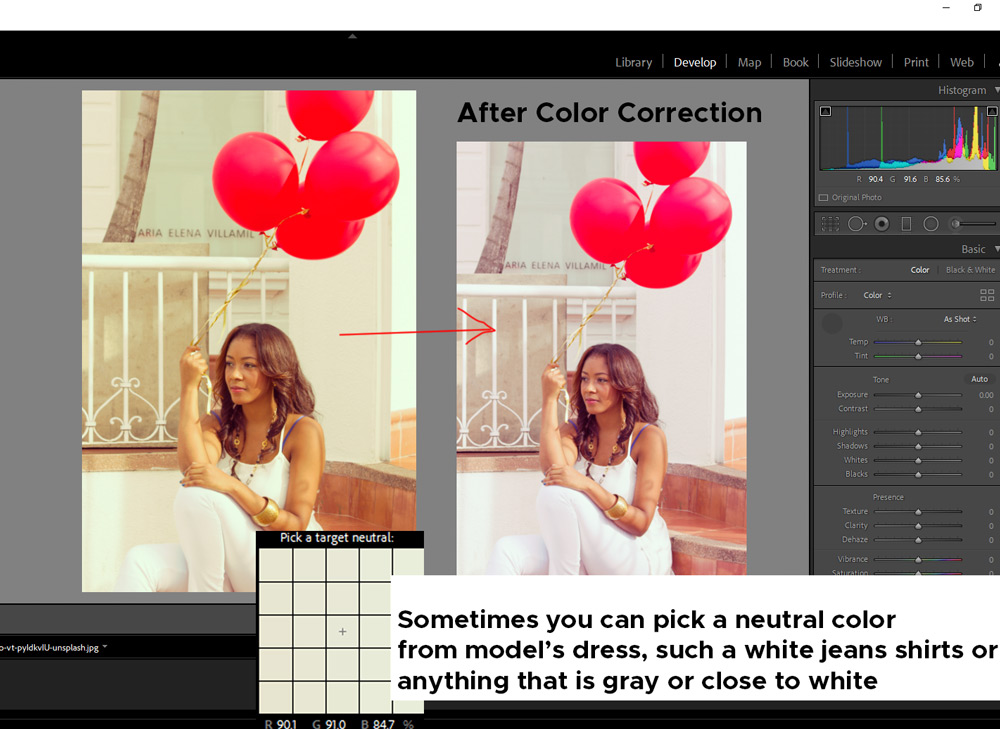
Step 5 – Accurate Neutral Point
Sometimes it is very easy to find a neutral point to correct color, for example in the image below you can see the model is wearing white jeans and this is perfect for selecting a gray point. We all know that RGB values are going to be the same in white color. When you see a model wearing a white shirt, jeans or dress or you see an object is white in your photo, you can select an accurate gray point from there.
I selected the White Balance tool, then I clicked on her jean, and right off the bat the color is automatically corrected by Lightroom.
I hope you enjoyed the tutorial. Try to find a gray/neutral point in your photo that will help you correct color in any photo. If you have questions, please leave a comment below.
Need Help With Photoshop or Looking for Professional Support?
Whether you're just getting started with Photoshop or need expert-level assistance, we're here to help! Contact us for personalized Photoshop tutorials, project support, or creative services.
Get in touch today to take your skills or projects to the next level.
CONTACT US NOW📘 Want to Master Photoshop Faster?
🎁 Get Your FREE PDF E-Book "Top 10 Photoshop Tricks Every Designer Must Know" Now – Packed with expert tips, shortcuts, and techniques to boost your creativity & workflow.
👉 Download Your FREE PDF E-Book NOW!