

In this tutorial, you’ll learn how to use the Pen tool in Photoshop. It’s one of the best tools to create precise selection especially when your subject has hard edges. The Pen Tool has many features and used to create the selection, paths and fill the selection.
You’ll learn all the basics from creating an anchor point to completing a path. Let’s get started!
Pen Tool Basics
Selecting Pen Tool
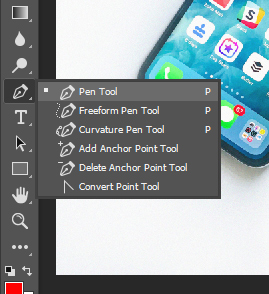
You can select the Pen Tool from the Tool Panel and you can also press (P) to activate it.
Creating a Simple Path
Once you selected the Pen Tool it’s time get into some basics.
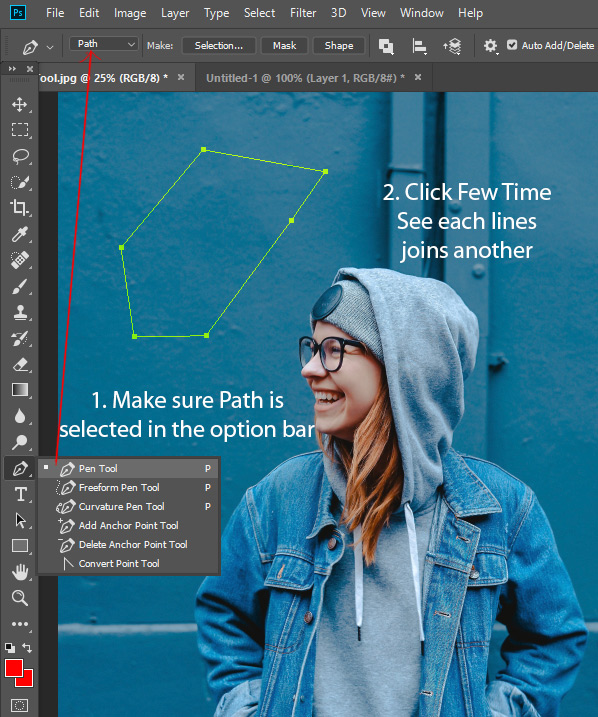
1. Whenever you use the Pen Tool, always make sure Path is selected in the option bars.
2. Now click on the image a few times to create a path made of straight lines as I did in the above image. You can notice as you click each line joins the another to form the path. This is a very basic straight line path that you created.
3. The last anchor point you add always appears as a solid square, indicating that it is selected. Previously defined anchor points become hollow, and deselected, as you add more anchor points.
Creating a Curved Path
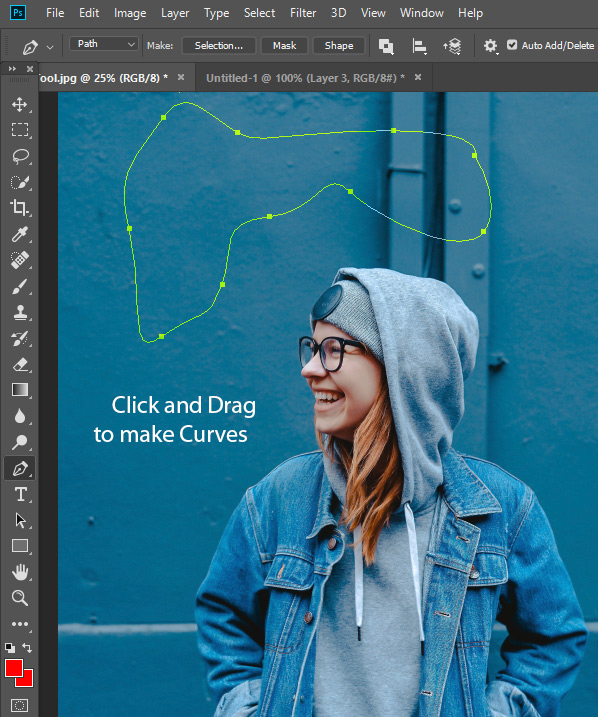
In order to create a Curved path just click and drag in or out to create a curved path.
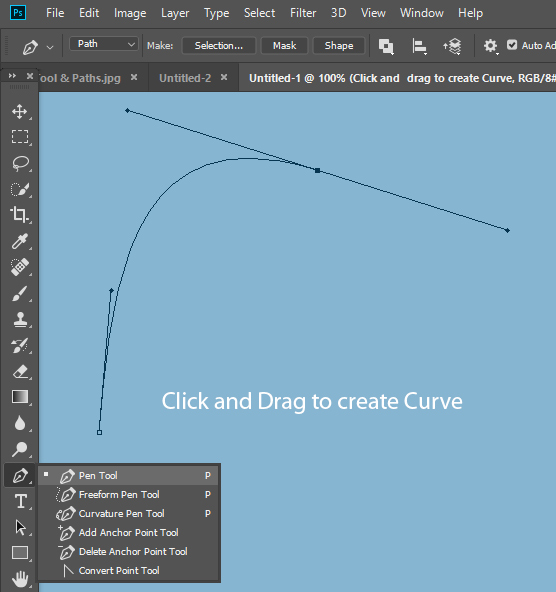
Keep clicking to add new anchor points and dragging from different locations to make a smooth Curve.
Here you can see the Curved path that I created:
Change the Direction
You can change the path direction using the Control Arms.
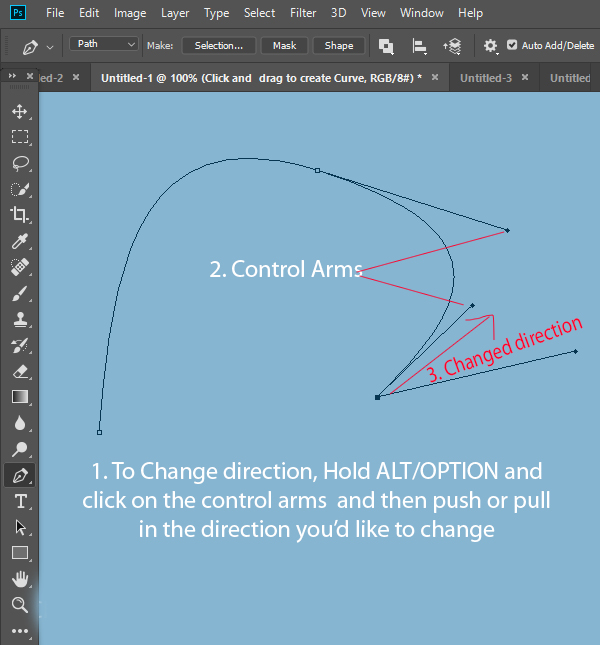
1. To Change direction, Hold ALT/OPTION and click on the control arms and then push or pull in the direction you’d like to change.
2. You can see the Control Arms. Hold ALT/OPTION and click-drag to change the direction of any anchor point.
3. See I’ve changed the direction of the path.
Adding and Deleting Points
If you want to add more points or maybe you want to delete the anchor points, it is possible and very easy-peasy.

1. To add a point, hover the Mouse over the path and Pen Tool will have a tiny (+) sign.
2. Now Click to add an anchor point.
3. To delete an anchor point, hover to that point and cursor will turn into (-) sign. Click on the point which you’d like to delete.
Changing the Pen Path

You can change the pen path at any time by Holding Down CTRL/CMD and then click-drag at any point to change the path.
Turning Path into Selection

To create the selection from the path, you first need to complete the path. To do so, once you’ve done creating the path position pen tool over the first anchor point and a small circle appears next to the Pen tool pointer when it is positioned correctly. Click or drag to close the path..
Here you can see a complete or closed path in below image.

Now right-click on the image and then choose Make Selection.
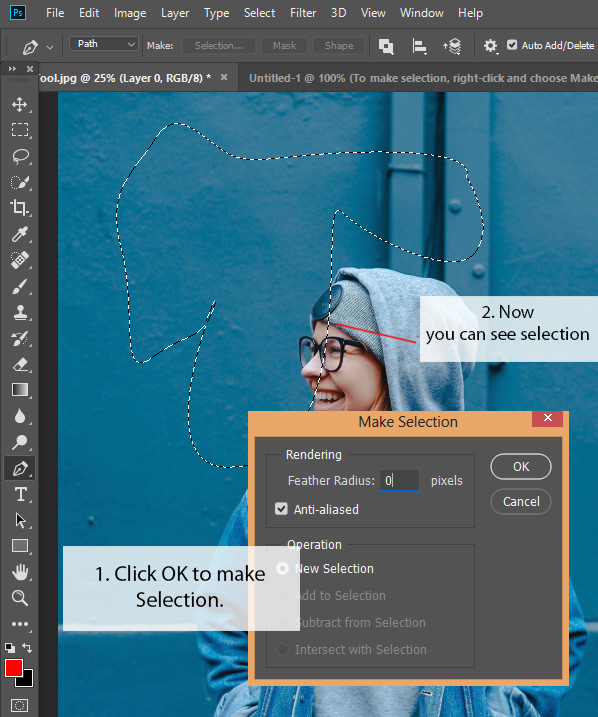
1. Now Make Selection Dialog Box will appear. You can enter Feather Value if you want to soften the edges of the selection but we are not getting into this. Just leave it to 0.
2. Now click OK to make a selection. You can see the marching ants are now activated indicating you’ve created the selection.
Making Selection with Pen Tool
Tracing the Subject
So now you know the basics of Pen Tool and let’s trace the subject and make a selection of the iPhone.
Here is the image I’m using to create a path, it’s a mobile phone.

I Zoomed in using the Zoom Tool (Z), you can do so by activating it (Press Z to activate Zoom Tool) and click on the image to zoom.
Activate the Pen Tool (P) make Path is Selected on the Options Bar.
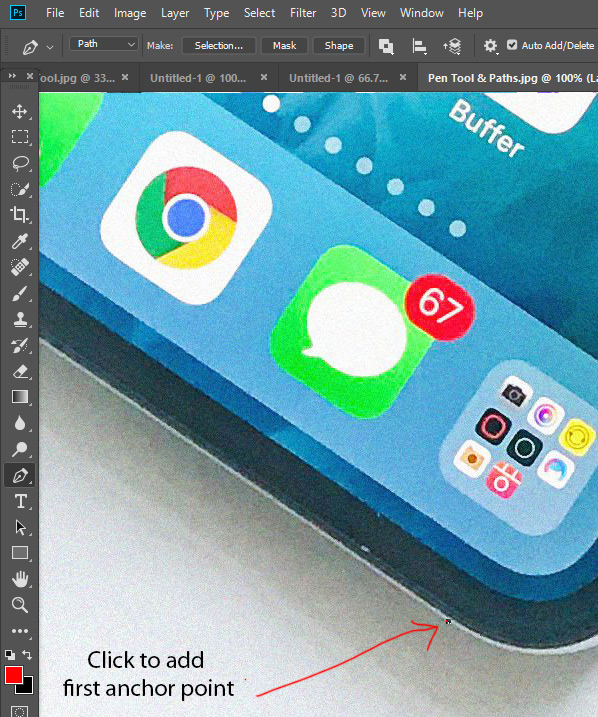
Now click to add the first anchor point (don’t drag) as I did below.
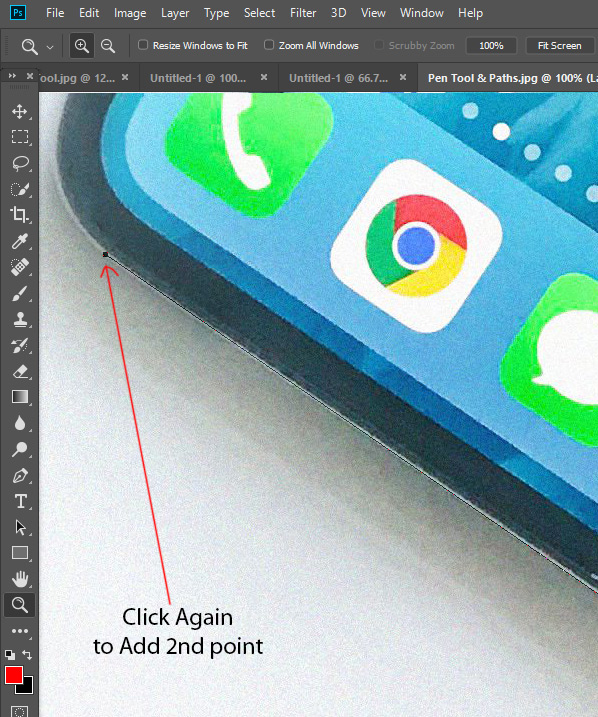
Click again to add the second point and you can see we’ve made a straight path line.
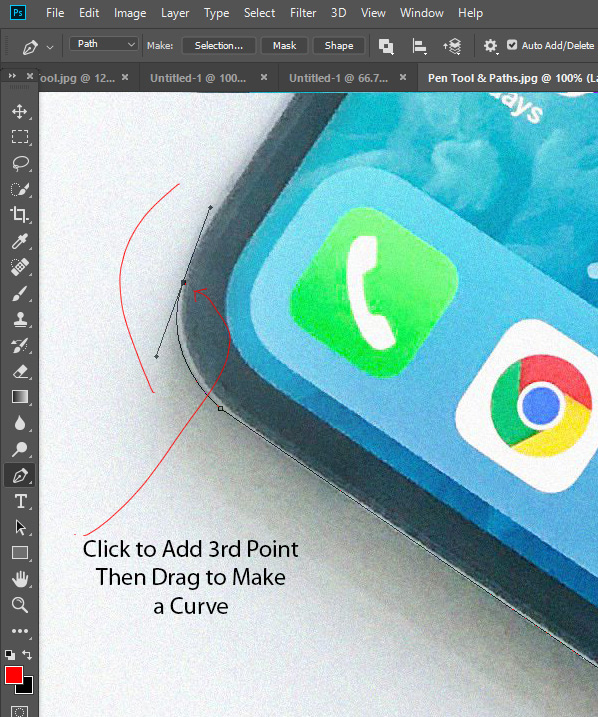
Now we’ve come close to the edge of the phone and you know it has curve shape. So we need to create a curve here.
To do so, click and drag to create the curve to trace the edges of the phone. Drag to set the slope of the curve segment you’re creating, and then release the mouse button.
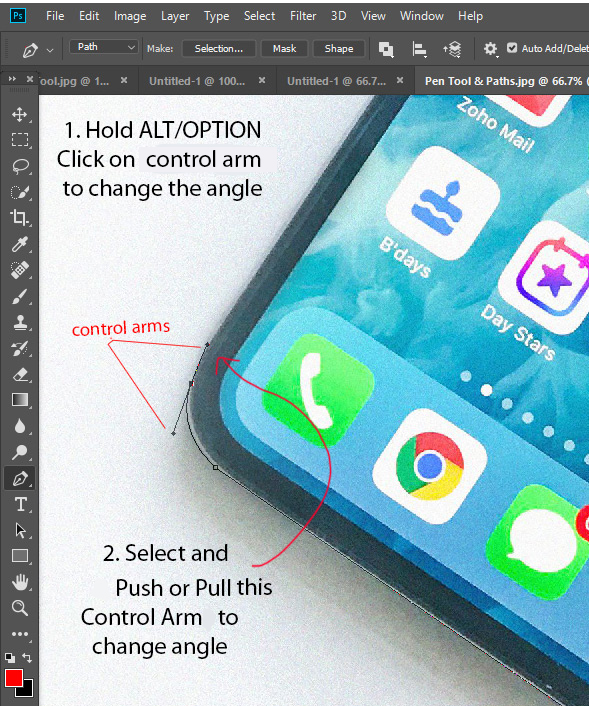
I want to slightly change the direction of the path by using one of the control arms.
I hold down ALT/OPTION and I clicked-drag the second control arm to change the direction of the path.
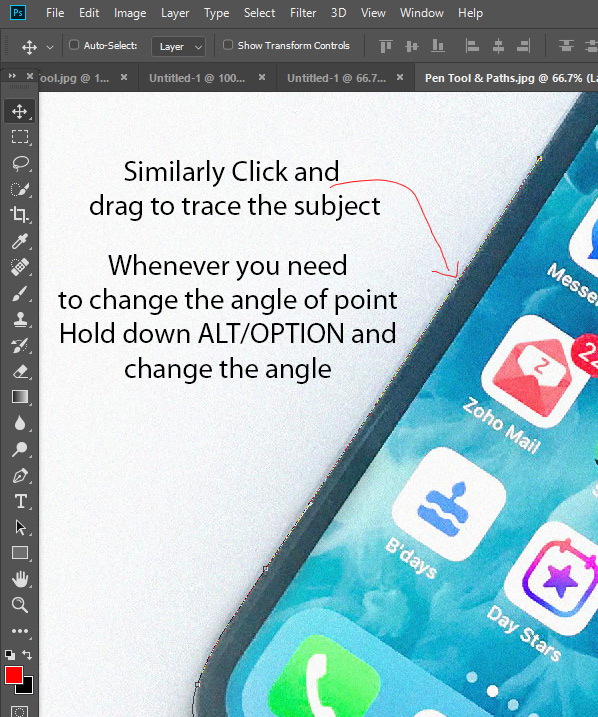
Similarly continue tracing the subject by adding a new anchor point, making the curve and whenever you need to change direction HOLD ALT/OPTION and click-drag on control arm to change the direction.
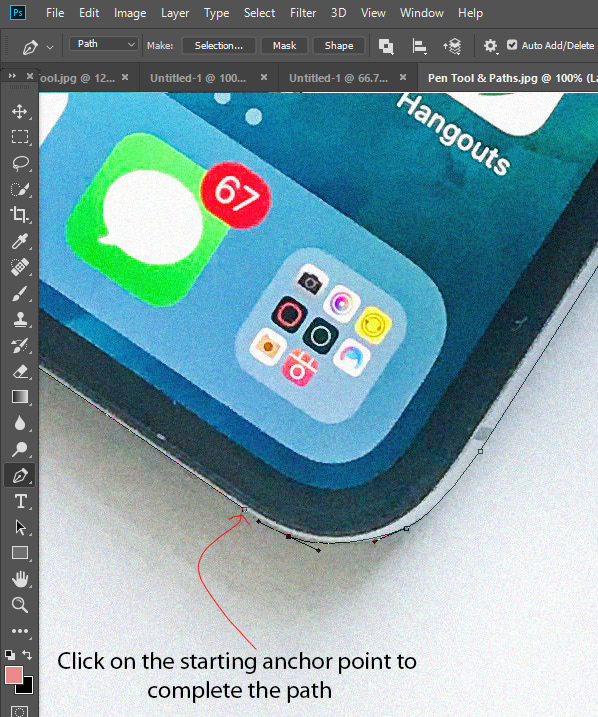
Once you are done with tracing, complete the path by clicking on the starting point.
Convert the Path into Selection
Make the selection by right-clicking on it and choose Make Selection.

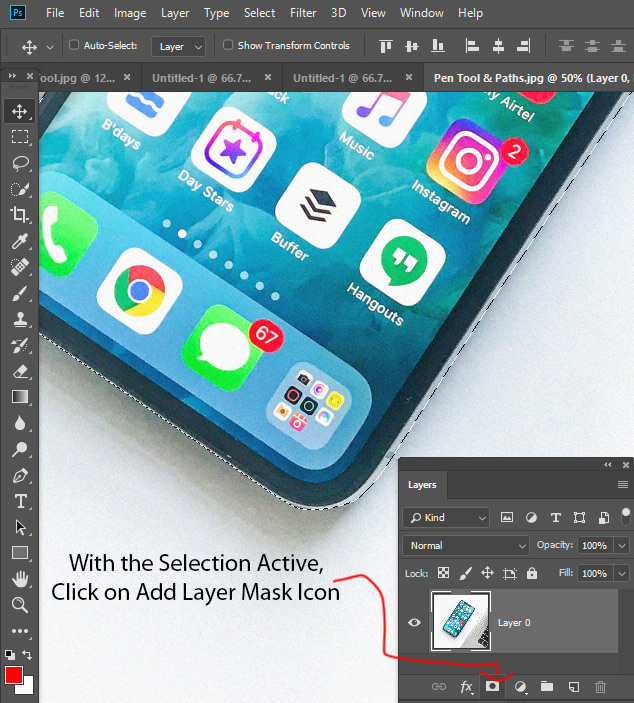
Add a Mask to Extract the Background
At the bottom of the Layer panel, click on Add Layer Mask Icon to add a mask and to remove the background.
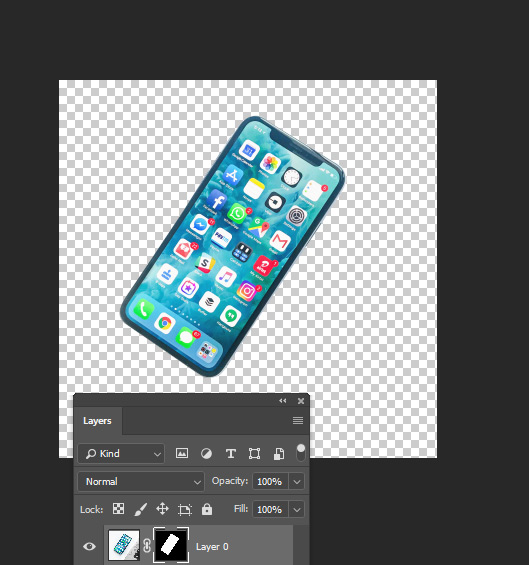
Here you can see the selection and we have extracted the phone from the background. Now you can add any background behind it just put an image underneath the phone layer.
Bonus Tip
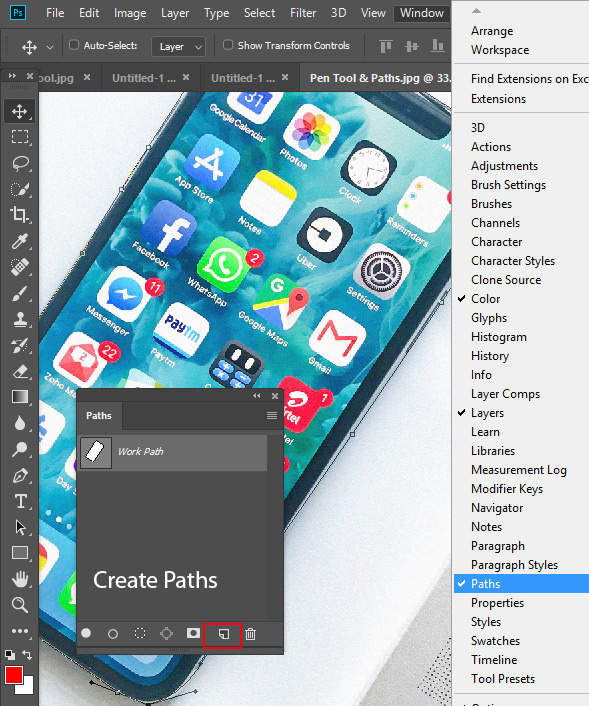
If you are wondering where these paths are stored, you can go to Window > Paths to access the Path Tab.
You can also create many paths you want by clicking the Create Paths Button.
Congratulation, Now you can Master Pen Tool!
Need Help With Photoshop or Looking for Professional Support?
Whether you're just getting started with Photoshop or need expert-level assistance, we're here to help! Contact us for personalized Photoshop tutorials, project support, or creative services.
Get in touch today to take your skills or projects to the next level.
CONTACT US NOW📘 Want to Master Photoshop Faster?
🎁 Get Your FREE PDF E-Book "Top 10 Photoshop Tricks Every Designer Must Know" Now – Packed with expert tips, shortcuts, and techniques to boost your creativity & workflow.
👉 Download Your FREE PDF E-Book NOW!