
In this tutorial, you’ll be introduced to the Photoshop interface. You’ll get to know about Photoshop work area, how to open and save images, undo a mistake, options bar, menu bar, zooming and panning, and all the basic stuff to keep you going.
Open Images and Create Documents
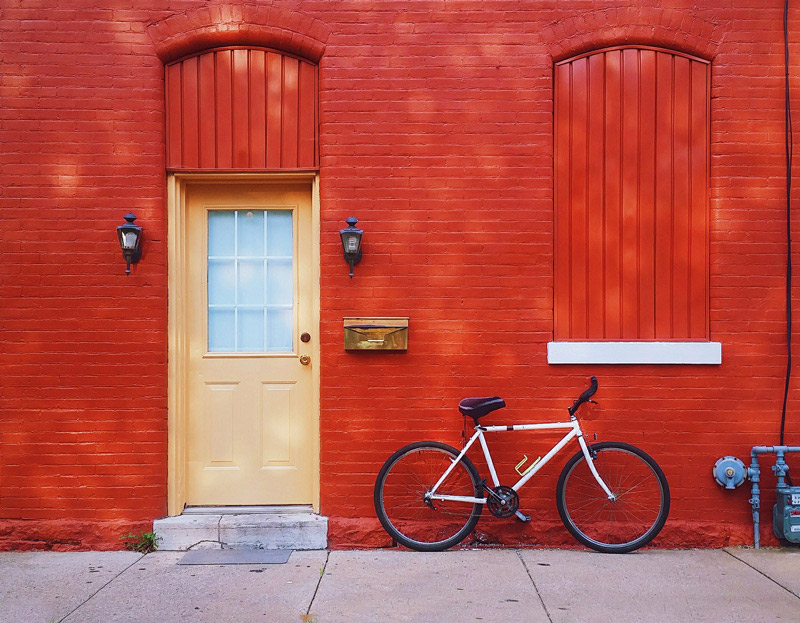
When you open Photoshop for the first time, your screen will resemble the below image.
1. Click on the Create New Button to create the document of your choice.
2. You can open an existing file by clicking on the Open Button.
How to Open Images
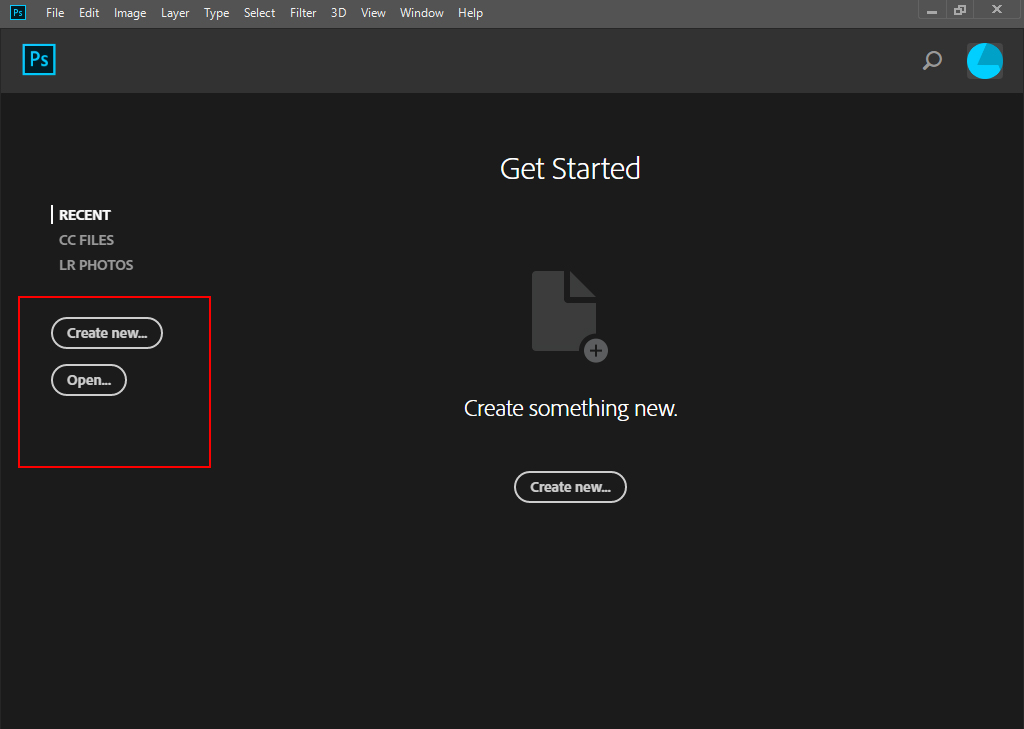
1. You can do the same in the Menu Bar, go there and Go to File > Open to open an existing image. A file explorer will open asking you to select images to open.
2. You can also create a new document, in the Menu bar, select File > New to create a new document. You can either select from default template or enter your own values to create an document.
Document Window
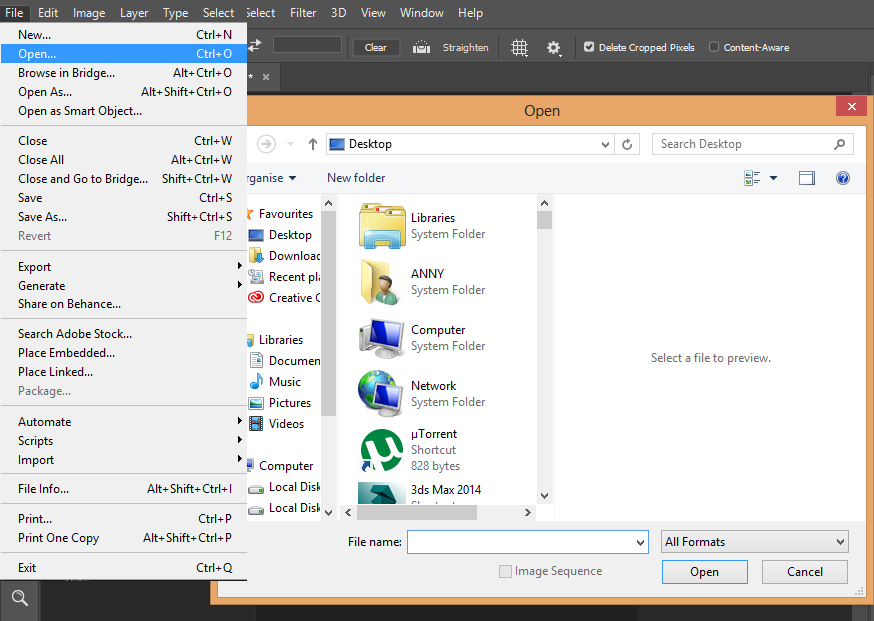
I opened two images in Photoshop by selecting File > Open then I selected two images.
This is the Document Window in Photoshop shows you how many images you’ve opened or you are working on!
1. When you open images in Photoshop, you’ll find a Tab about each opened images which is highlighted in the image.
2. A Tab gives you information about the image like name, color profile, and etc..
3. If you want to see another image that you opened in Photoshop, you can click on the tab of that image that you want to open. In my case, I can click on the left tab to see the second image.
Create a New Document
You can create a new document by selecting File > New and that will bring you this New Document Window which you can see below:
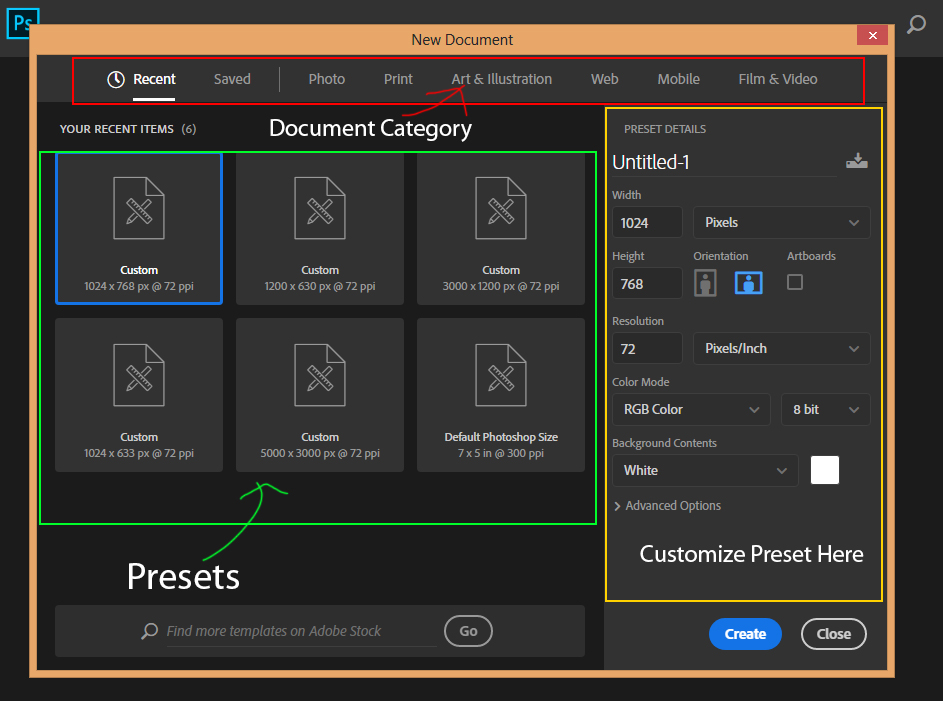
Photoshop has a lot of default presets to choose from. It has categories, presets sizes and you can even customize the presets by entering your own value.
1. In Red, you can see the Categories of the Document choose the one that you prefer.
2. In Green, you can see the Default Preset Sizes, after choosing category, pick the preset size.
3. In Yellow, you can customize the presets by entering your own values in the Width and Height field.
4. You can click on Create Button to create a new document from scratch.
Photoshop Work Area
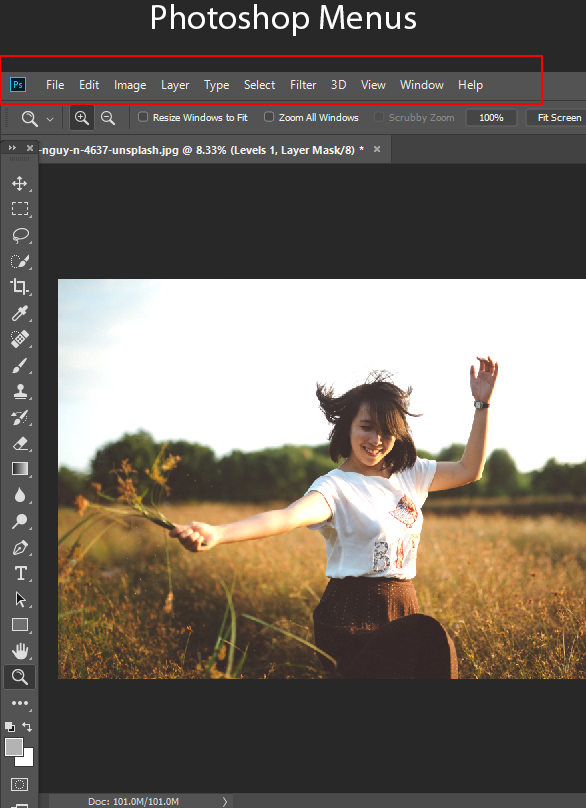
Menus
At the very top of your screen, you can see Menus. These have a bit of important role but you don’t need to worry about in image editing. As you make your way up towards the advance tutorials you’ll learn about these with yourself.
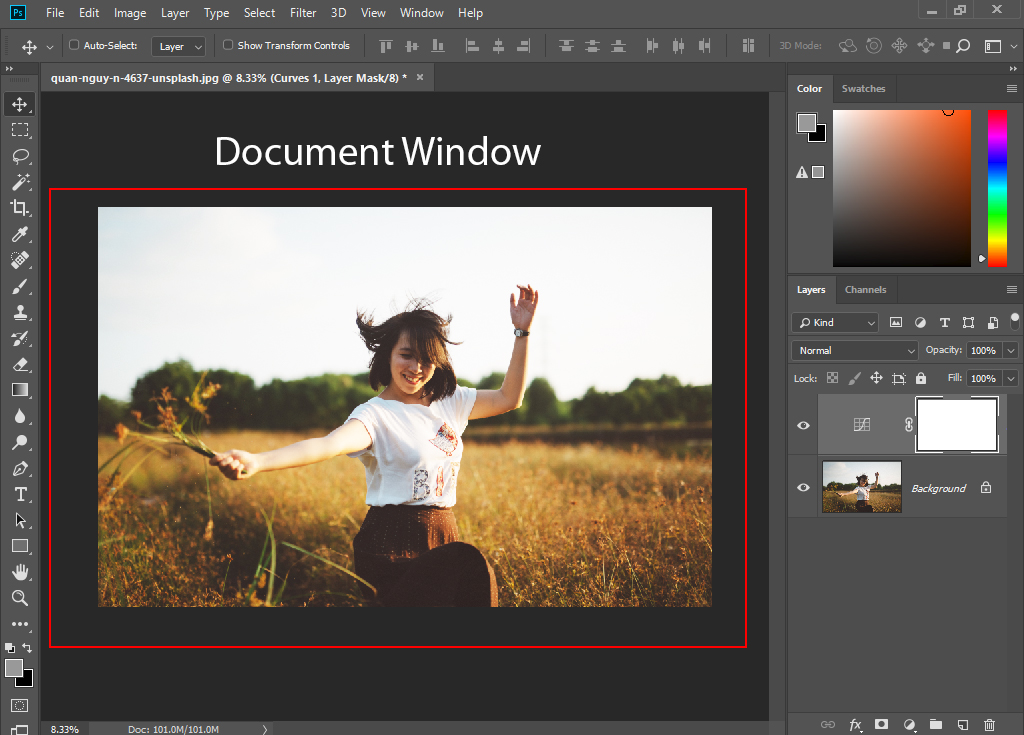
Document Window
This is your Document Window as you already familiar with. There is where you work on the images, art, design, and magic art!
Panels on the Right
Over at the right of the document window, you’ll find Panels. These Panels has a variety of controls to edit images.

1. Panels included Color, Swatches, Layers and other panels with a variety of controls to work and edit on an image.
2. You can switch between Panels Group by clicking on the Panel TAB.
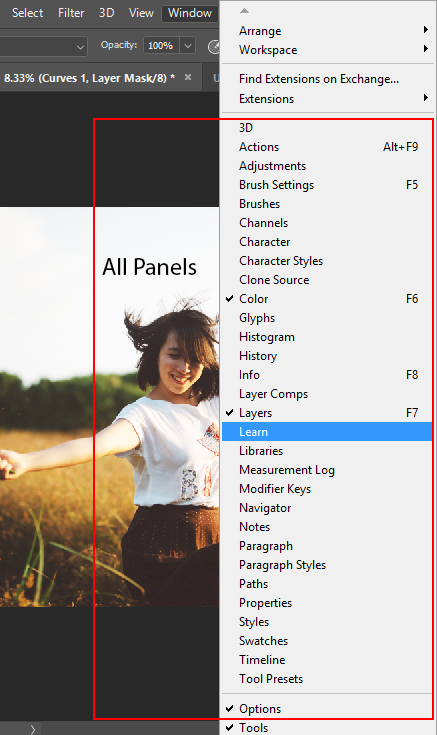
3. You can find the full list of Panels under Window Menu. Go to Window to see all the panels.
4. If you want to make a panel visible, go to Window Menu and select the panel that you’d like to see.
Tool Panel
At the left of the document window, you’ll find Tool Panel and here you can find a lot of tools and each tool has a different purpose in Photoshop.
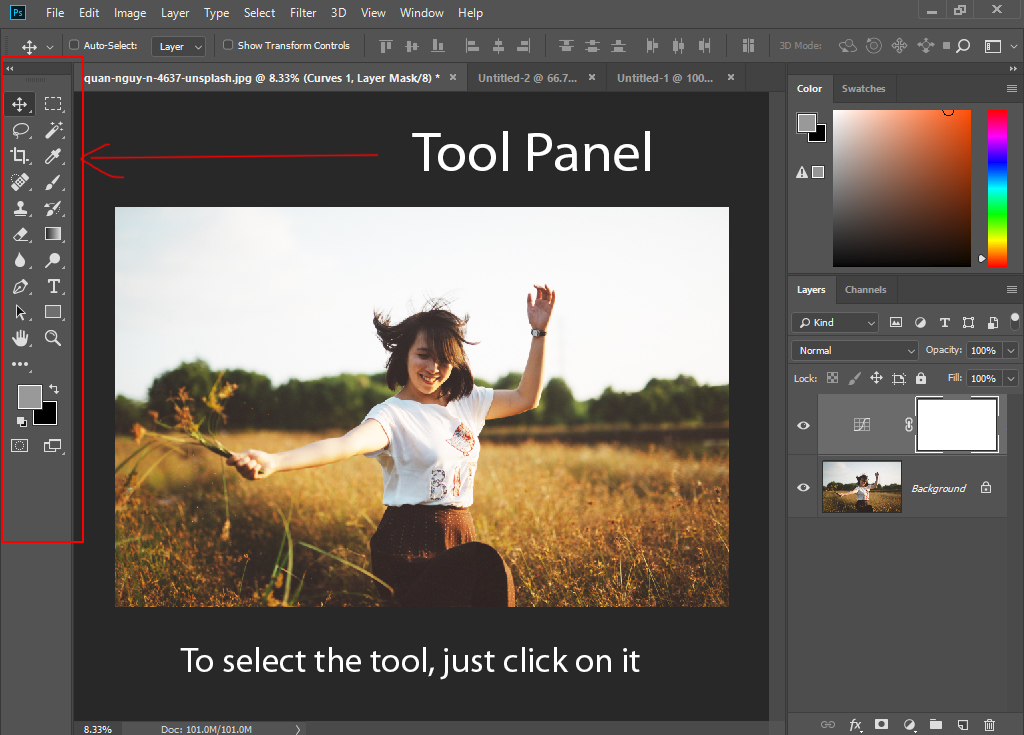
1. Hover over the icon of the tool to see the name of the tool.
2. To select a tool, just click on it.
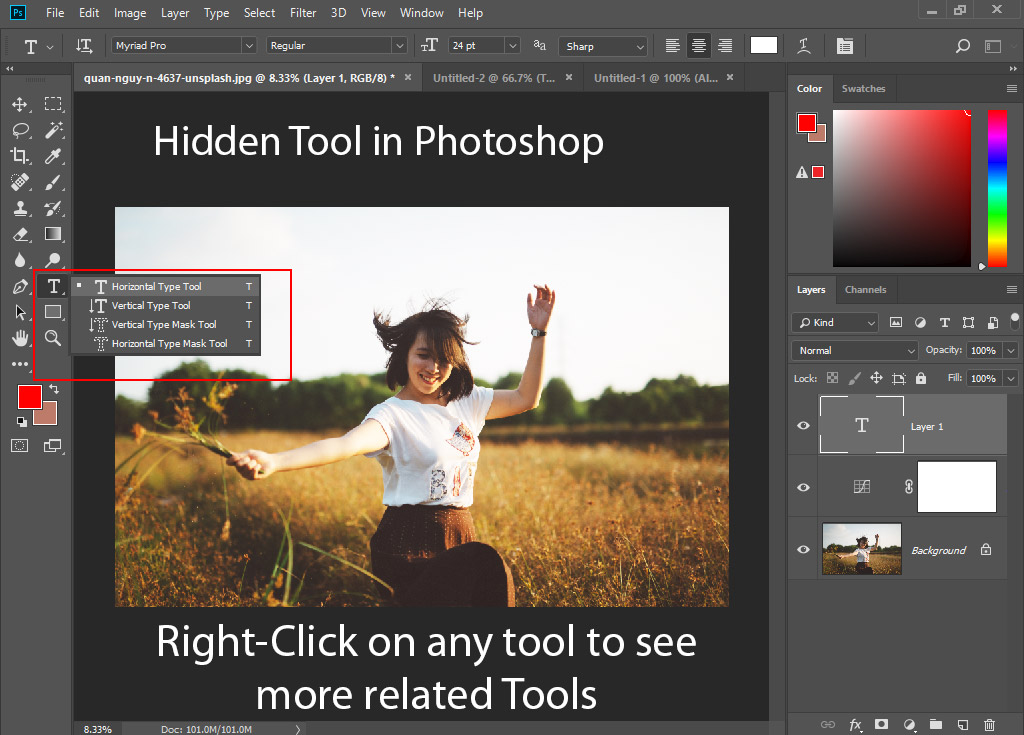
3. There are more tools than you see in Photoshop and I called them Hidden Related Tool.
4. Right-click on any tool to see more related Tools. For instance, I’ve clicked on the Type Tool and a Fly-Out menu with more related tools shows up.
Options Bar
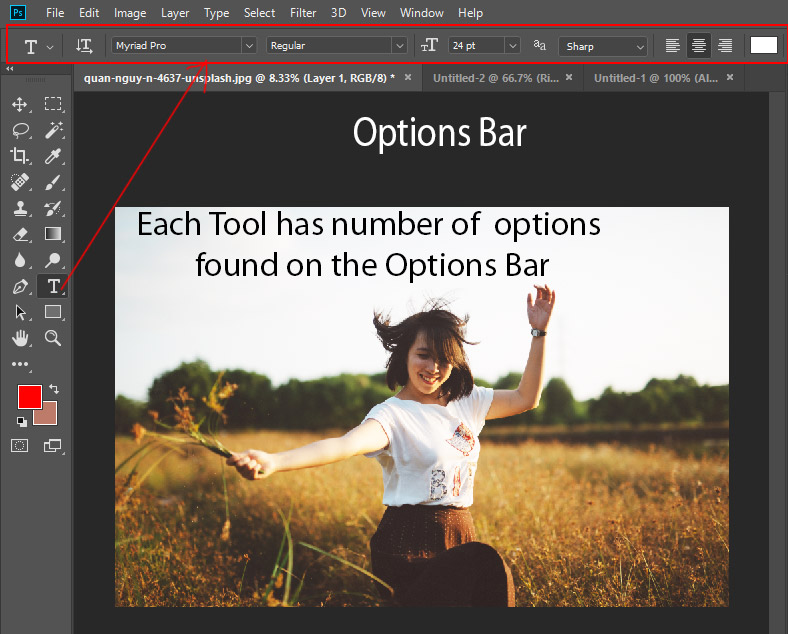
1. Each tool has numbers of options found in the Options Bar at the top of the screen.
2. It changes depending on what tool is selected. For instance, I’ve selected the Type Tool and I am seeing the options for the text.
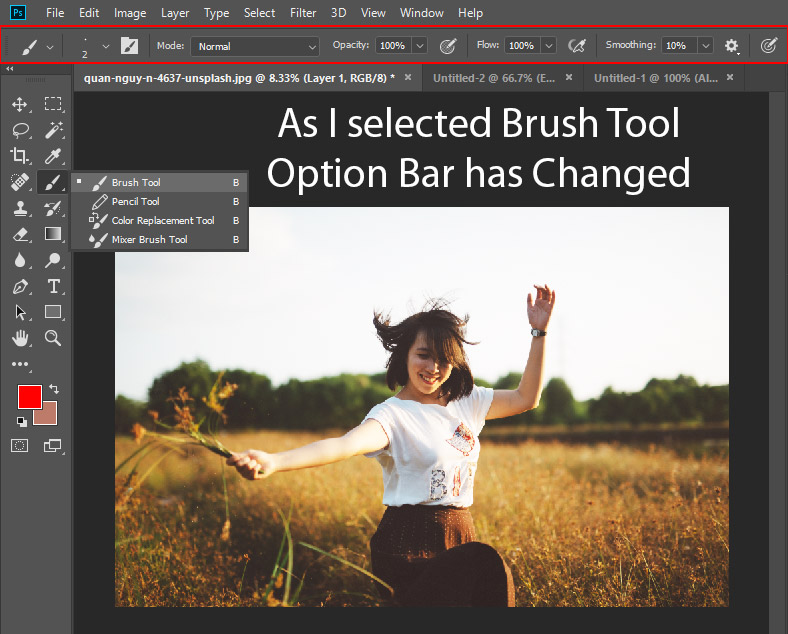
3. As I selected the Brush tool, the Options Bar has changed giving me options for the brush.
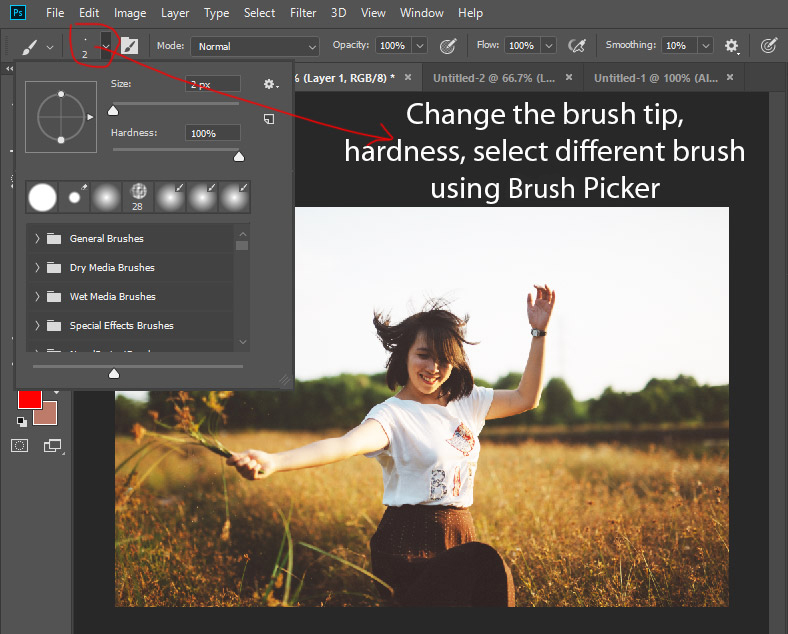
4. Let’s say if you want to make changes to brush. You can do that using the Options Bar. Let’s say if I want to change the brush size, I can do that by clicking on the Brush Picker (Highlighted in Red).
Zooming and Panning
Zoom In and Out
1. Select the Zoom Tool in the Tool Panel so we can do some zooming.
2. Use the + Zoom Icon in the Options bar to Zoom In
3. Use the – Zoom Icon in the Options bar to Zoom Out.
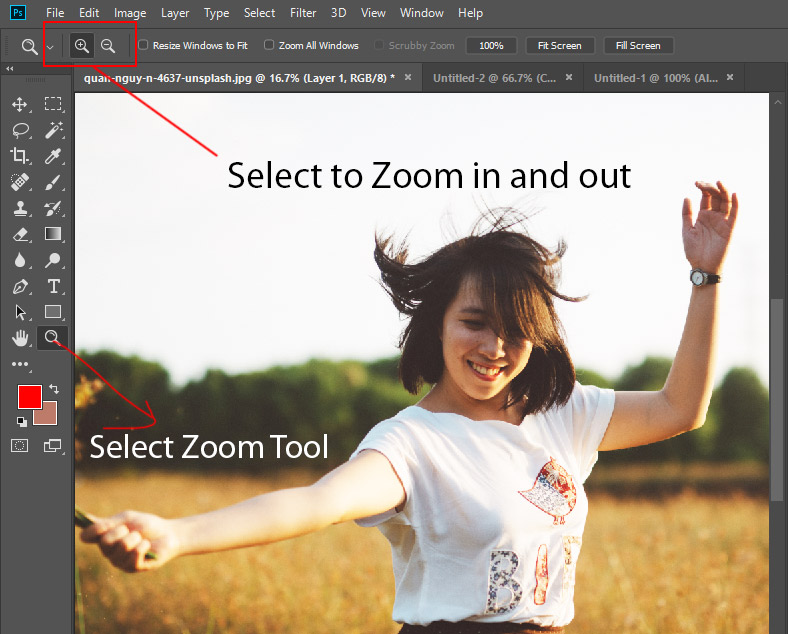
4. After selecting Zoom Icon click on the image to Zoom In and Out.
5. To switch between Zoom Plus (+) and Minus (-) Icon hold down the ALT/Option Key.
6. You can use the Zoom Tool without selecting it by pressing { CTRL/CMD + ALT/OPTIONS + (+/-) } key on the Keyboard.
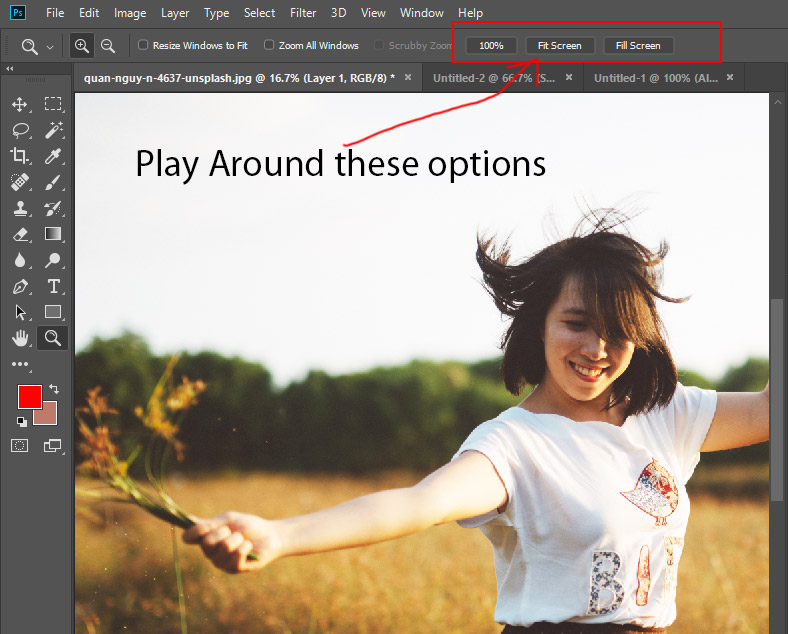
Photoshop has Pre-Defined Options for zoom can be found in the Options bar. You can click on the 100%, Fit Screen, and Full Screen to use zoom levels quickly that you use often.
Panning
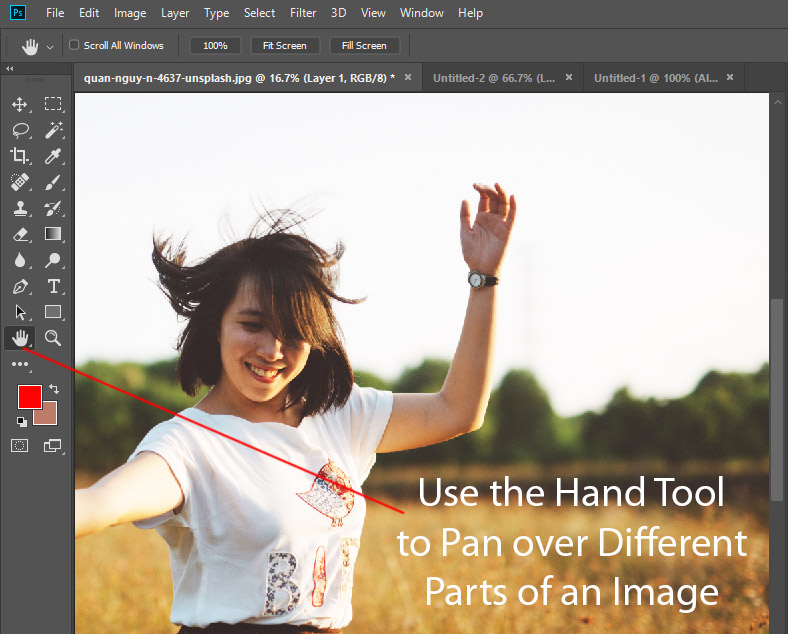
1. Panning means moving around a large or zoomed-in image.
2. Select the Hand Tool and now your cursor will change into a Hand Icon. Now click and drag and move the image in the document window to the part which you want to see.
3. Once you are done, you can click on the Fit Screen in the Options bar to view the entire image.
Undo a Mistake and Save your Work
Undo an Action
1. To undo the last action, press CTRL/CMD + Z
2. To redo the last action, press CTRL/CMD +Z again.
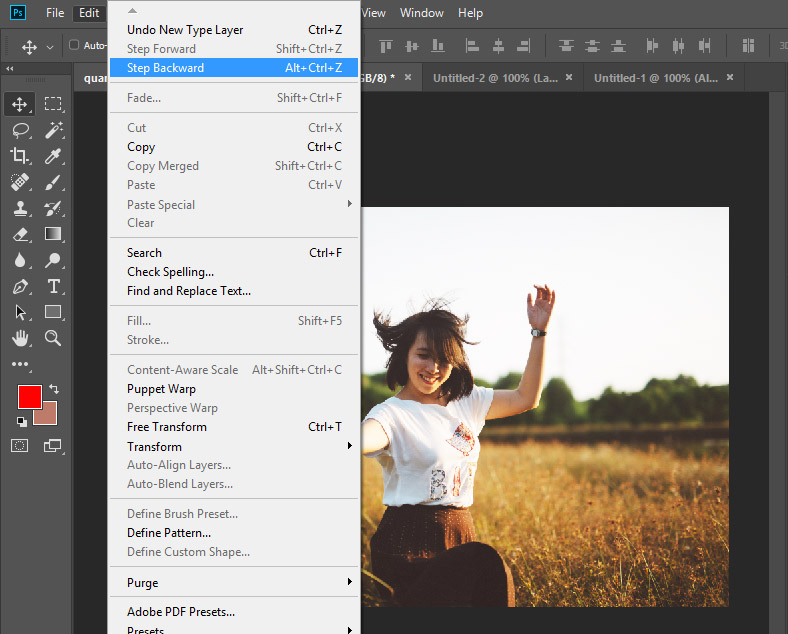
3. To undo multiple actions, Edit > Step Backward or ALT/OPTIONS + CTRL/CMD + Z. You can do that up to 50 times.
4. To forward multiple actions, Edit > Step Forward or SHIFT + CTRL/CMD + Z.
Save your Work
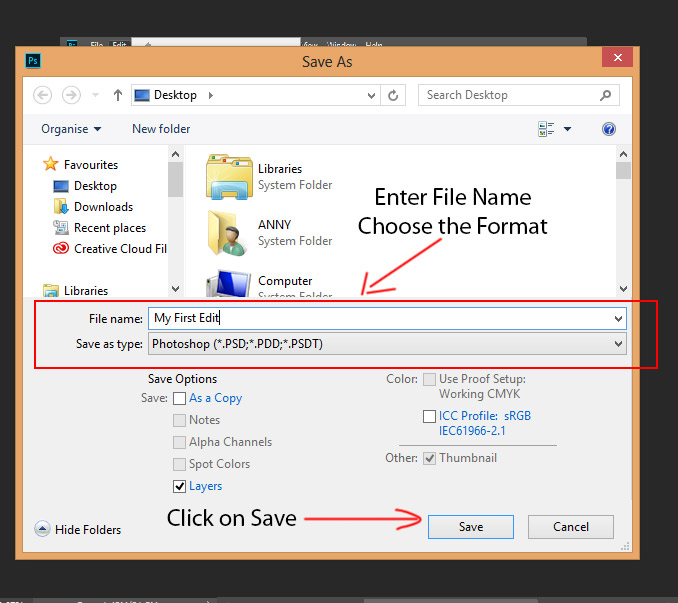
1. Go to File > Save As to save your work.
2. Save your artwork in PSD format to retain layers and other editable types so you can come back later and make changes.
3. You can also save in JPG or PNG format that will save as a standard image that can be viewed, shared and opened by other programs.
Congratulation, you are now Familiar with Photoshop!
Need Help With Photoshop or Looking for Professional Support?
Whether you're just getting started with Photoshop or need expert-level assistance, we're here to help! Contact us for personalized Photoshop tutorials, project support, or creative services.
Get in touch today to take your skills or projects to the next level.
CONTACT US NOW📘 Want to Master Photoshop Faster?
🎁 Get Your FREE PDF E-Book "Top 10 Photoshop Tricks Every Designer Must Know" Now – Packed with expert tips, shortcuts, and techniques to boost your creativity & workflow.
👉 Download Your FREE PDF E-Book NOW!