
In this tutorial, you’ll learn how to resize, crop, straighten and add to image canvas. We’ll go through step by step to each of these sections to get you started on image resizing in Photoshop.
Resizing an Image
Image Dialog Box

You can go to Image > Image size to resize any image. In the Image Size dialog box you can resize your image by entering the values.

1. Go to Image > Image Size or CTRL/CMD + ALT/OPTION + I to bring the Image Size dialog box.
2. Before you resize the image by entering the value make sure the Linked Icon is on by clicking on it so the width is linked to the height.
3. Check the Resample Option to tell Photoshop that it is okay to throw away some pixels when you making the image smaller or add some pixels when you making the image larger.
4. You can change the Measurement Unit using the Measurement Menu.
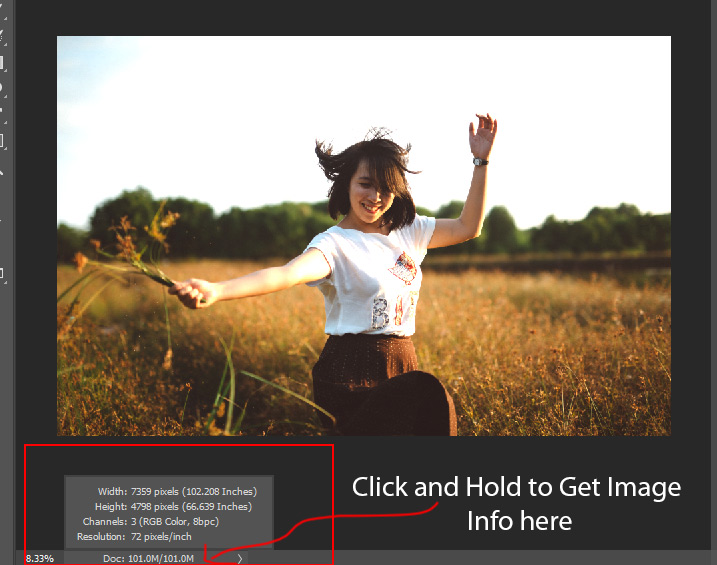
5. At the bottom, you can go the Status Bar to check the image info.
Resize the Image

1. Click on the Width Field enter the value as I entered 1000px to make the image smaller.
2. You can see the Height Field automatically changed.
3. The Resolution Field is set to 72. When you are preparing the image for print you may want to change it to 300 but as we are resizing the image for screen views leave it to 72 or 100 or whatever it happens to be.
4. Now click OK to accept the changes and you’ve resized an image.
Set the Resolution
You can tell Photoshop how many pixels is going to be print per inch by setting the Resolution when you print an image.

1. Go to Image Menu > Image Resize again.
2. In the Resolution Field enter 300. Resolution value means the number of image pixels that will be assigned to each inch when you print image. 300 is good enough for printing on a typical inkjet printer at home.
3. Uncheck the Resample to preserve the original image pixels.
4. As you enter the 300 in the Resolution Field, the Height and Width changed 102 inches by 73 inches to 24 inches by 15 inches that’s the size at which this image will print for best print results.
5. Click OK to accept changes.
Crop the Image
Crop Tool
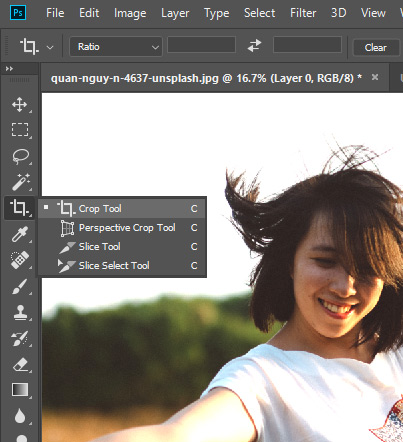
You can use the Crop Tool (C) to crop an image. To activate either hover over to Tool Panel and select it from there or press C Key to activate it.
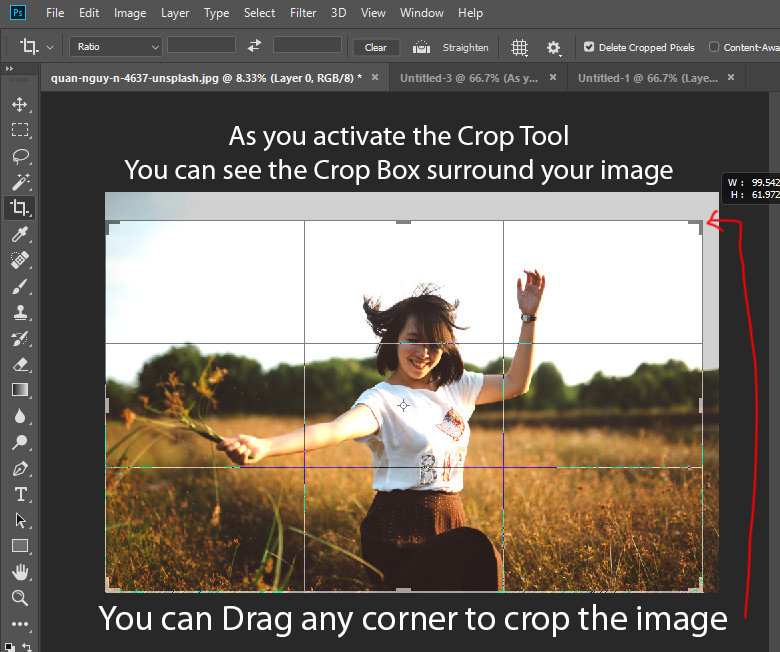
1. Press C Key to activate the Crop Tool. Once you activated it, a resizable crop box will immediately surround your image.
2. You can drag any corner or edge to crop the image. You can click inside the image to reposition to it. When you do Photoshop will darken the soon-to-be cropped away pixels, giving you a preview of what it will look like after the crop.
Crop Presets
You can constrain the crop to a certain size by using the Crop Presets.
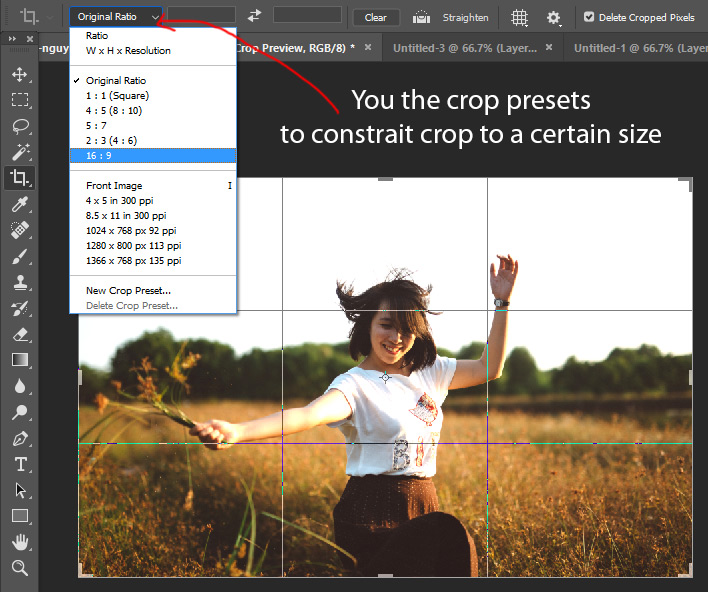
1. Use the menu at the left of the Options bar at the top of your screen to use crop presets. Pick any one that you’d like to use.
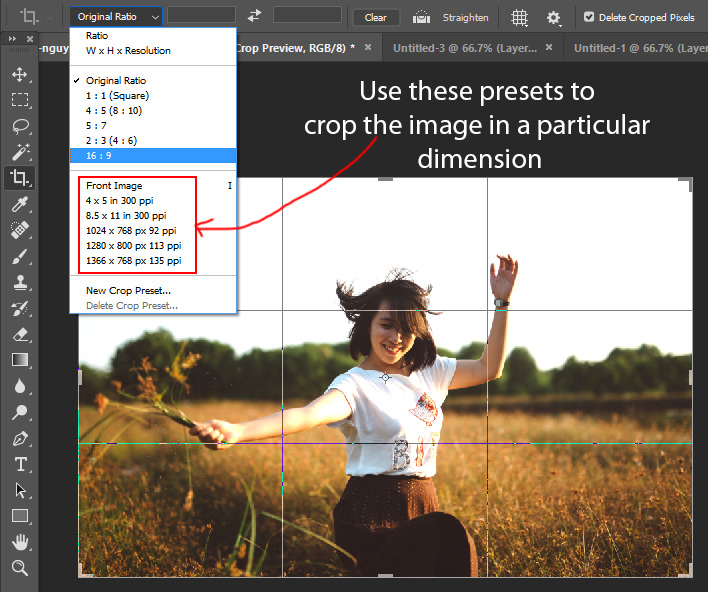
2. If you want to crop a photo to a particular dimension, you can use the highlighted presets in the image.
Straighten Tool

1. To straighten the image, click on the Straighten Icon in the Options bar to activate it.
2. Now your cursor will turn into a Tiny + Icon. Click and drag to draw a line across an area of the image that really should be straight as I drew in the image. When you release the mouse Photoshop rotates the image and straighten the areas.
3. Turn off the Delete Cropped Pixels that will tell Photoshop to hide the cropped pixels instead of deleting them so you can come back later and make the adjustments if necessary.
4. Double-click inside the image to accept the changes and your image is cropped and straighten now.
Canvas Size
Add Canvas
You can add a canvas or space to the image using the Canvas Size Dialog Box. You can add canvas to width and height.
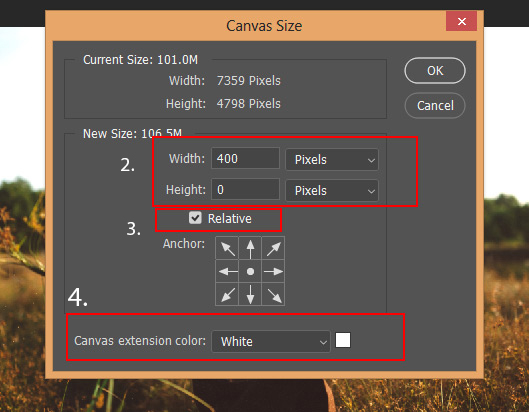
1. To add canvas, Go to Image Menu > Canvas Size.
2. Enter the 400px in the Width Field. Photoshop will add 400px space to both sides right and left of the image. Make sure to measure width and height in pixels for online use or in inches for print using Unit Measurement Menu.
3. If you know the total width in pixels that you want the image to be, you could type the number in the width field. But if often easier to tell Photoshop to add how many pixels rather than worrying about the total will be by checking the Relative option. So Check the Relative.
4. You can change the color of the canvas using the Canvas Extension Color Menu at the bottom of the dialog box.
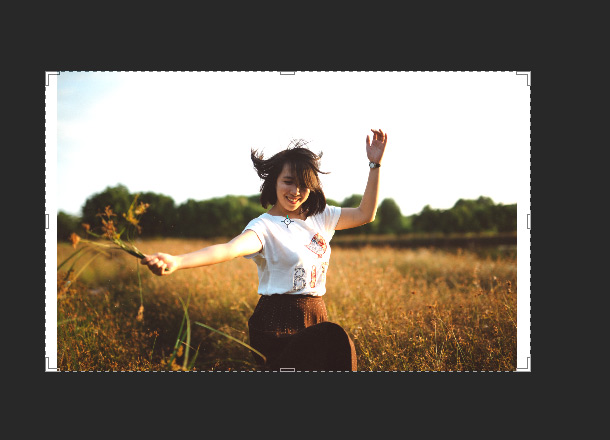
Here you can see it has added the canvas to both sides of the image:
Adding Canvas to One Side
Let’s say you want to add extra space only to the one side, you can do it by using the Anchor Points in the Canvas Size Dialog Box.
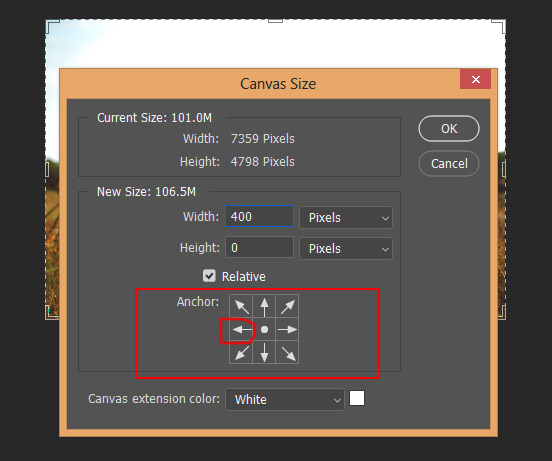
1. Go to Image > Canvas Size again.
2. Make sure the Width and Height field is set to 0 and unit measurement is set to Pixels. Now enter the value in the Width Field to 400.
3. Click on the Left Middle Anchor Point to add canvas only on the right side.
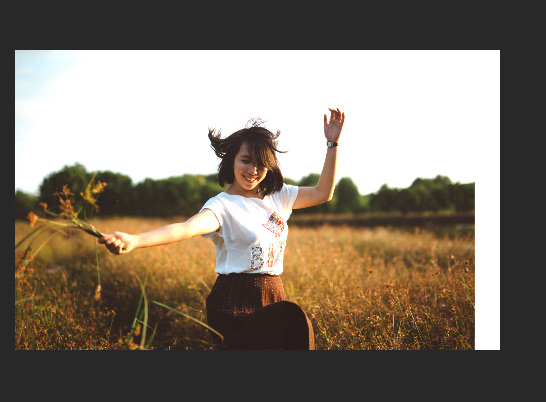
Here you can see it added extras canvas to the right side:
Congratulations! now you can Crop, Resize, and Straighten the image!
Need Help With Photoshop or Looking for Professional Support?
Whether you're just getting started with Photoshop or need expert-level assistance, we're here to help! Contact us for personalized Photoshop tutorials, project support, or creative services.
Get in touch today to take your skills or projects to the next level.
CONTACT US NOW📘 Want to Master Photoshop Faster?
🎁 Get Your FREE PDF E-Book "Top 10 Photoshop Tricks Every Designer Must Know" Now – Packed with expert tips, shortcuts, and techniques to boost your creativity & workflow.
👉 Download Your FREE PDF E-Book NOW!