
The Select and Mask feature first introduced in 2015 since then it’s a go-to choice of everyone for refining selections and layer masks.
The best thing about this it is Non-Destructive at the same it is flexible and you can go back at any time to make changes to your layer mask and selections.
Tutorial Resources
Select & Mask Basics
Launch Select & Mask Workspace
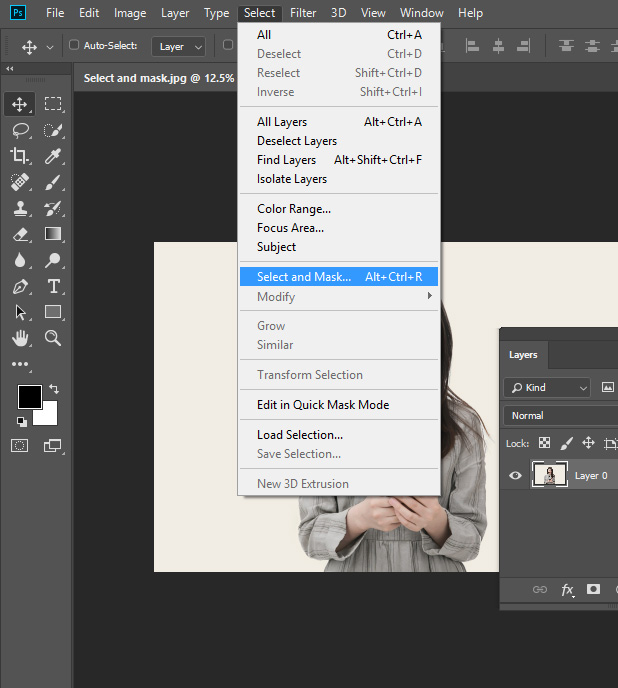
In order to launch Select & Mask Work Area, go to Select > Select & Mask.
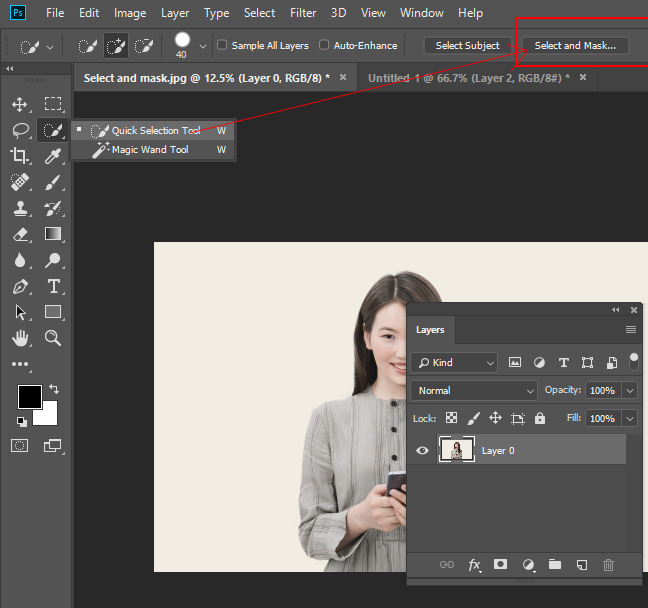
You can also select it from the Options Bar but make sure you’ve selected any selection tool in the Tool Panel otherwise it won’t appear to you.
Select & Mask Tools
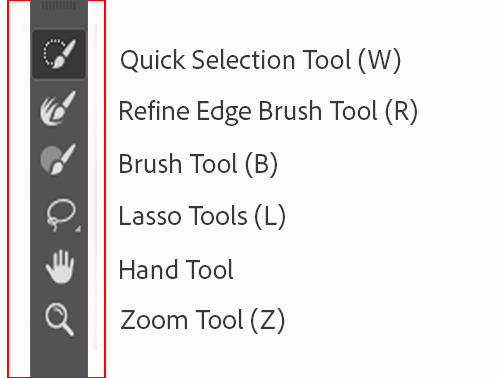
In this feature, Adobe has put together a bunch of Tools from Tool Panel. When you launch it you’ll find at the very left, some tools there.

These tools are the same that you find in the Tool panel except the Refine Edge Brush Tool which is really useful.
You can see the Tools Available in the Work Area:
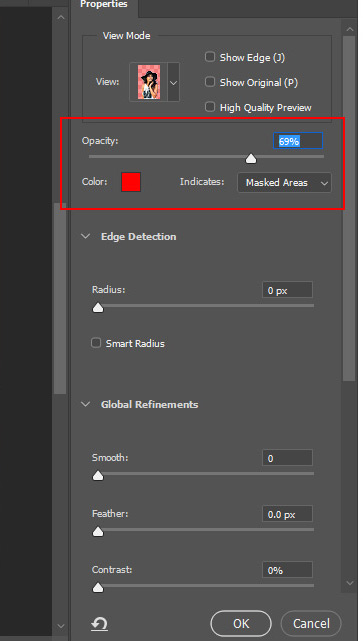
View Mode
At the very right, you’ll find a dialog box that is View Mode. It allows you to see the selection on many various views.
For example, if you choose the Overlay view, selected areas appear transparent and non-selected areas are highlighted in red.
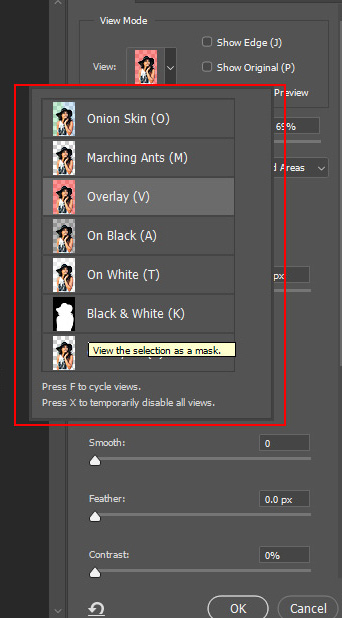
Right underneath it we have Transparency Slider that sets transparency/opacity for the View Mode.
Let’s say that we have selected the Overlay View. Now you can drag the Transparency/Opacity slider to control the opacity of the red overlay.
Global Refinements
After the view mode, we have Global Refinements, where you smooth, soften, sharpen and shift edges if necessary.
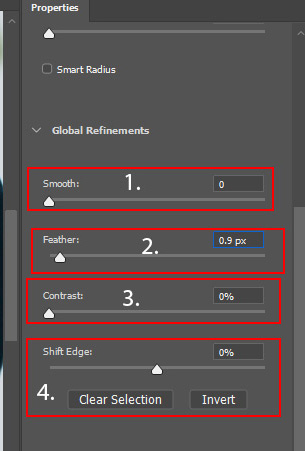
1. Smooth Slider will smooth out the edge of the selection by creating a smoother outline.
2. Feather Slider will soften the edges of the selection.
3. To make the edge of the selection sharp, you can use the Contrast Slider.
4. You can shift edges of the selection using Shift Edges slider.
Output Settings
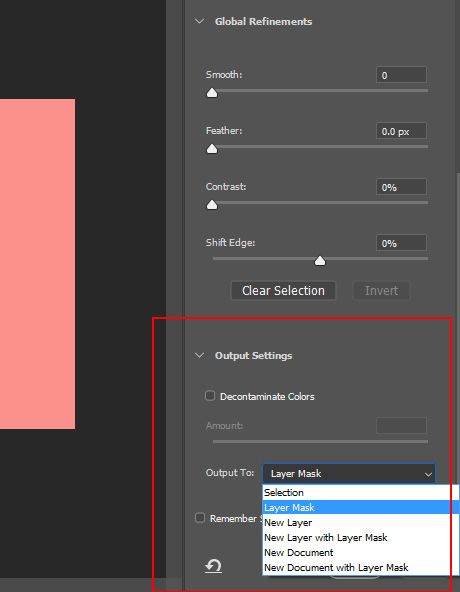
In the Output Settings, you tell Photoshop how you want the output results.
For instance, you can select New Layer with Mask if you want the results on a new layer with an attached layer mask. Similarly, you have many to choose from.
Using Select & Mask for Selections
Select Background using Quick Selection Tool
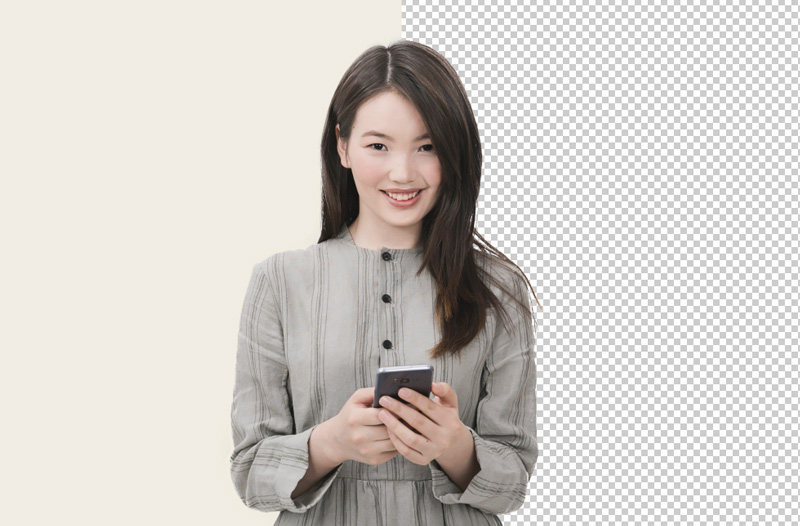
Download the image provided in the tutorial resource section and go to File > Open to open it in Photoshop. Make sure to you unlocked the background layer by double-clicking on it.
Go to Select > Select & Mask.
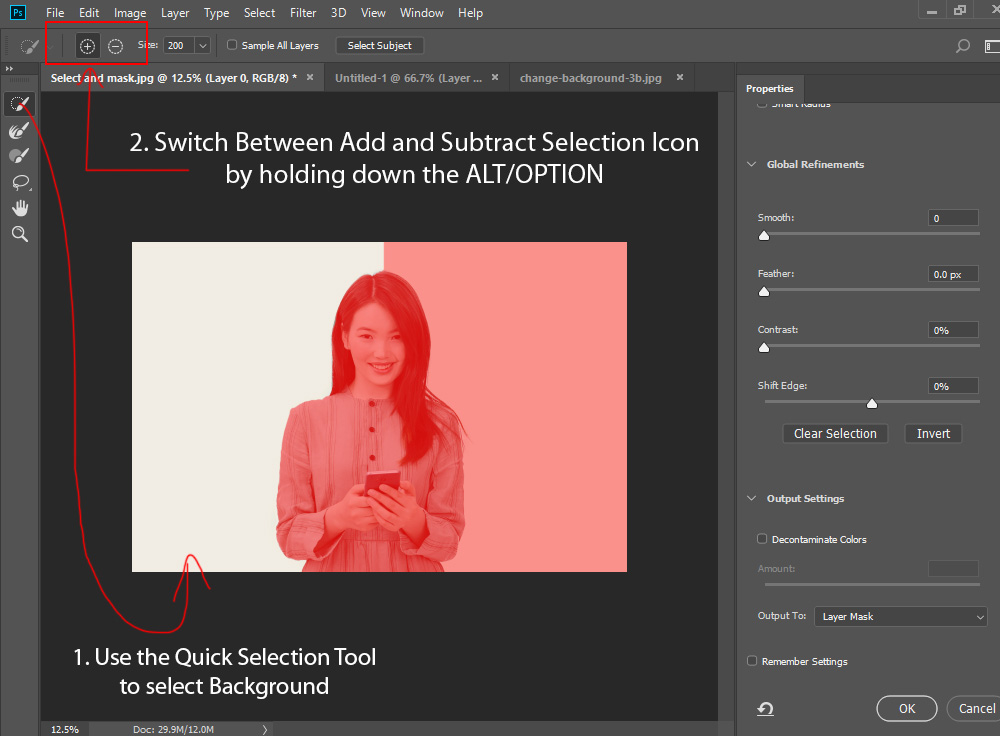
1. Select the Quick Selection Tool (W) and drag over the image to select the background. You can see I’ve selected half of the background that is turned into white.
2. You can add or subtract from the refinement area if needed by holding down ALT/OPTION and drag over the image parts that you don’t want to add to the selection.
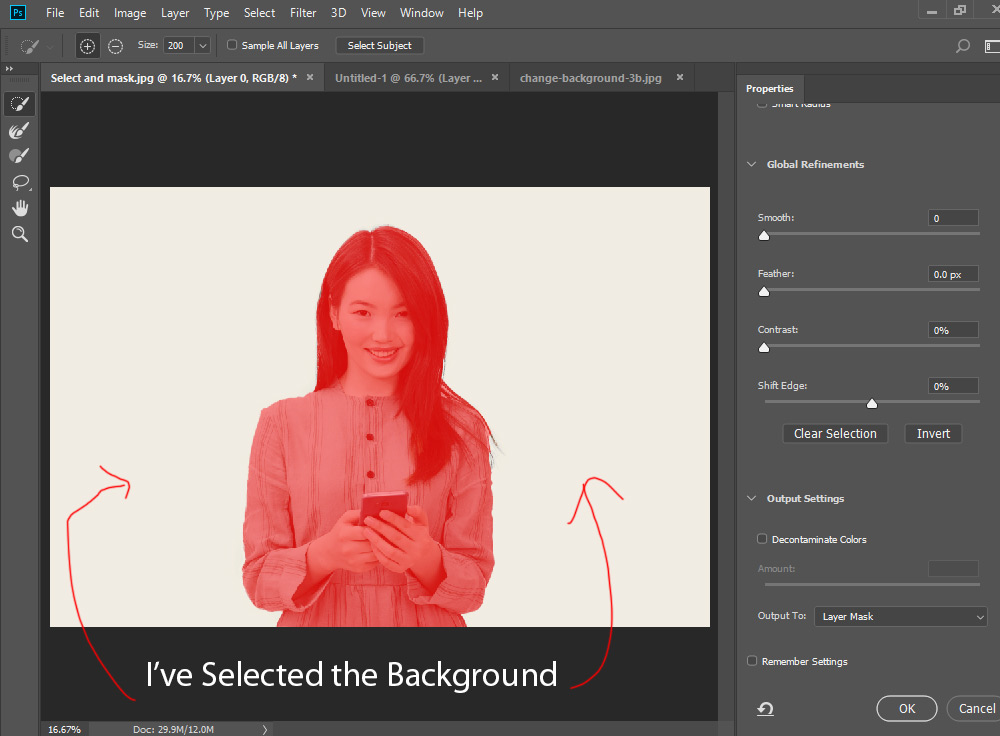
I clicked on the right of the background to select all remaining parts. Here you can see I’ve selected the background:
Note: we are selecting the background here instead of subject. Because it is easier to select the background rather going after the subject details which is time-consuming and finicky.
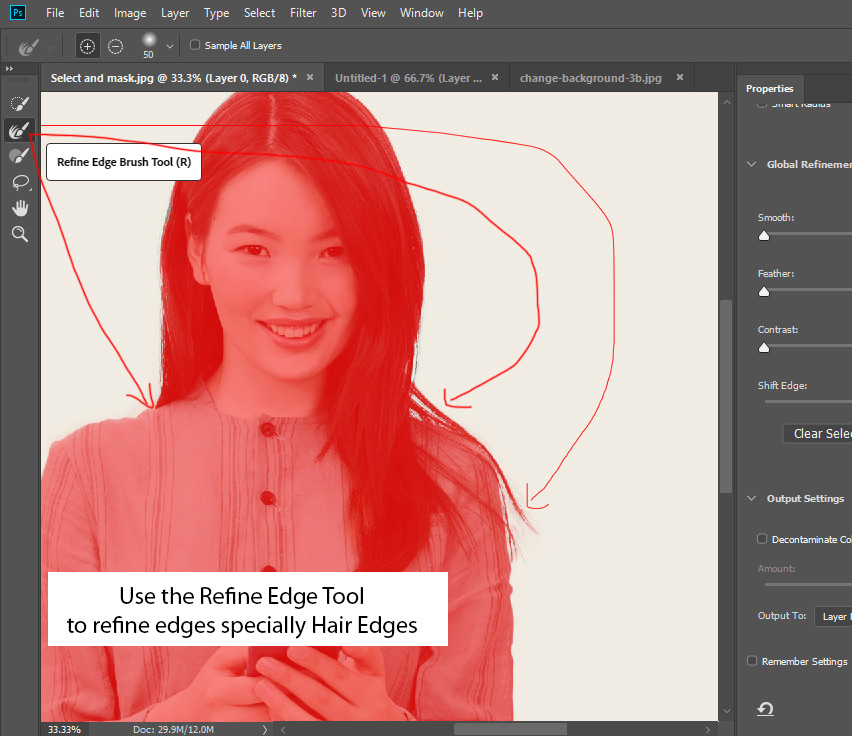
Use Refine Edge Tool to Refine Edges
Now select the Refine Edge Tool (R), brush over the hair edges to refine them that we have missed while making the selection of background.
Use Brush Tool for Manual Clean Up
Sometimes the selection is not precise even if you have a clean background to cut out which is the case here.
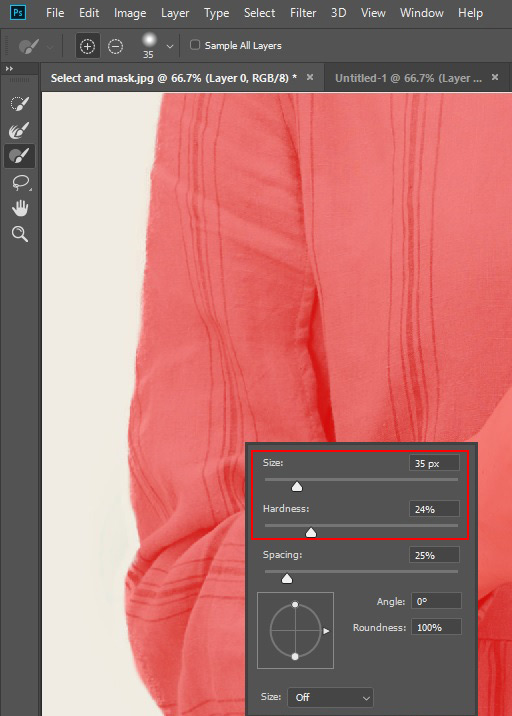
You can notice some parts of the subject are being extracted and we don’t want that. In order to add them back, select the Brush Tool and hold down the ALT/OPTION, brush over the parts to add them.

I am using a hard brush for manual clean up. You can access the brush menu by right-clicking in the image to see the size and hardness of the brush. But make sure you’ve selected the Brush Tool before right-clicking.
Seeing the Selection
Head over to the View Mode and then select Black/White View.

As far as I can see my selection looks good. If you find some grey parts there what you can do is that select the Brush Tool and hold down the ALT/OPTION, brush over the parts to add them back.
Output the Results
In the end, we’ll output the selection in a mask. But before you do that, you can take a look the Global Refinement section to see if there is a further need to fix the edges of the selection. If so, feel free to play around with these.
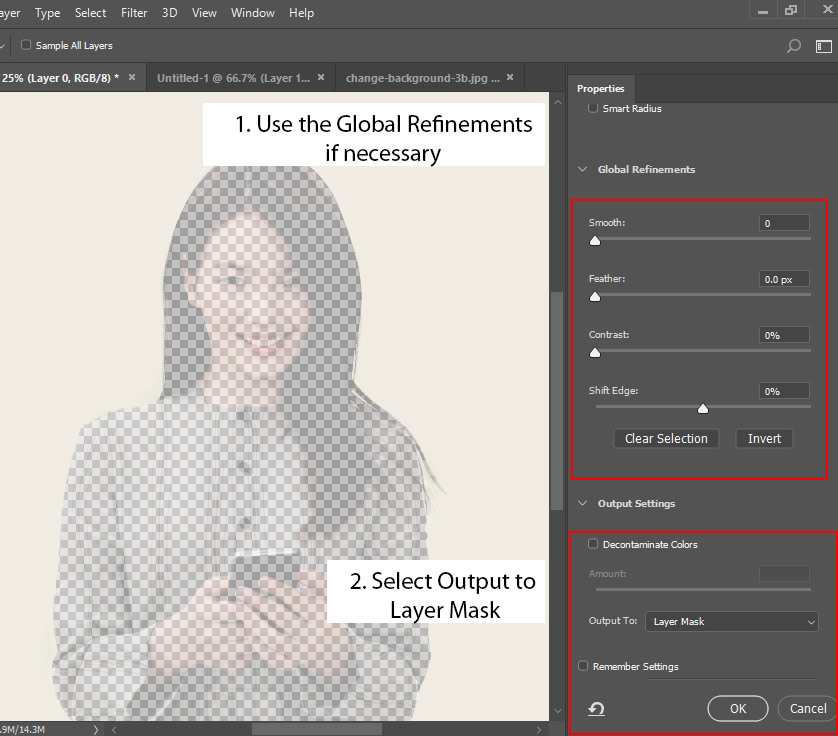
In the Output Settings, I’m selecting Layer Mask to see the results on a same layer with layer mask attached to. Click OK to output the results.
Results
Here are the results that you are going to get:

In order to see the subject, press CTRL + I to inverse the Layer Mask results.
Bingo! Here is the decent selection:
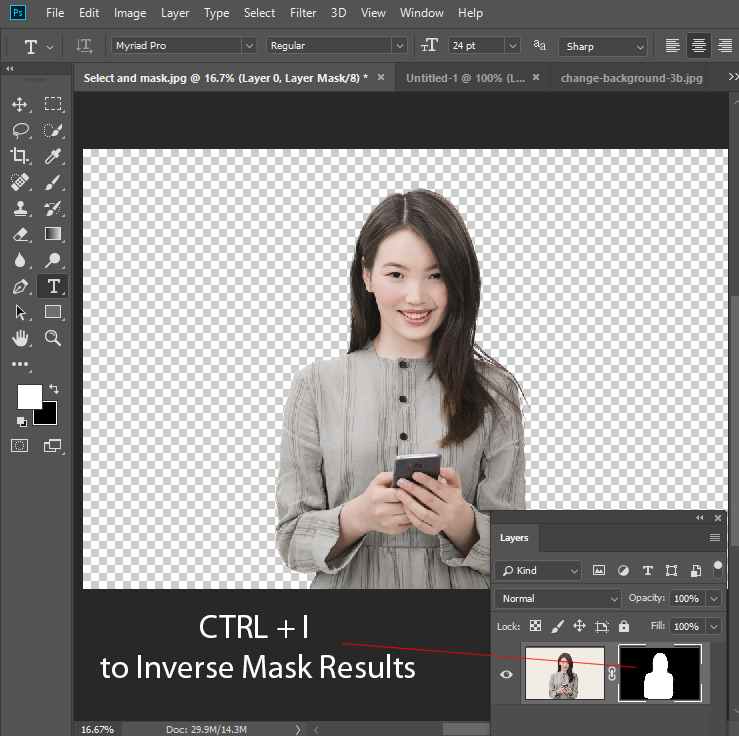
Now I can add a new background behind the subject:

Fine-Tune Layer Mask
If you think that there is still a lot of possibilities to improve the selection, you can right-click on the mask and choose Select and Mask to refine the selection again and again.

There is how you can use Select and Mask!
Congratulations!, Now you can Make and Refine Selections in Photoshop!
Need Help With Photoshop or Looking for Professional Support?
Whether you're just getting started with Photoshop or need expert-level assistance, we're here to help! Contact us for personalized Photoshop tutorials, project support, or creative services.
Get in touch today to take your skills or projects to the next level.
CONTACT US NOW📘 Want to Master Photoshop Faster?
🎁 Get Your FREE PDF E-Book "Top 10 Photoshop Tricks Every Designer Must Know" Now – Packed with expert tips, shortcuts, and techniques to boost your creativity & workflow.
👉 Download Your FREE PDF E-Book NOW!