

In this basic lesson, we are going to learn about the Layer Mask in Photoshop. Photoshop layer mask is one of the important aspects and it is impossible to imagine Photoshop without the layer mask. We’ll deep dive into masking covering from creating a mask to how to use it. Let’s get started!
What is Layer Masking?
1. Layer masking is a way to hide and reveal the parts of a layer.
2. It gives you precise control over the parts of the image to edit them than permanently deleting or erasing them.
3. You can use Layer mask in compositing, making edits to a part of the image, cutting out images for use in a different document, and etc.
How to Add a Layer Mask
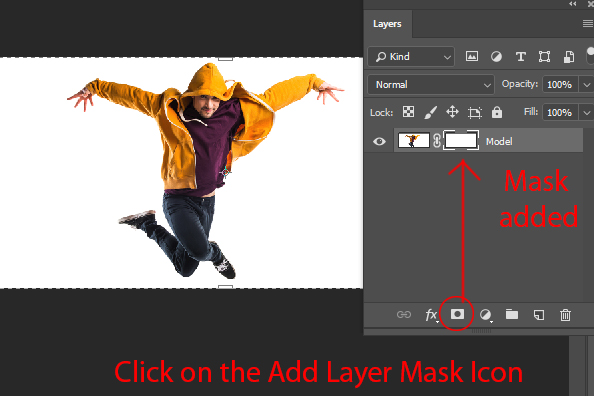
1. Select a Layer in the Layer panel.
2. Click on the Add Layer Mask button to add a Layer mask. A white layer mask thumbnail appears on the selected layer, revealing everything on the selected layer.
3. The White Borders around the mask indicates that you’ve selected or working on mask.
4. You can also add layer mask by selecting Layer > Mask > Reveal All.
Layer Mask Basics

1. In order to paint on the mask, we use the Brush tool. You can press (B) to activate it and you can also hover to tool panel to activate it.
2. Painting on a mask using a black color means hiding the parts of the layer.
3. Painting on a mask using a white color means revealing the parts of the layer.
4. Press (D) to Reset the Foreground/Background colors to White and Black. You can switch between the foreground/background color by pressing (X) key.
Using Layer Mask: Hiding the Parts
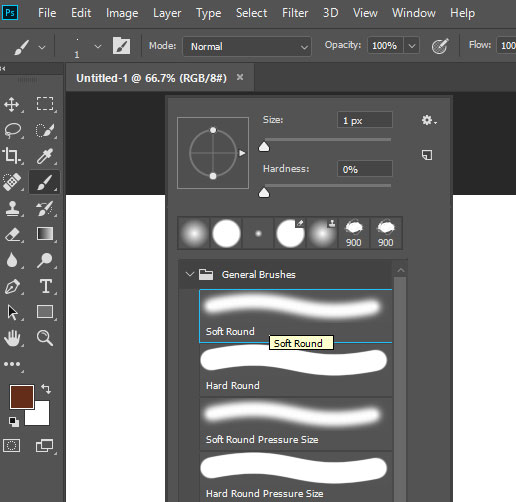
Use this soft round brush for masking, right-click in the document/image and then select it from Brush library.
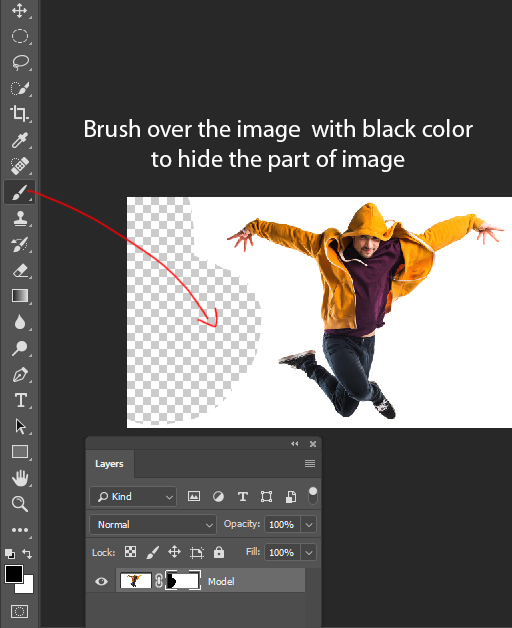
1. Activate the Brush tool and set the Foreground color to black by pressing (D). Brush over the image using a soft brush to hide the parts of the image.
2. You can see I’ve painted on the left parts and it starts to mask the parts of the image you can see the transparent area starts to pop up.
3. The Layer mask parts where we have painted has turned into black meaning these parts are now hidden. See the mask thumbnail.
Using Layer Mask: Revealing the Parts
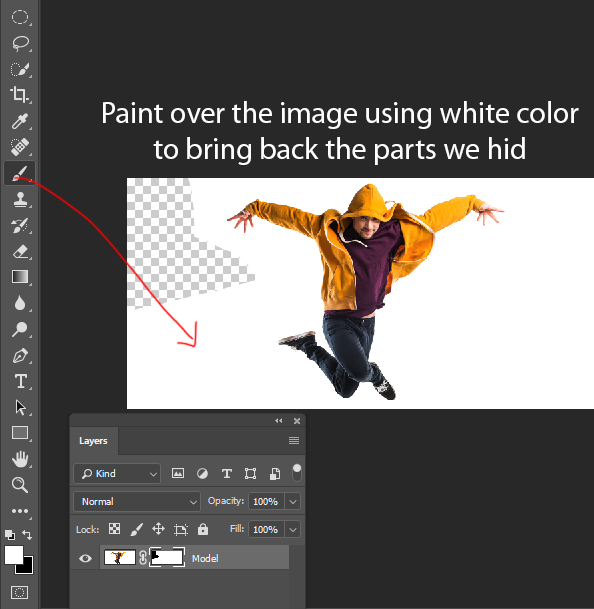
1. Switch the foreground color to white by pressing (X). Brush over the hidden areas using a soft brush with white color to reveal the parts we hid.
2. You can see by painting over the image using the white color we have brought back the parts that we hid. You can go back anytime and mask and reveal the parts of the image using a layer mask as it is non-destructive.
3. To delete a mask, right-click on it and choose Delete Layer Mask
Understanding Layer Mask Results
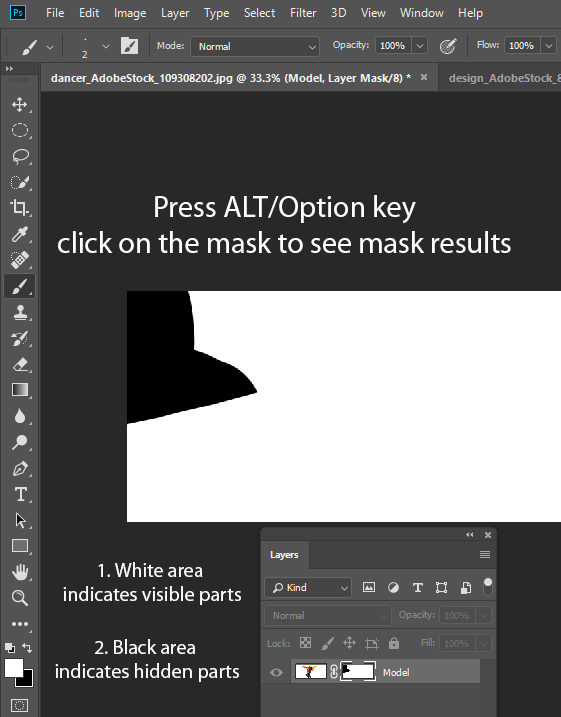
1. Press ALT/Option and click on the mask to see the layer mask results.
2. The white area indicates visible parts.
3. The Black area indicates hidden parts.
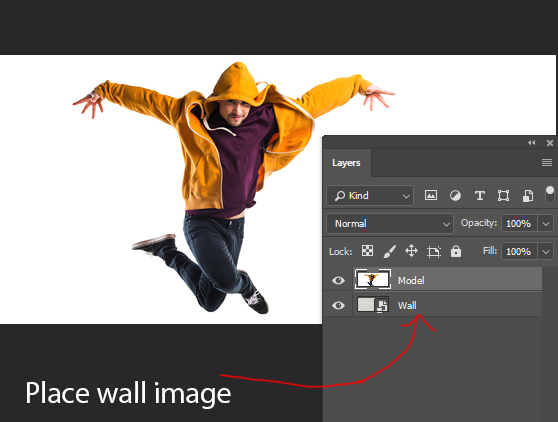
Layer Mask with Selection
I’ve added the wall image under the model layer by selecting File > Place Embedded. Activate the Move Tool by pressing (V) and drag this layer under the model’s layer.
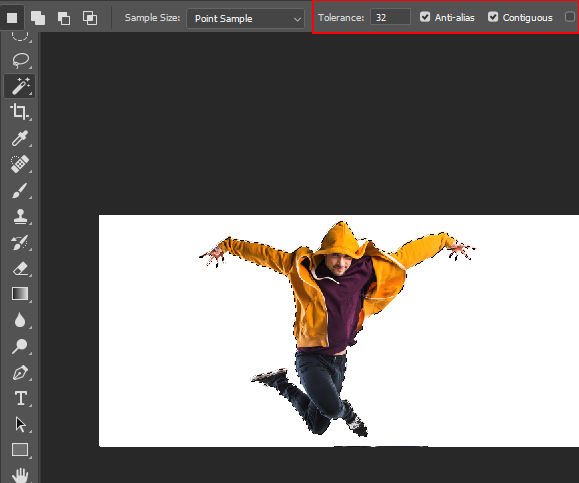
Select the Magic Wand Tool by pressing (W) on the keyboard. Make sure Contiguous is checked on the option bar. Now click on the white background to select it.
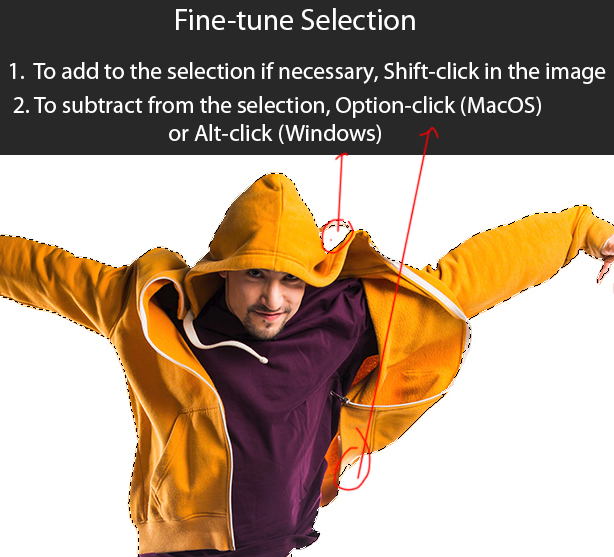
You can add and minus selection to fine-tune it.
To add the selection, press the Shift Key and click in the image.
To minus the selection, press the ALT Key and click in the image.
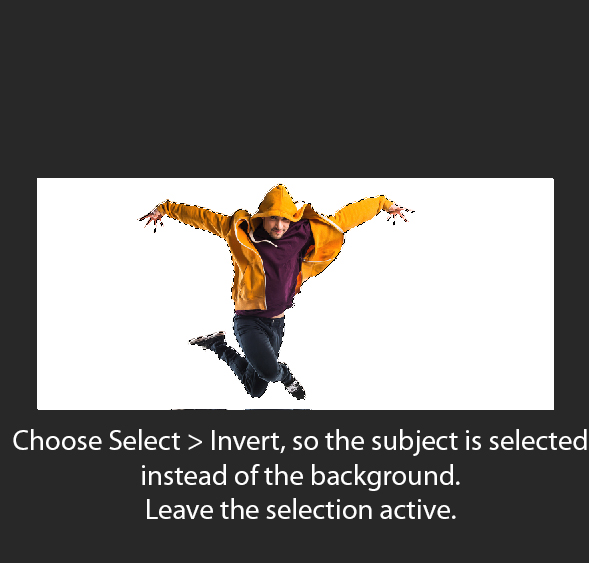
Right now the background is selected, in order to select the dancer, go to Select > Inverse and inverse the selection to select the subject.
Now click on the Add Layer Mask to add the mask. See the results and we have changed the background of the dancer using a layer mask.
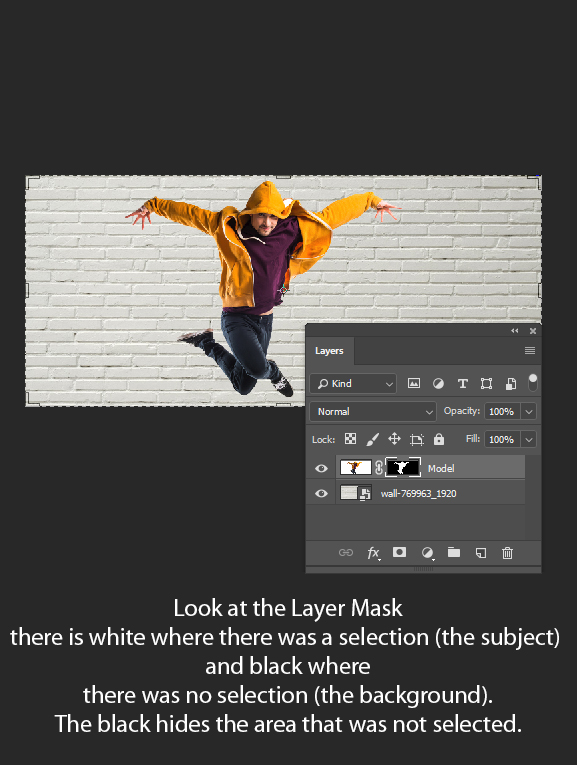
Final Results:

Bonus Tip
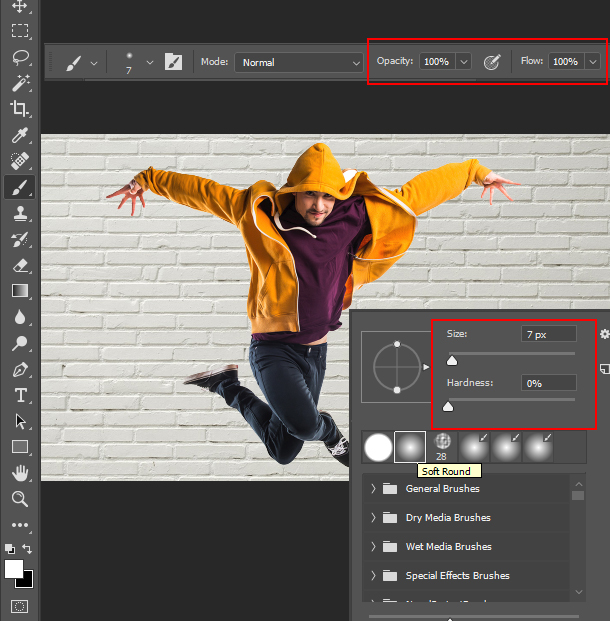
Always use a soft round brush (unless necessary) to get soft blending results on the layer mask. You can set the hardness of the brush, just select a brush and then right-click anywhere in the document/image to make the brush settings visible.
You can also set the opacity and flow of the brush in the options bar to make the blending looks smooth and soft so it doesn’t look too drastic.
Need Help With Photoshop or Looking for Professional Support?
Whether you're just getting started with Photoshop or need expert-level assistance, we're here to help! Contact us for personalized Photoshop tutorials, project support, or creative services.
Get in touch today to take your skills or projects to the next level.
CONTACT US NOW📘 Want to Master Photoshop Faster?
🎁 Get Your FREE PDF E-Book "Top 10 Photoshop Tricks Every Designer Must Know" Now – Packed with expert tips, shortcuts, and techniques to boost your creativity & workflow.
👉 Download Your FREE PDF E-Book NOW!