In this beginner tutorial, I’ll cover everything that you need to know about Photoshop’s Layers. Whether you are just getting started with Photoshop or maybe you are looking to consolidate your knowledge about Photoshop I’ve got you covered. So, here we go!
What are Layers?
Layers are the building blocks of your work in Photoshop. They can contain images, text, shapes or objects. You can move, edit, work with one content of layer without affecting the content of other layers.
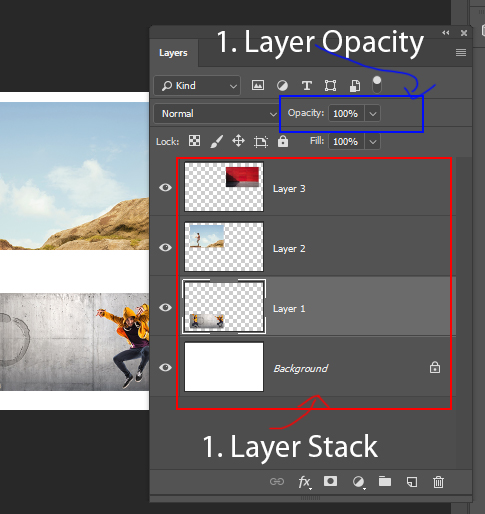
1. In the Layers Panel you can see how many layers you have arranged in a stack. See the Red Color. If you don’t see the Layers Panel go to Window > Layers to make it visible.
2. Layer Opacity controls the transparency of the layers. You can reduce the opacity of a layer using the Opacity Slider. See the Blue Rectangle indicates the Opacity Slider.
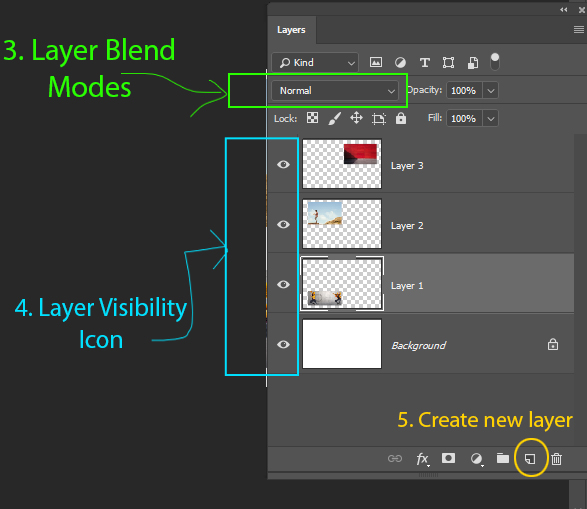
3. In green, we have Blending Modes of the layers that give you the power to blend a layer with other layers beneath it. You don’t need to worry about it now as you’ll learn more about it in next upcoming tutorials.
4. You can turn on and off the visibility of a layer by clicking on the eye icon to the left of a layer. See the Cyan Rectangle.
5. You can create a new layer by clicking on the Create New Layer button highlighted in the yellow color.
6. In order to work on a layer, you must select it in the Layers Panel. Click once to the right of a layer name to select that layer. To select more layer, hold CTRL OR CMD as you click other layers.
Working with Layers
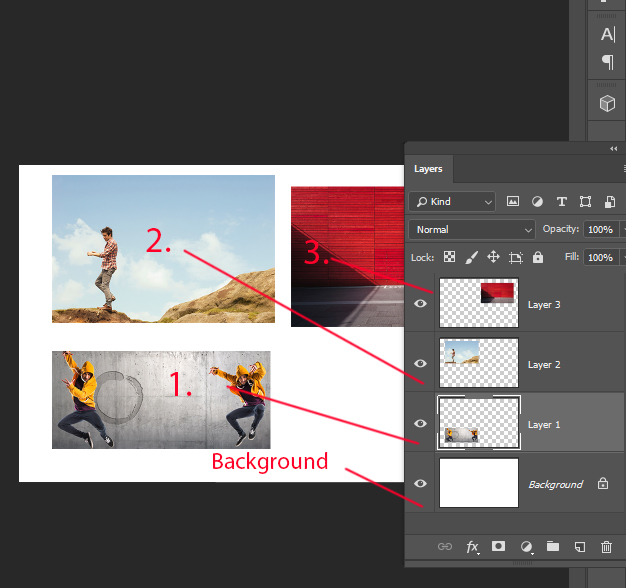
I opened 3 images in Photoshop by selecting File > Open picked 3 images from my PC.
1. In the above image, you can see 4 layers each containing separate contents.
2. Go ahead and turn on and off the layer visibility by clicking on the eye icon. To make a single layer visible Hold down ALT/Option Key and click on that layer eye icon which you want to make visible.
3. Select a layer by clicking on the right to the name. You can select the multiple layers by selecting the top layer, then Hold Down Shift Key and click on the layer at the very bottom.
Practice: Layer Basics
Moving Layers Up or Down
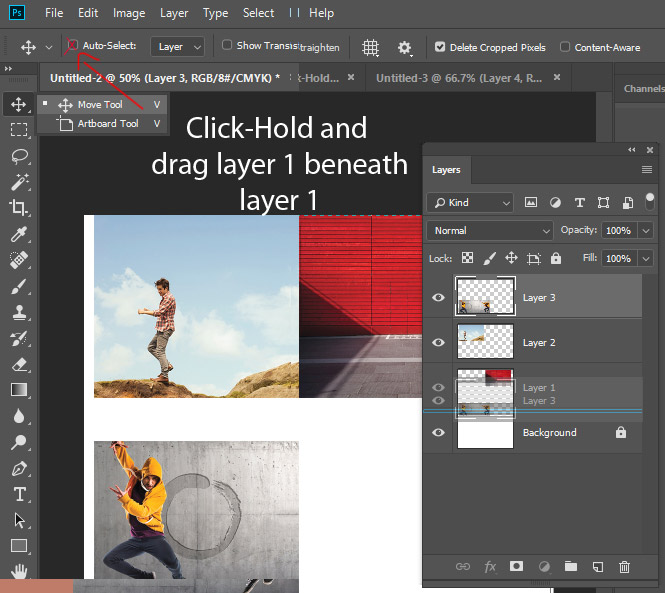
1. You can drag a layer up or down using the Move Tool (V). Select it and make sure Auto Select is Unchecked otherwise it will select the layers automatically.
2. Select the top layer, Layer 3, and drag it below Layer 1. Release your finger from the mouse once you see the double line to move it below Layer 1.
Creating a New layer
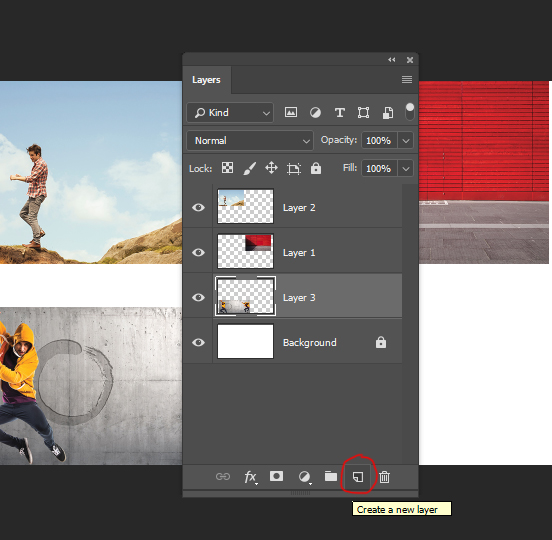
To create a new click on the Create New Layer Button or press CTR/CMD + SHIFT + N.
Rename Layers
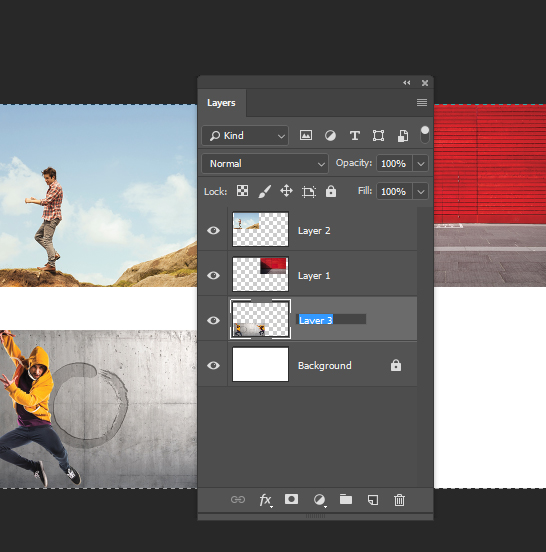
You can rename any layer by double-clicking on it and then type name to rename it.
Change the Opacity of a Layer
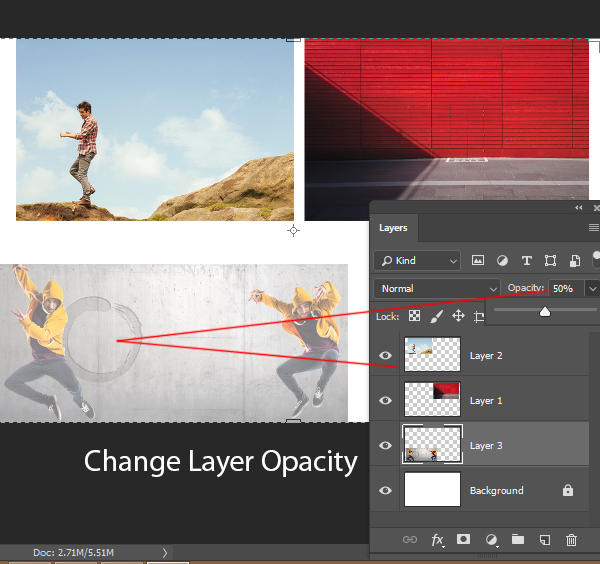
You can change the opacity of a layer by dragging the Opacity Slider located near the top of the Layers panel to make the layer more or less transparent.
Delete a Layer
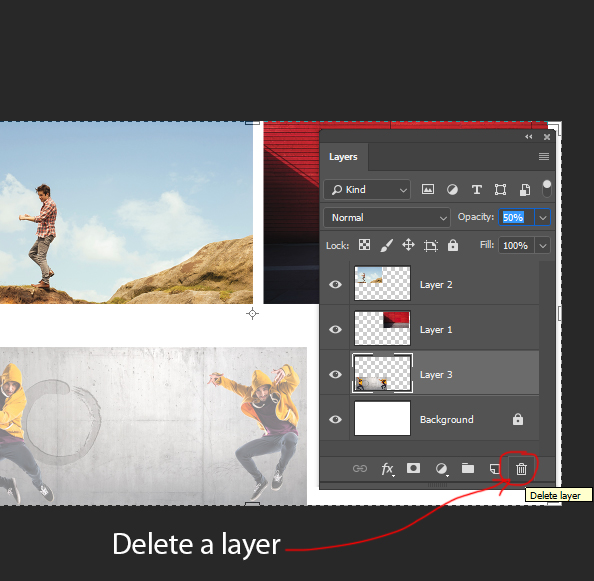
To delete a layer, select it and then click on the Delete Layer Icon or press Delete to delete it.
Resizing a Layer
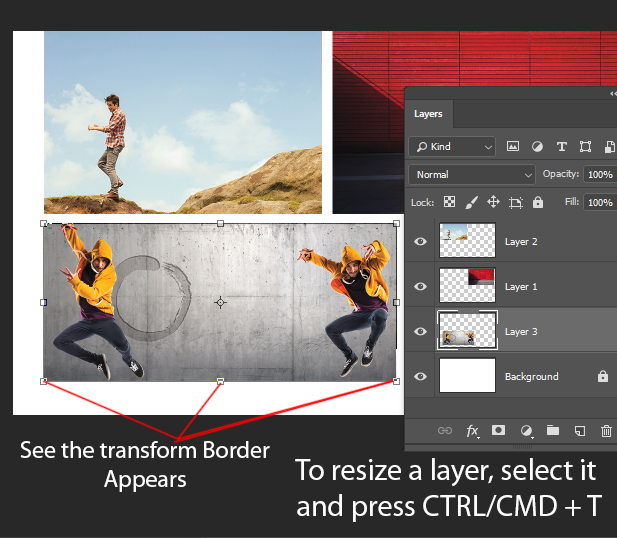
1. You can resize a layer and make it smaller and bigger using the Free Transform Tool CTRL + T or Edit > Free Transform. Select a layer as I selected the Layer 3 and press CTRL + T to activate the Transform Tool.
2. To avoid distortion while resizing an image Hold Down Shift Key to constraint proportions as you click on any corner or edge and drag IN or Out to resize the image.
3. You can hold down SHIFT + ALT to keep the aspect ratio of the image while resizing the image.
4. Once you resized the image, double-click inside the image to accept the changes.
Placing an Image to Layer
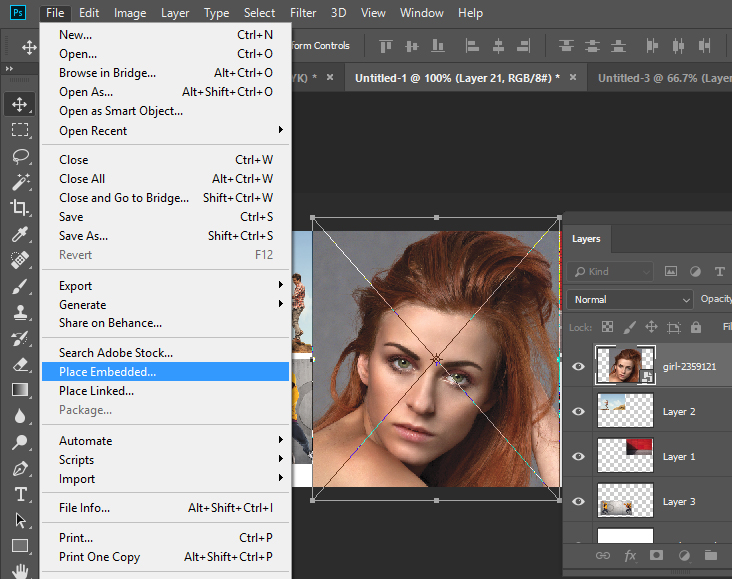
1. To place an image in the Layers Panel, go to File > Place Embedded to place the image.
2. By default whenever you add an image to Photoshop, you can see Transform Border active automatically so you can adjust the size of the image.
Don’t forget to avoid distortion and keeping the aspect ration of the image if necessary as we did in the previous step.
Loading Multiple Images
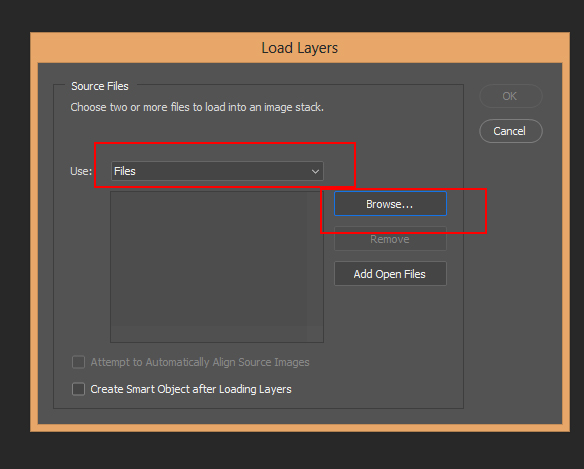
To load multiple images in Photoshop, go to File > Scripts > Load Files into Stack
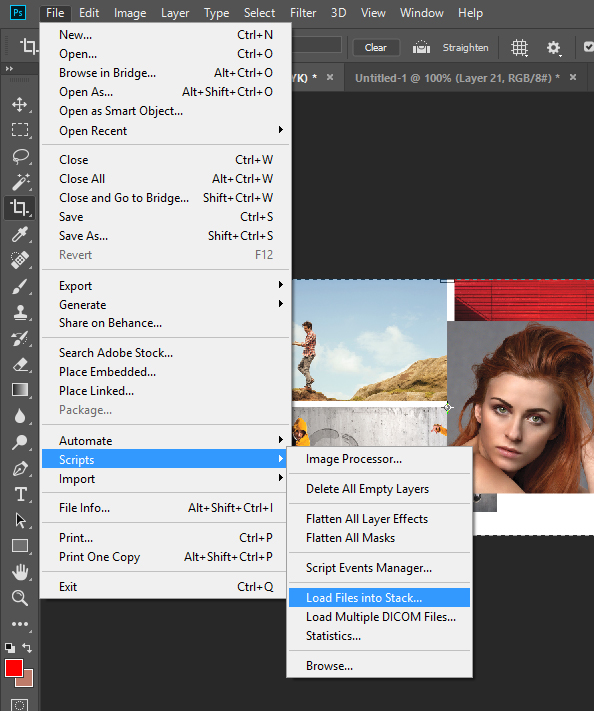
Now Click on Browse to select to multiple images from your PC and once you selected the images click on OK to load them in Photoshop.
Unlocking a Background Layer
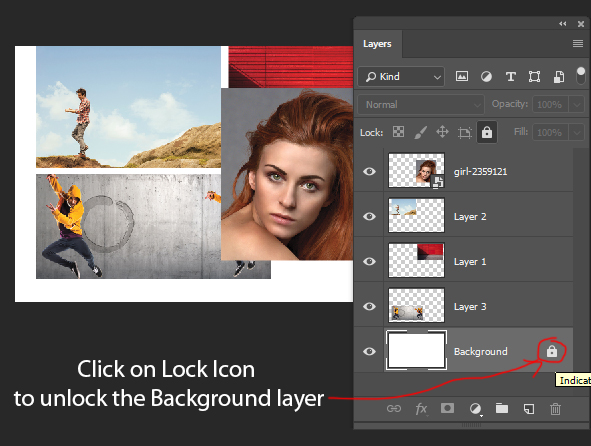
A background layer is a layer on which you can’t make any changes. You can’t move it, change the opacity, work on it because it is locked.
To unlock the background layer Click on the Lock Icon to unlock.
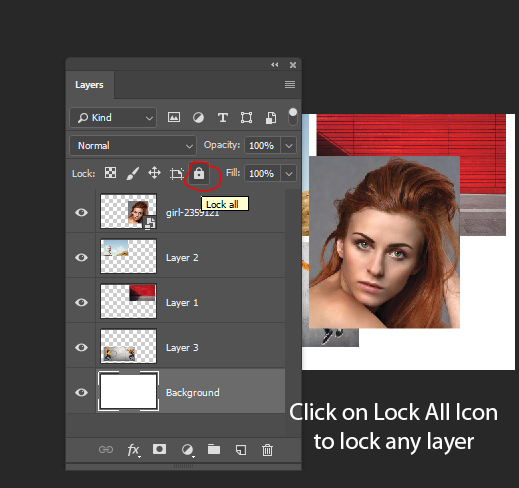
To lock any layer click on the Lock All Button to lock it.
Congratulations! Now, you know how to use Layers in Photoshop!
Need Help With Photoshop or Looking for Professional Support?
Whether you're just getting started with Photoshop or need expert-level assistance, we're here to help! Contact us for personalized Photoshop tutorials, project support, or creative services.
Get in touch today to take your skills or projects to the next level.
CONTACT US NOW📘 Want to Master Photoshop Faster?
🎁 Get Your FREE PDF E-Book "Top 10 Photoshop Tricks Every Designer Must Know" Now – Packed with expert tips, shortcuts, and techniques to boost your creativity & workflow.
👉 Download Your FREE PDF E-Book NOW!
