
The Brush Tool might be the most versatile tool in Photoshop. It can be used for everything from painting in new details and blending effects, to fixing exposure and editing Layer Masks.
In this tutorial, we’ll go through the basics of Brush Tool. You’ll get to know everything from creating a brush tool to creating a light effect using a Blending Mode.
Brush Tool Basics
Where to Find Brush Tool?
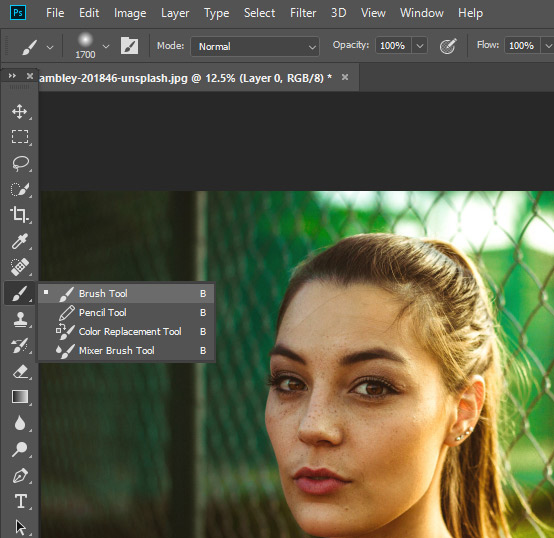
You can find the brush tool in the Tool Panel. Hover to Tool Panel and select it from there.
You can also press (B) to select it.
Brush Tip, Hardness and Size
In the options bar, you will find a lot of options for the brush tool.
1. Click on the Brush Picker Little Arrow pointing downwards to bring the brush menu.
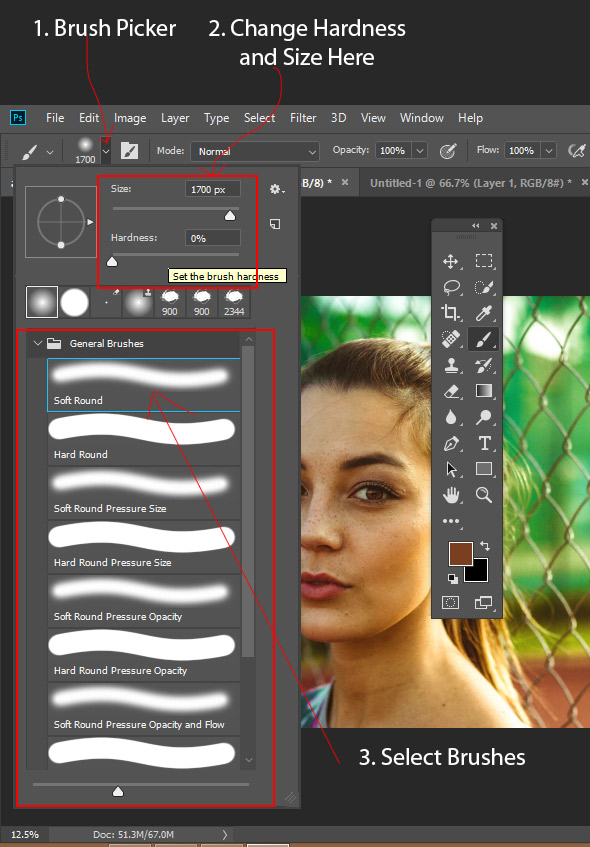
2. Vary the brush Hardness and Size by dragging the Size and Hardness Slider. The more hardness % you set the harder the brush stroke will be.
3. You can scroll down to select brushes. You can find many brushes there from round tip to leaf tip. You can select the brush here which you’d like to use. For instance, I’ve selected the Soft Round Brush.
Advance Brush Settings
On the next to the Brush Picker, we have advanced settings for the brushes. Click on it and bring up the Brush Settings Panel.

With brush settings, you can change the brush dynamics, shape, how the brush will apply brush strokes and much more to unleash from there. But for the sake of simplicity, we are not getting into this since it requires a lot of time to break down.
Brush Blending Modes
On the next of Brush Settings, we have brush blending modes. These blending modes are same as layer’s blending mode.
A brush blend mode defines how the brush stroke will apply to the image. You will learn about these later in this tutorial.
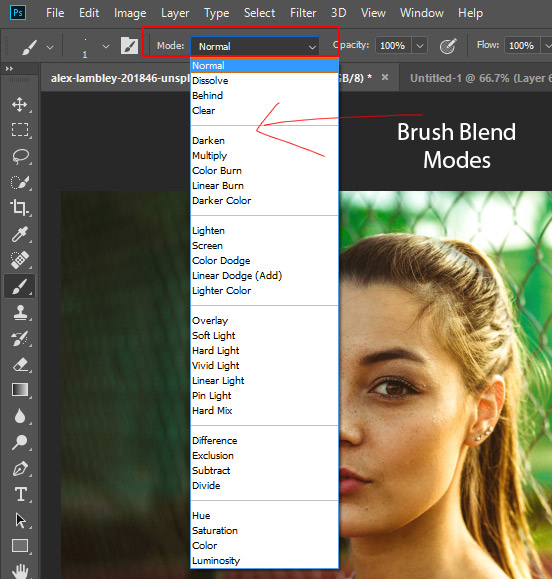
Make sure it set to Normal Mode unless you know what you are doing. You can notice we have a lot of blend modes in the image above.
Brush Opacity and Flow
You can find the brush opacity and flow in the Options bar. These are one of the best features of Brush Tool.
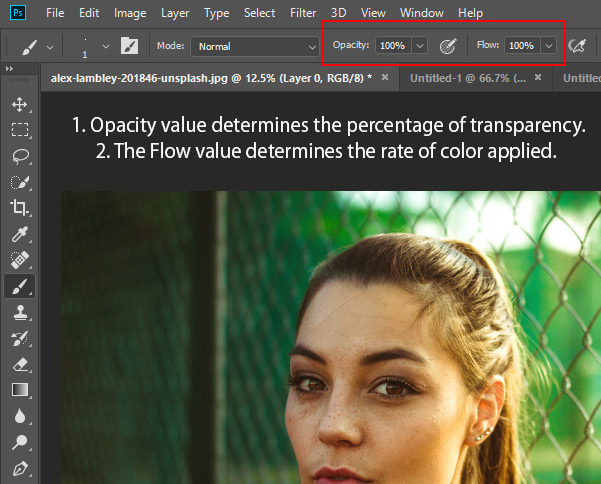
1. The Opacity value determines the transparency of brush stroke. 100% means you cannot see through brush stroke whereas a value of less than 100 provides transparency on applied brush stroke.
2. The Flow value determines the rate of color applied each time you apply a brush stroke. There is a huge difference between opacity and flow and you’ll get know about it shortly.
Brush Options for Graphic Tablet
The rest of the options you see are for graphics tablet use. I’d recommend that use it when you have a graphics tablet otherwise I generally don’t use them.
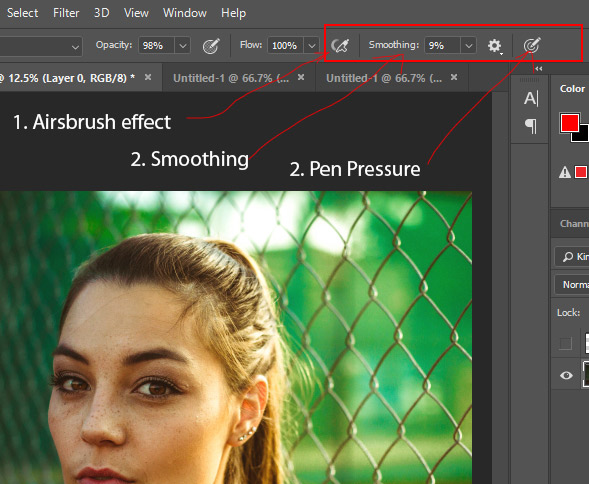
1. Check the Airbrush Effect Option if you want an airbrush effect. It’s very useful when you are retouching skin and it may work well with the tablet.
2. Smoothing adds smoothness to the brush stroke. Really comes handy when you are painting and want to get a smooth brush stroke.
3. When you are using Pen on a Graphic Tablet, make sure you check Pen Pressure to control sensitivity of the pen.
Import Brushes
You can import brushes in Photoshop as much as you want. Bring the brush menu by clicking on Brush Picker icon.
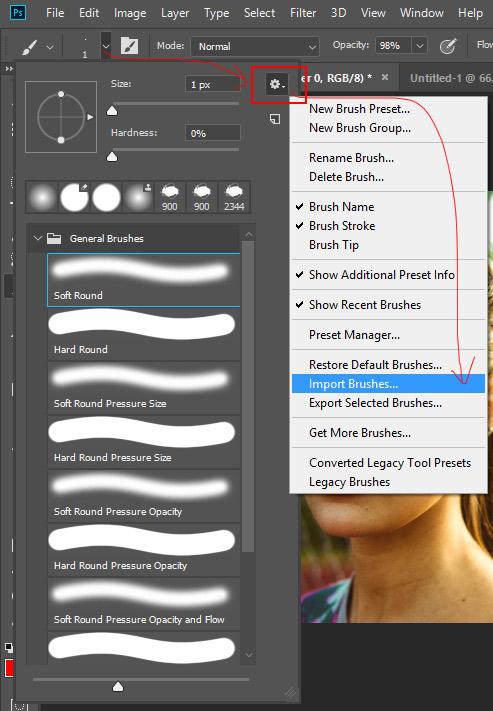
Then click on the Little Gear Icon and select Import Brushes and you can navigate into your PC to load more brushes in Photoshop.
Brush and Color
Without the Color, the brush is incomplete and vice-versa.
There are multiple ways to set the foreground color. You can select a color from Color Picker Box, you can sample a color from the image and you can also use Swatches Panels as well.
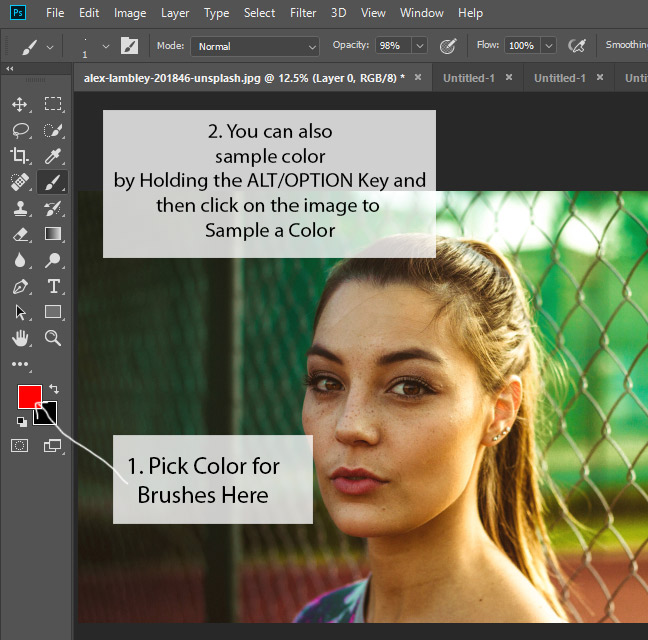
1. Head over to Foreground and Background Color Boxes. You can click here to set a color for the brush.
2. You can also sample the color from the image. With the Brush Tool Selected, hold down AlT/OPTION Key and now brush will switch to Eye Dropper Tool allowing you to sample a color from the image. Just click anywhere in the image to sample a color.
3. Behind the Foreground Color box, there is a Background Color box, where you can store another color. You can switch between Background and Foreground Color by pressing (X).
Understanding Opacity and Flow
Brush Stroke 100% Opacity and Flow
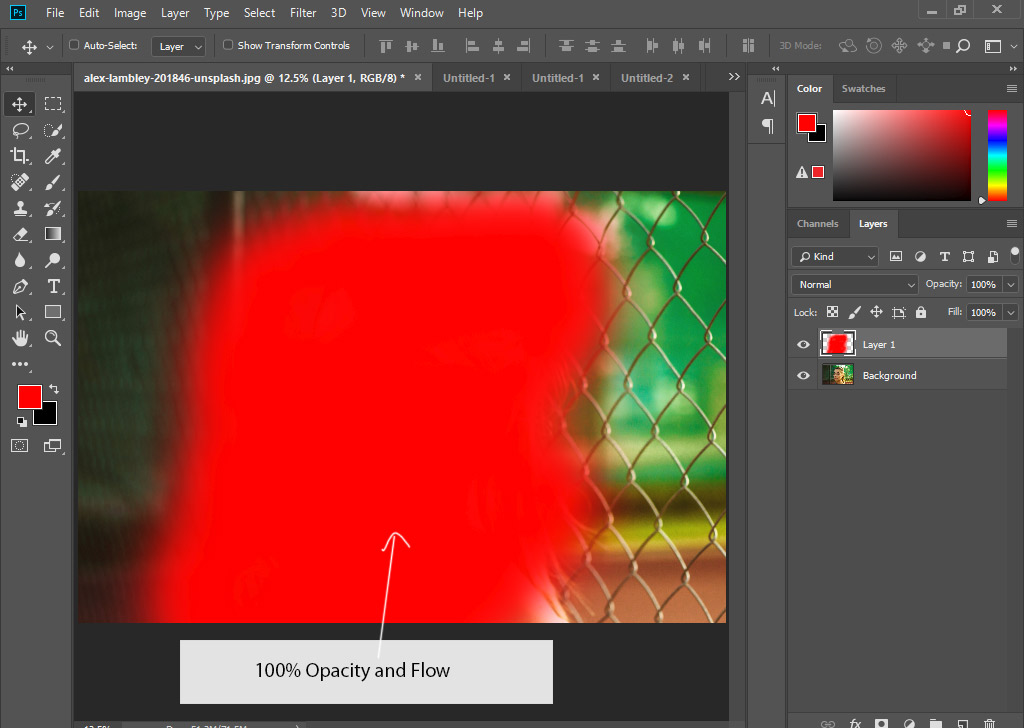
In the below image, you can see I brush over the image with 100% Opacity and Flow. You can notice we can’t see through the image since the brush stroke is 100% visible. There is no transparency.
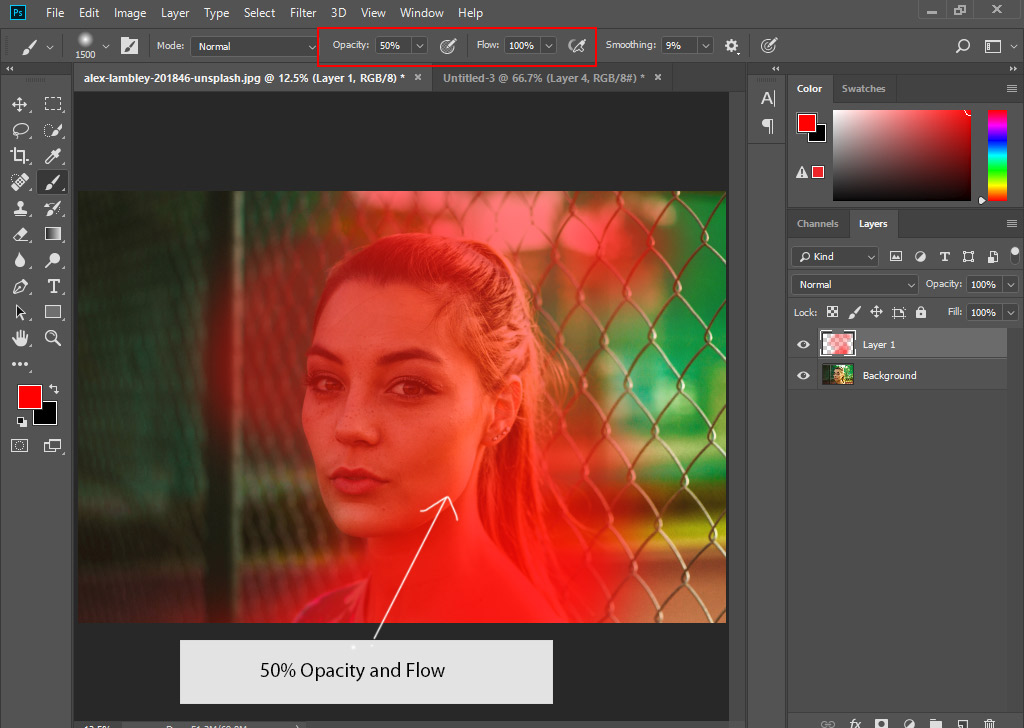
Let’s turn down the opacity to 50%. You can go to Options Bar and then drag the opacity slider to set the opacity.
Now in the below, you can see the brush is much transparent and you can easily see through it.
Note: the brush strokes are not looking natural here. Each time you apply a brush stroke it kinda stacks them like 50% first time and second time again 50% leading to 100% brush stroke. This makes the brush strokes unnatural as there is no gradual blend between them.
Set the opacity to 100% and this time reduce the Flow to 10%.
Now as I brush over the image the brush stroke looks natural and you can see a gradual blend between each brush stroke in the below image.

Always use relatively low Flow Value to get most out of the brush tool. Now may have cleared your doubt about Opacity and Flow!
Let’s Create light Effect with Brush Tool
Set the Brush
In order to create light you need to select the Soft Round Brush as you know that light is always soft and glowing. Soft Round Brush will help us to achieve a nice glowing light effect and it’s a default Photoshop brush as well.
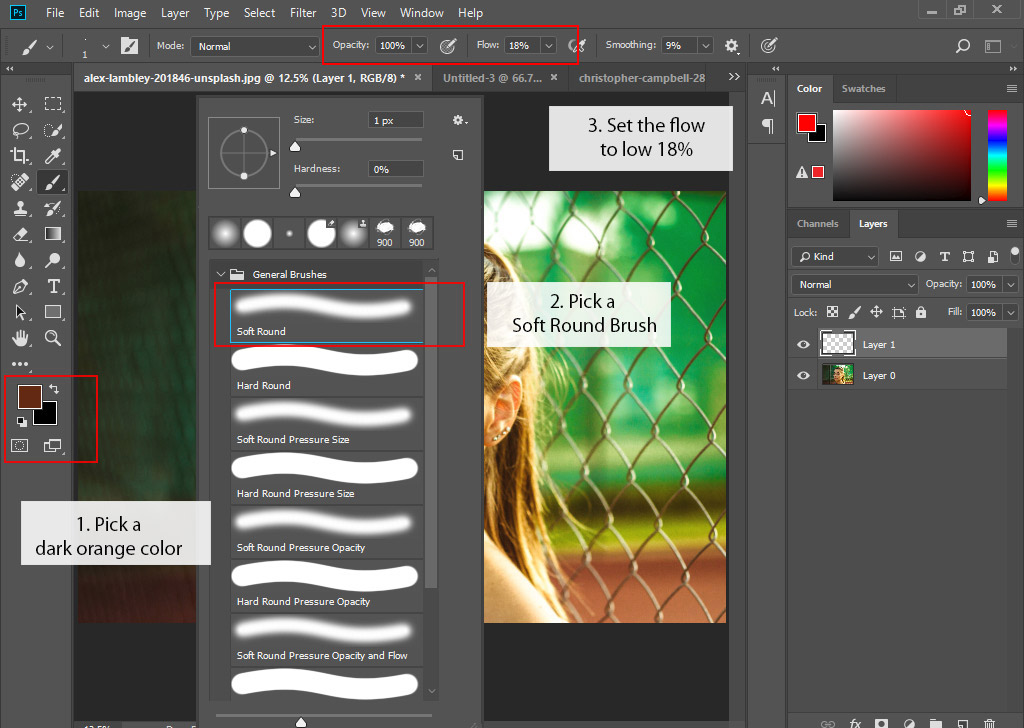
1. Pick a dark orange color. I am choosing a dark orange color because we’ll use the Linear Dodge blend to create a light effect. This blend mode always lightens up the things so it is better to use a dark color to avoid any harsh or drastic light.
2. With the Brush Tool Active, right-click on the image to bring the brush menu and select a soft round brush.
3. Make sure you set the Opacity to 100% and Flow to fairly low something like 10%-20%.
Paint using Brush Tool
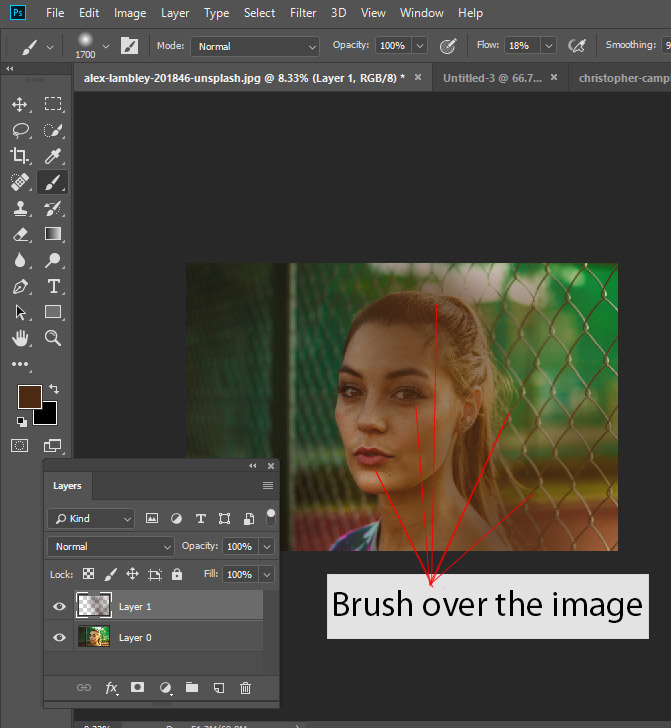
Now create a new layer by selecting Layer > New Layer and then brush over the image as I did in the below image.
Blending Modes
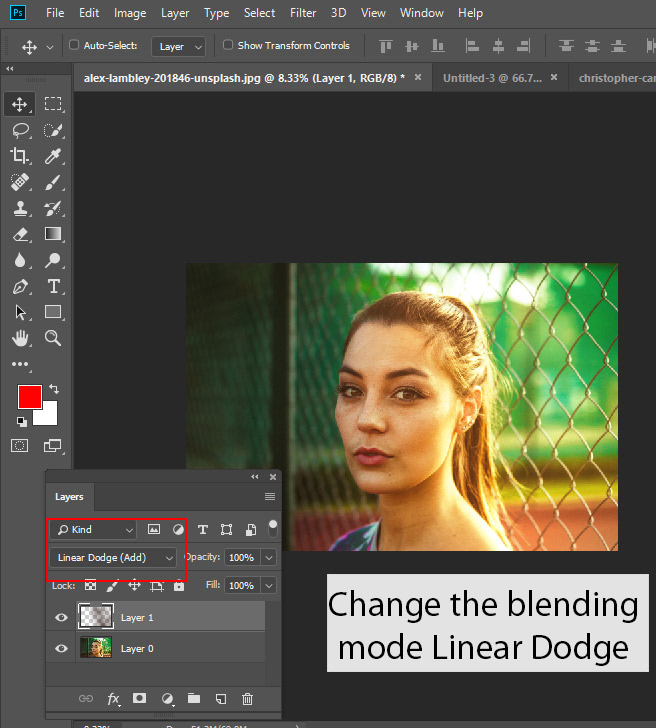
Change the blending mode to Linear Dodge.
Here you can see we’ve created the light effect. Although, you can adjust the opacity of the layer to subtle the light effect.
The Linear Dodge blend mode always lightens up the image.
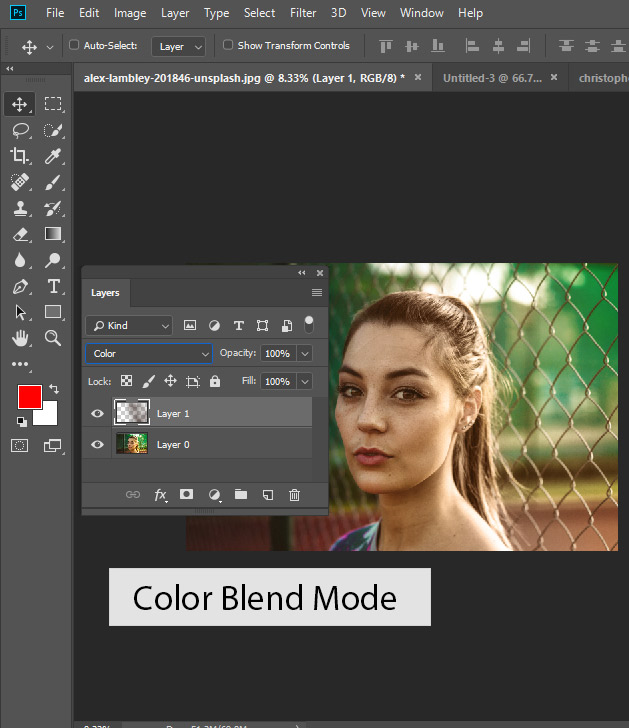
Now change the blend mode to Color, this blend modee will color the image by blending it to layer underneath it.
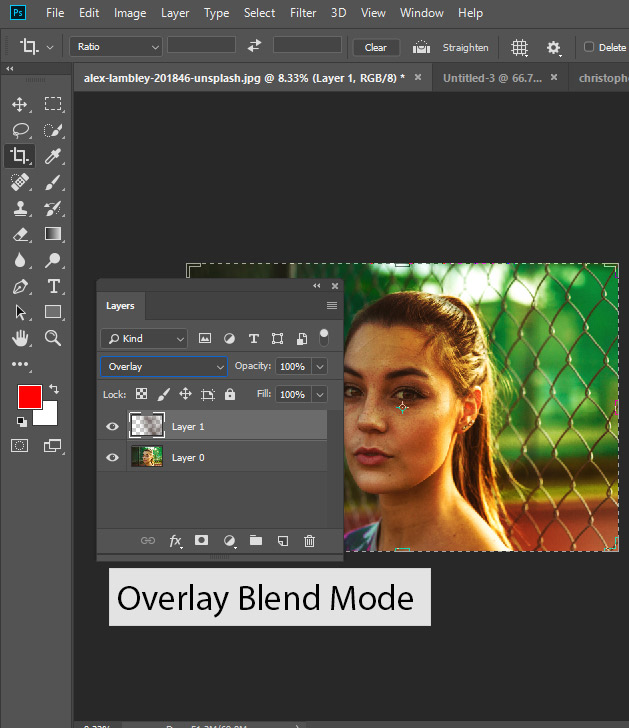
Now change the blend mode to Overlay, Photoshop will blend the dark orange color with all layers underneath it and this blend mode always gives you a contrasty look.
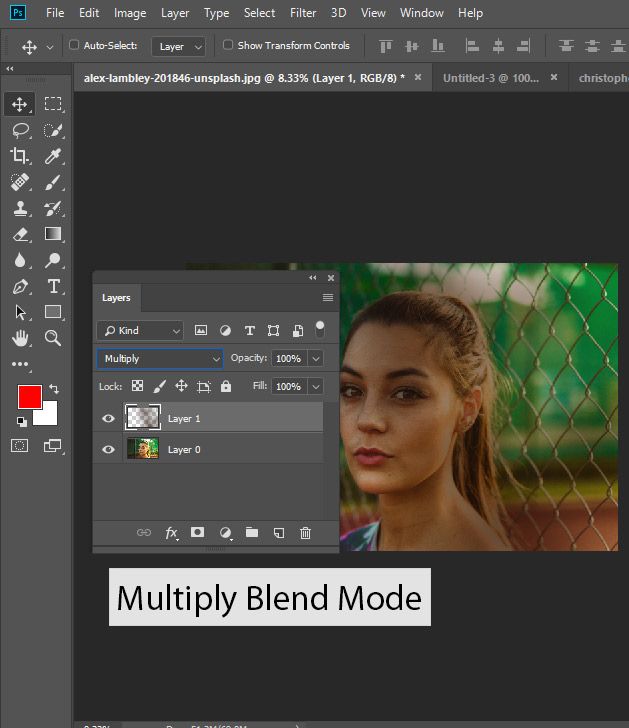
Now change the blend mode to Multiply, Photoshop will blend the dark orange color with all layers underneath and this blend mode always gives you a dark look.
Blending Modes Groups
You can see the Blending Modes groups in the below image.
1. Normal mode is the default Blending Mode. You can reduce the opacity of a layer to see through it. Dissolve mode really doesn’t get used often.
2. Second, we’ve “Darken”, “Multiply”, “Color Burn”, “Linear Burn” and “darker color”, these are the darken mode because they always dark the image. You’ve seen the dark effect created by the Multiply Mode.
3. Third, we’ve “Lighten”, “Screen”, “Color Dodge”, “Linear Dodge” and “Lighter color”, these are the lighten mode. They always lighten the image.
You’ve seen we used the Linear Dodge mode to create light effect. You can even try other modes from this group.
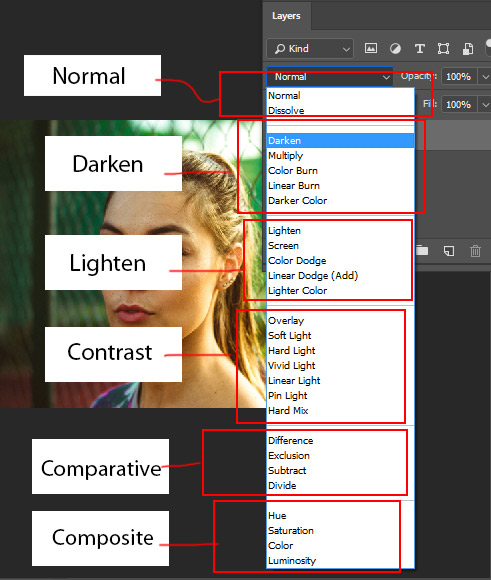
4. In the fourth group we’ve “Overlay”, “Soft Light”, “Hard Light”, “Pin Light”, “Vivid Light”, “Linear Light” and “Hard Mix”, these are the contrast mode. Each one both darkens and lightens the image.
Overlay mode had given a contrast look to the image when we used it. Feel Free to try other modes from this group.
5. The Inversion Blending Modes “Difference”, “Exclusion”, “Subtract” and “Divide” look for variations between the base (background layer) and blend layers (is the layer where the color is applied) to create the blend.
You don’t need to worry about this group as it is too complicated and most of the time you actually don’t need to use the Inversion or Comparative Blending Group.
6. Finally, we’ve Composite mode and “Hue”, “Saturation”, “Color”, and “Luminosity” modes made up the composite group.
You’ve seen we used the Color mode and it has blended the color with the image.
How do I know which Blending Mode to use?
Well, I think the answer is pretty simple and you don’t need to learn and remember about each Blending Mode.
Just use that Blending Mode that is giving you the best results from others. That’s the basic rule of thumb.
For instance, you’ve seen we want to lighten the image and I went to Lighten Group, I selected all the blend modes to see which one is giving me a nice glowing light.
I found that Linear Dodge is working best for me so I used it.
Helpful Shortcuts for Brush Tool
To get Eyedropper with painting tools……………………………………………………….Alt
Change paint opacity (with Airbrush OFF)…………………………………. Number keys (0 to 9)
Change paint opacity (with Airbrush ON)……………………………Shift–Number keys (0 to 9)
Change Airbrush flow (with Airbrush ON)…………………………………. Number keys
Change Airbrush flow (with Airbrush OFF)………………………….Shift–Number keys
To get Crosshair cursor……….While in any painting/editing tool, turn Caps Lock on
Decrease/Increase brush size…………………………………………………………….. [ or ]
Decrease/Increase hardness of brush…………………………………… Shift–[ or Shift–]
Switch between preset brushes …………………………………………………………< or >
Open Brushes pop-up panel……………………………….Right–click in image window
That’s it for the tutorial!
Congratulation, Now You can use Brush Tool and Blending Modes!
Need Help With Photoshop or Looking for Professional Support?
Whether you're just getting started with Photoshop or need expert-level assistance, we're here to help! Contact us for personalized Photoshop tutorials, project support, or creative services.
Get in touch today to take your skills or projects to the next level.
CONTACT US NOW📘 Want to Master Photoshop Faster?
🎁 Get Your FREE PDF E-Book "Top 10 Photoshop Tricks Every Designer Must Know" Now – Packed with expert tips, shortcuts, and techniques to boost your creativity & workflow.
👉 Download Your FREE PDF E-Book NOW!