
In this tutorial, I’ll show you how to make selections, how to fine-tune it using Select and Mask and change the background in the beginning to reap the benefit of your new background.
Tutorial Resource Section
Add the New Background
Step 1
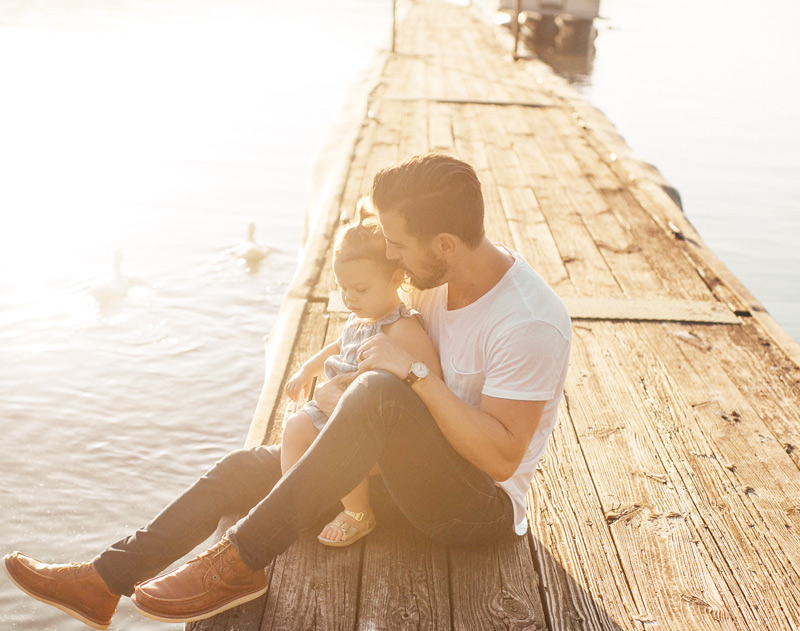
The basic rule of thumb, when changing and removing the background is to add the new background initially that you want behind your image.
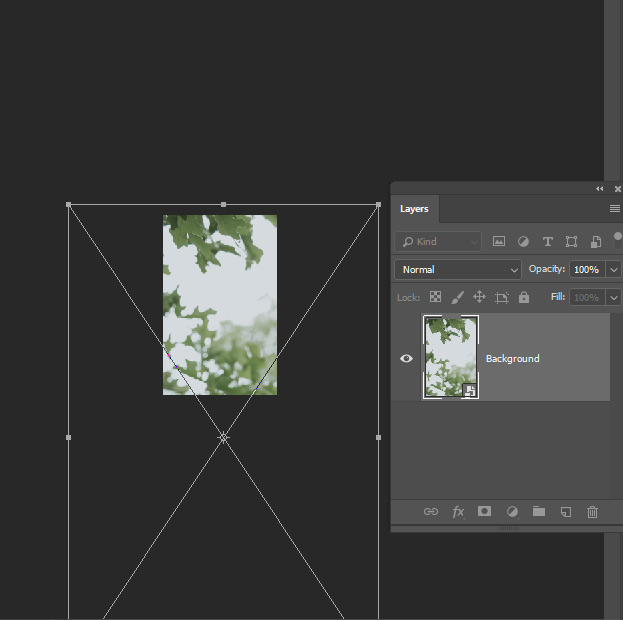
First, I opened the image that is going to be a new background (You can download it from Tutorial resource section). Go to File > Open and open the image.
Press CTRL/CMD + T to activate the Transform Tool. Hold down SHIFT + ALT/OPTION key and drag out any corner to enlarge the image.
Here you can see how I resized it:
Step 2 – Blur Background
Although the background is blurred I want to add more blur to the background. To do this, convert the background layer into Smart Object by right-clicking on it and click Convert to Smart Objects.
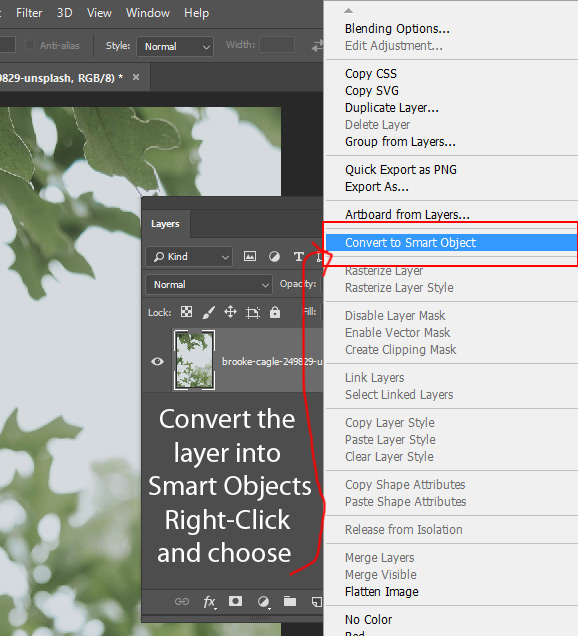
Converting a layer into Smart Objects allows you to go back anytime to Fine-Tune the Filter’s settings. Once you applied any filter, double-click on the name of the Filter to change the settings at any time.
Now go to Filter > Blur > Gaussian Blur:
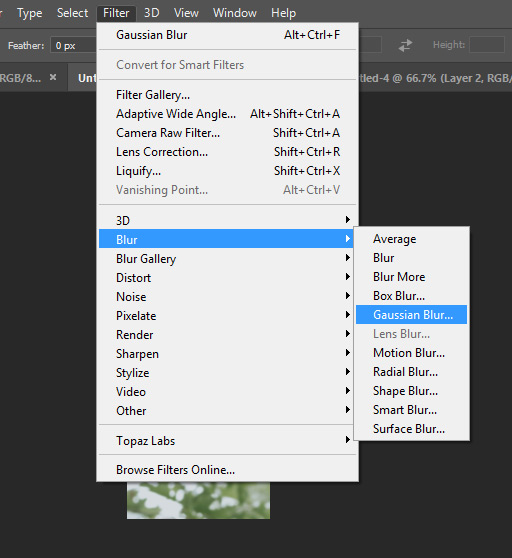
Now Drag the Radius Slider to right to blur the background. I used 11px Radius but it all depends up to you and your image that how strong the blur effect you want on the image.

Add the Subject
Step 3
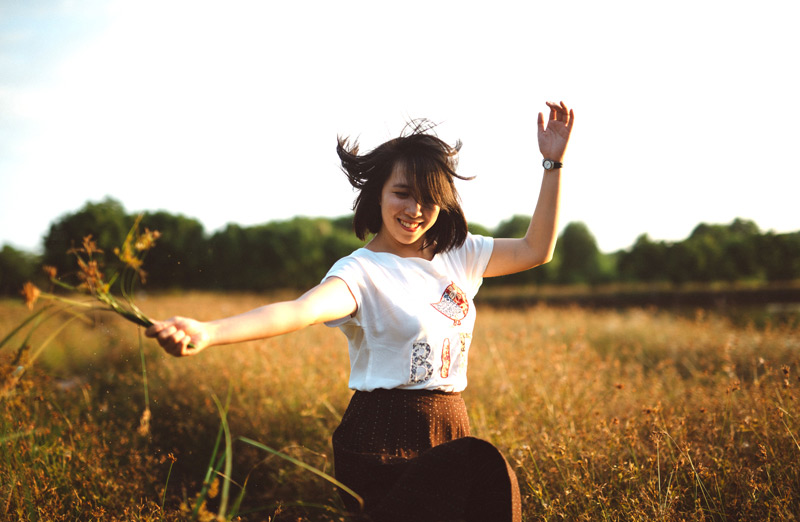
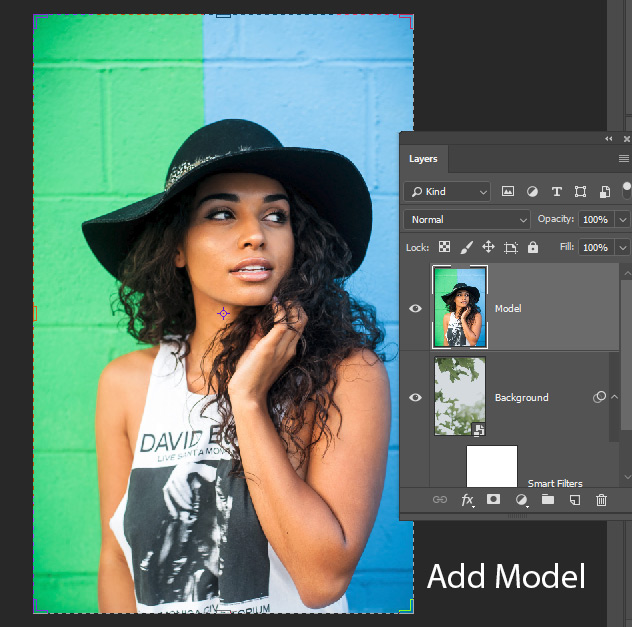
Now, I’m placing the model (download it using the above-mentioned links) into the main document by selecting File > Place Embedded. You may want to resize the image in order to fit nicely to the document. You can use the Free Transform Tool CTRL + T to resize the image as I’ve already done it.
Make Selection to Change Background
Step 4
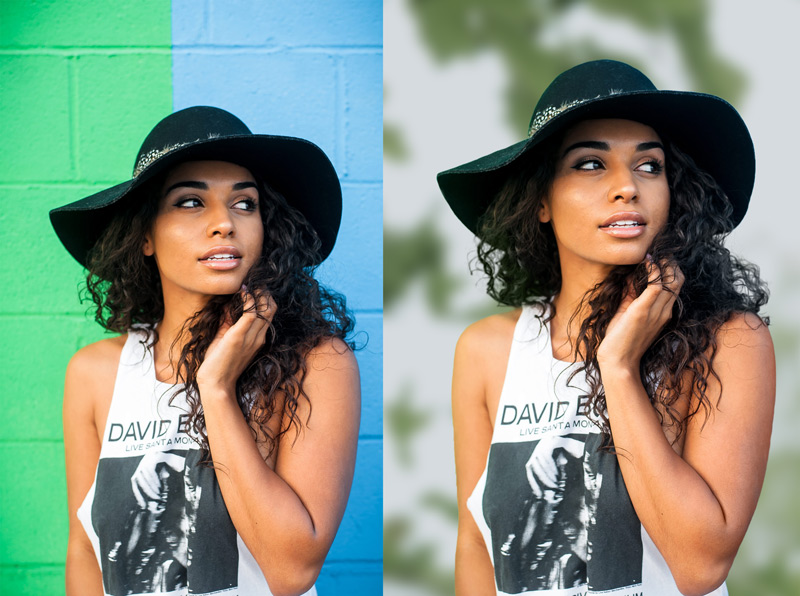
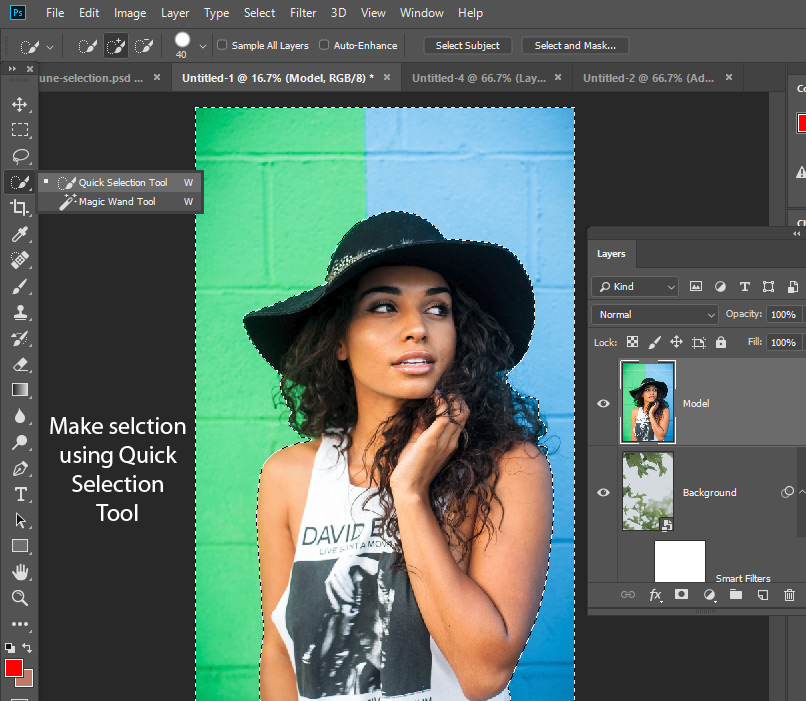
In order to change the background, we need to make the selection of the model. To do so, use the Quick Selection Tool (W) to make selection.
Go to Tool Panel and select Quick Selection Tool (W). Now Drag over an area you want to select. This tool tries to find image edges and automatically stops the selection there.
Let’s say I want to select the background, just hold and drag over the background to select it.
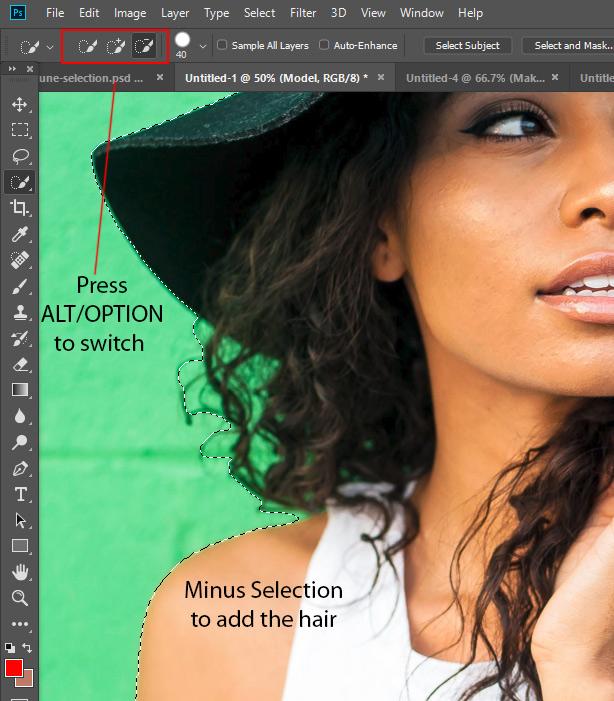
To select less, hold the Alt key (Windows) or the Option key (macOS) as you drag over areas to remove from the selection as I did in the image below.
Step 5
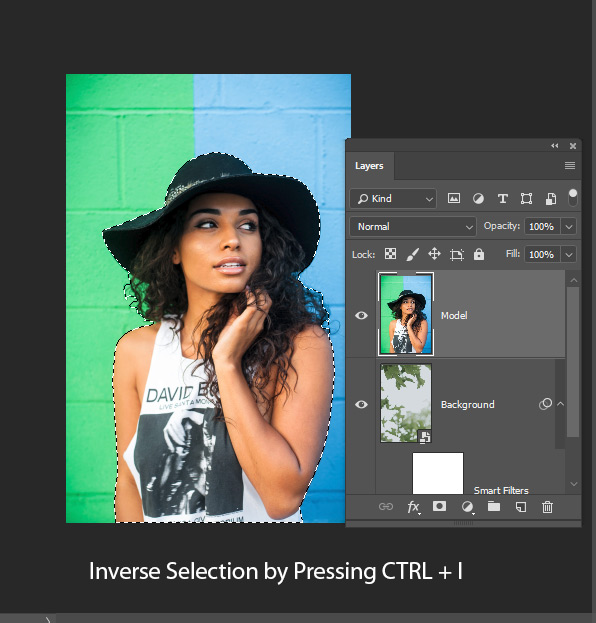
Once you are happy with the selection press CTRL + I to inverse the selection to select the subject.
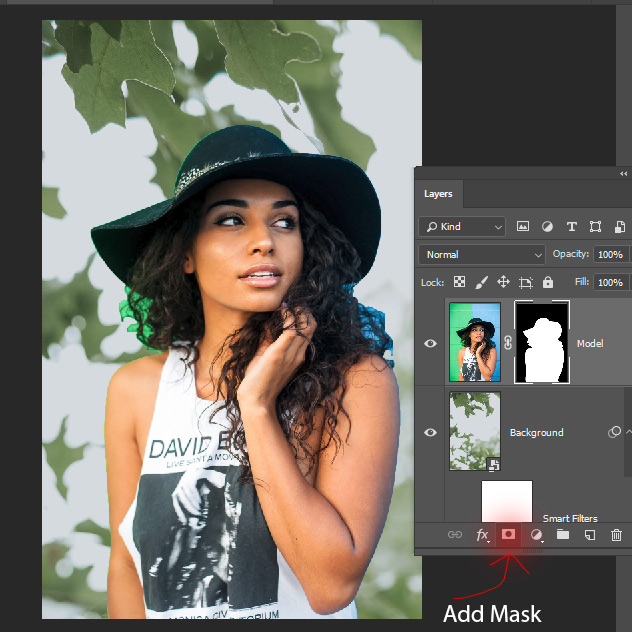
Now click on Add Layer Mask button to add a mask and remove the background.
Fine-Tune Selection using Select & Mask
Step 6
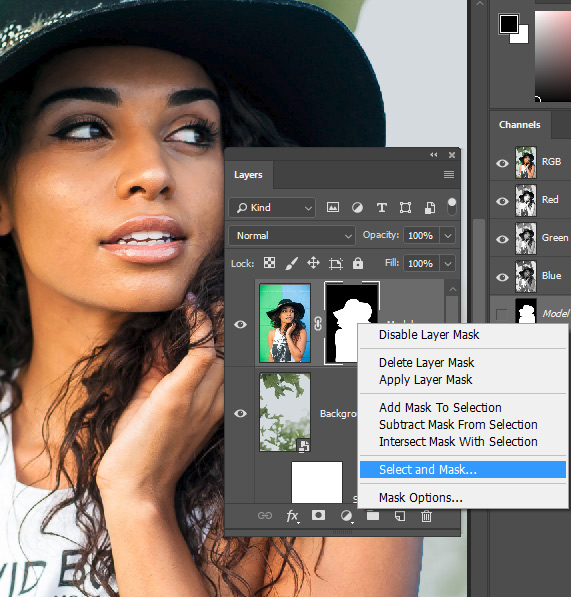
It’s time to refine the selection using Select & Mask. Right click on the mask and choose Select and Mask or open the Select and Mask workspace by choosing Select Menu > Select and Mask.
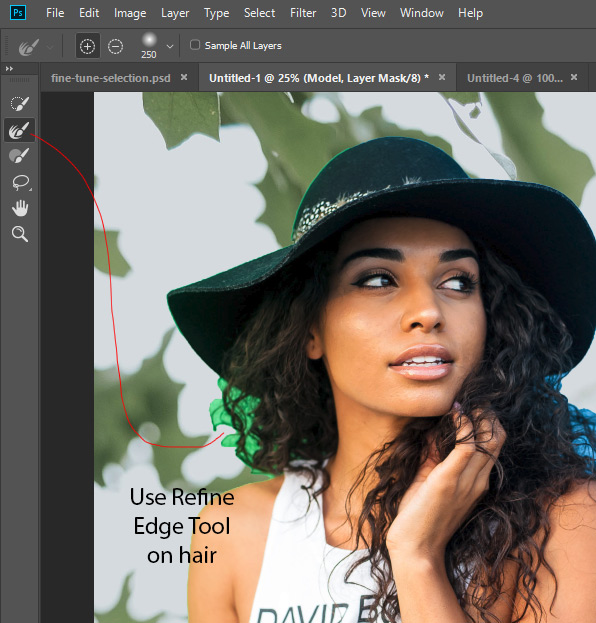
Now use the Refine Edge Tool on the hair to get rid of the green background from the hair.
This Tool try to find edges by doing some sort of calculation. You just need hold and drag over the hair to remove the green background.
Here you can see how I used it on both sides:
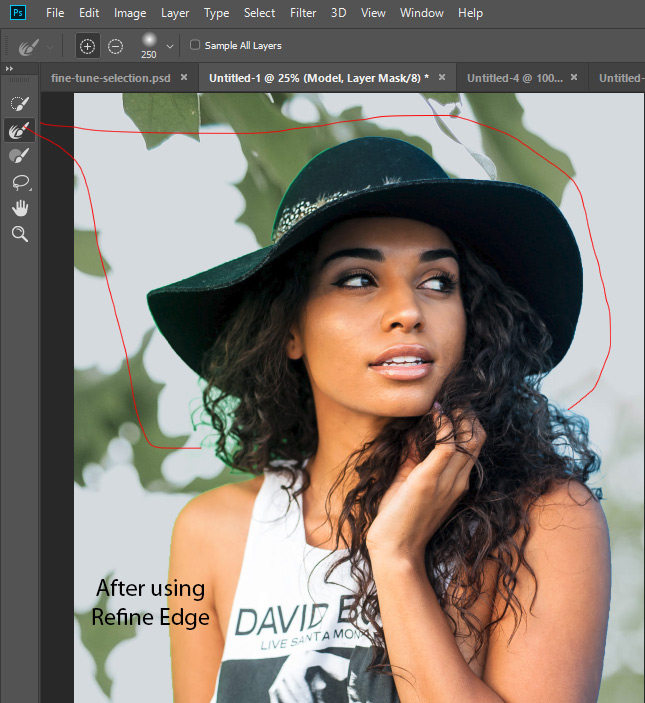
Step 7
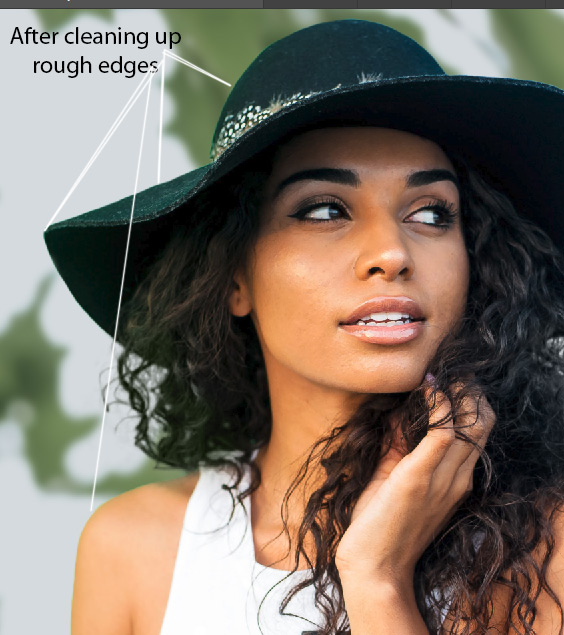
As you can notice the edges of the subject looks too rough. It doesn’t matter which selection tool you use you’ll always get the hard or rough edges around your subject.
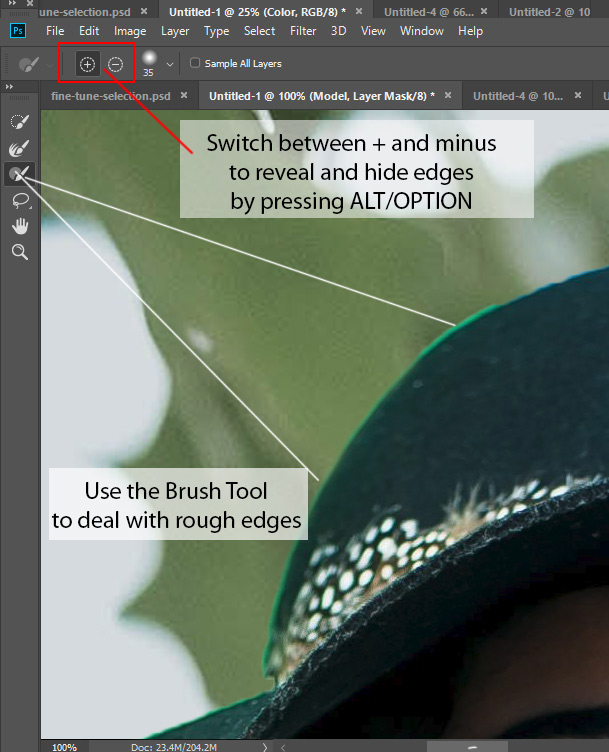
You need to smooth or soften them. I usually go manually around these edges to clean them up.
Right underneath the Refine Edge Tool you’ll find the Brush Tool.
Select it and paint on the image where you want to add to the selected area.
If you want to subtract from the selected area press Alt (Windows) or Option (macOS) and paint on the area to remove as I did to remove the edges.
Results after cleaning up edges:
Step 8
In the Global Refinement settings you’ll a lot of sliders to play around.
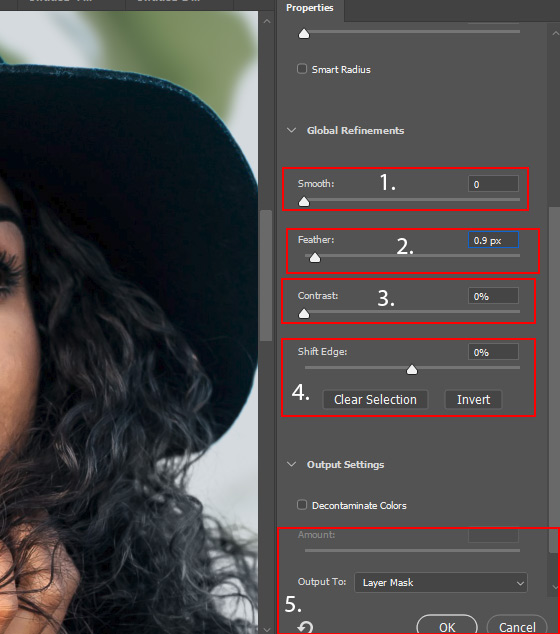
1. Smooth Slider will smooth out the edge of the selection.
2. Feather Slider will soften the edges as I used it a bit.
3. To make the edge of the selection sharp, you can use the Contrast Slider.
4. You can shift edges of the selection using Shift Edges slider.
5. In the output menu , I’ve selected Layer Mask to tell Photoshop that I want the results on the existing layer mask. You can select New Layer with Mask if you want the results on a layer with an attached layer mask.
6. Click OK to get the results:
Removing Color Fringe
Step 9
As you can notice the color fringing on the edges of the hair. We are going to take care of this using a Hue/Saturation adjustment layer.
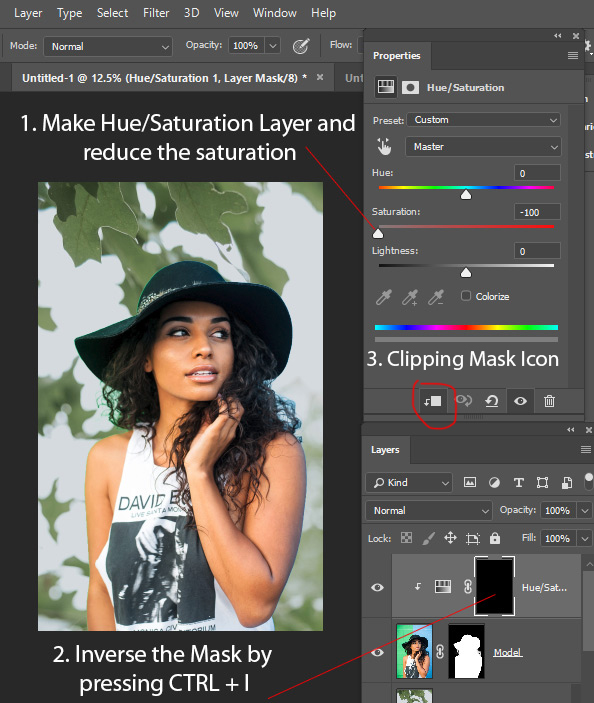
1. Go to Layer Menu > New Adjustment Layer > Hue/Saturation. Drag the Saturation Slider to left to desaturate the image.
2. Inverse the layer of the Hue/Saturation. Select the mask and then press CTRL + I to create a black layer.
3. Make sure you clipped Hue/Saturation layer to model layer by pressing the Clipping Mask Button since we don’t want our background to be saturated.
Step 9B
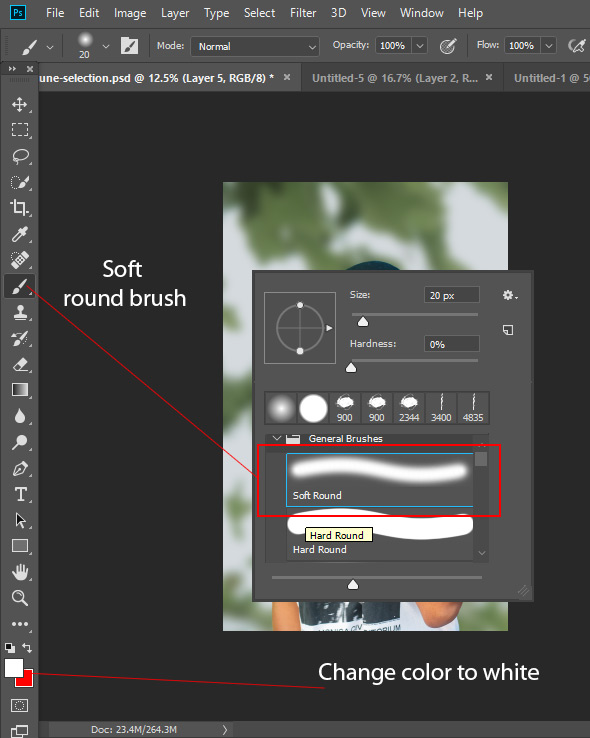
Select Brush Tool (B) in the Tool Panel
With the Brush Tool Active right-click inside the image to bring the brush set and pick a soft round brush from there.
Set the Foreground Color to White by clicking the Foreground/Background color box.
Now Reveal the black/white or desaturated effect on the hair.
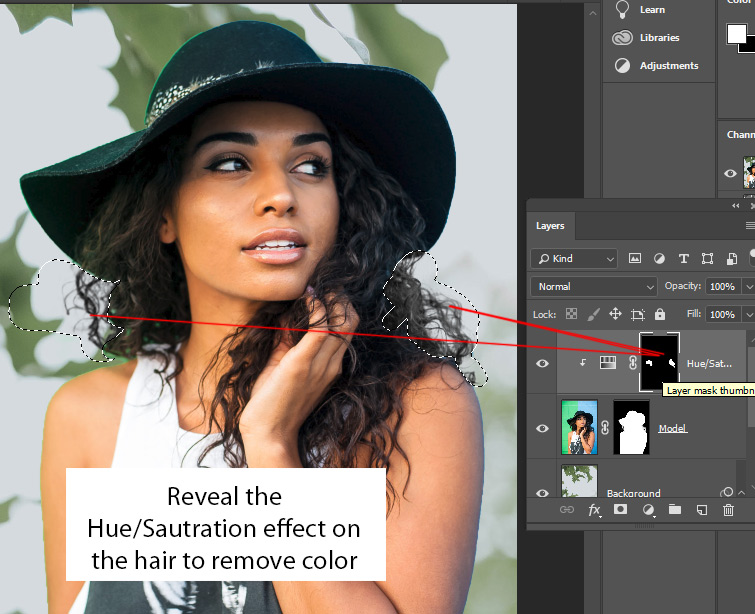
Step 9C
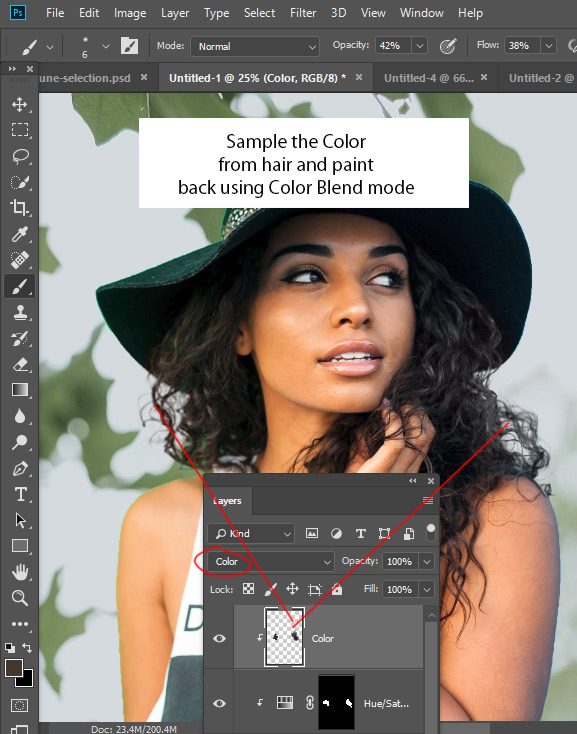
In order to add color back to hair, we can use Color Blend Mode.
Create a new layer by pressing CTRL + SHIFT + N and clip this layer. To clip a layer Right-Click on it and choose Create Clipping Mask. Change the blending mode of this layer to Color.
You need to clip this newly created to Hue/Saturation.
Sample the color from the model hair by pressing the ALT/OPTION KEY and make sure you’ve selected the Brush Tool, I think the model has brunette hair, so I selected the hair and painted on the hair.
Step 10
In the below image, you can notice the model has the blue color on the right-arm and she also has green color on the left-arm.
Although, green might be suiting the skin hair as we have green color in our new background. But the blue color needs to be removed.
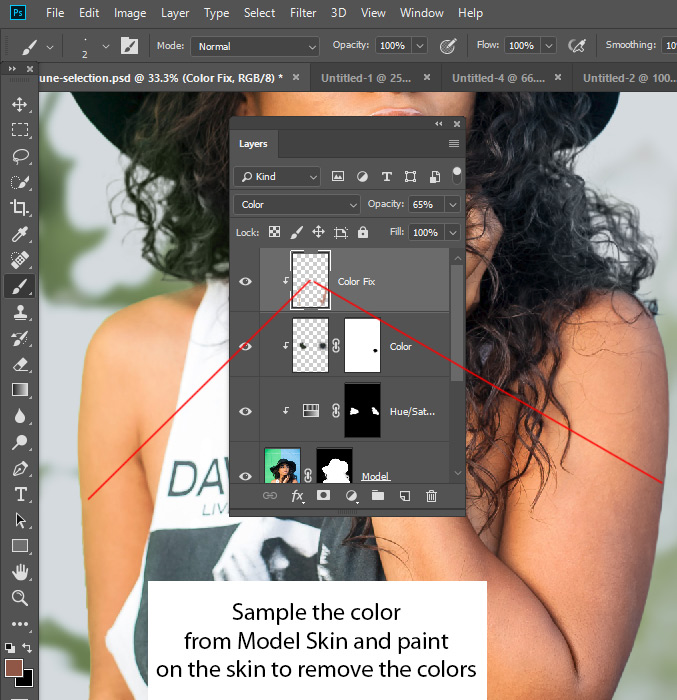
To do so, create a new layer and clip it to layer underneath it.
Again change the blending mode to Color and sample the color from the model skin. Make sure you pick the dark shade color of the skin as the edges of the arm are bit darken.
Using a soft round brush, paint the color on the skin.
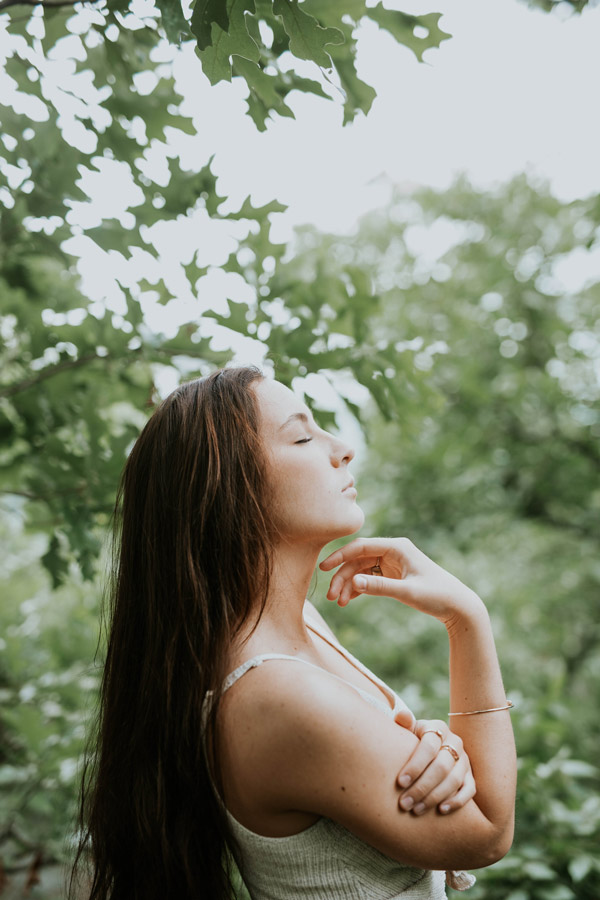
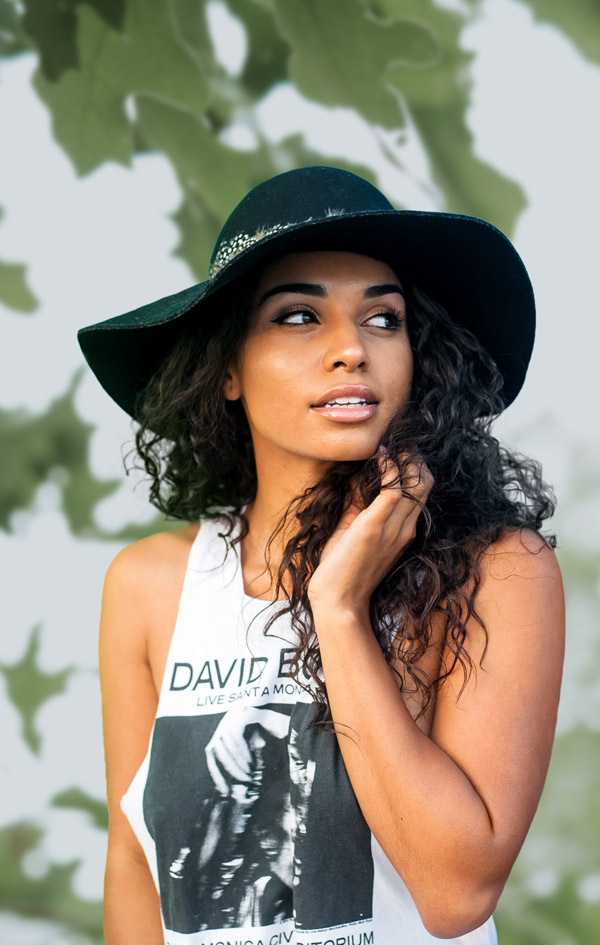
In the end, you can see we’ve changed the background of an image.
Bonus Tip
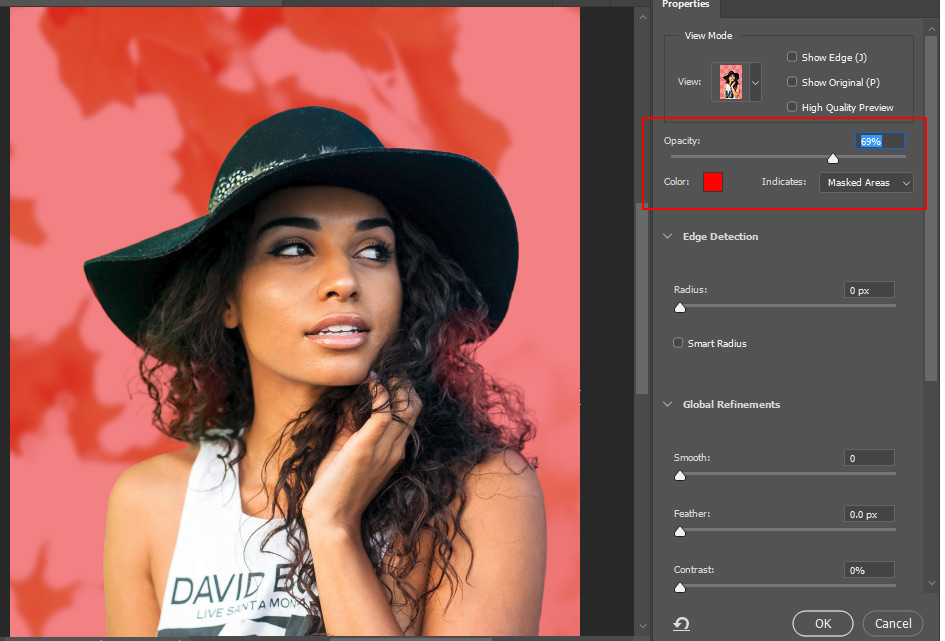
In the Select and Mask workspace, go to the View menu and choose a view mode.
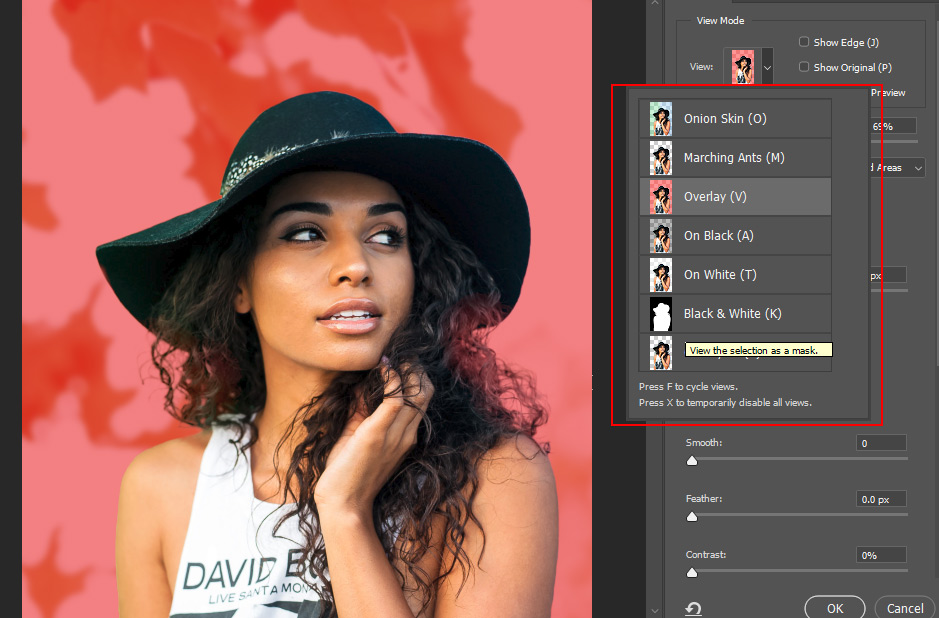
For example, if you choose the Overlay view, selected areas appear transparent and non-selected areas are highlighted in red. You can drag the Transparency/Opacity slider to control the opacity of the red overlay.
Congratulations! Now, You know how to Remove a Background!
Need Help With Photoshop or Looking for Professional Support?
Whether you're just getting started with Photoshop or need expert-level assistance, we're here to help! Contact us for personalized Photoshop tutorials, project support, or creative services.
Get in touch today to take your skills or projects to the next level.
CONTACT US NOW📘 Want to Master Photoshop Faster?
🎁 Get Your FREE PDF E-Book "Top 10 Photoshop Tricks Every Designer Must Know" Now – Packed with expert tips, shortcuts, and techniques to boost your creativity & workflow.
👉 Download Your FREE PDF E-Book NOW!