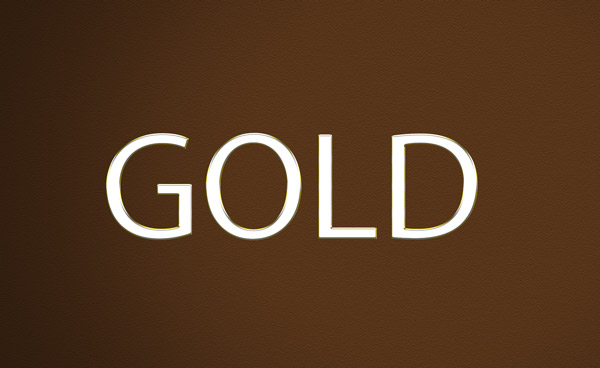
In this tutorial I’ll show you how to create a shiny gold text effect in Photoshop. We’ll first create a paper texture background for our text effect and then we’ll add the text. Using blending options, we’ll turn the text into a gold one and at the end, we’ll enhance the text by adding more focus to it, creating lights and adding a vignette effect. Follow the tutorial and add a shiny gold text style to your text.
Create the Background
Step 1
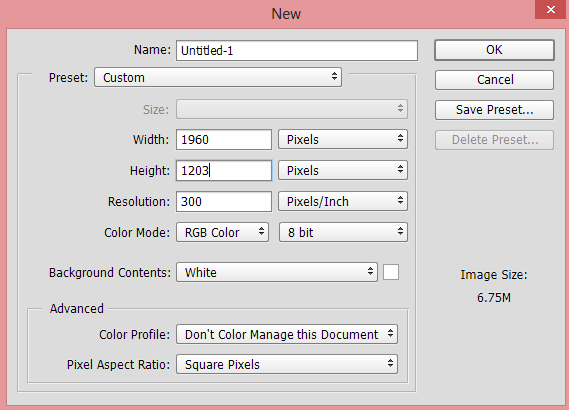
Create a new document in Photoshop by File > New and enter the following the settings. I’m working on bigger document but you can reduce the size of the document if you wish. Just enter the value according your way and hit ok.
Step 2
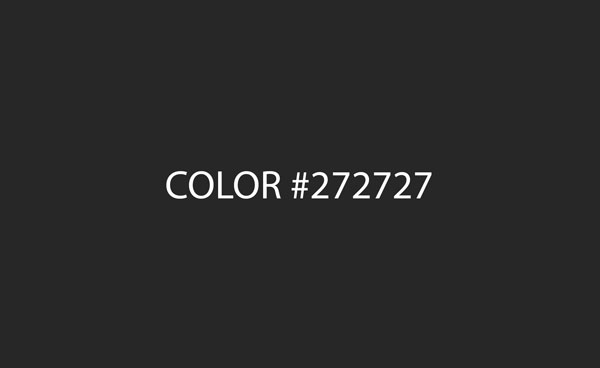
Set the foreground color to #272727 and press ALT + BACKSPACE to fill the document with above mention color. You can also fill the document with black if you want but I would like to go with sort of dark gray color.
Here you can see the background is filled with dark gray color:
Step 3
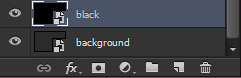
Now we are going to add a texture to our background. Hit CTRL + SHIFT + N to create a new layer. Press (D) to set the foreground color to black and fill this layer with black color by pressing ALT + BACKSPACE. Convert this into Smart Objects by right clicking on it and choose ‘Convert to Smart Objects’. Name this layer ‘black’.
Go to Filter > Filter Gallery > Sketch and under the sketch filter choose Note Paper. Set the Image Balance to 25, Graininess to 10 and Relief to 11. See the settings below.

Set the blending mode of black layer to Overlay. Here we have our paper texture effect for the background :

Step 4
Go to Layer > New Adjustment Layer > Curves or click on the third icon at the bottom of layer panel and create a Curves adjustment layer. Now darken the background using the following settings:
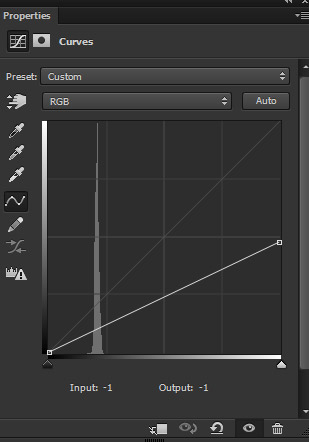
Here are the results with more darkness:

Step 5
Create a Color Balance adjustment layer and alter the Midtones values to change the color of background into the dark brown color.
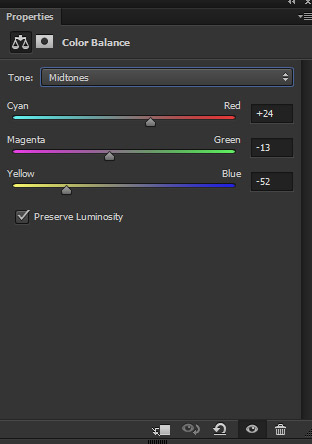
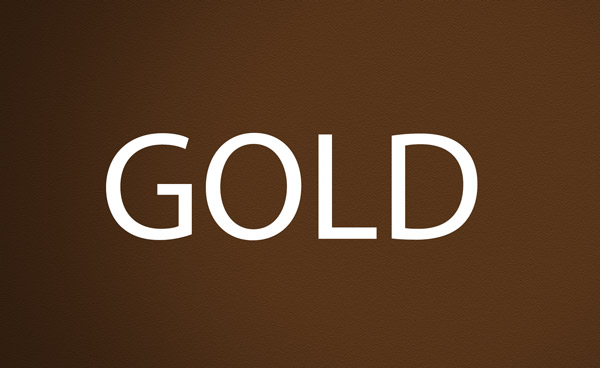
Here you can see the results and there is a reason behind choosing this color. And the reason that gold effect looks best either at the black background or into dark brown color like you see in the below image. Also, at the end, you’ll have lot option to add more shiny to text like you can add the sparkles, light and much more.

Step 6
Create a new layer and name it ‘light’. Activate the Brush Tool (B) and select a soft round brush with 100% opacity and flow. Now using a white color paint a bigger brush stroke starting from right to left. Here you can see how I painted the lights.

Set the blending mode to Overlay 100%.

Add the Text
Step 7
It’s time to add the text. First set the foreground color to white. Activate the Type Tool (T). Now type your text like I typed ‘gold’. Feel free to type your own text. I’m using Myriad Pro Regular font but you can use any font whichever you want.
Step 8
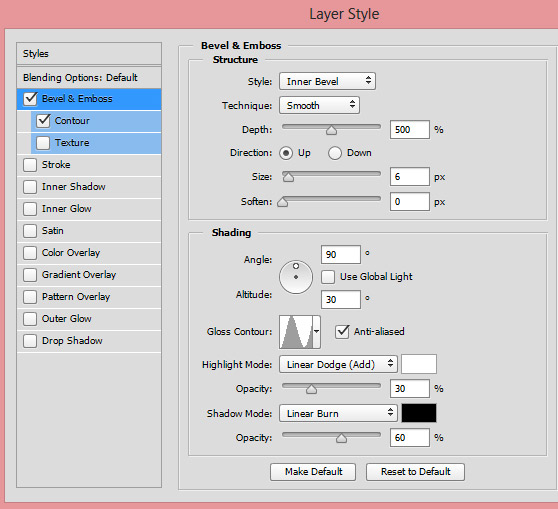
Now we are going use Blending Options effect to actually turn the simply white text into a gold one. Right click on the text layer and choose “Blending Options”. First Check the Bevel & Emboss and under the Structure options, I increased the Depth to 500% and size to 6 pixels. Under the shading options, I changed the Angle to 90 Degree. Don’t check the Use Global Light and I used the Gloss Contour available at 26 position.
I changed the Highlight Mode to Linear Dodge and reduced the opacity to 30%.
Also, I changed the Shadow Mode to Linear Burn and reduced the opacity to 60%.
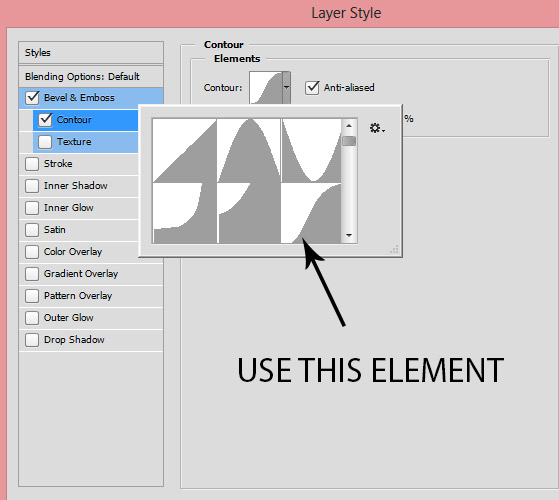
Under the Bevel & Emboss, check the Contour and use the indicated the contour elements for the text.
Results so far:

Step 9
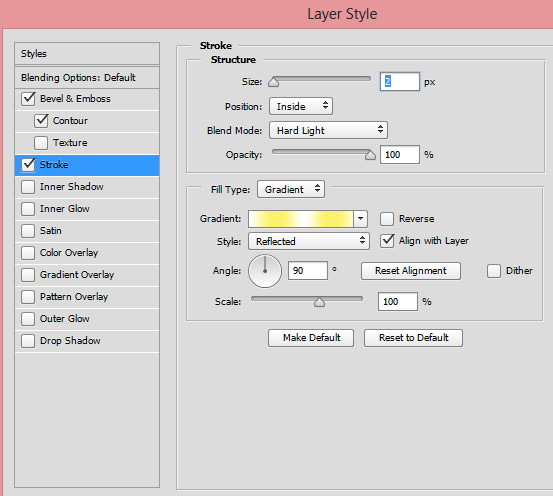
Now we’ll use the Stroke option to add shiny gold highlights to our text. So check the Stroke option and under the structure options, I changed the size to 2 pixels and Position to Inside. Also, changed the blend mode to Hard Light.
Select the Fill Type to Gradient. Set the style to Reflected and change the Angle to 90 Degree.
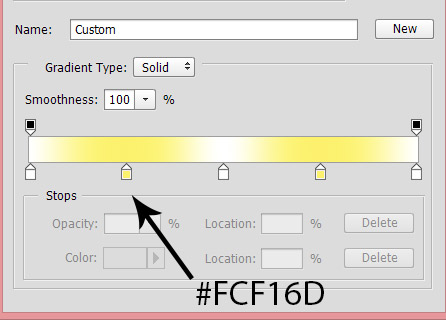
I chose the combination of white and gold color for adding highlights to text. Here you can see which color I used for gradient:
Now you’ll notice a shiny yellow and white highlights around the text.
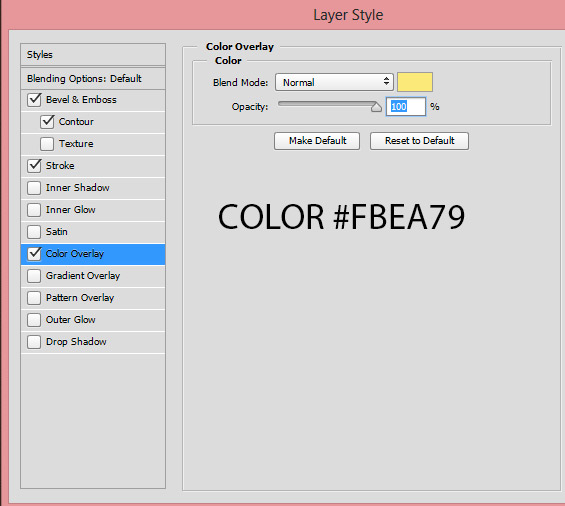
Step 10
Using the Color Overlay options I changed the color of the text. I chose the color #FBEA79 for the text. If your text color already has yellow color then there is no need to follow this step I changed the color as you know that our text is white.
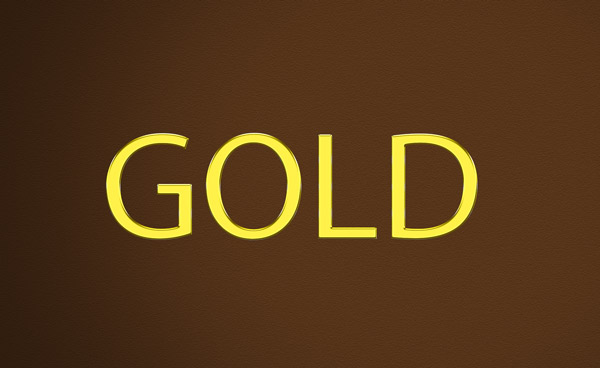
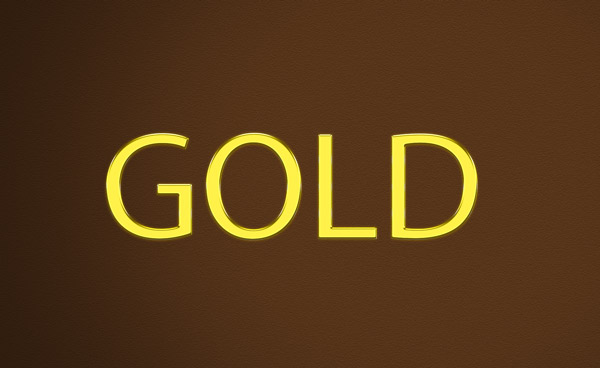
Here you can see that gold text started to appear:
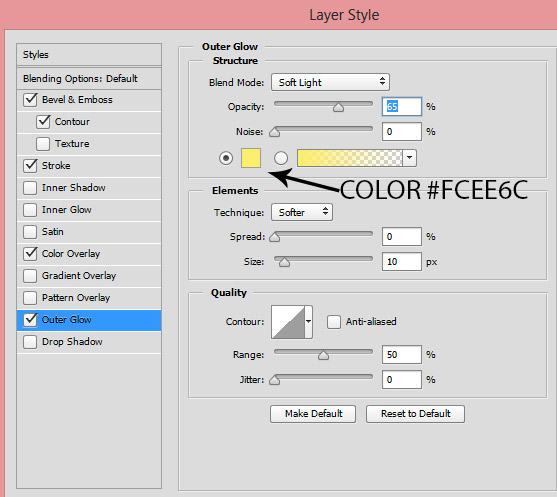
Step 11
Using the Outer Glow options I added glow to text. I used the #FCEE6C with Soft Light blend mode and don’t forget to reduce the opacity to 65%. If you want more glow then you can increase the opacity and you can also change the blend mode as well.
Results with gold outer glow around the text:
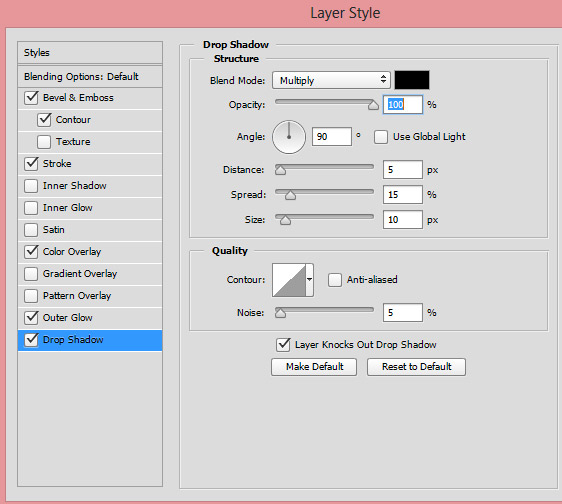
Step 12
Use the Drop Shadow effect to make the text stand out. Set the opacity to 100% and Angle to 90 Degree. Set the distance to 5, spread to 15% and Size to 10 pixels.
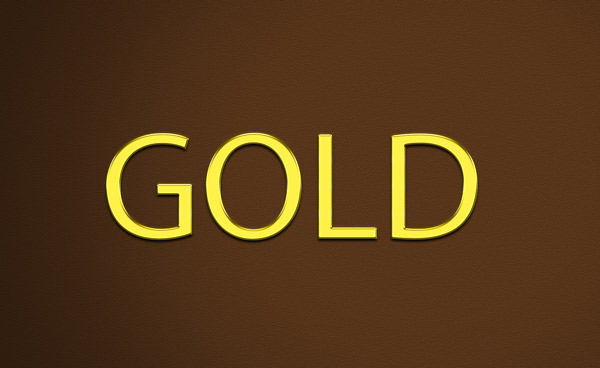
Results with shiny gold finish:
Step 13
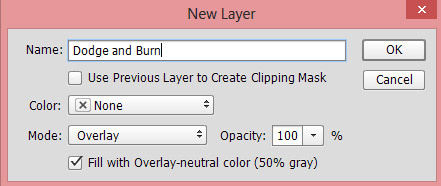
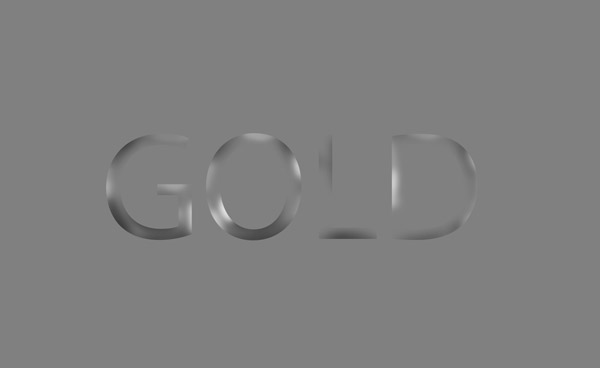
Now we’ll enhance the gold text using Dodge & Burn (O) tool. Go to Layer > New Layer and fill this layer with 50% gray color with blend mode changed to Overlay 100%.
Now use the Dodge Tool (O) with Exposure 10-12% settings and Range set to Midtones and now brighten those parts where you see the white highlights. Similarly, use the Burn Tool (O) to add more shades to those parts where you see the black shade. Do it patiently, it’s like polishing the gold like goldsmith and if you skip this then you’ll not able to add more shiny details to the text.
Here you can see in the Overlay mode how I did it :
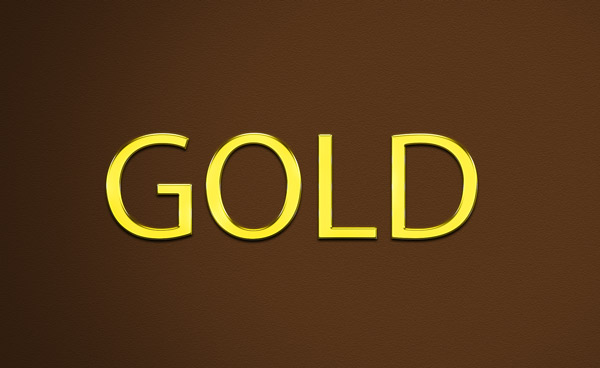
Here are the results in Normal mode:
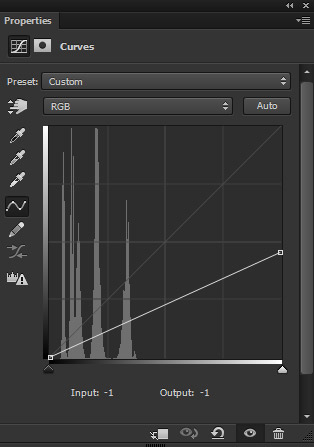
Step 14
Use the Curves adjustment layer one more time to darken the entire text. Here you can see the settings:
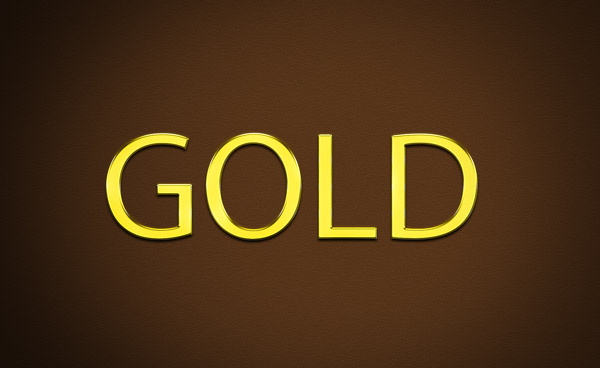
On the layer mask of Curves, I masked the dark effect from the middle to add more light and focus on the text. Use a soft round black brush for masking the effect. Here are the results after masking:
Step 15
On a new layer, I painted the white light to the text using a soft white brush and here you can see I painted the light on the middle.
Set the blending mode to Soft Light and lower the opacity to 75%
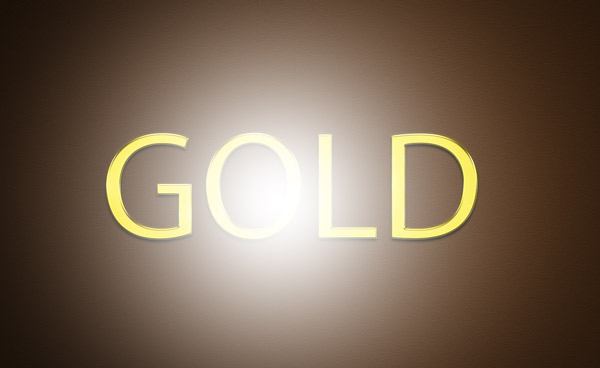
Here are the final results:

Conclusion
Thanks for following the tutorial. I hope you like the tutorial and if you do then do share it with the world and don’t forget to check the 3D version of this tutorial. Please let me know if you baffled at any step I would be happy to help you.
Need Help With Photoshop or Looking for Professional Support?
Whether you're just getting started with Photoshop or need expert-level assistance, we're here to help! Contact us for personalized Photoshop tutorials, project support, or creative services.
Get in touch today to take your skills or projects to the next level.
CONTACT US NOW📘 Want to Master Photoshop Faster?
🎁 Get Your FREE PDF E-Book "Top 10 Photoshop Tricks Every Designer Must Know" Now – Packed with expert tips, shortcuts, and techniques to boost your creativity & workflow.
👉 Download Your FREE PDF E-Book NOW!