

In this tutorial, I’ll show you how you can add orange & teal coloring in your images. This tutorial is the image specific tutorial meaning instructed steps won’t work on every image but provides a good starting point. You’ll learn how to give your images an orange & teal coloring if your images have blue and red tones. Let’s get into it!
Step 1 – Choosing Image
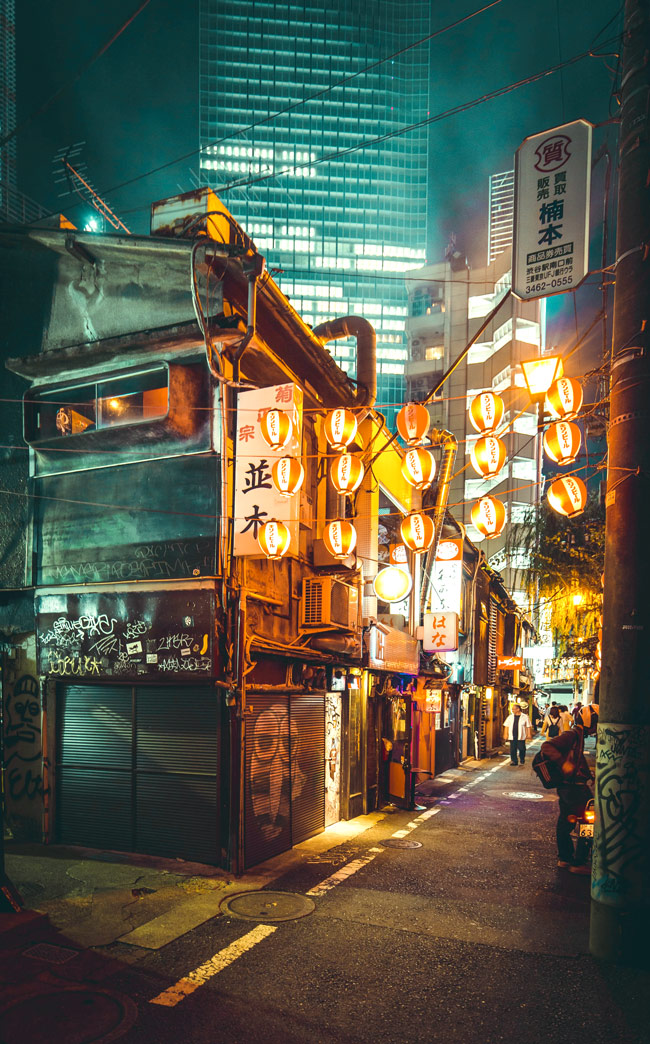
As I said that you need images with blue & red tones. The image that I picked has blue & red tones which makes the image perfect to play around with colors. We can easily turn blue color into teal and of course, we can do the same with reds which are close to orange color (obviously reds are closer to orange color, lol). That’s why I picked this image from Unsplash so I can manipulate color easily.
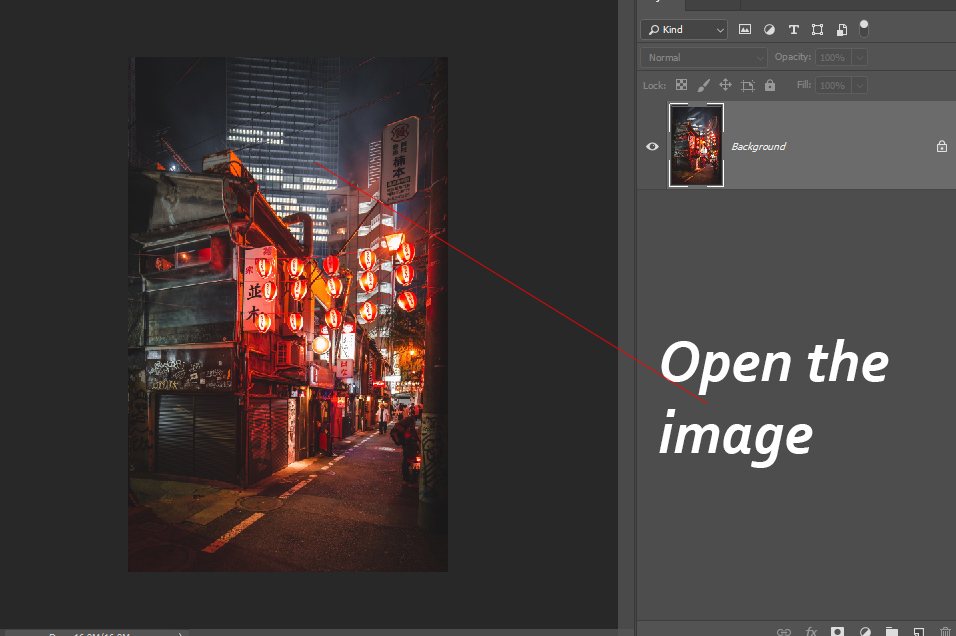
Go to File > Open and open the sample image in Photoshop.
Step 2 – Boost Brightness
So before I start doing coloring I want to give a boost of brightness to the image. Since it’s a night scene so I thought it is good idea to add some information on shadows & highlights.
Create a Curves adjustment layer by selecting Layer > New Adjustment Layer > Curves.
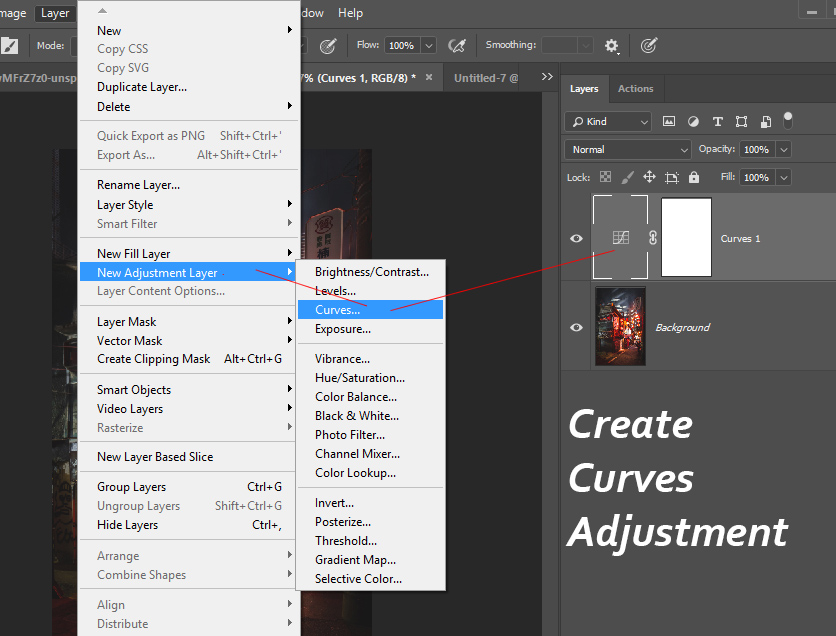
I added a point in the middle to increase brightness on the midtones that will also affect shadows & highlights to some extent. But it will be more subtle rather than increasing brightness on specific regions such as shadows & highlights.
You can input the following settings if you are following along:

You can also use Blend-IF to target shadows & highlights in your image. That will work great if shadows or maybe highlights don’t have much information in your images.
Step 3 – Basic Coloring
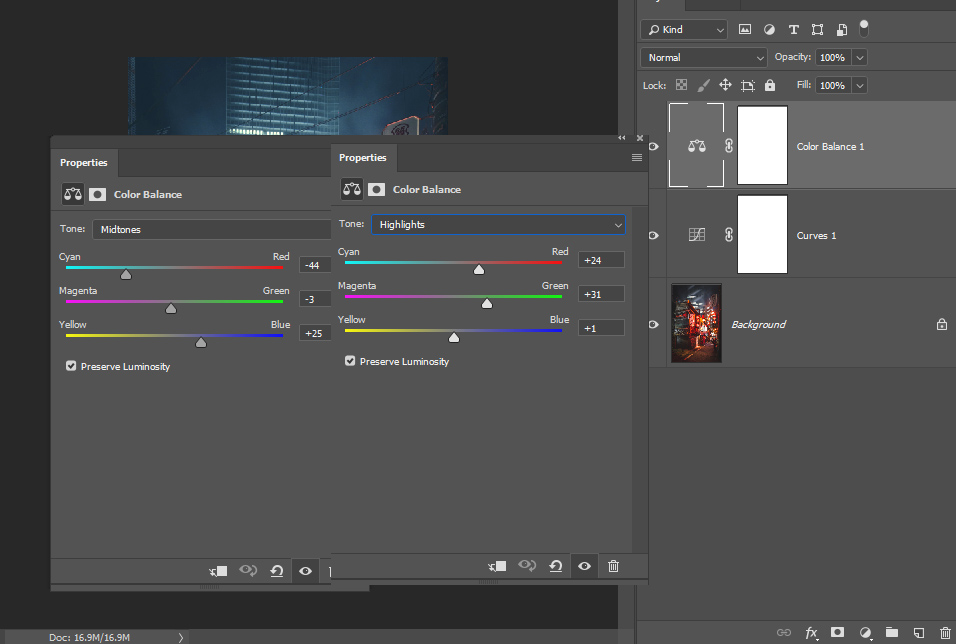
Now I started to play around with colors using a Color Balance adjustment layer. You can see in the image below I am canceling reds, magentas, and yellows from midtones. In highlights, I am aiming to add green color & red color.
See the settings below:
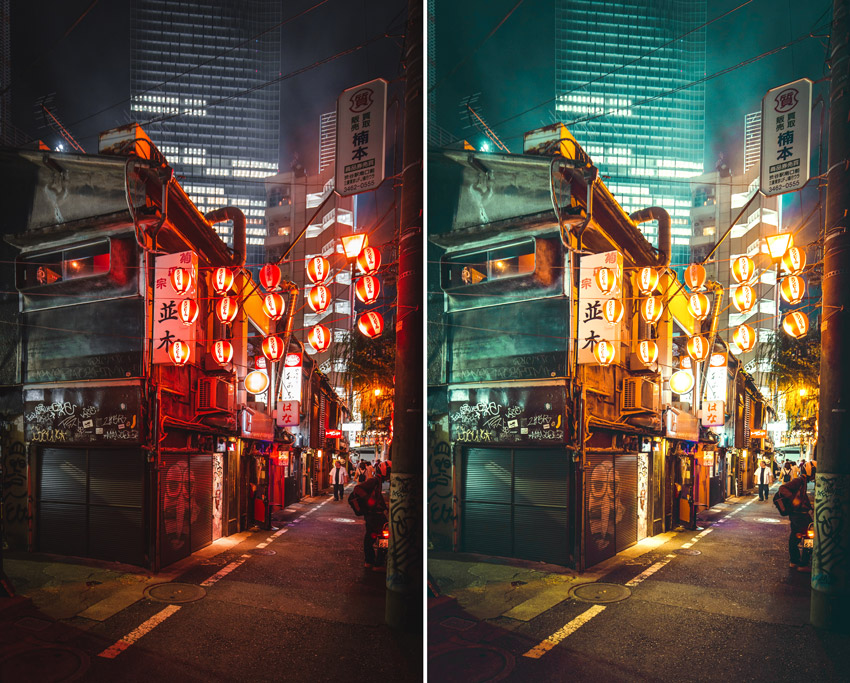
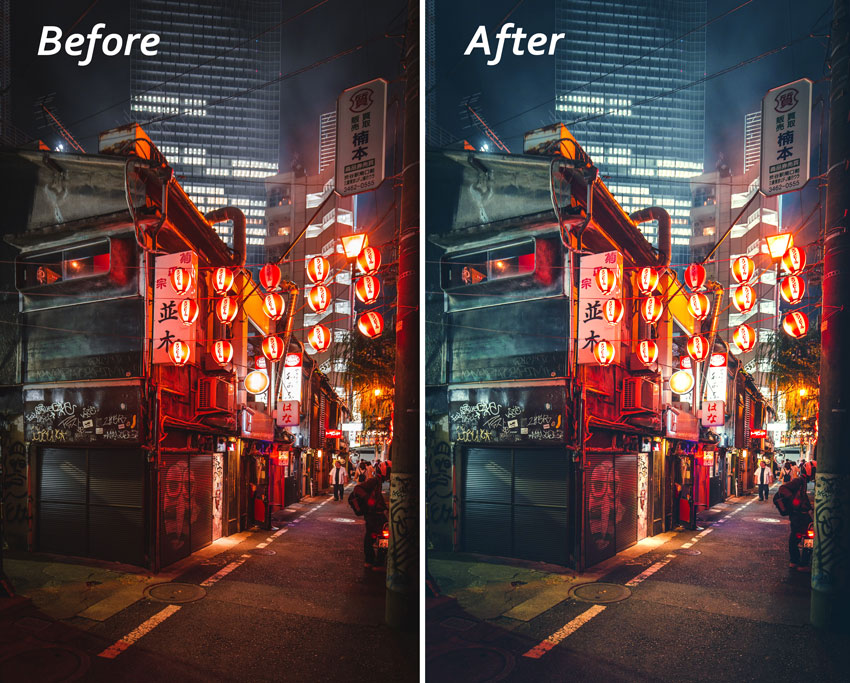
You can compare before & after results. Looks like we have more blues in shadows than reds.
A pro tip here is that you don’t want to look at the sliders when you play around with color balance. When you use Color Balance eyes should be on your image to see how it is affecting your image.
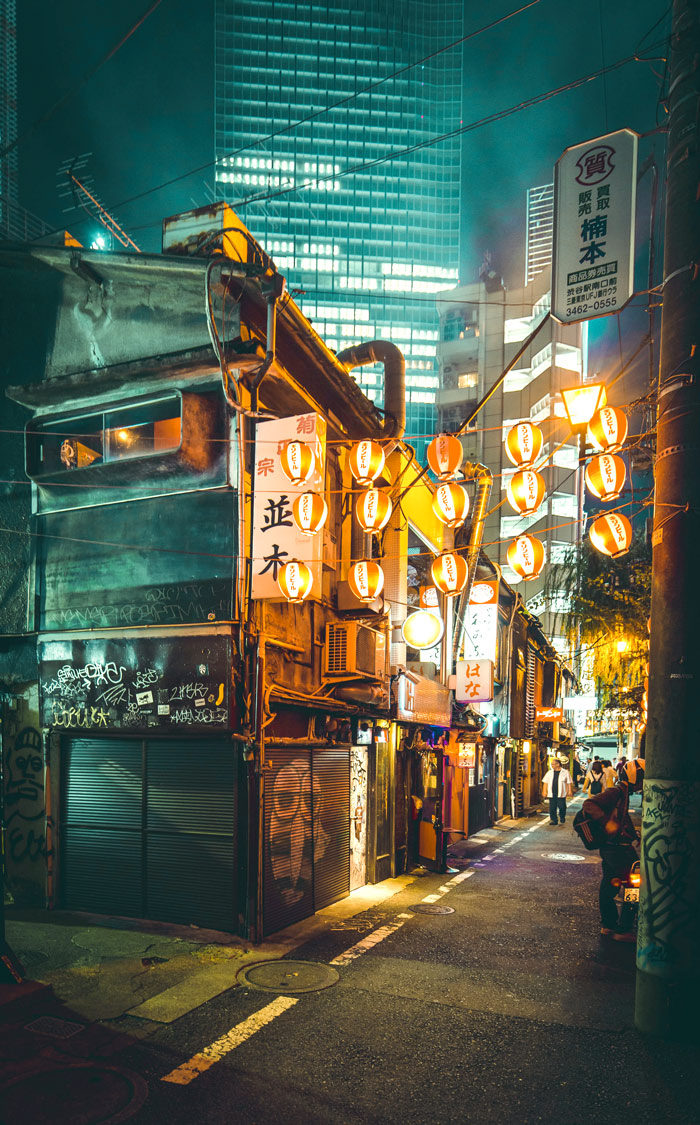
Step 4 – Coloring with Adobe Camera Raw
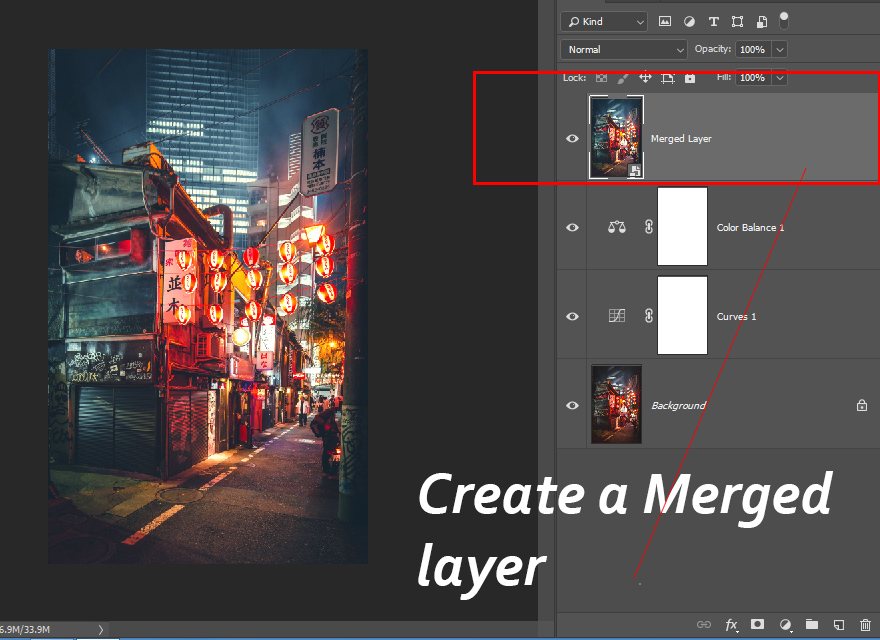
We’ll add coloring using Adobe Camera Raw Filter. First, create a merged layer by pressing CTRL + SHIFT + ALT + E and this will create a single merged layer on top of all layers. Make sure you have converted this layer into Smart Object by right-clicking on it and choose “Convert To Smart Objects”.
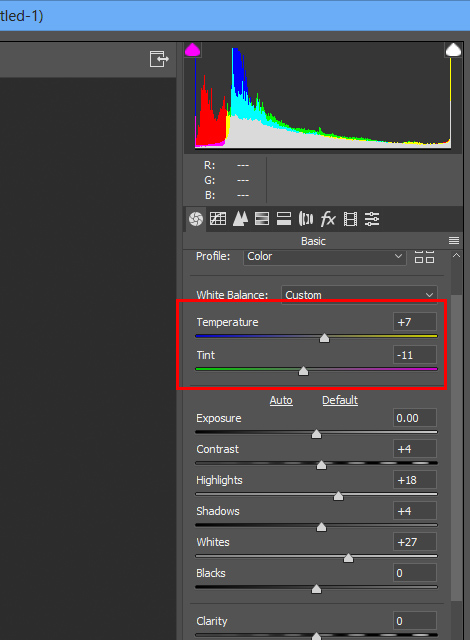
I added Temp to +7 to add yellows and Tint to -11 to add greens to the image. The rest of the settings, you can play around with it to suit your image. You can adjustment exposure, shadows, whites & black sliders if there is a need to just play around with it to see how it works.
For examples, if you want more info on your shadows you can increase the shadows similarly if you want highlights to pop just increase the whites & highlights.
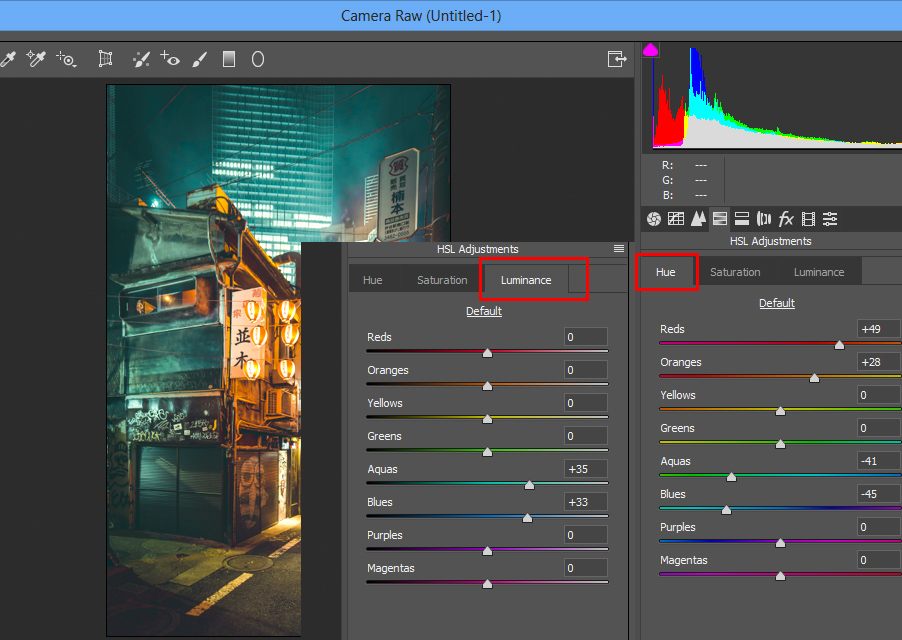
In the HSL Adjustments, I increased the Luminance of Blues & Aquas, it will make these color brighter. In the Hue Tab, I increased Reds & Oranges this will turn reds & orange color into orange. Also, I reduced the Hue on Aquas & Blues making these colors in the image teal.
Next, I went Split Toning and added cyan coloring to highlights.
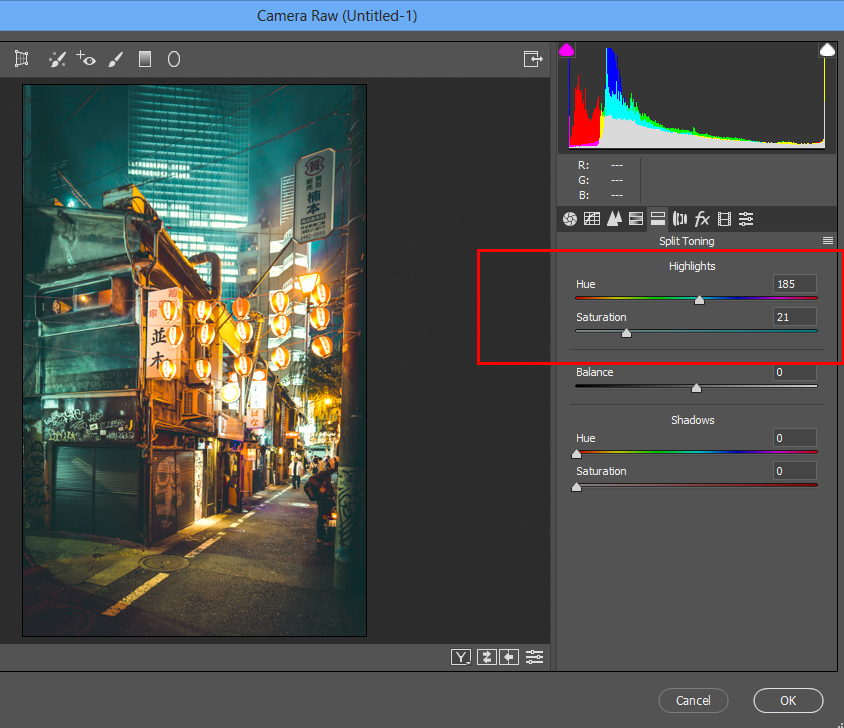
See the difference, isn’t the color looks crisp & popped?
Step 5 – Bring Back Colors
I noticed that the color of the lanterns that are hanging over the street looks a bit on the yellow side. I want to make it orange and you can do this by adding yellows to the image and then controlling the intensity of the color.
To do this, create a Color Balance adjustment layer and you can see I have added yellows, magentas, reds to the midtones. In highlights, I added yellows, & magentas but reduced reds.
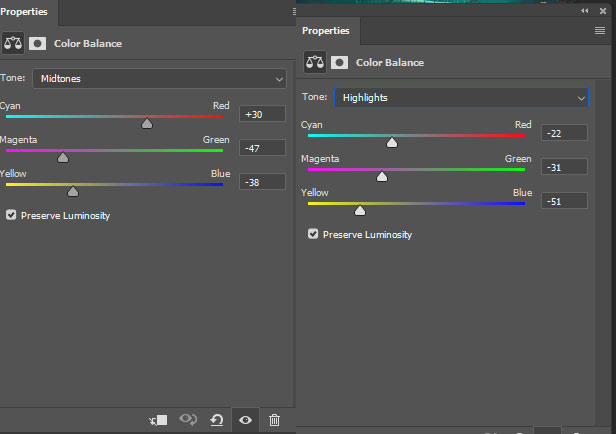
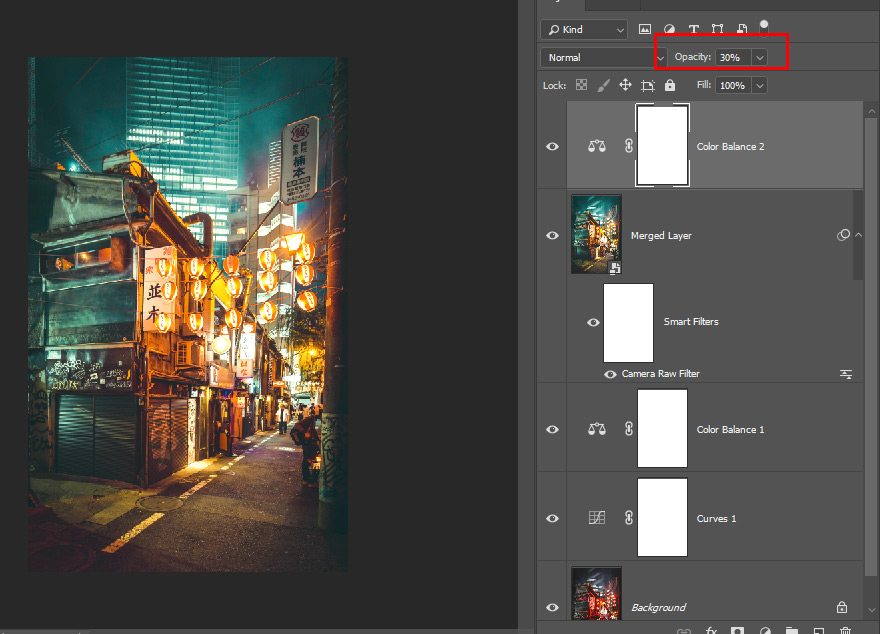
I reduced the opacity of Color Balance to 30%. It was adding reds everywhere which I want to get back orange color but I don’t want it to affect the entire image very hard so I reduced the opacity to 30%.
Final Results:
You can compare the results from step 1 to step 5:

I hope you enjoyed the tutorial and let me know how this tutorial has helped you by commenting in the comment section below.
Need Help With Photoshop or Looking for Professional Support?
Whether you're just getting started with Photoshop or need expert-level assistance, we're here to help! Contact us for personalized Photoshop tutorials, project support, or creative services.
Get in touch today to take your skills or projects to the next level.
CONTACT US NOW📘 Want to Master Photoshop Faster?
🎁 Get Your FREE PDF E-Book "Top 10 Photoshop Tricks Every Designer Must Know" Now – Packed with expert tips, shortcuts, and techniques to boost your creativity & workflow.
👉 Download Your FREE PDF E-Book NOW!

