


In this tutorial, you’ll learn how to add exposure and coloring effects to only the Highlights & Shadows of the image using Photoshop Blend If Sliders. I’ll show you how to brighten images without losing contrast and how to create a bright coloring effect that is visible only on the highlights using the Blend If Sliders. Let’s jump right into it.
Step 1 – Open a Baby Photo
I am using a baby photo for this tutorial and if you want to follow along you can download the same image from Unsplash. These techniques of light and airy coloring will work on every image so you can use any of your images but do not use images that are too brighten or blown out.
Go to File > Open and open the baby photo:

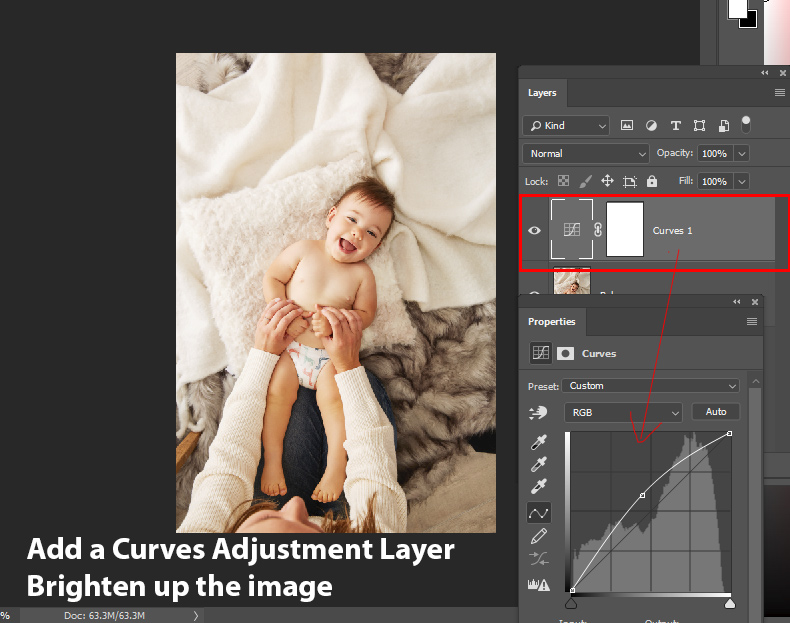
Step 2 – Brighten Up Shadows
Now we’ll begin brightening the image and by brightening I don’t mean to brighten up the entire image at one go. Instead, we’ll target shadow and highlight areas of the image and will brighten up them one by one so we don’t lose information from shadows and highlights.
Go to Layer > Adjustment Layers > Curves and use the following settings to brighten up the image:
Step 3 – Use Blend If Sliders to Target Shadows
Since that Curves adjustment has lighten up the entire image, we can use the Blend If options to limit the effect of Curves to shadows of the image.
To do this, you must access the blending options of the Curves layer, Right-click on the Curves layer, and choose Blending Options.
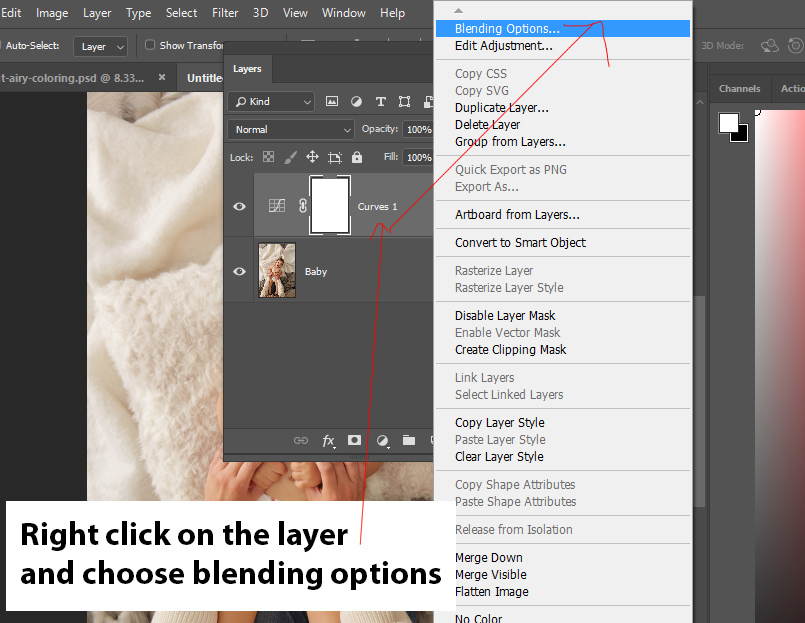
Under the Blend IF Section, you’ll find a option Underlying Layer.
Now Hold down the ALT key and click on the white slider and drag the slider to the left to split the white slider.

Now you know how to split Blend If sliders, we are going to drag the white slider to left and this will limit the Curves effect only to the shadows leading to brighten shadows and avoiding blowing out the highlights on the image.
Here you can see I dragged it pretty much to left and you can play around with dragging to see what works best for you:

Here you can see on the right image that we only brighten the shadows of the image:

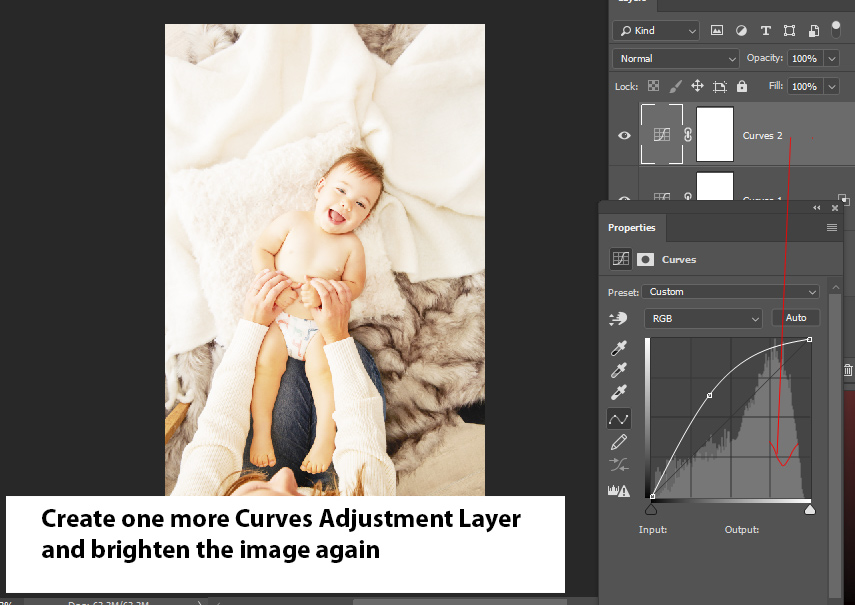
Step 4 – Brighten Up Highlights
Now we’ll do the same thing to increase the light on the highlights but do not overdo it as we don’t want to lose information on the highlights.
Let’s make a Curves adjustment layer again and use the following settings to increase the brightness:
Step 5 – Use Blend If to Target Highlights
Right-click on the Curves 2 layer and choose “Blending Options” and this time split the Shadows Slider and drag it to the right. This will limit the effect of Curves to only the highlights.
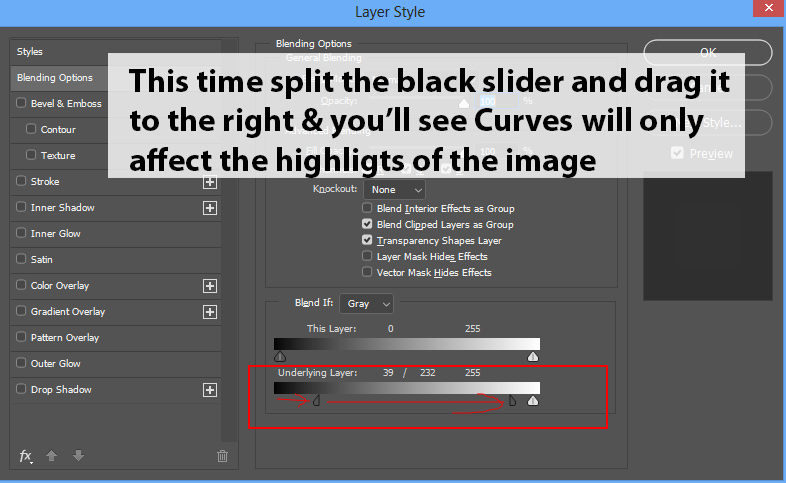
Here you can see the Curves is now affecting only highlights of the image:

Step 6 – Bright Coloring
Bright coloring simply means that coloring the highlights of the image. You can do this again using Blend IF but we need to add color first and we’ll make the color visible only to highlights using Blend IF.
Create a Solid Fill Color adjustment layer by selecting Layer > Adjustment Layer > Solid Fill Color.
You can see I chose a bright cyan color and you can choose any color but make sure it is bright, not dark.
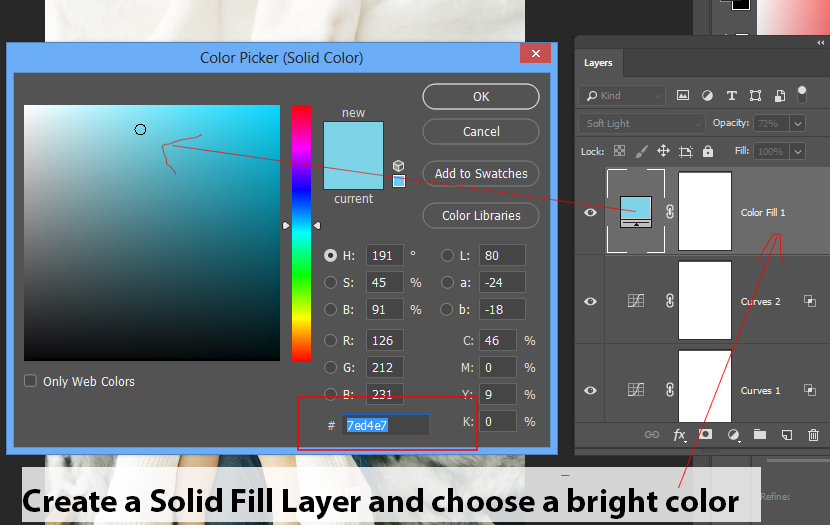
Change the blending mode of this layer to Soft Light to blend the solid color layer with the image. You can play around with the opacity and I set it to 72%.

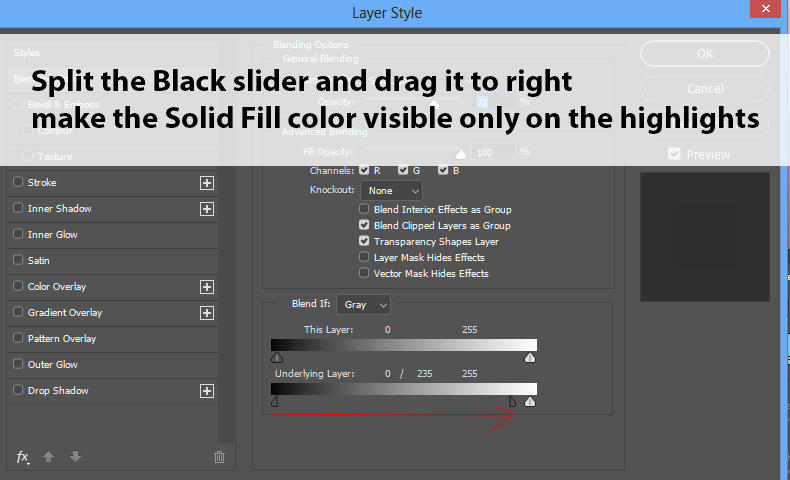
Now right-click on the Solid Color Fill layer and choose Blending Options. This will bring the Blending Options dialog box once again.

Split the black slider by holding down the ALT key and drag it to the right to make the color visible only on the highlights of the image. This will add a nice, soft coloring effect to the highlights of the image.
Light & airy coloring look is here:

Here you can compare the results from Step 1 to Step 7:

More examples!
Example 1:

Example 2:

I hope you enjoyed the tutorial and learned how to use Blend If to add color and exposure only to the certain parts of an image. Don’t forget to leave a comment in the comment section below.
Need Help With Photoshop or Looking for Professional Support?
Whether you're just getting started with Photoshop or need expert-level assistance, we're here to help! Contact us for personalized Photoshop tutorials, project support, or creative services.
Get in touch today to take your skills or projects to the next level.
CONTACT US NOW📘 Want to Master Photoshop Faster?
🎁 Get Your FREE PDF E-Book "Top 10 Photoshop Tricks Every Designer Must Know" Now – Packed with expert tips, shortcuts, and techniques to boost your creativity & workflow.
👉 Download Your FREE PDF E-Book NOW!

