

In this tutorial, you’ll learn how to create a high contrast HDR effect in Photoshop. You’ll learn about the High Dynamic Range effect, how you can mimic it in Photoshop, & full details about the process of this effect. Lastly, you can target colors to pop out the details of photos just like you see in HDR videos or photos. You can also manipulate colors that work best with your images by adding coloring to highlights & shadows and changing hues of colors.
What is High Dynamic Range?
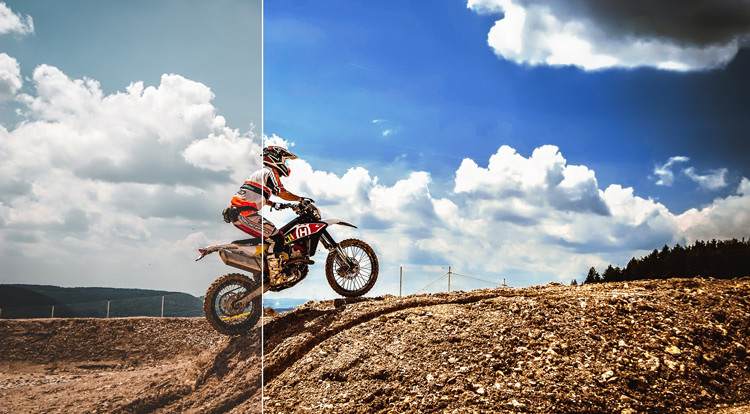
Now let me tell you what is an HDR effect, it is basically the combination of exposures of the same image. For instance, you go to a place, capture some images of it in different lighting conditions such as in the bright daylight to get an overexposed image, in neutral lighting conditions where the light is neutral, & in an underexposed condition where your image looks dark with some underexposed areas.
Once you have all three images (exposures) or maybe more, then in the post-processing, combine all the exposures to get the details from each photo and blend them together to produce an image that contains a High Dynamic Range = all exposure details of your image. But in this tutorial, we’ll use only one image to replicate a contrasty HDR Effect.
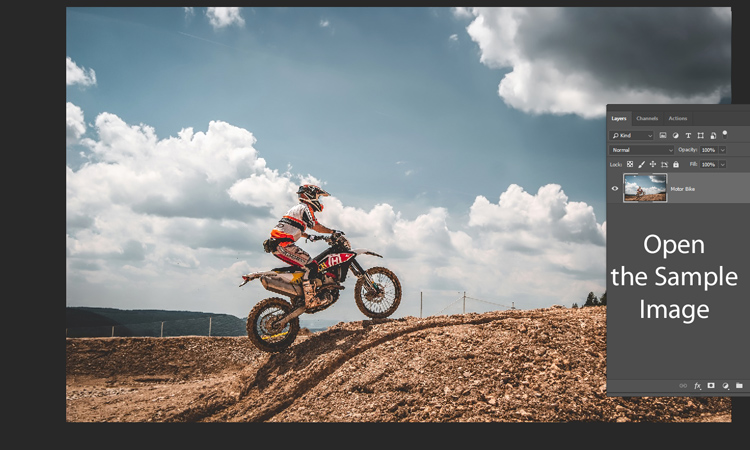
Step 1 – Open the Sample Image
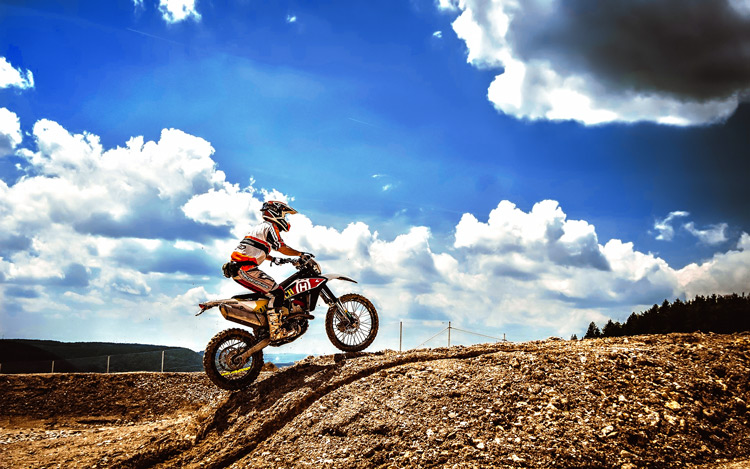
First, download the sample image from Pixabay and go to File > Open to open the image. As you can notice in the image below that the image is perfect for a High Contrast HDR effect.
The reason why I am saying this is because it already has some good amount of contrast and we just need to tweak it further to produce an HDR photo. The tip here is always pick a photo that has a decent contrast for HDR Photos especially this kind of effect that we are building right now.
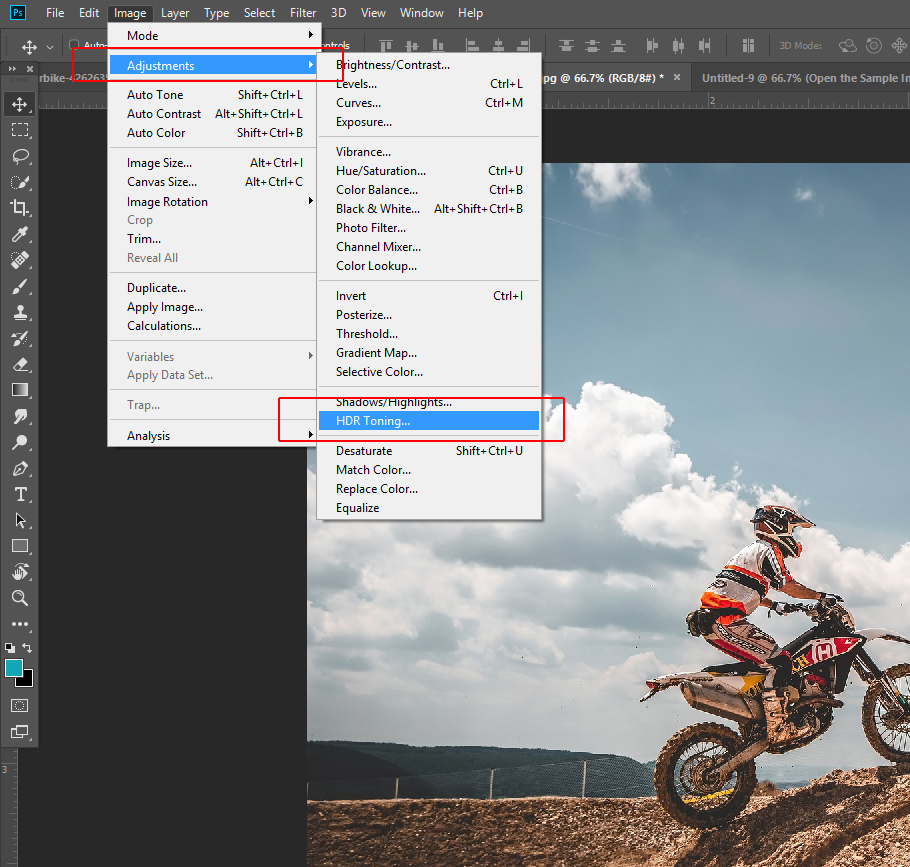
Step 2 – HDR Toning
I’ll use HDR Toning filter to produce an HDR image but the worse part about this filter it flattens the entire document. I have talked about this filter in my Dramatic Moody Effect tutorial. You can give it a read before following this tutorial.
A tip is duplicate your original image before you use this filter otherwise it gonna destroy the details of your image.
ok, Go to Image > Adjustments > HDR Toning. It will generate a warning “HDR Toning will flatten your document. Do you want to proceed?” and hit yes only once you saved a copy of your image. Don’t forget to do that.
Step 3 – HDR Toning Settings
In the HDR toning settings, I entered the following values it might looks confusing or overwhelming, maybe you’ll wonder how I ended up with these settings. To get a starting point, you can use some pre-built presets that come default with this filter. On the very top, you can see Preset Tab, go there and choose a preset for a start point, and then you can adjust the settings of the filter to suit your image.
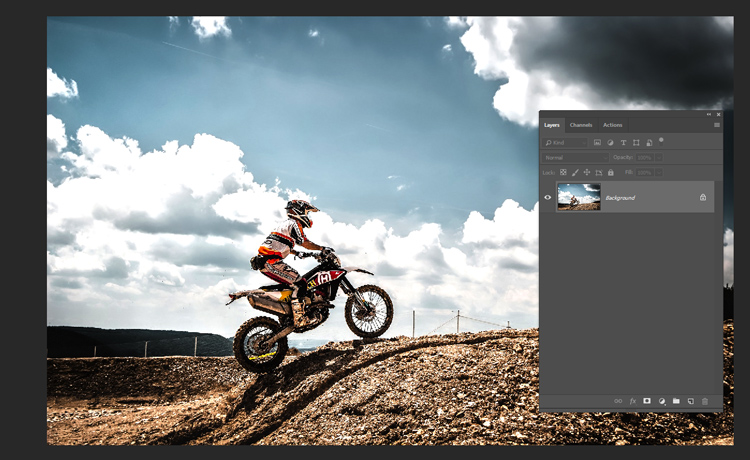
I picked the preset Photorealistic High Contrast & I adjusted the settings to suit the image, every settings remains the same only thing that I changed is Shadows to +41, Highlights to -83, & Vibrance to +71.

Here you can see a high contrast HDR look:
Step 4 – Coloring with Adobe Camera Raw
We’ll add coloring to the image and Adobe Camera Raw is the perfect place to start as it allows you to select individual tones in images. First, convert the image into Smart Object, right-click on it & choose convert to Smart Object.

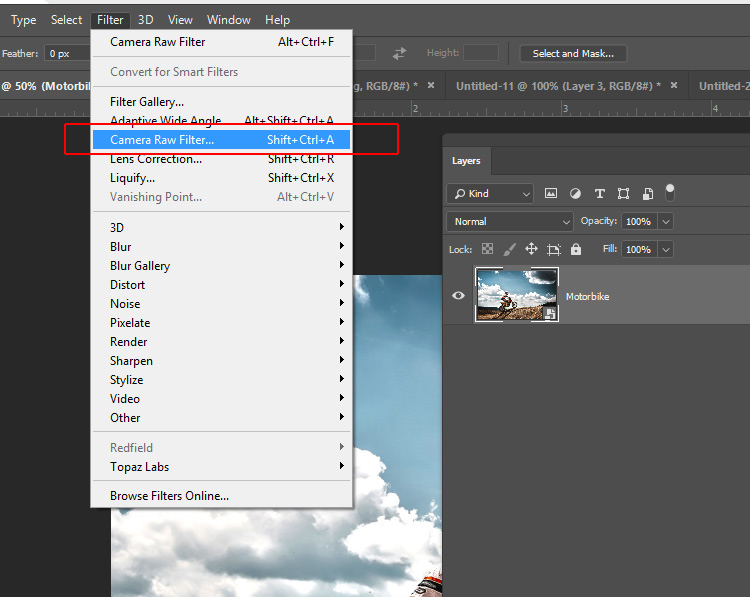
Go to Filter > Adobe Camera Raw:
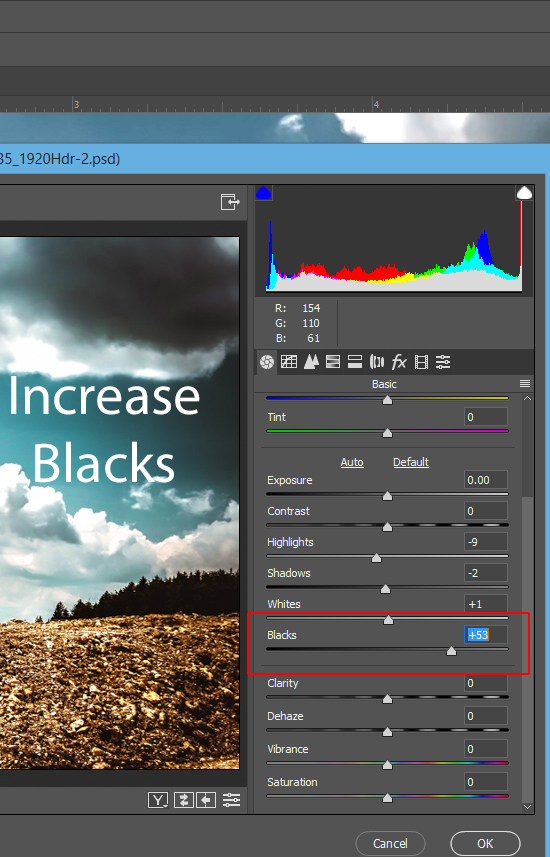
First, I increased the Blacks of the image, blacks are the darkest parts of the image, by increasing them you are pulling more info from shadows region. So you need to have details from every region of your image otherwise it is not an HDR image.
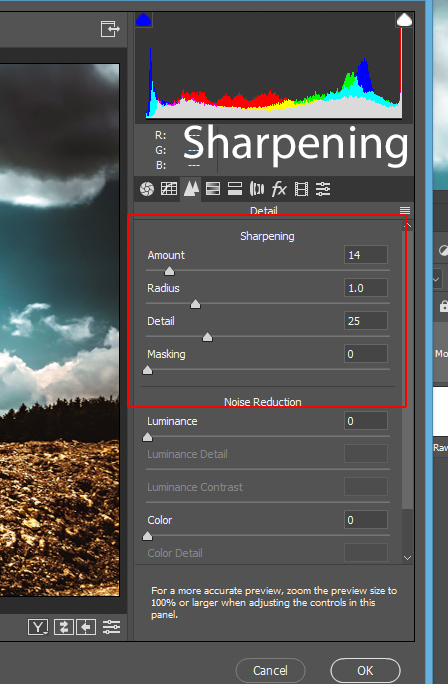
I added some sharpening on the Details Tab, see the settings below:
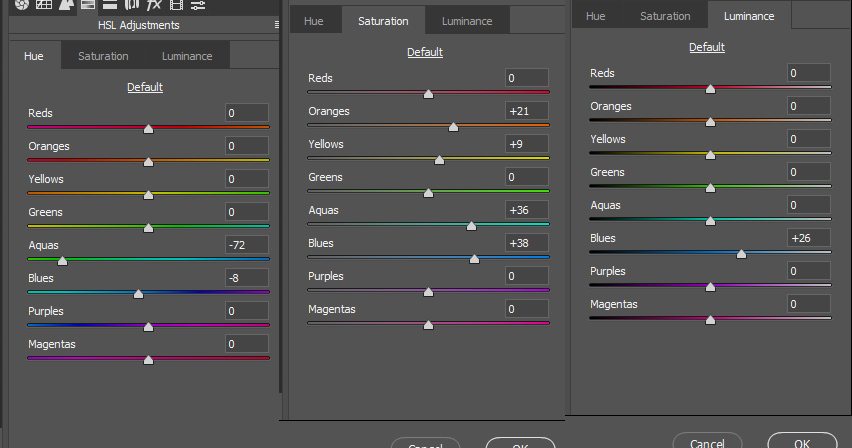
In the HSL adjustment, I changed the Hues of Aqua (I want to change the sky color), I increased the Saturation Level of Oranges, Yellows Blues, & Aquas to make these color poped, & in the Luminance, I increased the Blues to +26 so I can add more light in the sky. You can see all the settings below.
Of course, these settings may vary from image to image, take a look at your image see which color needs improvement, target it using HSL to pop out the color.
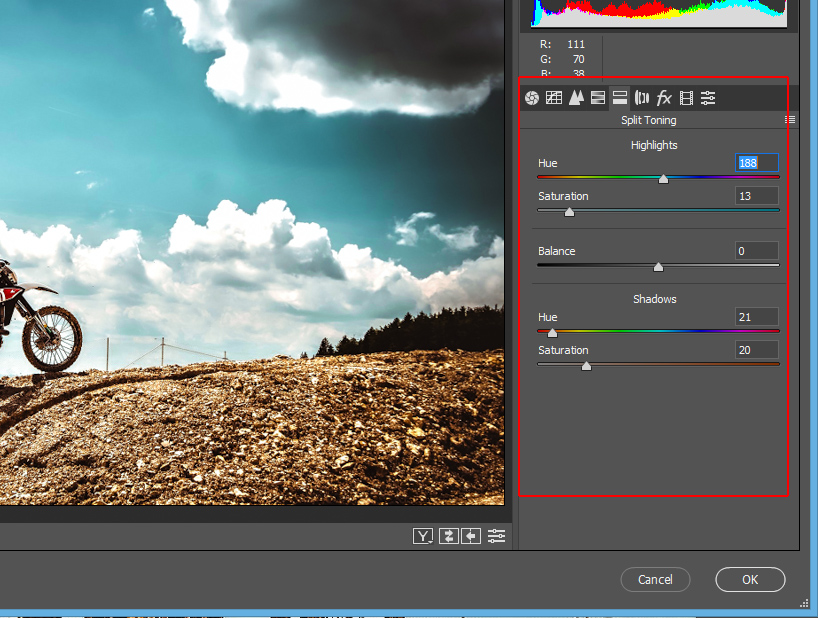
Finally, I added teal coloring to Highlights & Orange to shadows in the Split Toning:
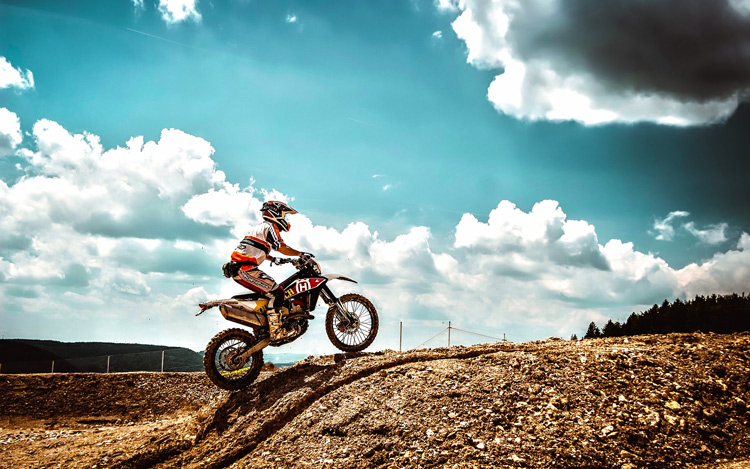
Here is the image after using Adobe Camera Raw:
Step 5 – Change the Sky Color
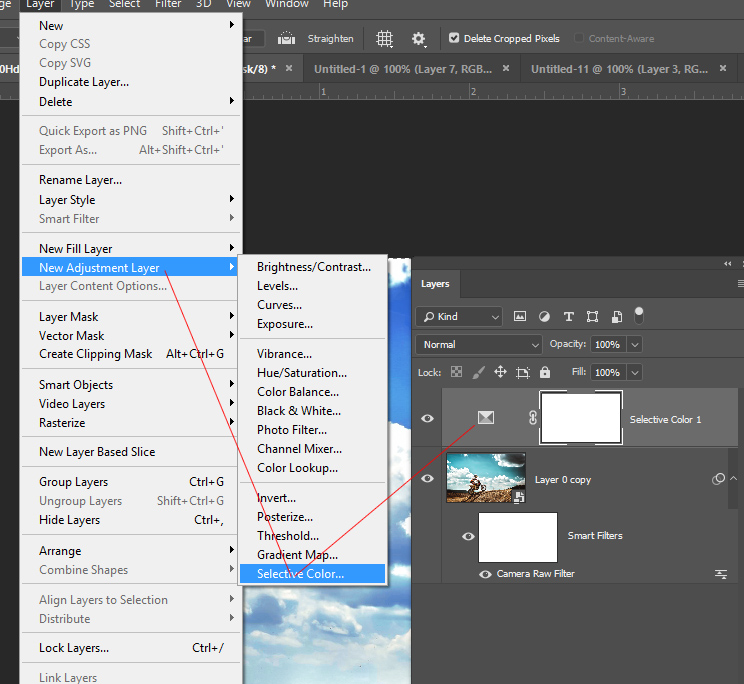
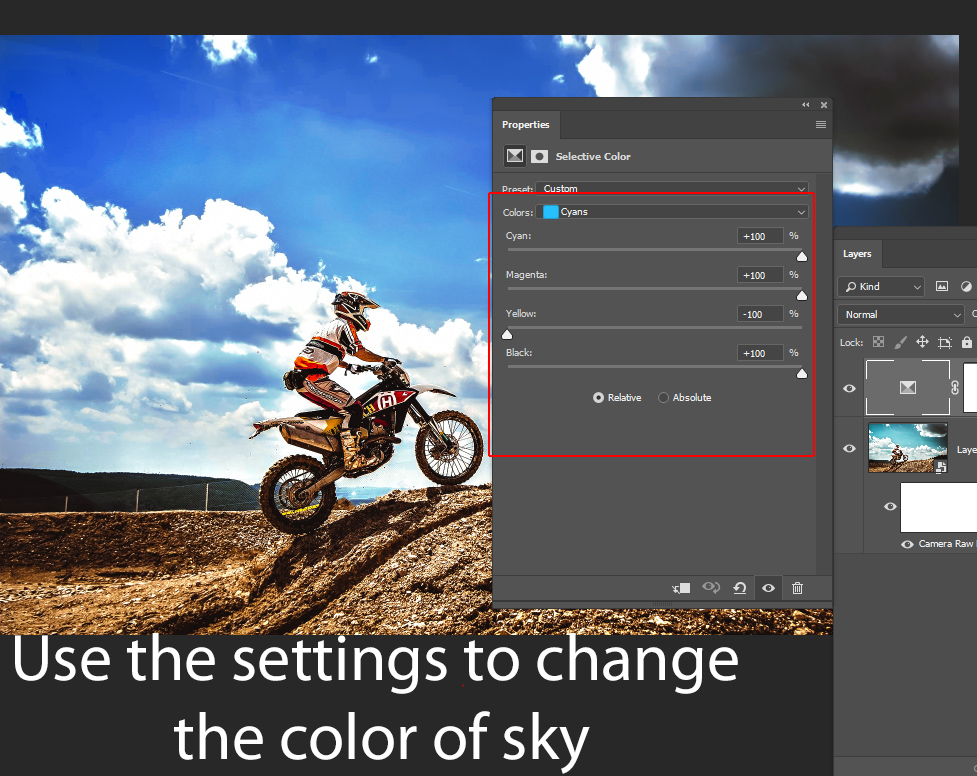
In the end, I changed the color of the sky from Aqua to Blue. I felt that sky looks more natural in Blue instead of Aqua. To change the color, we need to target Cyan or Aqua color, go to Layer > New Adjustment Layer > Selective Color to make a Selective Color Adjustment Layer.
Select the Cyan color & use the following settings to change the color of the sky.
Here are my final results:
I hope you enjoyed the tutorial and do let me know if you have any questions.
Need Help With Photoshop or Looking for Professional Support?
Whether you're just getting started with Photoshop or need expert-level assistance, we're here to help! Contact us for personalized Photoshop tutorials, project support, or creative services.
Get in touch today to take your skills or projects to the next level.
CONTACT US NOW📘 Want to Master Photoshop Faster?
🎁 Get Your FREE PDF E-Book "Top 10 Photoshop Tricks Every Designer Must Know" Now – Packed with expert tips, shortcuts, and techniques to boost your creativity & workflow.
👉 Download Your FREE PDF E-Book NOW!

