

In this Photoshop tutorial I’ll show you how to add hard light effect to an image. Hard light effects also known as high contrast effects. This tutorial will walk you through the some simple steps to achieve the hard light effects. You’ll also learn how to bring out the hidden details of highlights and shadows, learning little bit facial retouching and using the adjustments layers effectively.
Tutorial Resources
Opening the Image for Hard Light Effects
Step 1
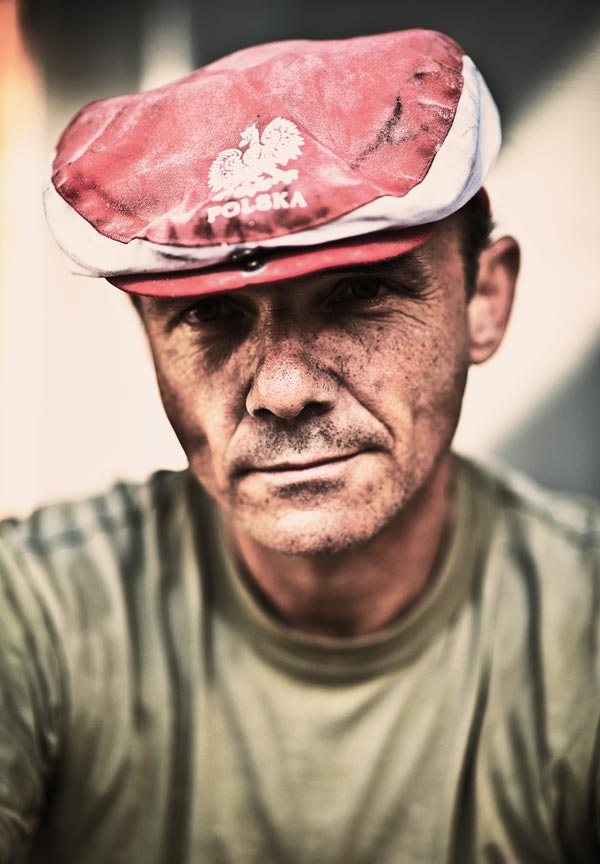
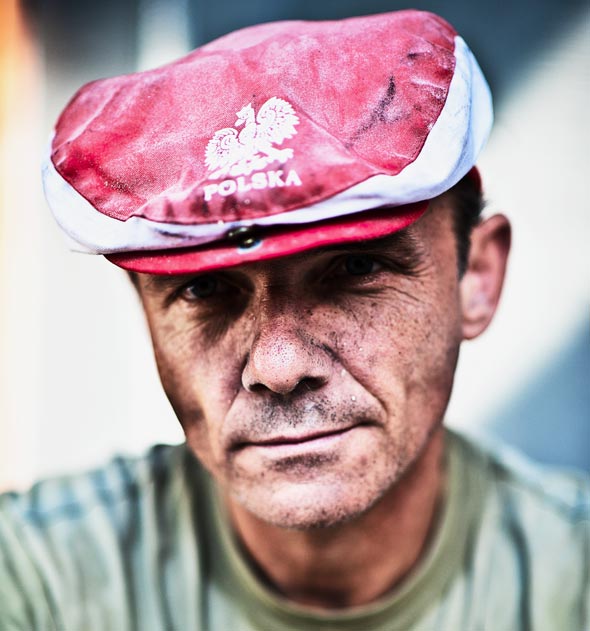
Open the old man in Photoshop by selecting File > Open. For hard light effects, you should choose only those images that already have enough contrast to work on it. These effects also used for body retouching like if you are working on fighter or boxer photos, dancer photos, movie posters (usually action movie) and many more.
Here we’ve the image :
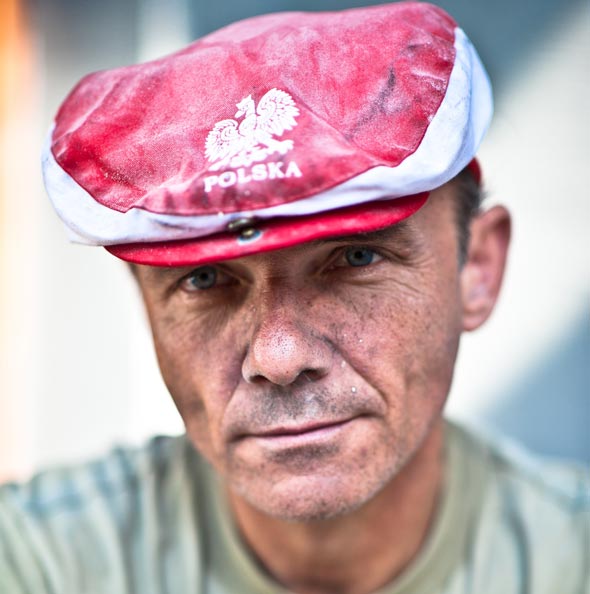
Step 2
First, I’ll reduce the brightness using Curves adjustment layer. You can add this adjustment layer by clicking on third button at bottom of layer panel.
Results :
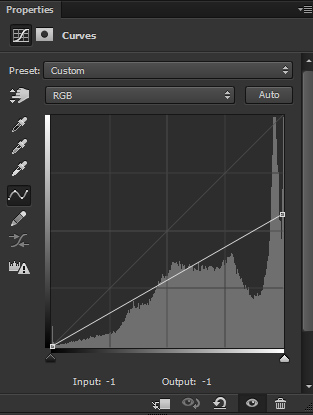
Step 3
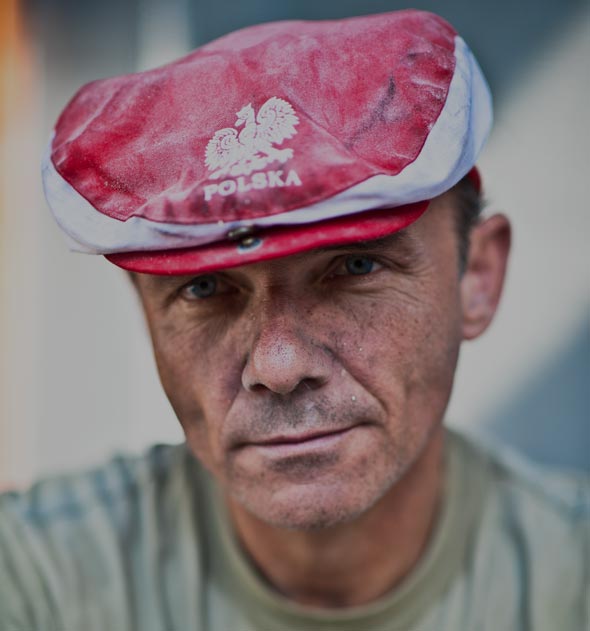
Next, I’ll use again Curves adjustment layer but this time I’ll increase contrast on highlights (mostly on highlights) and shadows parts (little bit on shadows). Use it with following settings to increase the contrast.

Results with high contrast :

Step 4
Now I’ll sharpen the details of old man. I’m using High Pass filter for this purpose. First, merge all layer into the single layer by pressing ALT + SHIFT + CTRL + E. Then convert this layer to Smart Objects and go to Filter > Other > High Pass. Set the radius value to 4px. The radius value is not fixed to use but you can increase it, until you see the details of skin. Name this layer ‘High Pass’.
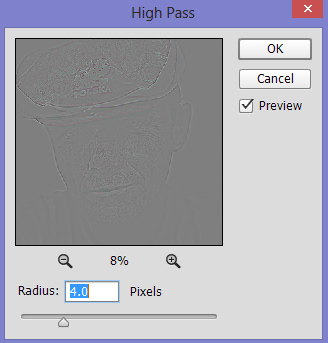
Change the the blend mode of high pass layer to Overlay and reduce the opacity to 60%.

Step 5
Create a new layer in Photoshop and fill this layer with 50% Gray color and set its blend mode to Overlay. To create new layer, go to Layer > New then use the following settings:
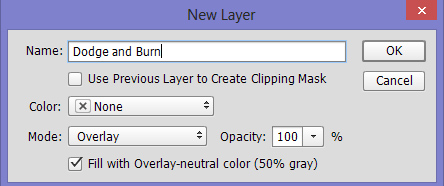
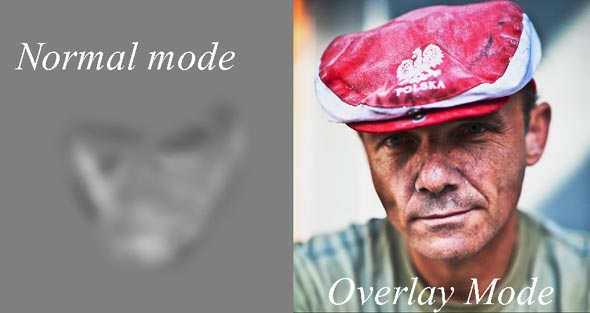
Select the Dodge Tool(O) with Midtones Range, Exposure about 9%-12% to lighten up the details on highlight area of old man face. Similarly, use the Burn Tool(O) to darken some details like facial hair, under the eyes and many other dark areas.
You can see how I did it with both Normal and Overlay mode.
Step 6
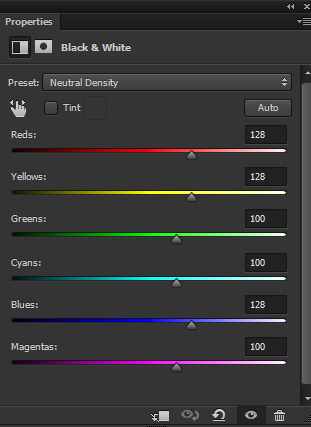
Make a Black/White adjustment layer and change its blend mode to
Soft Light. Now use the preset Neutral Density to further enhance the contrast.
Feel free to experiment with other presets.
Results :
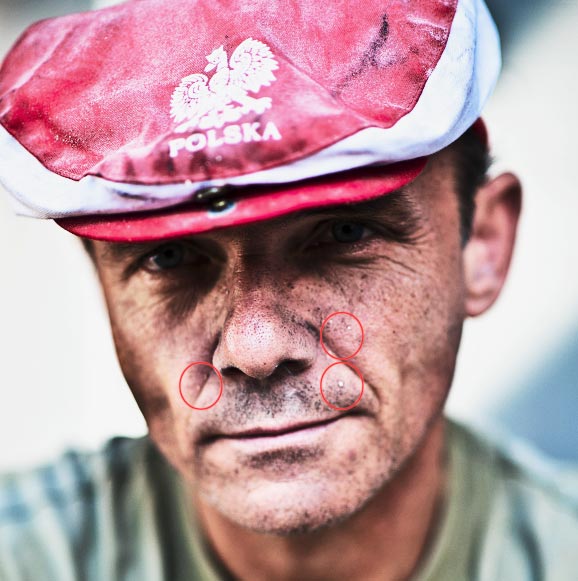
Step 7
You may notice that there are lot of white spots (indicated by red circle and many other areas) on old man face. We need to clean up these details as it looks not so good. To do this, merge all the layer into single layer and then use the Clone Stamp Tool (S) to remove all these details.
You can see the below image for reference.
Results after cloning :

Final Adjustments
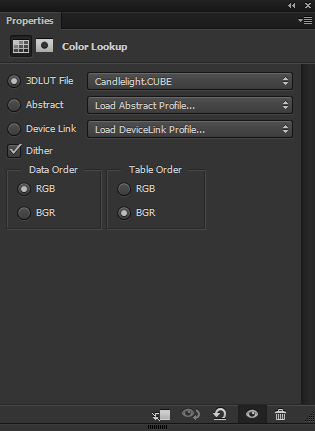
Step 8
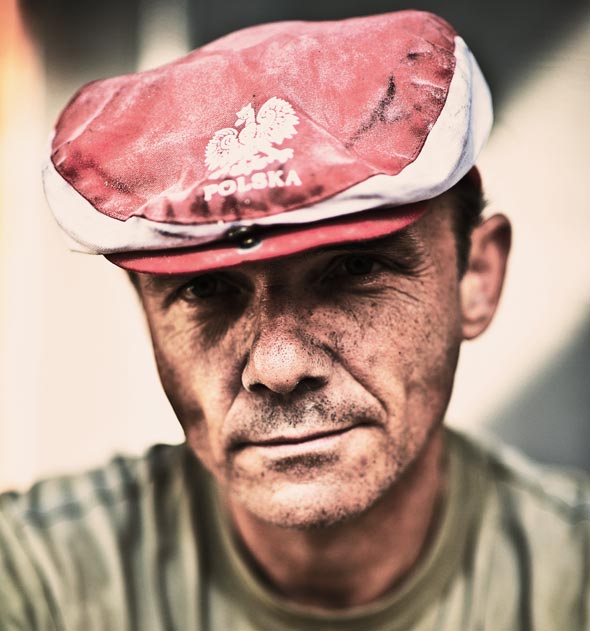
Use the Color Lookup adjustment layer with Candlelight Filter and reduce its opacity to 80%.
Final Results :
Conclusion
Thanks for following the tutorial. I hope you enjoyed it and learned some new techniques of creating hard light effects. Do let me know if need any help. I’ll be happy to help you. Have a great day!
Need Help With Photoshop or Looking for Professional Support?
Whether you're just getting started with Photoshop or need expert-level assistance, we're here to help! Contact us for personalized Photoshop tutorials, project support, or creative services.
Get in touch today to take your skills or projects to the next level.
CONTACT US NOW📘 Want to Master Photoshop Faster?
🎁 Get Your FREE PDF E-Book "Top 10 Photoshop Tricks Every Designer Must Know" Now – Packed with expert tips, shortcuts, and techniques to boost your creativity & workflow.
👉 Download Your FREE PDF E-Book NOW!
